
Oblíbené kategorie
Hledáte přízi?


|
|||||||||||||
Holiday Touch |
|||||||||||||
|
|
|||||||||||||
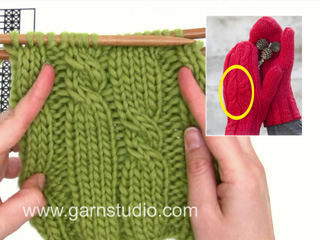
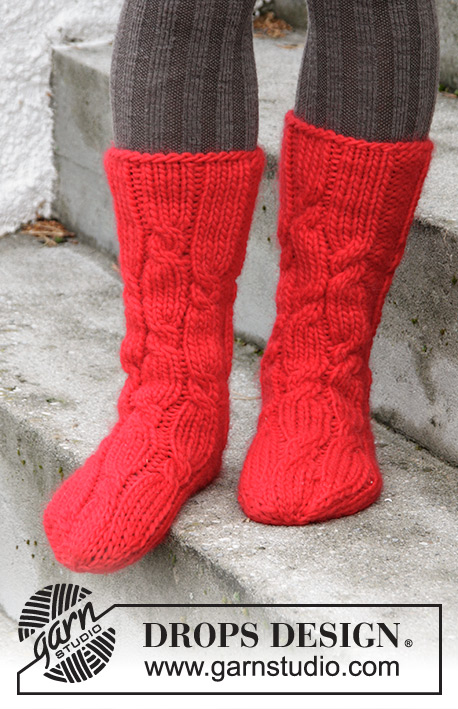
DROPS Advent: rukavice – palčáky s copánkovým vzorem pletené z příze "Nepal".
DROPS Extra 0-1207 |
|||||||||||||
|
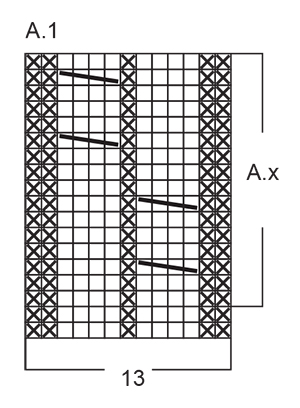
VZOR: Viz schémata A.1 a A.2. TIP - PŘIDÁVÁNÍ: Přidáváme nahozením; v následující řadě pleteme nahození hladce za zadní nit, aby se v pletenině netvořily dírky. TIP - UJÍMÁNÍ: Ujímáme takto – začínáme 3 oka před značkou: 2 oka spleteme hladce, 2 oka upleteme hladce (značka leží mezi těmito 2 oky), 1 oko sejmeme hladce, 1 upleteme hladce a sejmuté přes ně přetáhneme. ------------------------------------------------------- RUKAVICE – PALČÁKY: PRAVÁ RUKAVICE: Na ponožkové jehlice č.3 nahodíme přízí Nepal 40-40 ok a upleteme 1 kruhovou řadu hladce. Označíme si začátek kruhové řady. Pokračujeme pružným vzorem 2/2 (tj. střídáme 2 oka hladce, 2 obrace), takto: *2 oka obrace, 2 hladce*, *-* opakujeme celkem 4x, 2 oka obrace, 3 hladce, 3 obrace, 4 hladce, 2 obrace, 4 hladce, 3 obrace a 3 hladce. Takto pleteme do výše 4-5 cm. V následující kruhové řadě ujímáme, takto: *2 oka spleteme obrace, 2 oka upleteme hladce, 2 obrace, 2 hladce*, *-* opakujeme celkem 2x, 2 oka spleteme obrace, 3 upleteme hladce, 2 oka spleteme obrace, 1 oko upleteme obrace, 4 hladce, 2 oka spleteme obrace, 4 oka upleteme hladce, 1 obrace, 2 oka spleteme obrace a 3 upleteme hladce = 34-34 ok. Pak pleteninu převedeme na ponožkové jehlice č. 4 a následující kruhovou řadu pleteme takto: 18 ok lícovým žerzejem (= dlaň), vzor A.1 (= 13 ok) a 3 oka lícovým žerzejem. V tomto rozvržení vzorů pokračujeme. Po dokončení 1 celé sekvence vzoru A.1 (na výšku) opakujeme vzor A.x - SOUČASNĚ ve výši 11-12 cm přidáme 1 oko na každé straně prvního oka v kruhové řadě (= prostřední oko na palci) – viz TIP – PŘIDÁVÁNÍ. Toto přidávání opakujeme na obou stranách prostředního oka na palci v každé 2. kruhové řadě ještě 4-5x = 44-46 ok. Pak odložíme všech 11-13 ok palce na pomocnou jehlici. V následující kruhové řadě nahodíme za těmito odloženými oky 1 oko nové = 34-34 ok. Po dokončení 2 celých sekvencí vzoru A.x (na výšku) měří díl asi 24-25 cm. Poslední řadu vzoru A.1 opakujeme až do výše asi 24,5-26,5 cm (rukavici si můžete vyzkoušet – do výsledných rozměrů má zbývat asi 3,5 cm výšky); pak vložíme značku za prvních 16 ok v kruhové řadě a druhou za následujících 17 ok (v kruhové řadě zbývá za poslední značkou 1 oko). Nyní pleteme lícovým žerzejem a SOUČASNĚ ujmeme 1 oko na každé straně obou značek – viz TIP – UJÍMÁNÍ. Toto ujímání opakujeme v každé 2. kruhové řadě ještě 2x, pak ujímáme v každé kruhové řadě, celkem 3x = na jehlicích zbývá 10 ok. Přízi odstřihneme, protáhneme zbylými oky, stáhneme a zapošijeme. PALEC: Odložených 11- 13 ok palce vrátíme na ponožkové jehlice č.4 a navíc nabereme 4-3 oka z okraje za nimi = 15-16 ok. Pleteme lícovým žerzejem v kruhových řadách, až je palec vysoký asi 4,5-5 cm (rukavici si můžete vyzkoušet – do výsledných rozměrů má zbývat asi 0,5 cm výšky). V každé z následujících 2 kruhových řad splétáme vždy 2 oka hladce = na jehlicích zbudou 4-4 oka. Přízi odstřihneme, protáhneme zbylými oky, stáhneme a zapošijeme. LEVÁ RUKAVICE: Pleteme stejně jako pravou rukavici, jen zrcadlově převrácenou – tj. pružný vzor pleteme takto: 3 oka hladce, 3 obrace, 4 hladce, 2 obrace, 4 hladce, 3 obrace, 3 hladce, 2 obrace, *2 oka hladce, 2 obrace*, *-* opakujeme celkem 4x. 1. kruhovou řadu za pružným vzorem pleteme takto: 3 oka hladce, 2 oka spleteme obrace, 1 oko upleteme obrace, 4 oka hladce, 2 oka spleteme obrace, 4 oka upleteme hladce, 1 obrace, 2 oka spleteme obrace, 3 oka upleteme hladce, 2 oka spleteme obrace, *2 oka upleteme hladce, 2 obrace, 2 oka hladce, 2 oka spleteme obrace*, *-* opakujeme celkem 2x. Pak pleteninu převedeme na ponožkové jehlice č.4 a pleteme následující kruhovou řadu takto: 3 oka lícovým žerzejem, vzor A.2 (= 13 ok) a 18 ok lícovým žerzejem. Pro klínek pro palec přidáváme na každé straně posledního oka v kruhové řadě (= prostřední oko na palci). Před ujímáním horní části rukavice vložíme značku za 1. oko v kruhové řadě a druhou za následujících 17 ok (= za poslední značkou leží v kruhové řadě 16 ok). |
|||||||||||||
Vysvětlivky ke schématu |
|||||||||||||
|
|||||||||||||
|
|||||||||||||

|
|||||||||||||
|
Vyrobili jste si tento nebo nějaký jiný z našich modelů? Přidejte ke svým fotkám na sociálních sítích tag #dropsdesign - díky tomu je uvidíme i my! Potřebujete s tímto návodem poradit?Otevřete-li si návod na stránce garnstudio.com, najdete tam výukových video-ukázek, Komentáře/Dotazy a další užitečné informace. © 1982-2024 DROPS Design A/S. Vyhrazujeme si veškerá práva. Tento dokument, včetně všech jeho dílčích částí, podléhá autorským právům. Podrobnější komentář k možnostem užití našich návodů najdete dole pod každým návodem na našich stránkách. |
|||||||||||||


V oblasti pletené a háčkované módy působí DROPS Design více než 40 let. Díky tomu vám můžeme nabídnout jednu z nejrozsáhlejších kolekcí modelů s bezplatnými návody dostupnými na internetu - navíc v 17 jazycích. K dnešnímu dni máme na 304 katalogů a 11422 návodů celkem - z nich je už 6304 dostupných v češtině.
Komentáře / Otázky (9)
Ik had niet goed gelezen hahaha. Er staat er blijft 1 steek na de tweede markeerder.
03.09.2022 - 22:14DROPS Design answered:
Dag Erzsébet,
Kan de beste overkomen ;) Bedankt voor de terugkoppeling en veel breiplezier!
04.09.2022 - 12:10Na de duim neem je 1 steek extra op= 34 steken. Aan het einde zet je een markeerder na de eerste 16 steken . Ee n tweede markeerder na 17 steken= 33 stekrn . Waar is die ene gebleven?
03.09.2022 - 22:12Hallo, wenn ich 40 Maschen aufnehme und 8 linke zusammen stricke, habe ich 32 und keine 34 Maschen. Muss ich dann nur 16 rechte Maschen stricken anstatt 18 und dann A x (13) + 3 rechte. Oder wo liegt mein Fehler... Danke. Lg
18.10.2020 - 15:02DROPS Design answered:
Liebe Frau Hoffmann, es werden nur 6 Maschen abgenommen: *2 M li zusstr, 2 M re, 2 M li, 2 M re *, von *-* insgesamt 2 x arb (= 2 Abnahmen), 2 M li zusstr (= 1 Abnahme), 3 M re, 2 M li zusstr (= 1 Abnahme), 1 M li, 4 M re, 2 M li zusstr (= 1 Abnahme), 4 M re, 1 M li, 2 M li zusstr (= 1 Abnahme) und 3 M re. Viel Spaß beim stricken!
19.10.2020 - 09:12Vorrei acquistare la lana Nepal colore rosso 3620 del modello Christmas touch, ma i rivenditori hanno esaurito il colore. Inoltre, vorrei acquistare 3 serie di ferri a doppia punta in betulla n. 3, 4, 5. Infine, avrei necessitá del misuratore di ferri. Non posso ordinare da voi ?\r\nGrazie. Sandra, Milano p.s. vi ho trovato su facebook, ma non so come postare le muffole rosse realizzate.
06.12.2018 - 05:00Vorrei inviarvi la foto delle muffole rosse che sono riuscita a realizzare.\r\nPotete darmi una mail ? Grazie.\r\nL\'unica difficoltà incontrata é nella spiegazione (e relativo video) di come iniziare gli aumenti del pollice. Sarebbe necessario spiegare con parole piú chiare e mostrare in un video il procedimento iniziale con piú lentezza e piú volte.\r\nSandra
13.11.2018 - 21:08Non mi é chiaro come effettuare il giro di diminuzioni dopo il polso a coste. Per muffola dx: indica di diminuire lavorando insieme 2 m a rovescio. Nei SUGGERIMENTI DIMINUZIONI\" consiglia di diminuire lavorando 2 m insieme a diritto. Non mi é chiaro come procedere. Devo seguire il testo o i suggerimenti ? Potete chiarirmi se no non posso continuare il lavoro delle muffole rosse "Christmas touch". Grazie. Sandra
17.10.2018 - 23:43DROPS Design answered:
Buongiorno Sandra. Dopo le coste deve diminuire come indicato nel testo, quindi lavorando 2 m insieme a rov. Seguirà le indicazioni che trova nel suggerimento per le diminuzioni, verso la fine della muffola, poco prima delle istruzioni del pollice , dove trova il riferimento: leggere il suggerimento per le diminuzioni. Buon lavoro!
18.10.2018 - 06:42Hej! Det är första gången jag stickar vantar. Vad betyder det när det står att jag ska lägga upp 40-40 maskor (mönster Holiday touch)? Mvh Thérèse
08.01.2017 - 10:05DROPS Design answered:
Hej. Det motsvarar de två storlekarna (S/M - M/L). Dvs stickar du den minsta storleken följer du den första siffran och stickar du den största så följer du den andra siffran. Lycka till!
09.01.2017 - 09:12Längst ner på sidan som alltid!
16.12.2015 - 11:10Hvor er diagram A2?
16.12.2015 - 10:31DROPS Design answered:
Hei Jill. Under A.1
16.12.2015 - 11:15