
Popular categories
Looking for a yarn?


|
||||
Tamzyn |
||||
 |
 |
|||
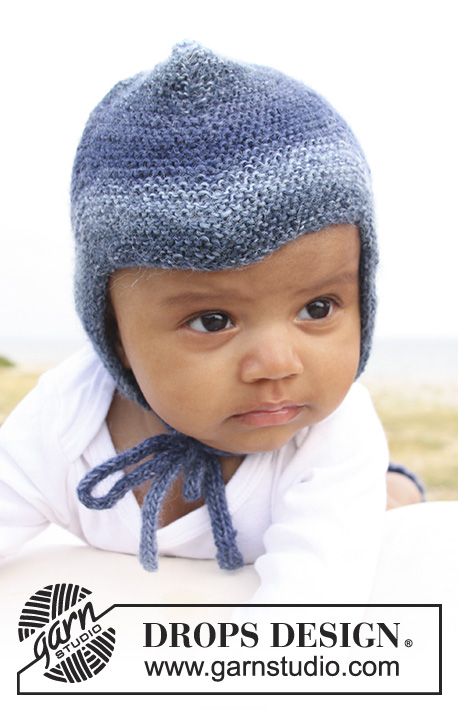
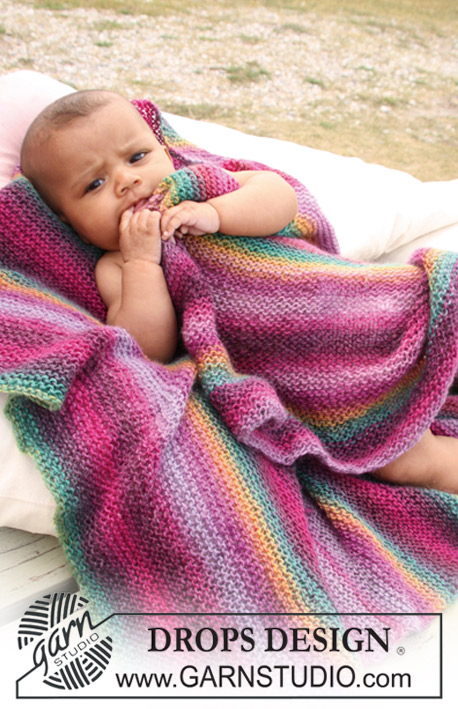
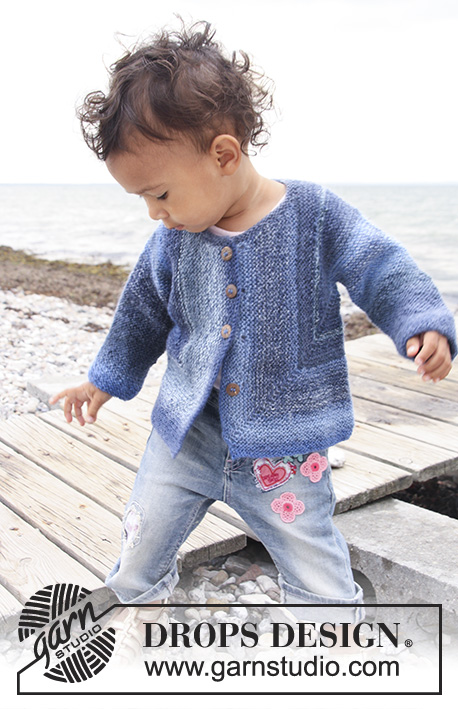
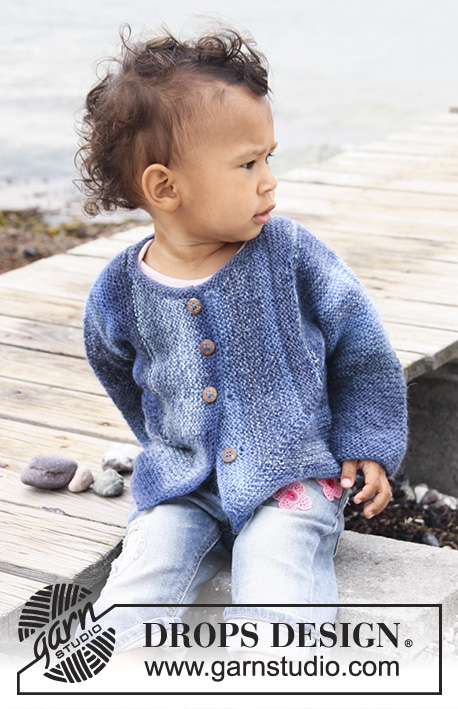
Knitted domino jacket in garter st for baby and children in DROPS Delight
DROPS Baby 20-15 |
||||
|
INCREASE TIP: Inc 1 st in each side of marker by making 1 YO. Work YO twisted on next row (i.e. knit in back loop of st instead of front loop) to avoid holes. ---------------------------------------------------------- JACKET: Work the piece sideways. Work 2 pieces and finish by sewing pieces tog in the back. Work the pieces from the sleeve edge towards the mid of jacket. RIGHT HALF: Worked back and forth on circular needle. Cast on 36-38-40 (40-42-44) sts on circular needle size 3 mm / US 2or3 with Delight. K back and forth on all rows until completed (= garter st). REMEMBER THE GAUGE! AT THE SAME TIME when piece measures 6-6-5 (5-6-6) cm / 2⅜"-2⅜"-2" (2"-2⅜"-2⅜"), inc 1 st in each side, repeat the inc on every 8th row a total of 6-7-9 (11-13-14) times = 48-52-58 (62-68-72) sts. Work until piece measures 17-19-20 (25-29-33) cm / 6¾"-7½"-8" (9¾"-11⅜"-13") – adjust so that the last row is worked from WS. BODY: K 1 row (= RS), at end of row cast on 41-43-50 (53-58-60) sts (= towards the back) = 89-95-108 (115-126-132) sts. NOW MEASURE PIECE FROM HERE! K 1 row, turn, insert a marker in the 2nd st on needle from RS (= in right side). Continue – AT THE SAME TIME inc 1 st on each side of the st with marker every other row a total of 38-40-46 (48-50-52) times – SEE INCREASE TIP. AT THE SAME TIME when piece measures 8.5-9-10.5 (11-12-13) cm / 3¼"-3½"-4¼" (4⅜"-4¾"-5⅛") work only over the last 60-65-74 (79-86-91) sts in the left side seen from RS (= back piece), slip the remaining sts on a stitch holder. BACK PIECE: Work until piece measures 13-14-16 (17-18-19) cm / 5⅛"-5½"-6¼" (6¾"-7"-7½") (from where back piece sts was cast on), bind off. FRONT PIECE: Put sts from stitch holder back on needle but leave 9-10-10 (10-12-12) sts towards the back on the stitch holder for neckline. Continue inc on every other row – AT THE SAME TIME dec 1 st towards the neck (= towards sts on stitch holder) on every 4th row a total of 6-7-7 (7-7-7) times. AT THE SAME TIME when piece measures 14-15-17 (18-19-20) cm / 5½"-6"-6¾" (7"-7½"-8") (from where inc on front piece started and towards mid front) bind off for 3-4-4 (5-5-5) button holes as follows (from neck, i.e. from WS): K 2, bind off 2 sts, * K 12-9-11 (9-10-10) sts, bind off 2 sts *, repeat from *-* a total of 2-3-3 (4-4-4) times, K rest of row. On next row cast on 2 new sts over the bound off sts. After all inc and dec there are 90-93-109 (115-121-126) sts on the needle. When finished with inc on right side, bind off 51-52-62 (66-70-74) sts from the neckline and down the front band of jacket (bind off from WS) = 39-41-47 (49-51-52) sts left on needle. K back and forth over these sts for approx. 1-1-2 (2-3-3) cm / ⅜"-⅜"-¾" (3/4"-1⅛"-1⅛") (fold piece at the shoulder and check that the front piece is the same length as back piece). Bind off. LEFT HALF: Work as right half but without button holes – this piece is assembled with wrong side out. ASSEMBLY: Put the 2 pieces towards each other and sew tog mid back – sew edge to edge to avoid a chunky seam. Fold the jacket and sew underarm and side seams in front loop of outermost sts. Sew on buttons. NECKLINE: Knit up 55 to 80 sts (including sts on stitch holder) around the neck on circular needle size 3 mm / US 2or3 with Delight. K 3 rows back and forth, bind off. |
||||
Diagram explanations |
||||
|
||||

|
||||
|
Have you made this or any other of our designs? Tag your pictures in social media with #dropsdesign so we can see them! Do you need help with this pattern?You'll find tutorial videos, a Comments/Questions area and more by visiting the pattern on garnstudio.com. © 1982-2024 DROPS Design A/S. We reserve all rights. This document, including all its sub-sections, has copyrights. Read more about what you can do with our patterns at the bottom of each pattern on our site. |
||||


With over 40 years in knitting and crochet design, DROPS Design offers one of the most extensive collections of free patterns on the internet - translated to 17 languages. As of today we count 304 catalogs and 11422 patterns - 11417 of which are translated into English (US/in).
We work hard to bring you the best knitting and crochet have to offer, inspiration and advice as well as great quality yarns at incredible prices! Would you like to use our patterns for other than personal use? You can read what you are allowed to do in the Copyright text at the bottom of all our patterns. Happy crafting!
Comments / Questions (191)
When doing the sleeve it says to add a stitch at each end every 8th row. Do you count one row to as one right and one wrong side or is it counted as one row being a ½ row?
08.03.2018 - 14:55DROPS Design answered:
Dear Mrs Swank, when increasing 1 st on each side of sleeve, increase 1 st at the beg of row from RS and 1 st at the end of the same row, work 7 rows without increasing and repeat these 8 rows starting from RS. Happy knitting!
08.03.2018 - 15:29En suivant les explications le devant du gilet se présente en pointe ; il me manque la partie inférieure qui semble être tricotée dans le sens horizontal. Comment puis-je y parvenir ?
25.02.2018 - 22:56DROPS Design answered:
Bonjour Nicole, veillez à bien augmenter de chaque côté de la maille avec le marqueur, le nombre de mailles avant le marqueur va augmenter et la ligne diagonale dans le schéma représente cette maille avec le marqueur. La partie droite (avant le marqueur) est crée par le début/la fin des rangs avant ce marqueur (avec les augmentations qui forme l'angle). Bon tricot!
26.02.2018 - 09:58I have made it through the sleeve and to the part where one increases on either side of stitch to form the front. In the photo, there seems to be a discernible diagonal line. I’ve only knitted 5 increase rows so far., but I don’t see any sign of this yet. I made increases by yo and have been knitting in the back to avoid a hole. It occurs to me that here the hole may be needed to give the desired effect. Any useful information would be appreciated.
05.02.2018 - 05:25DROPS Design answered:
Dear Pam, the diagonal is made through the sts increased on each side of the st with marker (see dotted line in chart), ie marker should stay in this st and increase should be worked on each side of this st (there will be always more st before the st with marker, seen from RS). YO's should be worked twisted on next row to avoid holes. Happy knitting!
05.02.2018 - 10:14I can't seem to understand how to continue this pattern. I did the sleeve but cannot seem to follow the directions when you put markers in and increase and add stitches. Is there a YOU Tube video? Might make it easier for me to understand.
29.01.2018 - 06:30DROPS Design answered:
Dear Mrs Schultze, after sleeve is done, cast on new sts for back piece and add a marker in the 2nd st from RS (leave the marker in this st = dotted line in chart) and now increase 1 st on each side of the st with marker (remember to move marker upwards but always in the same st which won't be the 2nd st on row anymoroe) every other row (= every row from RS) for front piece. Happy knitting!
29.01.2018 - 10:22Ich liebe diese Jacke!! Könnten Sie bitte eine Anleitung für Größe 134 posten? Das wäre so schön!
24.01.2018 - 22:41DROPS Design answered:
Liebe Iris, diese Jacke gibt es nur bis Größe 116 und eine ähnliche für Damen finden Sie hier. Viel Spaß beim stricken!
25.01.2018 - 08:20Hej Super flot trøje - er ved at strikke den med striber - hvordan strikkes udtagninger på venstre halvdel, når den ikke skal vende vrangen ud ved sammensyning? :-)
22.01.2018 - 06:53DROPS Design answered:
Hej Helle, jo venstre halvdel skal monteres med vrangen ud. God fornøjelse!
30.01.2018 - 11:27Tack för uppmuntrande svar. Kanske jag vågar. Men ett par mer konkreta frågor: Måste man sticka m rundstickor? Det står ju ”fram och tillbaka” så det borde gå m vanliga stickor. När det står FRAM- O BAKST - vilken del av koftan är det?
04.01.2018 - 08:43DROPS Design answered:
Hei igjen. Du strikker fram -og bakstykket samtidig, så rundpinner er nok det beste alternativet på grunn av mange masker. Om du ser på målskissen nederst på oppskriften og ser strekene går både til venstre (bakstykket/BAKST) og til høyre (fremstykket/FRAMST) og opp til der det felles av til halsen, så er det dette som blir kalt FRAM – OCH BAKST. Når FRAM – OCH BAKST er ferdig strikket, setter du maskene til fram stykket på en tråd og strikker bak stykket ferdig. God Fornøyelse!
04.01.2018 - 13:57Jag förstår inte den här beskrivningen. Hur blir det en diagonal? Hur ska man öka när man kommer till bakstycket - så många på stickan? Hur gör man detta med markör? Finns det någon ytterligare instruktion eller video? För jag vill gärna kunna göra denna kofta men vågar inte nu!
03.01.2018 - 18:50DROPS Design answered:
Hei Gudrun. Denne oppskriften er skrevet litt anderledes enn man kanskje er vant til. Men se på målskissen og les godt igjennom oppskriften før man begynner, så er dette en morsom måte å strikke en jakke på. Vi har ingen video på hvordan strikke hele jakken, men mange videoer på de ulike teknikkene som brukes i oppskriften. God Fornøyelse!
04.01.2018 - 07:16Jackie Taber wrote:
I am sorry, but I am still confused. The picture suggests that the fronts of the sweater worn by the child has a rectangle shape. If the front is finished in a diagonal shape after all increases are completed, then how does it become a rectangle shape when there are no further instructions?
07.11.2017 - 16:54Jackie Taber answered:
I finally figured it out. When doing the increases, the stitch marker is moved with each increase. I was leaving the stitch marker on the second stitch for the entire front piece creating a severe diagonal shape.
08.11.2017 - 14:07Jackie Taber wrote:
When working the front section, it finishes in a diagonal shape. The pattern does not explain how it becomes rectangle shaped. Can you help me?
07.11.2017 - 00:47DROPS Design answered:
Dear Mrs Taber, look at the chart with measurement, the front piece should have this shape, the dotted line on front piece marks the st with marker where you increase on each side. Happy knitting!
07.11.2017 - 09:13