
Popular categories
Looking for a yarn?


Comments / Questions (8)
![]() Hetty Stok wrote:
Hetty Stok wrote:
I have a slightly different question to others about this turning action. After it says to knit over knit and purl over purl stitches. Is this the stitch that appears to be a knit from the now- turned side? Or the stitch that was worked as a knit in the previous row, but now appears as a purl? ( Same question applies to purls.) If the hat appears to be an unbroken rib why this turning action? Mine has now made the purls knits and the knits purls, and a distinct jog.
12.04.2025 - 19:30DROPS Design answered:
Dear Hetty, you can check how to work after turning in this video. You knit over what now seems a knit stitch and purl over what now seems a purl stitch. Happy knitting!
14.04.2025 - 00:48
![]() Lena Lund wrote:
Lena Lund wrote:
Har 108 maskor och ska sticka diagram A1, tycker det ska vara lika många maskor efter varje ihoptagning men jag får inte det, vad är felet?
14.11.2024 - 15:02DROPS Design answered:
Hej Lena, STORLEK 3/5 ÅR: Börja på 3:e varvet i A.2, och sticka A.2 (= 28 maskor) totalt 3 gånger, sedan stickas A.1 (= 24 maskor – börja på 1:a varvet i A.1). Fortsätt detta mönstret, och minska som visat i diagrammen. 28+28+28+24=108 m - var går det fel?
19.11.2024 - 10:50
![]() Auður wrote:
Auður wrote:
Hæ,ég skil ekki leiðbeiningarnar í mynstrinu. Er að prjóna á 2ja ára.\r\nÞað er ekkert mynstur þar sem stendur prjóna 24 lykkjur a1,prjóna 24 lykkjur og hvað svo?
17.08.2024 - 20:15DROPS Design answered:
Blessuð Auður: Þú finnur MYNSTUR A.1-A.3 neðst á síðunni. STÆRÐ 2 ÁRA * Prjónið A.1 (= 24 lykkjur – byrjið á 1. umferð í A.1), prjónið A.2 (= 28 lykkjur – byrjið á 3. umferð í A.2) *, prjónið frá *-* alls 2 sinnum í umferð. Haldið áfram með þetta mynstur og fækkið lykkjum eins og útskýrt er í mynsturteikningu. Þú heldur svo áfram í ALLAR STÆRÐIR þegar þessi kafli er búinn. Gangi þér vel.
18.08.2024 - 11:50
![]() Sanna wrote:
Sanna wrote:
Kun käännän työn, teenkö kerroksen oikeaa niin kuin ohjevideossa, vai onko se vain sileitä töitä varten? Voisiko olla toinen video, jossa tehdään sama joustinneuleella? Onko kuvio tarkoitus saada samaksi kuin ennen käännöstä, vai näinkö juuri aivan hirveän vaivan turhaan (purin muutaman senttimetrin, koska olin ehtinyt neuloa seitsemän senttiä). Loin silmukat neuloen, eli reuna on nätti molemmilta puolilta.
06.10.2023 - 13:50
![]() Josephine wrote:
Josephine wrote:
Wie stricke ich denn weiter, wenn ich die Arbeit von innen nach außen gedreht habe? Dann ist der Faden zum Abstricken auf der entgegengesetzten Seite. Spätestens bei den Abnahmen... da bin ich angelangt... komme ich nicht voran. Wie wird dann gestrickt? Wird ein Video angeboten?
12.02.2023 - 20:32DROPS Design answered:
Liebe Josephine, dieses Video zeigt (für ein anderes Modell) wie man die Arbeit wendet, und wie man weiterstrickt. Viel Spaß beim stricken!
13.02.2023 - 10:23
![]() Barbara wrote:
Barbara wrote:
Hello, does the work really have to be turned around after 4 or 5 cm, even if the K2P2 design looks exactly the same from the right and the wrong side? Thanks!
09.01.2023 - 01:27DROPS Design answered:
Dear Barbara, yes it should be turned, so that the cast on edge will be seen from WS when folded. Happy knitting!
09.01.2023 - 10:43
![]() Antonia Muscò wrote:
Antonia Muscò wrote:
Salve,mi spiegate gentilmente come si può evitare il buchino quando si gira il lavoro. Grazie... è un piacere lavorare a maglia con i vostri tutorial..detto da una principiante!!
09.10.2022 - 14:43DROPS Design answered:
Buonasera Antonia, deve tirare bene il filo quando gira il lavoro. Buon lavoro!
10.10.2022 - 19:09
![]() Sofia Pettersson wrote:
Sofia Pettersson wrote:
Hej! Jag förstår inte vad detta betyder: "Nu vänds arbetet så att uppläggningskanten blir fin när kanten viks upp, dvs resten av mössan stickas runt i motsatt riktning av vikkanten." Kan ni förklara? Tack på förhand! :)
08.02.2022 - 16:54DROPS Design answered:
Hej Sofia, jo om du strikker den anden vej, så bliver retsiden den anden og når du bukker kanten op får du den fine side af kanten på retsiden :)
09.02.2022 - 12:16
|
|||||||||||||
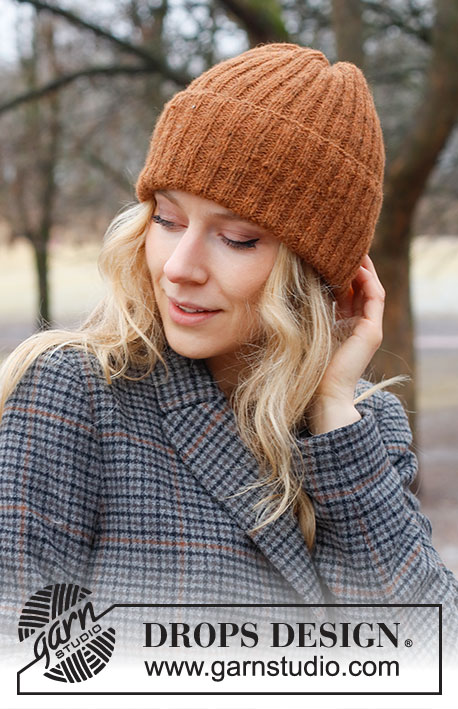
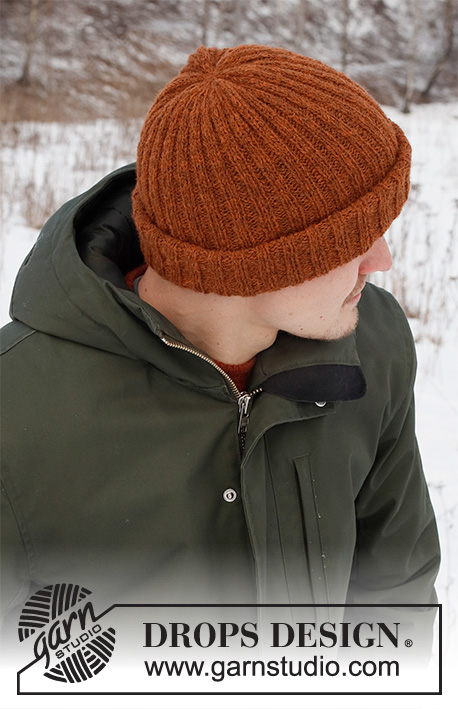
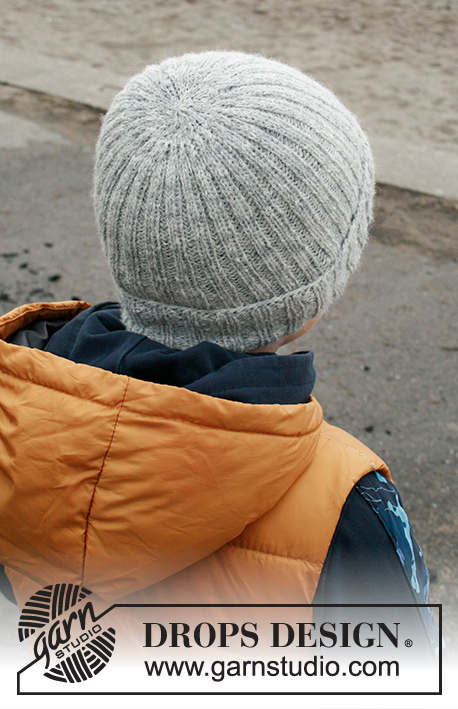
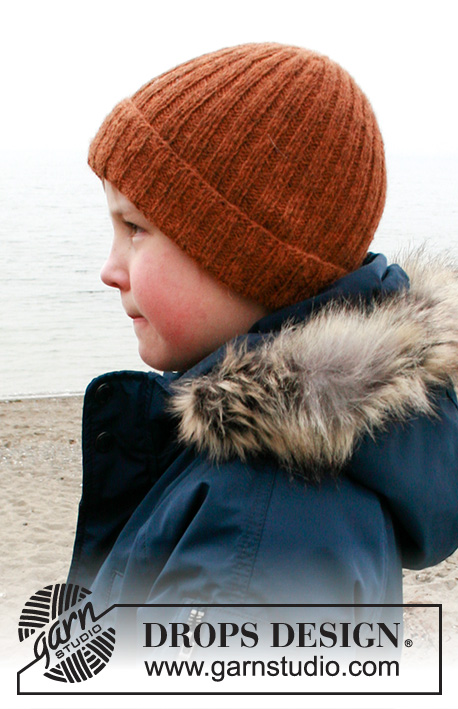
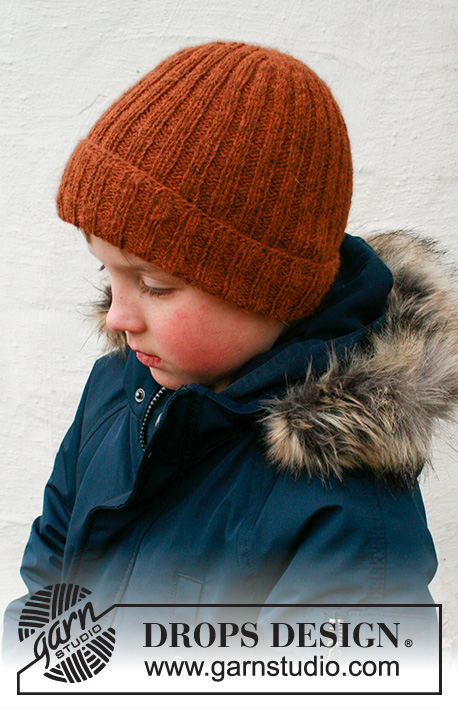
Pumpkin Patch Hat#pumpkinpatchhat |
|||||||||||||
 |
 |
||||||||||||
Knitted hat for children in DROPS Sky. The piece is worked with rib. Sizes 2 to 12 years.
DROPS Children 40-36 |
|||||||||||||
|
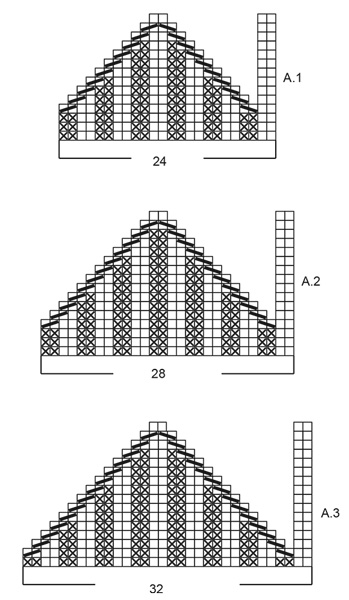
------------------------------------------------------- EXPLANATIONS FOR THE PATTERN: ------------------------------------------------------- PATTERN: See diagrams A.1 to A.3. Choose diagram for your size. ------------------------------------------------------- START THE PIECE HERE: ------------------------------------------------------- HAT – SHORT OVERVIEW OF THE PIECE: The piece is worked in the round with short circular needle/double pointed needles, bottom up. HAT: Cast on 104-108-112-116 stitches with short circular needle size 3 mm and DROPS Sky. Knit 1 round then work rib in the round (knit 2, purl 2) for 4-5-5-5 cm. Turn the piece (so the turn-up will be on the right side when it is folded up later) and work the rest of the hat in the opposite direction. Continue with knit over knit and purl over purl. REMEMBER THE KNITTING TENSION! When the piece measures 19-21-22-22 cm, decrease as described below: SIZE 2 YEARS: * Work A.1 (= 24 stitches – start on round 1 in A.1), work A.2 (= 28 stitches – start on round 3 in A.2) *, work from *-* 2 times on the round. Continue this pattern and decrease as described in the diagrams. SIZE 3/5 YEARS: Start on round 3 in A.2 and work A.2 (= 28 stitches) 3 times, then work A.1 (= 24 stitches – start on round 1 in A.1). Continue this pattern and decrease as described in the diagrams. SIZE 6/9 YEARS: Start on round 3 in A.2 and work A.2 (= 28 stitches) 4 times on the round. Continue this pattern and decrease as described in the diagrams. SIZE 10/12 YEARS: Start on round 1 in A.2 and work A.2 (= 28 stitches) 3 times, then work A.3 (= 32 stitches – start on round 1 in A.3). Continue this pattern and decrease as described in the diagrams. ALL SIZES: When the diagrams have been completed in height there are 16 stitches left in all sizes. Work 1 round where all stitches are knitted together 2 and 2 = 8 stitches. Cut the strand, thread it through the remaining stitches, tighten and fasten well. The hat measures approx. 23-25-26-27 cm from the top down. Fold up the bottom 4-5-5-5 cm. |
|||||||||||||
Diagram explanations |
|||||||||||||
|
|||||||||||||
|
|||||||||||||
Have you finished this pattern?Tag your pictures with #dropspattern #pumpkinpatchhat or submit them to the #dropsfan gallery. Do you need help with this pattern?You'll find 14 tutorial videos, a Comments/Questions area and more by visiting the pattern on garnstudio.com. © 1982-2025 DROPS Design A/S. We reserve all rights. This document, including all its sub-sections, has copyrights. Read more about what you can do with our patterns at the bottom of each pattern on our site. |
|||||||||||||


With over 40 years in knitting and crochet design, DROPS Design offers one of the most extensive collections of free patterns on the internet - translated to 17 languages. As of today we count 314 catalogues and 11822 patterns translated into English (UK/cm).
We work hard to bring you the best knitting and crochet have to offer, inspiration and advice as well as great quality yarns at incredible prices! Would you like to use our patterns for other than personal use? You can read what you are allowed to do in the Copyright text at the bottom of all our patterns. Happy crafting!
Post a comment to pattern DROPS Children 40-36
We would love to hear what you have to say about this pattern!
If you want to leave a question, please make sure you select the correct category in the form below, to speed up the answering process. Required fields are marked *.