
Catégories populaires
Vous cherchez un fil?


Commentaires / Questions (46)
![]() DB a écrit:
DB a écrit:
I am having a hard time reading the chart. Do you have the written out version available? Thank you, DB
28.07.2021 - 12:19DROPS Design a répondu:
Dear DB, we only have diagram to this pattern, but this lesson should be able to help you understanding how to read diagrams. Happy knitting!
28.07.2021 - 13:41
![]() Monica 77 a écrit:
Monica 77 a écrit:
Buon giorno, scusate la domanda ma sono una prncipiante :quando ho il lavoro al rovescio(ferro di ritorno) li prendo come si presentano o tutti al diritto?grazie in anticipo x la risposta
28.03.2021 - 21:42DROPS Design a répondu:
Buonasera Monica, per il ferro di ritorno deve lavorare come indicato nel diagramma, che mostra tutti i ferri di lavoro. Buon lavoro!
28.03.2021 - 21:55
![]() Benedetta a écrit:
Benedetta a écrit:
Buongiorno, ho lavorato 15maglie x 19 ferri a maglia rasata col ferro circolare n. 6, ma ho ottenuto un quadrato 8,5 cm x 8,5 cm. Che ferri devo usare? Grazie
14.11.2020 - 10:10DROPS Design a répondu:
Buongiorno Benedetta, deve provare a rifare il campione usando una misura di ferri più grande. Buon lavoro!
14.11.2020 - 15:37
![]() Eloise a écrit:
Eloise a écrit:
Does reverse mean backwards? Do I now knit left to right (A3 to A1)? And do I also flip the knit/purl stitches? For example, do I know knit row 8 (rather than purl it as I did with the first piece) because it’s now from the WS? Or is this still considered the RS side?
09.03.2020 - 07:26DROPS Design a répondu:
Dear Eloïse, both pieces should be mirrored, ie work 2nd piece as first one but cast on 1 st at the end of row from RS instead of from WS so that the 2 sts in garter st are at the end of row from RS instead of at the beg of row from RS and so on. Happy knitting!
09.03.2020 - 12:42
![]() Eloise a écrit:
Eloise a écrit:
Is it absolutely necessary to knit the second piece in reverse? I find it very confusing.. is there any way to knit it as the first piece but still be able to put it together in the end? Thanks!
08.03.2020 - 22:25DROPS Design a répondu:
Dear Eloise, the poncho is asymmetric, that is why you need to knit the first piece mirrored for the second, otherwise you will not be able to put the pieces together.
08.03.2020 - 22:49
![]() Chiara a écrit:
Chiara a écrit:
Ciao, per realizzare il poncho si può usare un filato A+A, vuol dire che uso un filato del 3 - 3,5 in doppio? Grazie
01.01.2020 - 18:47DROPS Design a répondu:
Buongiorno Chiara. Sì, può sostituire il filato indicato con un filato del gruppo A usato doppio. Verifichi sempre la correttezza del campione. Buon lavoro!
02.01.2020 - 11:17
![]() Melinda Fülöp a écrit:
Melinda Fülöp a écrit:
Hej Hur ska man sticka den andra delen sen? Jag blir tacksam om svaret blir på svenska. Tack
16.12.2019 - 17:08DROPS Design a répondu:
Hej Melinda, du stickar den andra delen på samma vis fast du lägger upp en ny maska i andra sidan. Lycka till :)
17.12.2019 - 11:38
![]() Maja a écrit:
Maja a écrit:
Hi, I'm a bit confused with how the written pattern corresponds to the diagram. I've now worked the first 2 rows. It says "Continue like this until piece measures 30 cm / 11 3/4'' from cast-on edge." Does this mean that I simply repeat the first 2 rows until the pattern measures 30cm, or should I keep following the diagram upwards? I'm quite a new knitter so I apologise if this is a silly question. Thanks!
26.10.2019 - 22:22DROPS Design a répondu:
Hi Maja, You continue the pattern upwards. Happy knitting!
28.10.2019 - 07:42
![]() Linda a écrit:
Linda a écrit:
Can this be done with written instructions instead of of by diagram or chart? I absolutely love this and I do not do well by charts. I usually write the instructions down on paper which works better for me. Thanks for sharing your beautiful work and pattern.
16.08.2019 - 20:11DROPS Design a répondu:
Dear Linda, you will find how to read knitting diagrams here. Happy knitting!
19.08.2019 - 08:58
![]() Katerina a écrit:
Katerina a écrit:
Hi, would it be possible to have a 30 cm vent in both sides?
08.03.2019 - 21:17DROPS Design a répondu:
Yes, just knit the garter just add the plus stitch for the seaming where you want the split start / end. Happy Knitting.
10.03.2019 - 16:47
|
||||||||||||||||||||||
So Classy!#soclassyponcho |
||||||||||||||||||||||
 |
 |
|||||||||||||||||||||
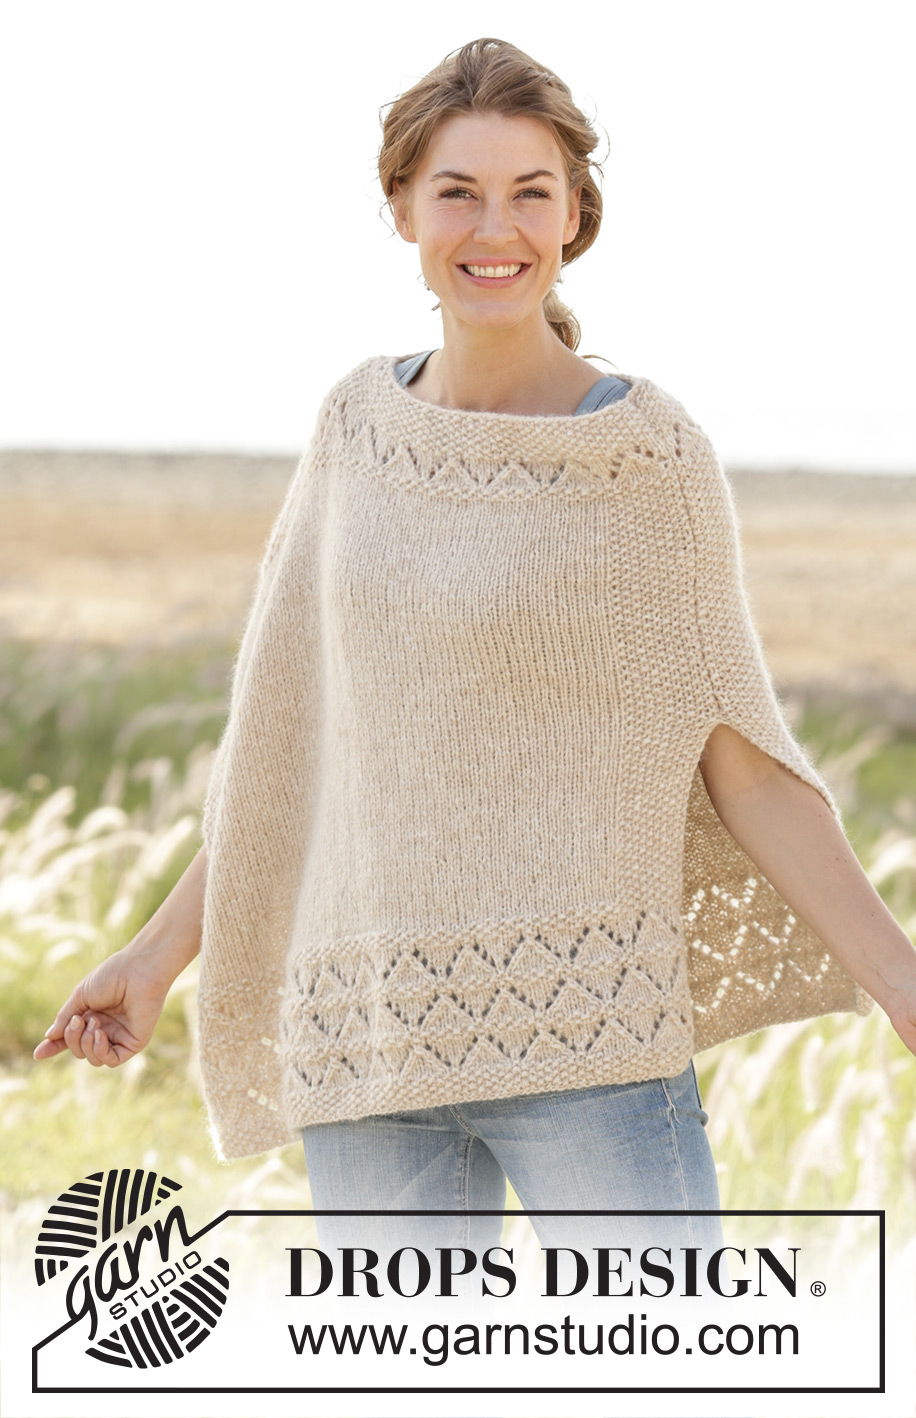
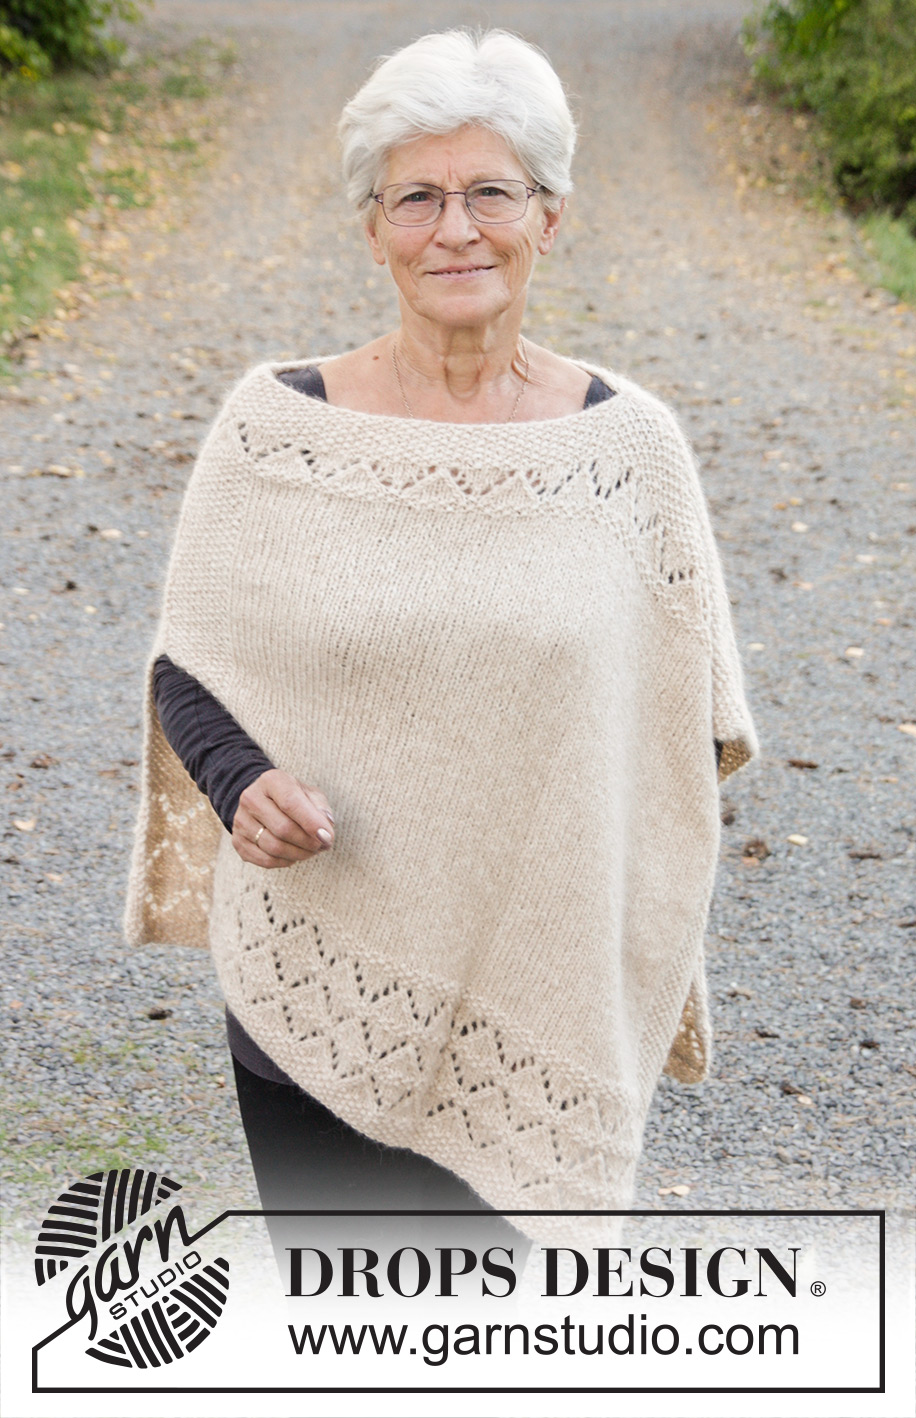
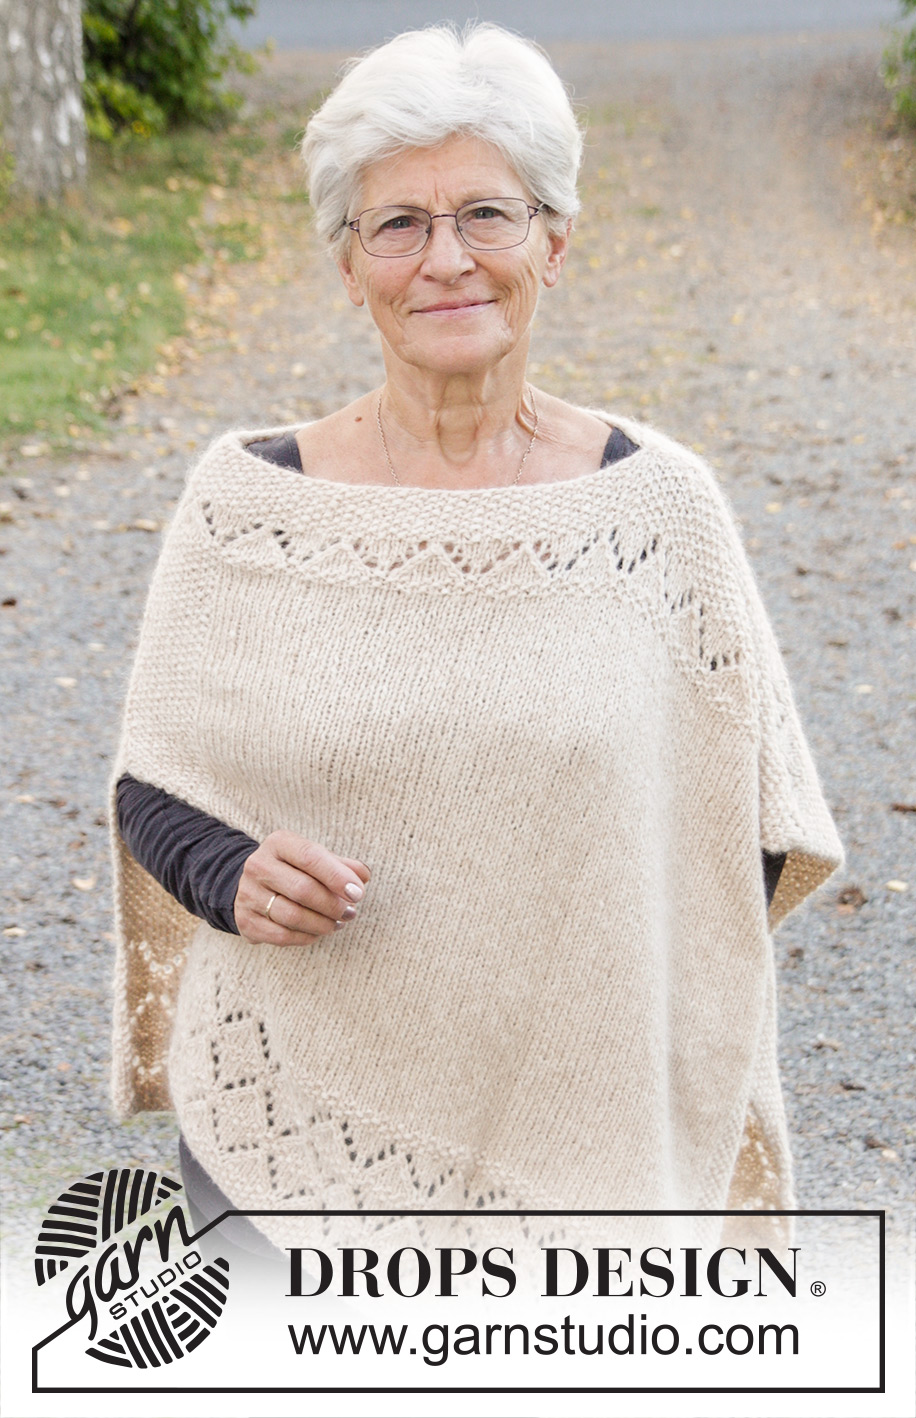
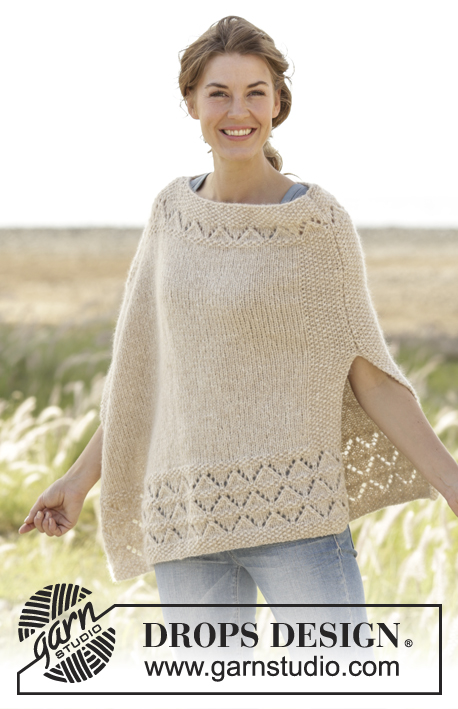
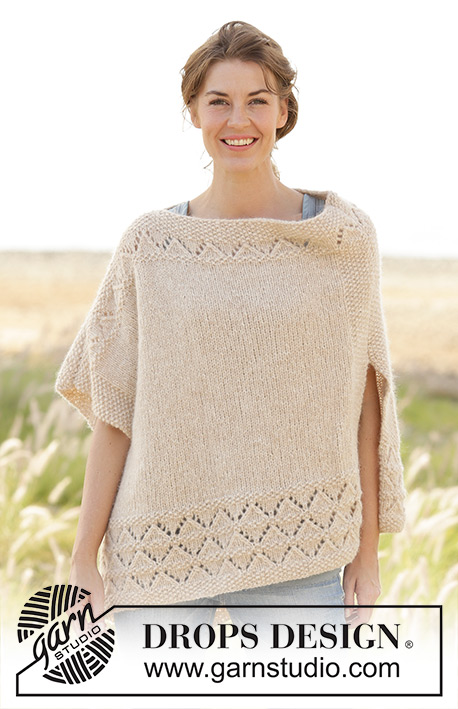
Poncho DROPS au point de riz avec point ajouré, en ”Air”. Du S au XXXL.
DROPS 170-28 |
||||||||||||||||||||||
|
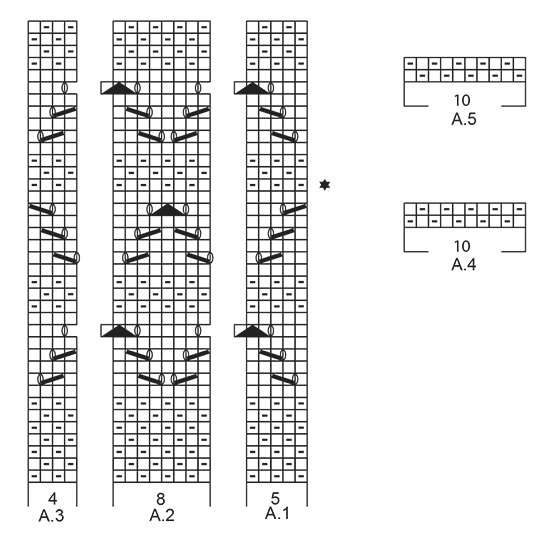
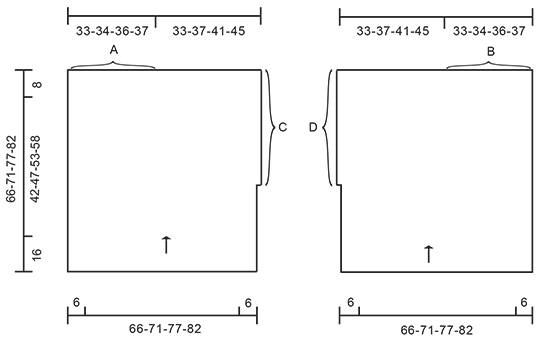
POINT MOUSSE (en allers et retours): Tricoter tous les rangs à l'endroit. 1 côte mousse = 2 rangs end. POINT FANTAISIE: Voir les diagrammes A.1 à A.5. Les diagrammes montrent tous les rangs du point fantaisie, vus sur l'endroit. ---------------------------------------------------------- PONCHO: Se tricote en allers et retours sur aiguille circulaire en 2 parties assemblées entre elles à la fin. Monter 99-107-115-123 m (y compris 1 m lis au point mousse de chaque côté) avec l'aiguille circulaire 6 en Air. Tricoter en point fantaisie ainsi: 1 m lis au POINT MOUSSE – voir ci-dessus, A.1 (= 5 m), 11-12-13-14 fois A.2 (= 8 m) en largeur. A.3 (= 4 m), 1 m lis au point mousse. NOTE: Continuer les m lis au point mousse jusqu'à la fin, elles font ensuite partie du point de riz. PENSER À BIEN CONSERVER LA MÊME TENSION QUE POUR L'ÉCHANTILLON! Quand A.1 à A.3 ont été entièrement tricotés 1 fois en hauteur, continuer sur l'endroit ainsi: Tricoter A.4 (NOTE: 1ère m du diagramme = m lis), 79-87-95-103 m jersey, A.5 au-dessus des 10 dernières m (NOTE: la dernière m du diagramme = m lis). Continuer ainsi jusqu'à ce que l'ouvrage mesure 30 cm depuis le rang de montage. À la fin du rang suivant sur l'envers, monter 1 m (repère fentes) = 100-108-116-124 m. Tricoter cette nouvelle m point mousse. C'est à dire qu'on a maintenant 2 m au point mousse en début de rang sur l'endroit. À 58-63-69-74 cm de hauteur totale, tricoter ainsi, en commençant par le rang du diagramme avec une étoile ainsi: 2 m au point mousse, A.1, 11-12-13-14 fois A.2 en largeur, A.3, 1 m lis au point mousse. Quand le diagramme a été tricoté 1 fois en hauteur, répéter les 2 derniers rangs du diagramme jusqu'à ce que l'ouvrage mesure 66-71-77-82 cm. Rabattre les m env à l'end et les m end à l'env. Monter et tricoter une autre pièce de la même façon mais en sens inverse. ASSEMBLAGE: Voir schéma des mesures. Faire la couture A et B en grafting. Faire ensuite la couture C et D dans le brin le plus à l'extérieur des m lis. On a maintenant une fente de 30 cm d'un côté et une tout le long de l'autre côté. Arrêter. |
||||||||||||||||||||||
Légende diagramme(s) |
||||||||||||||||||||||
|
||||||||||||||||||||||
 |
||||||||||||||||||||||
 |
||||||||||||||||||||||
Vous avez terminé ce modèle?Alors taguez vos photos avec #dropspattern #soclassyponcho ou bien présentez-les dans la galerie #dropsfan Vous avez besoin d'aide pour ce modèle ?Vous trouverez 20 tutoriels vidéo, une rubrique commentaires/questions et plus encore en vous rendant sur la page du modèle sur garnstudio.com © 1982-2026 DROPS Design A/S. Tous droits réservés. Ce document, y compris ces sous-sections, est protégé par les droits d'auteur (copyright). Apprenez-en davantage sur ce que vous pouvez faire avec nos modèles en bas de chacune des pages de notre site. |
||||||||||||||||||||||


Avec plus de 40 ans dans la conception de modèles tricot et crochet, DROPS Design offre l'une des plus vastes collections de modèles gratuits sur internet - traduits dans 17 langues. À ce jour, on compte 325 catalogues et 12298 modèles en français.
Nous nous efforçons de vous apporter le meilleur de ce que le tricot et le crochet peuvent vous offrir, inspiration et conseils mais également des fils de haute qualité à des prix incroyables! Vous souhaiteriez utiliser nos modèles autrement que pour un usage personnel? Vous pouvez lire ce que vous êtes autorisés à faire dans le Copyright en bas de page de chacun de nos modèles. Bon tricot!
Poster un commentaire sur le modèle DROPS 170-28
Nous aimerions connaître votre avis sur ce modèle !
Si vous souhaitez poser une question, merci de bien vouloir vérifier que vous avez choisi la bonne catégorie dans le formulaire ci-dessous afin d'accélérer la réponse. Les champs obligatoires sont indiqués par une *.