
Catégories populaires
Vous cherchez un fil?


Commentaires / Questions (22)
Renée a écrit:
Hi Thanks for your response, but I figured it out myself, I was just a bit confused by the mid front and mid back. I am very pleased with the result. It looks really lovely. Thanks for all your help!
13.12.2013 - 11:48Renée a écrit:
Hi Could you please explain the assembly instructions as they are rather confusing.
10.12.2013 - 10:44DROPS Design a répondu:
Dear Renée, on both pieces, you increased on one side and not on the other one. Put both pieces tog so that edge without inc are on mid back. Sew cast off rows together starting from mid front, and continue along edges on back side, this seam should measure approx. 30 cm (back of head). Happy knitting!
10.12.2013 - 13:41
![]() Renée a écrit:
Renée a écrit:
Thank you for clarifying.
08.12.2013 - 11:21René a écrit:
Just to clarify; for part 1 you do the increase at the beginning of the row after the edge stitch. And for Part 2, you do the increase before the final stitch at the end of the row. You wrote in your previous post that you do the increase every other row, but you meant every 4th row as stated in the pattern.
02.12.2013 - 09:31DROPS Design a répondu:
Dear Renée, you are correct, I mistyped last answer, you inc approx. every 2 cm, ie every 4 th row (= every 2nd row from RS). Inc will be done at beg of row from RS for 1st part and at the end of row from RS for 2nd part. Happy knitting!
02.12.2013 - 13:57Renée a écrit:
The pattern states that the part 1 increase,should be done on the RS. I assumed this was the right side of the work, i.e. the side worn outwards. But, as this is garter stitch there is no right/outer side or wrong/inner side, as both sides look the same. The part 2 increase is done on the left side. I am a little puzzled. Surely, it does not matter which side you do the increase on, as you would merely join the 2 sides that have been increased? Or I am missing something?
29.11.2013 - 15:44DROPS Design a répondu:
Dear Renée, you will inc here at the right side of piece, seen from RS, ie at beg of row every other row. And for 2nd part you will inc at the end of row every other row (=every row from WS). Happy knitting!
29.11.2013 - 16:46Renee a écrit:
Thank you!
21.11.2013 - 13:02Renée a écrit:
Hi I am confused by the increase. I realise a YO is needed, but do not know what is meant by "inc 1 st from RS inside 1 st on the right side of the piece". I understand that the increase is done with the Right Side (RS) of the knitting facing you. However, I am not sure what is meant by "inside 1 st on the right side of the piece" Do you mean you knit the first stitch in the row and then do the YO? Can you please explain.
20.11.2013 - 10:06DROPS Design a répondu:
Dear Renée, it means you will inc after the edge st, at the beg of row, seen from RS: K1 (edge st), YO (inc) and continue until end of RS row. Happy knitting!
20.11.2013 - 11:13
![]() Siv Aarflot a écrit:
Siv Aarflot a écrit:
Denne kunne vært morsom og prøve seg på.
01.02.2012 - 15:27
![]() Faultier a écrit:
Faultier a écrit:
Sehr leicht zu stricken, wunderschön und hält warm.
23.01.2011 - 19:31
![]() Karen Sanborn a écrit:
Karen Sanborn a écrit:
This one is very nice to wear with a coat during winter
30.06.2010 - 18:29
|
|
Sandy Wind |
|
 |
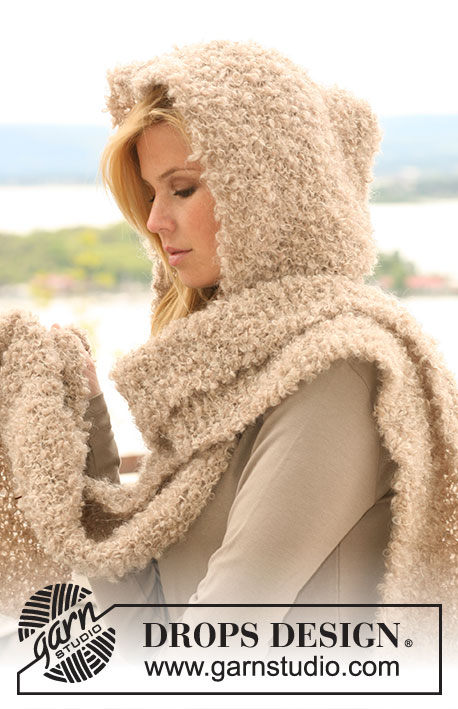 |
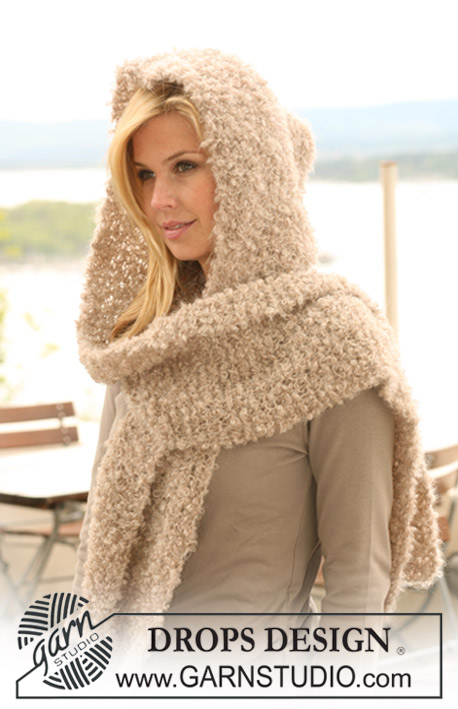
Écharpe Capuche tricotée au point mousse en DROPS Puddel.
DROPS 123-36 |
|
|
POINT MOUSSE (en allers retours) : Tricoter tous les rangs à l'endroit AUGMENTATIONS: Augmenter en faisant 1 jeté. Au rang suivant tricoter le jeté torse à l'end pour éviter un trou. -------------------------------------------------------- ÉCHARPE CAPUCHE: Se tricote en 2 parties assemblées ensuite ensemble. 1ère PARTIE : Se tricote en allers retours. Monter 25 m avec les aiguilles 7. Tricoter au POINT MOUSSE – voir ci-dessus! PENSER À BIEN CONSERVER LA MÊME TENSION QUE POUR L'ÉCHANTILLON ! À 106 cm de hauteur totale, augmenter 1 m sur l'endroit, à 1 m du bord , à droite de l'ouvrage – Voir AUGMENTATIONS ! Répéter ces augmentations 8 fois au total tous les 4 rangs (environ tous les 2 cm) = 33 m. Continuer au point mousse. Rabattre SOUPLEMENT à 130 cm de hauteur totale. 2ème PARTIE : Se tricote comme la 1ère partie mais augmenter à gauche. ASSEMBLAGE: Les côtés sans augmentations = milieu dos. Coudre les 2 parties ensemble en haut, bord à bord, en commençant au milieu devant. Continuer la couture sur environ 30 cm le long du bas de l'écharpe capuche. Rentrer les fils. |
|
Vous avez terminé ce modèle?Alors taguez vos photos avec #dropspattern ou bien présentez-les dans la galerie #dropsfan Vous avez besoin d'aide pour ce modèle ?Vous trouverez 8 tutoriels vidéo, une rubrique commentaires/questions et plus encore en vous rendant sur la page du modèle sur garnstudio.com © 1982-2026 DROPS Design A/S. Tous droits réservés. Ce document, y compris ces sous-sections, est protégé par les droits d'auteur (copyright). Apprenez-en davantage sur ce que vous pouvez faire avec nos modèles en bas de chacune des pages de notre site. |
|


Avec plus de 40 ans dans la conception de modèles tricot et crochet, DROPS Design offre l'une des plus vastes collections de modèles gratuits sur internet - traduits dans 17 langues. À ce jour, on compte 324 catalogues et 12290 modèles en français.
Nous nous efforçons de vous apporter le meilleur de ce que le tricot et le crochet peuvent vous offrir, inspiration et conseils mais également des fils de haute qualité à des prix incroyables! Vous souhaiteriez utiliser nos modèles autrement que pour un usage personnel? Vous pouvez lire ce que vous êtes autorisés à faire dans le Copyright en bas de page de chacun de nos modèles. Bon tricot!
Poster un commentaire sur le modèle DROPS 123-36
Nous aimerions connaître votre avis sur ce modèle !
Si vous souhaitez poser une question, merci de bien vouloir vérifier que vous avez choisi la bonne catégorie dans le formulaire ci-dessous afin d'accélérer la réponse. Les champs obligatoires sont indiqués par une *.