
Catégories populaires
Vous cherchez un fil?


Commentaires / Questions (56)
![]() Antje a écrit:
Antje a écrit:
Das Bild und das Diagramm stimmen nicht überein. M.3 ist glatt rechts gestrickt, also müssen die Maschen in den Rückrunden links gestrickt werden. Nach Ihren Ausführungen sind alle Reihen im Diagramm angegeben, da sollen aber rechte Maschen folgen. Da passt was nicht.
31.07.2024 - 11:36DROPS Design a répondu:
Liebe Antje, ja richtig, M.3 wird glatt rechts mit dem Lochmuster gestrickt, die Hinreihen stricken Sie rechts (mit Lochmuster) und die Rückreihen stricken Sie links. M3 wird dann über 8 Reihen in der Höhe wiederholt. Viel Spaß beim Stricken!
01.08.2024 - 08:59
![]() Tuija Roukals a écrit:
Tuija Roukals a écrit:
Hei, en ymmärrä malliohjeen alkua kun siinä käsketään neuloa 11 s M1 mukaisesti mutta M1 on 7 silmikkaa
07.07.2024 - 13:17DROPS Design a répondu:
Hei, piirroksessa M.1 on 9 silmukkaa. Neulo nämä 9 silmukkaa ja neulo sitten vielä mallikerran ensimmäiset 2 silmukkaa.
08.07.2024 - 16:59
![]() Maaike Bandstra a écrit:
Maaike Bandstra a écrit:
Als ik het tel patroon die zoals het er staat kom ik niet op 119 uit mijn 2 kanst. Ik hou 5 steken over
06.04.2024 - 15:38
![]() Hannatjie Delport a écrit:
Hannatjie Delport a écrit:
Your pattern says yo and sl1 as if to knit. Your comment said english rib is yo and sl1 as if to purl. I am sl as if to knit and cannot change it but it is the first pattern that is a bit confusing to me. Mine still looks beautiful, although i am not quite sure if it is correct.
27.10.2023 - 20:15DROPS Design a répondu:
Dear Mrs Delport, slip the stitch as if to purl - pattern will be edited, thanks. Happy knitting!
28.10.2023 - 08:57
![]() Hannatjie Delport a écrit:
Hannatjie Delport a écrit:
Thanks for the answer. The pattern now looks more like the picture. What is the goal of the yo and the p 2tog on wrong side as it looks the same for me if you just slip or right side and purl on wrong side? I cannot really see the use for the extra step. The picture also looks more than a kl p 1 rib than k1 p 2.
25.10.2023 - 21:26DROPS Design a répondu:
Dear Mrs Delport, this stitch is in fact a stitch in English rib, from RS you make a yarn over and slip 1 st as if to P and from WS you will purl together the stitch and the yarn over. Happy knitting!
26.10.2023 - 06:52
![]() Hannatjie Delport a écrit:
Hannatjie Delport a écrit:
In m1 it is p2, yo+slip 1 as if to knit. Is the yarn at the back or front at this stage?
20.10.2023 - 20:44DROPS Design a répondu:
Dear Hannatjie, when you slip 1 as if to knit the yarn should be at the back. Happy knitting!
23.10.2023 - 00:41
![]() Patty Walk a écrit:
Patty Walk a écrit:
Good morning, I have a question about the assembly of the sweater. After I pick up 100-106 st. round the neck and work 3/4 of an inch in garter stitch, do I just bind off and that's it?
17.10.2023 - 13:15DROPS Design a répondu:
Dear Mrs Walk, correct, neck edge is 2 cm / ca 3/4" garter stitch. Happy knitting!
17.10.2023 - 16:00
![]() Conny a écrit:
Conny a écrit:
I'll try again in English. With size M, the pattern says to cast on 113 stitches. That includes 1 edge stitch on each side. You then have to knit a couple of repetitions of the pattern, but that amounts to 113 stitches WITHOUT the edge stitches. Shouldn't the cast-on be 115 stitches then?
01.10.2023 - 09:16DROPS Design a répondu:
Hi Conny, The edge stitches are included in the M.1 pattern on each side. Happy knitting!
02.10.2023 - 06:51
![]() Christine Cornhill a écrit:
Christine Cornhill a écrit:
I love your yarn and patterns, but I struggle with following diagram pattern instructions. Please can you include written instructions ie k2 yf k2tog etc for the pattern part. I've bought Patterns from other designers and they include both diagram and written instructions. Thanks
31.08.2023 - 11:18DROPS Design a répondu:
Dear Mrs Cornhill, we only have diagram for this pattern, but this lesson will help you understanding how to read diagrams. Happy knitting!
01.09.2023 - 08:33
![]() Conny a écrit:
Conny a écrit:
Moeten er bij maat M niet 115 steken worden opgezet ipv 113? Met 113 steken INCL. kantsteken (zoals in patroon vermeld) kom ik de kantsteken tekort, omdat de patroonherhalingen samen op 113 steken komen, zoals ook door jullie berekend in het antwoord aan Marie Boutin op 12-2-2014.
29.08.2023 - 23:54
|
||||||||||||||||||||||
French Fields#frenchfieldssweater |
||||||||||||||||||||||
 |
 |
|||||||||||||||||||||
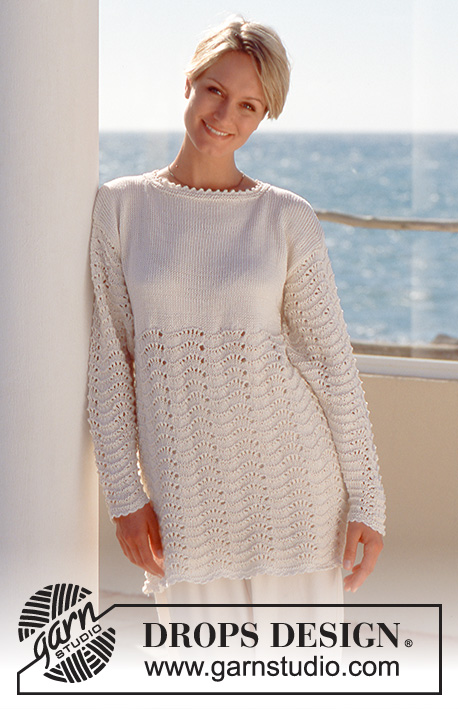
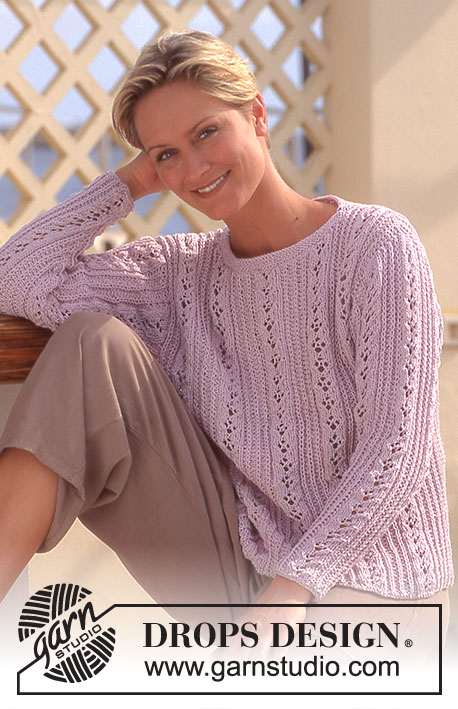
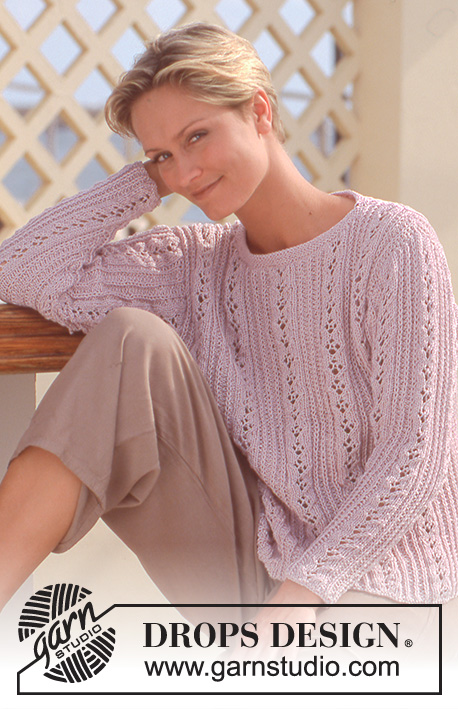
Pull DROPS en point ajouré en Muskat. Du S au L.
DROPS 45-14 |
||||||||||||||||||||||
|
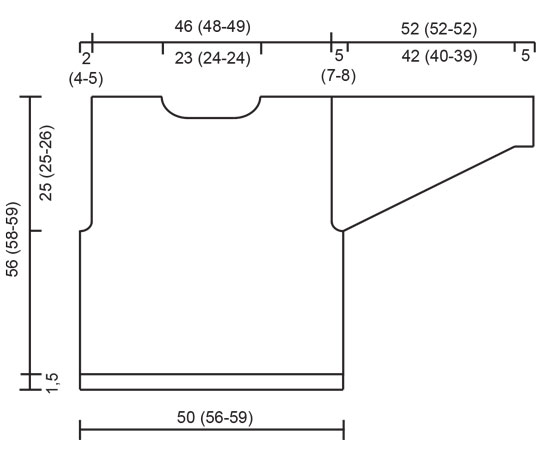
Échantillon : 20 m x 26 rangs = 10 x 10 cm en jersey Point mousse (en allers retours) : Tricoter tous les rangs à l'endroit Point mousse (en rond) : 1 tour end, 1 tour env Point fantaisie : Voir diagramme ci-dessous. 1 diagramme = 1 motif à répéter. Le diagramme montre le motif sur l'end. Devant : Se tricote en allers retours sur aiguille circulaire. Avec les aiguilles 4 monter 101-113-119 m (y compris 1 m lis de chaque côté) , tricoter 2 rangs au point mousse. Continuer en point fantaisie ainsi : 11-17-20 m de M1, 4 fois M2, M3, 11-17-20 m de M1. PENSER À BIEN CONSERVER LA MÊME TENSION QUE POUR L'ÉCHANTILLON ! À 31-33-33 cm de hauteur totale, rabattre pour les emmanchures de chaque côté tous les 2 rangs : 0-1-2 fois 3 m, 2 fois 2 m et 1-2-1 fois 1 m = 91-95-97 m. À 50-52-53 cm de hauteur totale, rabattre pour l'encolure les 33-35-35 m centrales puis côté encolure tous les 2 rangs : 2 fois 2 m et 2 fois 1 m. Rabattre les mailles restantes à 56-58-59 cm de hauteur totale. Dos : Monter et tricoter comme pour le devant. Former les emmanchures comme pour le devant. À 54-56-57 cm de hauteur totale, rabattre pour l'encolure les 41-43-43 m centrales puis 2 m côté encolure au rang suivant. À 56-58-59 cm de hauteur totale, rabattre toutes les mailles. Manches : Se tricotent en allers retours sur aiguille circulaire. Avec les aiguilles 4 monter 45-45-47 m (y compris 1 m lis de chaque côté) et tricoter 2 rangs au point mousse. Continuer en point fantaisie ainsi : 1-1-2 m de M1, 2 fois M2, M3, 1-1-2 m de M1. À 5 cm de hauteur totale, augmenter 1 m de chaque côté 28-28-29 fois : Taille S et M : alternativement tous les 3 et 4 rangs Taille L : tous les 3 rangs = 101-101-105 m – tricoter les augmentations en point fantaisie au fur et à mesure. À 47-45-44 cm de hauteur totale, rabattre de chaque côté tous les 2 rangs : 6-9-10 fois 5-3-3 m, rabattre les mailles restantes, la manche mesure environ 52 cm de hauteur totale. Assemblage Coudre les épaules. Monter et coudre les manches et les côtés. Avec les aiguilles 3 relever 100 à 106 m autour de l'encolure et tricoter 2 cm point mousse. |
||||||||||||||||||||||
Légende diagramme(s) |
||||||||||||||||||||||
|
||||||||||||||||||||||
 |
||||||||||||||||||||||
 |
||||||||||||||||||||||
Vous avez terminé ce modèle?Alors taguez vos photos avec #dropspattern #frenchfieldssweater ou bien présentez-les dans la galerie #dropsfan Vous avez besoin d'aide pour ce modèle ?Vous trouverez 21 tutoriels vidéo, une rubrique commentaires/questions et plus encore en vous rendant sur la page du modèle sur garnstudio.com © 1982-2026 DROPS Design A/S. Tous droits réservés. Ce document, y compris ces sous-sections, est protégé par les droits d'auteur (copyright). Apprenez-en davantage sur ce que vous pouvez faire avec nos modèles en bas de chacune des pages de notre site. |
||||||||||||||||||||||


Avec plus de 40 ans dans la conception de modèles tricot et crochet, DROPS Design offre l'une des plus vastes collections de modèles gratuits sur internet - traduits dans 17 langues. À ce jour, on compte 324 catalogues et 12290 modèles en français.
Nous nous efforçons de vous apporter le meilleur de ce que le tricot et le crochet peuvent vous offrir, inspiration et conseils mais également des fils de haute qualité à des prix incroyables! Vous souhaiteriez utiliser nos modèles autrement que pour un usage personnel? Vous pouvez lire ce que vous êtes autorisés à faire dans le Copyright en bas de page de chacun de nos modèles. Bon tricot!
Poster un commentaire sur le modèle DROPS 45-14
Nous aimerions connaître votre avis sur ce modèle !
Si vous souhaitez poser une question, merci de bien vouloir vérifier que vous avez choisi la bonne catégorie dans le formulaire ci-dessous afin d'accélérer la réponse. Les champs obligatoires sont indiqués par une *.