
Oblíbené kategorie
Hledáte přízi?


Komentáře / Otázky (37)
![]() Labiche Odette napsala:
Labiche Odette napsala:
Bonjour, pourriez vous me dire si le diagramme n°2 je fais un rang endroit et un rang envers donc le total est de 22 rangs ? Pour la torsade je la fais avant le diagramme n°3 ou après ? En attendant votre réponse je vous souhaite une bonne journée.
17.09.2025 - 17:02Odpověď DROPS Design :
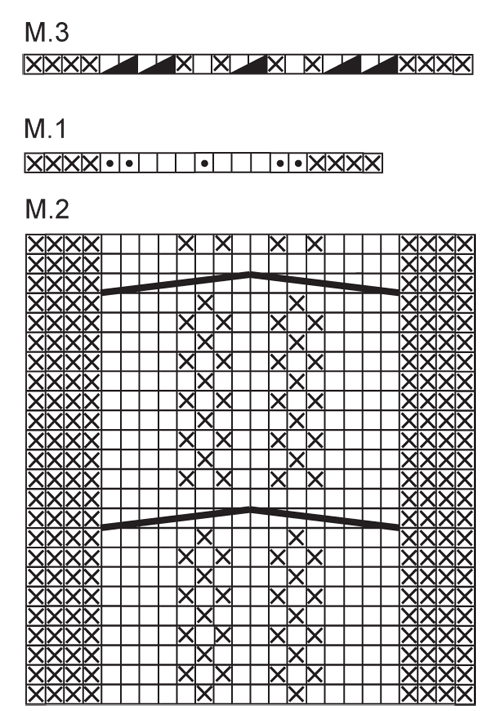
Bonjour Mme Labiche, vous tricotez dle diagramme M.2 en commençant sur l'envers (car M.1 se tricote sur l'endroit et ainsi les torsades de M.2 sont sur l'endroit) et vous répétez la totalité des rangs de M.2: sur l'endroit lisez de droite à gauche et sur l'envers, de gauche à droite; quand le diagramme est terminé en hauteur, reprenez-le au 1er rang. Quand vous aurez atteint la hauteur souhaitée, tricotez M.3. Bon tricot!
18.09.2025 - 18:12
![]() Diane Songer napsala:
Diane Songer napsala:
I don’t understand why with this headband, you only cast on 27 sets. Isn’t that too little?
19.11.2024 - 22:24Odpověď DROPS Design :
Dear Mrs Songer, if your tension is right you should get the correct finished measurements - note that you will increase on the first row in M.1 to compensate the number of stitches required for the cable. Happy knitting!
20.11.2024 - 08:13
![]() Gladys Freer napsala:
Gladys Freer napsala:
What is the yardage needed to make this head band? Thank you.
14.11.2022 - 21:39Odpověď DROPS Design :
Hi Gladys, The Drops yarn has approx. 82 yards per ball and you need 2 balls. Happy knitting!
15.11.2022 - 07:00
![]() Nicole Rivard napsala:
Nicole Rivard napsala:
Comment fait-on pour ajuster au 11 e ou 23e rang du M2? Et le M3, est-ce qu\'il se tricote quand on a finit au complet le diagramme M2? Merci
02.11.2021 - 16:53
![]() Marie napsala:
Marie napsala:
Danke für die schnelle Antwort !
09.10.2019 - 13:50
![]() Marie napsala:
Marie napsala:
Muß die 1. Reihe von M2 eine Rückreihe nach der Reihe M1 sein?
09.10.2019 - 10:48Odpověď DROPS Design :
Liebe Marie, ja genau, M.1 wird eine Hin-Reihe, so daß M.2 beginnt mit einer Rückreihe, so daß die Zöpfe bei Hinreihen gestrickt werden. Viel Spaß beim stricken!
09.10.2019 - 11:17
![]() Luisa napsala:
Luisa napsala:
Sorry one question how do I work the wrong side or it is on the diagrams for both sides wrong and right sides thanks much
25.08.2019 - 13:04Odpověď DROPS Design :
Dear Luisa, this pattern is worked flat, back and forth on needles. The diagram shows both right and wrong rows: start to read it from bottom right corner to left for right side rows and from left to right for wrong side rows. Happy knitting!
25.08.2019 - 15:32
![]() Tammy napsala:
Tammy napsala:
This ear warmer looks soooo cute. Is there a written pattern or only the chart? I’ve tried to do charts but I just haven’t been able to do them successfully.
18.11.2018 - 22:53Odpověď DROPS Design :
Dear Tammy, there are only diagrams to this pattern - 1 square in diagram = 1 row - both RS and WS rows are shown in diagram. Start M.1 from the right side reading from the right towards the left (= you increase 5 sts) then work M.2 starting on the bottom corner on the left sdie from WS towards the right - and work RS rows from the right towards the left. See diagram key to know how to work each stitch. Happy knitting!
19.11.2018 - 09:19
![]() Patty napsala:
Patty napsala:
I actually figured it out how to get 30 stitches. Please clarify which direction to read the different rows on the chart. Thanks much!
18.09.2018 - 19:14Odpověď DROPS Design :
Dear Patty, M.1 is worked from RS = from the right towards the left. M.2 is worked beginning from WS = start on the bottom corner on the left side and read WS rows from the left towards the right and the RS rows from the right towards the left. M.3 will be then worked from RS = from the right towards the left. Happy knitting!
19.09.2018 - 09:28
![]() Patty napsala:
Patty napsala:
I have read over this several times. After M1, I am not sure how you get 30 stitches?? the 3 garter stitches, M1 (19 stitches) and 3 garter stitches = 19 + 6 = 25. So after M1 I end up with 25 stitches. Please clarify. It seems like many people have had the same question. Thank you
18.09.2018 - 19:02Odpověď DROPS Design :
Hi Patty. It is correct that M.1 is worked across 19 stitches, but in 5 of those stitches you'll work 2 stitches in one = 5 stitches increased. So after M.1 is worked once, you'll have 30 stitches on the needle: 3 garter + 24 M.1 (including 5 increased) + 3 garter. Happy knitting.
01.10.2018 - 15:47
|
|||||||||||||||||||
Hot Line#hotlineheadband |
|||||||||||||||||||
|
|
|||||||||||||||||||
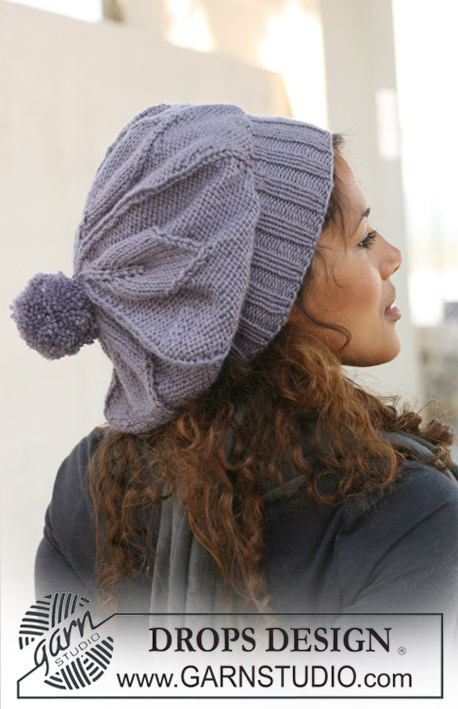
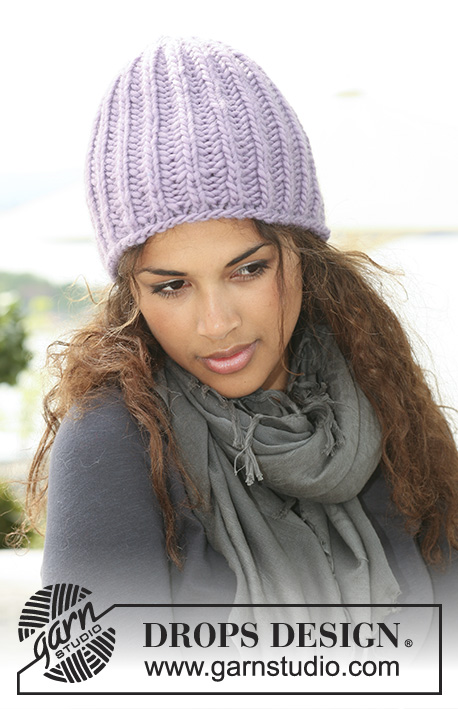
DROPS čelenka s copánkovým vzorem z příze „Nepal“.
DROPS 126-24 |
|||||||||||||||||||
|
VROUBKOVÝ VZOR (v řadách): Pleteme stále hladce, lícové i rubové řady. VZOR: Viz schémata M.1, M.2 a M.3. Vzor je nahlížen z lícové strany. ---------------------------------------------------------------------- ČELENKA: Pleteme v řadách. Na jehlice č.4,5 nahodíme přízí Nepal 25 ok a upleteme 2 řady vroubkovým vzorem. Následující řadu – lícovou – pleteme takto: 3 oka vroubkovým vzorem, vzor M.1 (= 19 ok), 3 oka vroubkovým vzorem. Po dokončení sekvence vzoru M.1 máme na jehlici 30 ok. Nyní pleteme vzorem M.2 se 3 oky vroubkovým vzorem po obou stranách, a to do celkové výše pleteniny asi 52-57 cm – končíme 11. nebo 23. řadou vzoru M.2. Nyní pleteme vzor M.3 se 3 oky vroubkovým vzorem po obou stranách = 25 ok. Po dokončení sekvence vzoru M.3 upleteme 2 řady vroubkovým vzorem a oka uzavřeme. DOKONČENÍ: Konce čelenky sešijeme. |
|||||||||||||||||||
Vysvětlivky ke schématu |
|||||||||||||||||||
|
|||||||||||||||||||
 |
|||||||||||||||||||
Dokončili jste tento model?Pak označte své fotky tagem #dropspattern #hotlineheadband nebo je pošlete do galerie #dropsfan. Potřebujete s tímto návodem poradit?Otevřete-li si návod na stránce garnstudio.com, najdete tam 11 výukových video-ukázek, Komentáře/Dotazy a další užitečné informace. © 1982-2026 DROPS Design A/S. Vyhrazujeme si veškerá práva. Tento dokument, včetně všech jeho dílčích částí, podléhá autorským právům. Podrobnější komentář k možnostem užití našich návodů najdete dole pod každým návodem na našich stránkách. |
|||||||||||||||||||


V oblasti pletené a háčkované módy působí DROPS Design více než 40 let. Díky tomu vám můžeme nabídnout jednu z nejrozsáhlejších kolekcí modelů s bezplatnými návody dostupnými na internetu - navíc v 17 jazycích. K dnešnímu dni máme na 324 katalogů a 12290 návodů celkem - z nich je už 7603 dostupných v [češtině].
We work hard to bring you the best knitting and crochet have to offer, inspiration and advice as well as great quality yarns at incredible prices! Would you like to use our patterns for other than personal use? You can read what you are allowed to do in the Copyright text at the bottom of all our patterns. Happy crafting!
Přidejte komentář k návodu DROPS 126-24
Rádi bychom věděli, co si o tomto modelu myslíte!
Pokud se chcete na něco zeptat, dbejte prosím na to, abyste ve formuláři níže vybrali správnou kategorii - díky tomu se dříve dozvíte, co potřebujete vědět. Povinná pole jsou označena *.