
Oblíbené kategorie
Hledáte přízi?


Komentáře / Otázky (34)
![]() Joana napsala:
Joana napsala:
Hi! I can’t understand this part: Continuing bind off for armhole on every other row: 3 sts 1 (1-2) times, 2 sts 2 (2-2) times, 1 st 1 (2-3) times = 56 (59-59) sts. I work only with the two pieces of front side? How? Sorry and thank you so much for your answers
21.04.2019 - 14:16Odpověď DROPS Design :
Hi Joanna, You are working each front piece separately and at the armhole end of every second row on each front piece bind off as follows, depending on the size you are working; so for example in size S you bind off 3 stitches one time, then 2 stitches 2 times and 1 stitch 1 time with a row between each bind-off row where you do not bind off. Hope this helps and happy knitting!
21.04.2019 - 15:04
![]() Joana Dinis napsala:
Joana Dinis napsala:
When you said : work the first 64 (68-72) sts, bind off the next 4 sts, it means a decrease? in the 4 sts? like knitting 2 sts together? for four times? thank uu
12.04.2019 - 23:35Odpověď DROPS Design :
Dear Joana, you have to cast off these 4 sts for the armhole, so you have to work them not as a decrease but as when you finish the work. Happy knitting!
13.04.2019 - 09:12
![]() Joana Dinis napsala:
Joana Dinis napsala:
Sorry i cant understand this part, 64 (68-72) sts front piece, bind off 4 sts for armhole, 126 (134-142) sts back piece, bind off 4 sts for armhole, 64 (68-72) sts front piece.
31.03.2019 - 13:15Odpověď DROPS Design :
Dear Mrs Dinis, on this row you will bind off the stitches for armhole dividing front and back pieces: work the first 64 (68-72) sts, bind off the next 4 sts for armhole, work the next 126 (134-142) sts for back piece, bind off the next 4 sts for armhole = 64 (68-72) sts remain for 2nd front piece, work these stitches and continue now each piece separately. Happy knitting!
01.04.2019 - 13:08
![]() Joana Dinis napsala:
Joana Dinis napsala:
When i need to do the hole for the buttons? and im starting with 262 sts, and its look like the whole body (front and back) is it right? i dont understand because you divide each part, and my work with 262 points looks like the whole body except the sleeves...
27.03.2019 - 23:03Odpověď DROPS Design :
Dear Mrs Dinis, buttonholes will be created when you will work the right front edge - see Assembly at the bottom of the pattern. You are right, you are first working whole body (= front pieces + back piece) in one piece until armholes, then you will divide and work each front piece and back piece separately. Happy knitting!
01.04.2019 - 09:14
![]() Joana Dinis napsala:
Joana Dinis napsala:
But what means 1 edge stitch? how i work an edge stich? sorry im begginer
11.03.2019 - 20:02Odpověď DROPS Design :
Dear Mrs Dinis, you can work the edge stitches in stocking stitch or in garter stitch. Happy knitting!
12.03.2019 - 09:41
![]() Joana Dinis napsala:
Joana Dinis napsala:
Which means this: (...) and continue knitting pattern with 1 edge sts on each side mid front ?
05.03.2019 - 16:43Odpověď DROPS Design :
Dear Mrs Dinis, you work as follows: 1 edge stitch, *K4, P4*, repeat from *-* until 1 stitch remains, 1 edge stitch. Happy knitting!
06.03.2019 - 08:47
![]() Heather napsala:
Heather napsala:
I am using the recommended Safron Cotton yarn but am struggling with the ribbing. It\'s not stretchy or springing closed. I know this can be an issue with cotton vs animal fibers but mine so far doesn\'t look nearly as tight as even the photo in the pattern. I\'ve even gone down a needle size (using #3 vs #4 in order to get gauge) yet my ribbing still looks flat. Do you have any tips to fix this....or know how the person who knitted the sweater in the photo achieved this tighter rib?
20.05.2018 - 05:46
![]() Micheline Girarad napsala:
Micheline Girarad napsala:
What does MID UNDER ARM mean? I do not understand that term. Thanks
03.04.2018 - 16:40Odpověď DROPS Design :
Dear Mrs Girarad, this is the place where there should be a seam when working sleeve back and forth, and that's the transition of round when working in the round. Happy knitting!
03.04.2018 - 17:08
![]() Micheliine Girard napsala:
Micheliine Girard napsala:
I have trouble understand the term NCREASE MID UNDER ARM . Also, 2 sts 33 times alternating on every 3rd and 4th round. Does that mean on both sides of the needle?
03.04.2018 - 01:25Odpověď DROPS Design :
Dear Mrs Girard, see increase mid under arm in previous answer - increase 33 times alternately on every 3rd and 4th round as follows: work 1 round with inc, *2 rounds without inc, 1 round with inc, 3 rounds without inc, 1 round with inc*, and repeat from *-* until you have inc a total of 33 times and you get 116 sts. Happy knitting!
03.04.2018 - 10:10
![]() Micheline Girard napsala:
Micheline Girard napsala:
Need help understanding the term in the Sleeve pattern: ''at the same time, inc. MID UNDER ARM. What does that mean exactly? I wait till I am half way to the end of the sleeve or what? Also, do I increase both sides of the sleeve, when it says 2 sts. 33 times alternating on every 3rd and 4th round.
03.04.2018 - 01:23Odpověď DROPS Design :
Dear Mrs Girard, you will increase mid under arm by working until 1 st remain before beg of round, inc 1 st, work last st on round, (marker beg of round), work 1 st and inc 1 st = you have inc 2 sts mid under arm (ie on each side of beg of round). Happy knitting!
03.04.2018 - 10:09
|
|
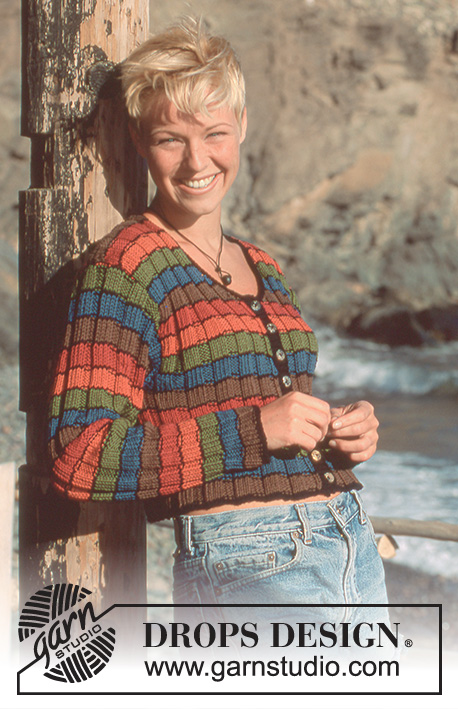
Sandy Beach |
|
 |
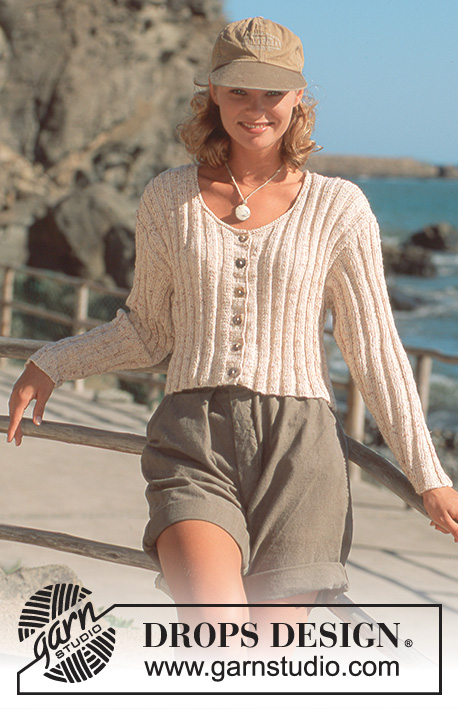 |
Propínací svetr pletený z příze DROPS Safran.
DROPS 41-23 |
|
|
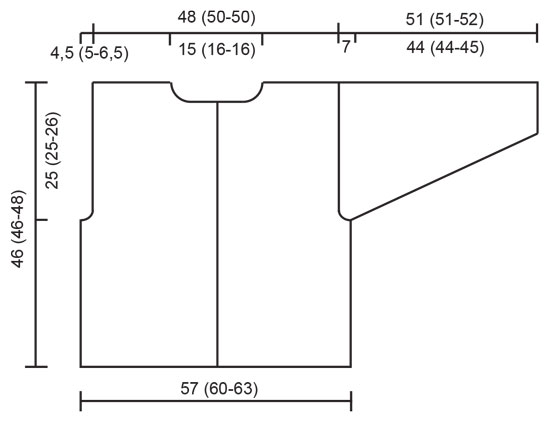
ZKUŠEBNÍ VZOREK: 23 ok na šířku x 30 řad na výšku jehlicí č. 3,5 a lícovým žerzejem = 10 x 10 cm. POZNÁMKA: Uvedená síla jehlic je pouze orientační. VZOR: Pleteme * 4 oka hladce, 4 oka obrace *, mezi *-* opakujeme. -------------------------------------------------------------------- TRUP: Pleteme v řadách na kruhové jehlici, od jednoho předního okraje ke druhému. Na kruhovou jehlici č. 3,5 nahodíme 262 (278-294) ok (včetně 1 krajového oka na každé straně). Pleteme pružným vzorem - viz výše. Ve výšce 21 (21-22) cm pleteninu rozdělíme na zadní a přední díly; další řadu pleteme v tomto rozvržení: Upleteme 64 (68-72) ok (= přední díl), uzavřeme 4 oka (= průramek), upleteme 126 (134-142) ok (= zadní díl), uzavřeme 4 oka (= průramek) a upleteme 64 (68-72) ok (= přední díl). Každý díl dokončíme samostatně. PŘEDNÍ DÍL: = 64 (68-72) ok. V každé 2. řadě uzavíráme na straně dílu pro průramek: 3 oka 1 (1-2)x, 2 oka 2 (2-2)x a 1 oko 1 (2-3)x = 56 (59-59) ok. Ve výši 29 (29-31) cm uzavřeme v každé 2. řadě pro průkrčník: 2 oka 7x a pak v každé 4. řadě 1 oko 4 (5-5)x. Ve výši 46 (46-48) cm uzavřeme všechna oka. ZADNÍ DÍL: = 126 (134-142) ok. Pro vytvarování průramku uzavíráme stejným způsobem jako u předních dílů = 110 (116-116) ok. Ve výši 44 (44-46) cm uzavřeme prostředních 30 (32-32) ok (= průkrčník). V následující řadě uzavřeme u průkrčníku ještě 2 oka. Ve výši 46 (46-48) cm uzavřeme všechna oka. RUKÁV: Na ponožkové jehlice č. 3,5 nahodíme 50 (50-50) ok a pleteme pružným vzorem (v podpaží pleteme 4 oka hladce). Současně přidáme v podpaží 2 oka. Takto přidáváme střídavě v každé 3. a 4. kruhové řadě, celkem 33 (33-35)x = 116 (116-120) ok. Ve výši 44 (44-45) cm uzavřeme v podpaží 6 ok a tvarujeme rukávovou hlavici, kterou dopleteme v řadách. V každé 2. řadě uzavíráme na každé straně rukávové hlavice 4 oka, celkem 9x. Nakonec uzavřeme všechna zbývající oka. Díl měří asi 51 (51-52) cm. DOKONČENÍ: Sešijeme náramenice. Podél levého předního dílu nabereme kruhovou jehlicí č. 3 asi 84 ok (celkový počet ok musí být dělitelný 8+4). Upleteme v řadách 3 cm výšky, poté uzavřeme. Postup opakujeme podél pravého předního dílu. Když upleteme 1 cm výšky, vypleteme v rovnoměrných rozestupech 6 knoflíkových dírek. 1 KNOFLÍKOVÁ DÍRKA = uzavřeme 3 oka, v následující řadě nahodíme nad nimi 3 oka nová. Kruhovou jehlicí č. 3 nabereme kolem průkrčníku asi 110-120 ok. Upleteme 2 řady hladce a nakonec uzavřeme. Vsadíme rukávy a přišijeme knoflíky. |
|
 |
|
Dokončili jste tento model?Pak označte své fotky tagem #dropspattern nebo je pošlete do galerie #dropsfan. Potřebujete s tímto návodem poradit?Otevřete-li si návod na stránce garnstudio.com, najdete tam 16 výukových video-ukázek, Komentáře/Dotazy a další užitečné informace. © 1982-2026 DROPS Design A/S. Vyhrazujeme si veškerá práva. Tento dokument, včetně všech jeho dílčích částí, podléhá autorským právům. Podrobnější komentář k možnostem užití našich návodů najdete dole pod každým návodem na našich stránkách. |
|


V oblasti pletené a háčkované módy působí DROPS Design více než 40 let. Díky tomu vám můžeme nabídnout jednu z nejrozsáhlejších kolekcí modelů s bezplatnými návody dostupnými na internetu - navíc v 17 jazycích. K dnešnímu dni máme na 324 katalogů a 12245 návodů celkem - z nich je už 7531 dostupných v [češtině].
We work hard to bring you the best knitting and crochet have to offer, inspiration and advice as well as great quality yarns at incredible prices! Would you like to use our patterns for other than personal use? You can read what you are allowed to do in the Copyright text at the bottom of all our patterns. Happy crafting!
Přidejte komentář k návodu DROPS 41-23
Rádi bychom věděli, co si o tomto modelu myslíte!
Pokud se chcete na něco zeptat, dbejte prosím na to, abyste ve formuláři níže vybrali správnou kategorii - díky tomu se dříve dozvíte, co potřebujete vědět. Povinná pole jsou označena *.