
Populaarsed kategooriad
Otsid lõnga?


Kommentaarid / Küsimused (73)
![]() SandraB kirjutas:
SandraB kirjutas:
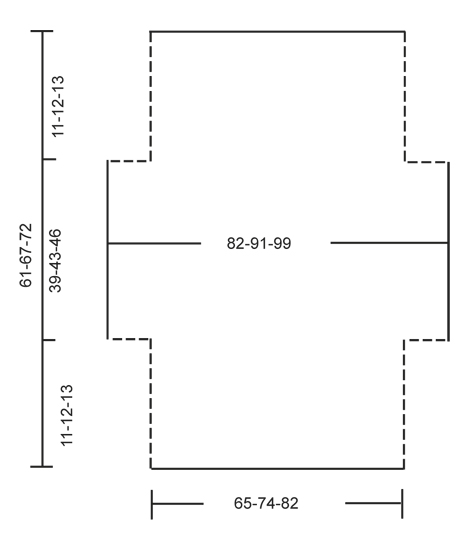
Hallo! Ik wil graag dit patroon maken. Heb nog niet zovaak kleren gehaakt. Daarom begrijp ik de tweede tekening met de maten niet zo goed. Hoe moet ik die zien?
01.07.2017 - 08:37DROPS Design vastas:
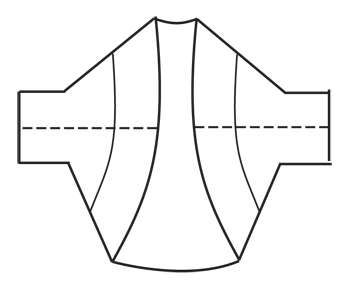
Hoi Sandra, In de tweede tekening zie je het werk wanneer je klaar bent met haken, maar nog niet in elkaar genaaid hebt. Het kledingstuk wordt op de horizontale lijn dubbel gevouwen en op op de stippellijnen aan elkaar gehaakt.
01.07.2017 - 12:01
![]() Elizabeth Baker kirjutas:
Elizabeth Baker kirjutas:
I have finished my 21 1/2 inches and pattern says to not work 12 stitches on either side how then do I start my next row
21.05.2017 - 19:07DROPS Design vastas:
Dear Mrs Baker, work next row until 12 sts remain, turn and work next row until 12 sts remain, turn and work next row. You will have now 12 sts unworked on each side. Happy crocheting!
22.05.2017 - 09:54
![]() Elizabeth Baker kirjutas:
Elizabeth Baker kirjutas:
I have finished my 21 1/2 inches and pattern says to not work 12 stitches on either side, how do I start next row?
20.05.2017 - 19:02
![]() Elizabeth Baker kirjutas:
Elizabeth Baker kirjutas:
After I have finished row 8 to continue do I start with A1 or A2 to repeat
01.05.2017 - 16:43DROPS Design vastas:
Dear Mrs Baker, after you have worked A.2 1 time in height, repeat A.2 from row 1. Happy croccheting!
02.05.2017 - 11:48
![]() Elizabeth Baker kirjutas:
Elizabeth Baker kirjutas:
After I have finished row 8 do I start with row A1 or A2
01.05.2017 - 16:20DROPS Design vastas:
Dear Elizabeth, after row 8, you should continue and repeat pattern A.2. I hope this helps. Happy crocheting!
06.05.2017 - 11:06
![]() GB kirjutas:
GB kirjutas:
Hi, in the pattern directions it says the picot has a DC in the first of the chain 3s, but the video shows a sc instead. Could you clarify please? Thanks!
15.04.2017 - 17:14DROPS Design vastas:
Dear GB, you should work 1 dc in 1st of the 3 ch as explained in the pattern and not 1 sc as worked in the video, thanks for noticing. Happy crocheting!
19.04.2017 - 15:24
![]() Mary Ancira kirjutas:
Mary Ancira kirjutas:
The letter sizes, (example- S, M, L,) are not showing what size the bust is like it normally does. Should I assume the sizes are the same on all the patterns?
03.04.2017 - 10:24DROPS Design vastas:
Dear Mrs Ancira, you will find at the bottom of the pattern a measurement chart with measurements for each size in cm, taken flat from side to side. Compare these to a similar garment you have and like the shape to find out the matching size. Read more about sizing and convert into inches here. Happy crocheting!
03.04.2017 - 11:25
![]() Stephanie kirjutas:
Stephanie kirjutas:
Bonjour je ne comprends pas l'augmentation, au rang 6 avec l'ajout de maille en l'air que l'on crochete apres avec une bride un ml une bride et ensuite crochete le reste comment ? c'est la que je saisis pas , parce que logiquement on serait sur le rang 7 mais ensuite encore au rang 7 ,pouvez vous m'expliquer merci
14.02.2017 - 00:10DROPS Design vastas:
Bonjour Stéphanie, la 1ère augmentation sur le côté se fait à la fin du rang 5 (= le rang suivant sera le rang 6), on crochète 14 ml à la fin de ce rang, on tourne, on crochète 11B, puis le rang 6 de A.2 et on crochète 15 ml à la fin du rang 6, on tourne, on crochète 1B, 1 ml sur les nouvelles ml et on continue le rang 7 comme A.2. Puis on continue A.2 sur toutes les mailles. Bon crochet!
14.02.2017 - 09:32
![]() Jasmine kirjutas:
Jasmine kirjutas:
Dear Jasmine, "on row 1 in A.1 work 1 dc in each st," So since I have 92 stitches in A.1 I need to do 92 DC stitches all the way across?
21.01.2017 - 03:45DROPS Design vastas:
Dear Jasmine, you should have 92 dc on first row, then work: A.1A (= 4 sts), repeat A.1B a total of 7 times (= 7 x 12 sts), and finish with A.1C (= 4 sts), ie: 3 + (x12=84) + 4= 91 sts. Happy crocheting!
23.01.2017 - 09:29Leonore kirjutas:
This pattern doesnt make any sence. Row one is clear to work. From there on i dont understand anything! Please write out the pattern. I dont work with diagrams or whatever this confusuon is called. Please help!
17.12.2016 - 18:45DROPS Design vastas:
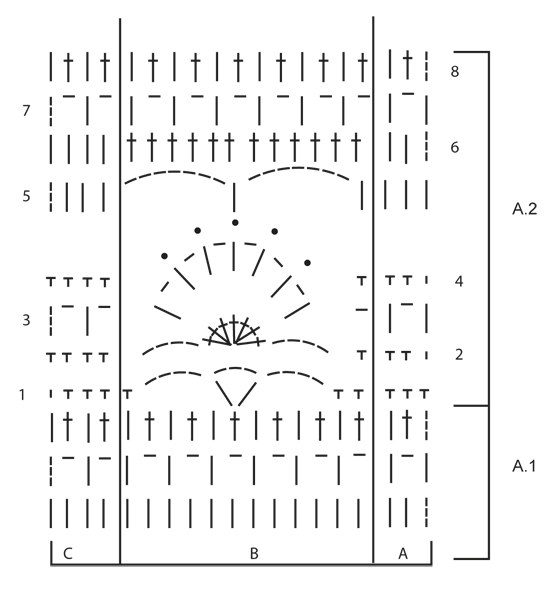
Dear Leonore, there is only diagram to this pattern, start reading diagram from the bottom corner on the right side and read towards the left from RS and from left to right from WS. Each symbol represents 1 st/group of sts. work A.1A (= 3 sts), then repeat A.1B (= 12 sts) and finish with A.1C (= 4 sts). You are welcome to contact your DROPS store for any further individual assistance. Happy crocheting!
19.12.2016 - 09:17
|
||||||||||||||||
Blue Wonder#bluewondershoulderpiece |
||||||||||||||||
 |
 |
|||||||||||||||
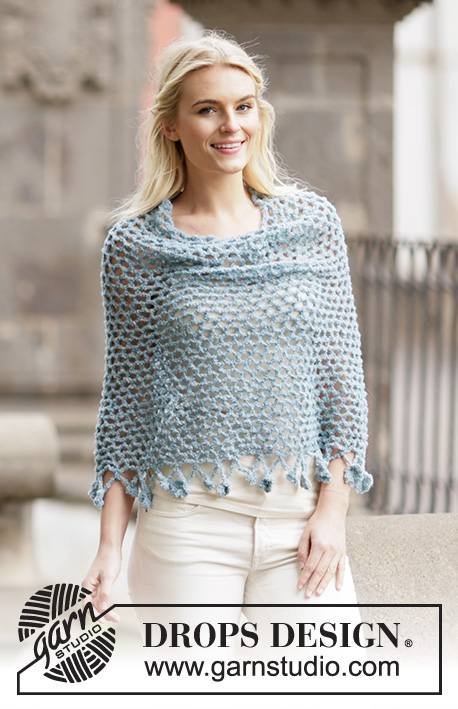
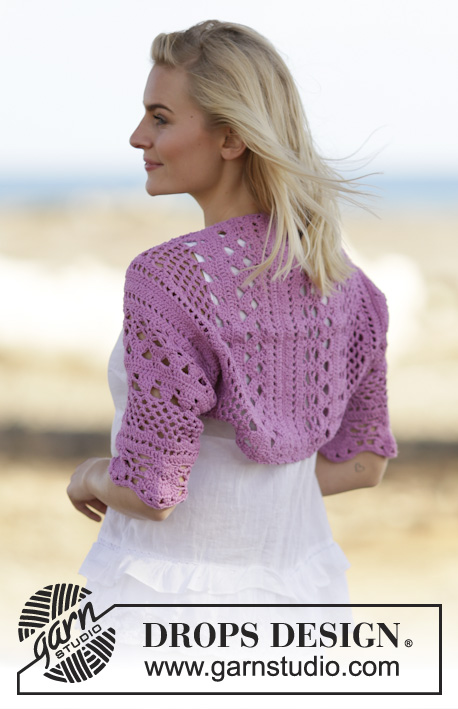
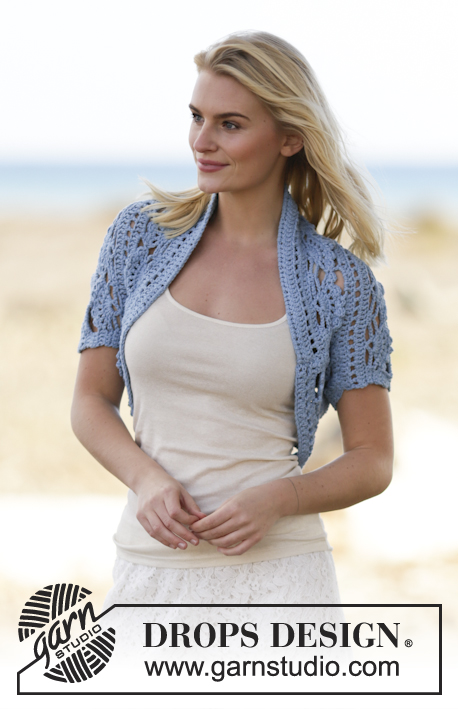
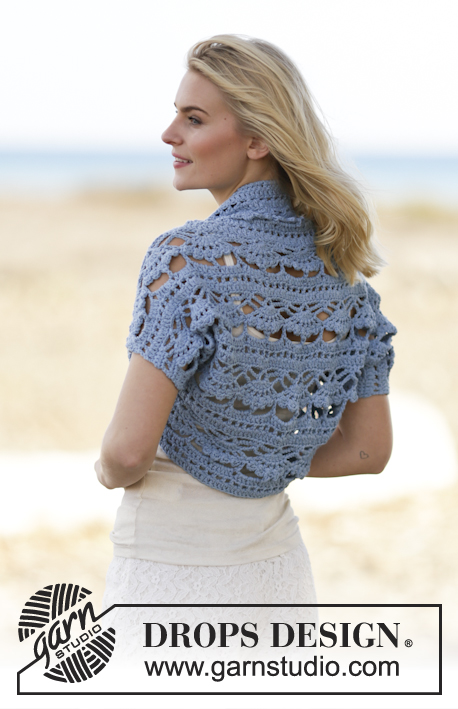
DROPS Paris lõngast heegeldatud boolero
DROPS 162-34 |
||||||||||||||||
|
MUSTER Vaata skeeme A.1 ja A.2. BOOLERO Heegelda 110-125-139 ahels 5 mm heegelnõelaga ja Paris lõngaga. 1. RIDA: pööra ja tee 1 ühekordne sammas (sm) neljandasse ahels-sse heegelnõelast (= 2 sm), tee 1 sm igasse järgmisesse 4-1-3 ahels-sse, * jäta vahele 1 ahels, tee 1 sm igasse järgmisesse 5 ahels-sse *, korda * kuni * = 91-103-115 sm. 2. RIDA: siis heegelda vastavalt skeemile A.1 nii: skeemi A.1 A, skeemi A.1 B kokku 7-8-9 korda, lõpus tee skeemi A.1 C. Kui skeem A.1 on tehtud 1 kord vertikaalselt, korda skeemi A.2 ülespoole. SAMAL AJAL, kui töö pikkus on u. 11-12-13 cm (järgmine rida on 6. rida skeemil A.2), tee 14 ahels rea lõpus (= 5. rida). Pööra ja tee 1 sm neljandasse ahels heegelnõelast, siis tee 1 sm igasse järgmisesse 10 uude ahels-sse. Jätka 6. reaga skeemil A.2, rea lõpus tee 15 uut ahels. Pööra ja tee 1 sm kuuendasse ahels heegelnõelast, * tee 1 ahels, jäta vahele 1 ahels, 1 sm järgmisesse ahels-sse *, korda * kuni* kuni järgmise 9 uue ahelsilmuseni, lõpus tee 1 ahels. Heegelda ülejäänud rida vastavalt skeemile A.2. Järgmisel real heegelda nagu enne, kuni uute silmusteni rea lõpus, tee 1 sm igasse ahels-kaarde ja 1 sm igasse sambasse. 12 sm on kasvatatud mõlemal küljel = 115-127-139 sm. Siis jätka 8. rida nii: tee skeemi A.2 A, skeemi A.2 B kokku 9-10-11 korda, lõpus tee skeemi A.2 C. Kui töö pikkus on u. 50-55-59 cm (järgmine rida on 7. rida), ära heegelda mõlemal küljel 12 samba kohale = 91-103-115 sm. Jätka nii: tee skeemi A.2 A, skeemi A.2 B kokku 7-8-9 korda, lõpus tee skeemi A.2 C. Jätka, kuni töö pikkus on u. 61-67-72 cm - lõpeta pärast tervet mustrikordust A.2. Katkesta ja kinnita lõng. VIIMISTLUS Õmble külje- ja käealused õmblused ühe õmblusena ääresilmuse kõrvalt. |
||||||||||||||||
Skeemi seletused |
||||||||||||||||
|
||||||||||||||||
 |
||||||||||||||||
 |
||||||||||||||||
 |
||||||||||||||||
Kas oled teinud seda mustrit?Lisa oma piltidele viide #dropspattern #bluewondershoulderpiece või saada link projektile meie #dropsfan galeriisse. Vajad abi selle mustriga?Garnstudio.com kodulehel on 7 õppevideot, küsimuste/vastuste osa ja muudki. © 1982-2026 DROPS Design A/S. Kõik õigused kaitstud. See dokument, ning selle alajaotused on kaitsud autoriõigustega. Loe rohkem, mida meie mustritega võib teha, iga mustrilehe alt meie kodulehel. |
||||||||||||||||


Tegeledes üle 40 aasta kudumise ja heegeldamise disainidega, pakub DROPS Design ühte suurimat tasuta mustrite kollektsiooni internetis - tõlgituna 17 keelde. Tänaseks on meil 324 kataloogi ja 12290 mustrit - millest 9431 on tõlgitud Eesti keelde.
Me anname endast parima, et tuua teieni kõike mida kudumine ja heegeldamine võib pakkuda - inspiratsiooni, nõuandeid ning ka kvaliteetseid lõngu parima hinnaga! Soovid kasutada mustreid muukski, kui ainult oma tarbeks? Loe infot meie Copyright osas iga lehekülje all. Rõõmsat loomist!
Jäta kommentaar mustrile DROPS 162-34
Ootame kommentaare selle mustri kohta!
Kui soovid midagi küsida, siis kiiremaks vastuse saamiseks veendu, et valid õige kategooria alloleval formil. Vajaliku väljad *.