
Categorias populares
Procura um fio?


Comentários / Perguntas (16)
![]() Sharon Hunt-Edwards escreveu:
Sharon Hunt-Edwards escreveu:
Hello, I would have worked the pattern as written until my Polaris yarn became scrap yarn and it would not have worked. Hopped onto ravelry got som help and am finished the increases after trying for about 3 days and am not a beginner knitter. Have knitted complicated lace patterns . Am one happy knitter. So I would agree with FS that the pattern as written is notcorrect.
27.02.2024 - 19:30
![]() FS escreveu:
FS escreveu:
Sorry but you are wrong. Try knitting it or charting it and you will see. (k3 yo k1 k1 yo) x3 is 15 sts not 12 and doesn't put the yo either side of the markers. k3 yo k1 sm k1 yo k2 yo k1 sm k1 yo k2 yo k1 sm will work but is 5 increases not 6. There needs to be k1 yo after the 1st/last marker as well. Either you do this at the start of round 1 or you go into round 2 and do it there. In this case the pattern needs to specify that.
27.02.2024 - 18:55
![]() FS escreveu:
FS escreveu:
The instructions for round 1 do not work. This has been mentioned above by Sharon HUnt. Your response to her question does not work either. In fact, it is even more incorrect. Round 1 should be * K1, yo, k to 1 st before marker, yo, k1 * repeat from * to * three times in total. In your reply to her question about the stitch count of the smaller size you say increase twice but the pattern says only once
27.02.2024 - 11:54DROPS Design respondeu:
Dear Fs, in the previous answer, the markers were supposed to be inserted after the first 4 sts then after every 4th stitch, then you increase on each side of 2 sticches (where the marker is between these both stitches), so that you work: *K3, YO, K1 (last of the 4th st before 1st marker), K1 (first of the 4 sts after marker), YO*, after you have worked from *-* you have 3 sts left before next marker, repeat from *-*. On next repeat, you will work the same way with 1 extra st before each increase, ie; *K4, YO, K2 (with marker between both K2), YO*, and so on. Happy knitting!
27.02.2024 - 13:39
![]() Sharon Hunt-Edwards escreveu:
Sharon Hunt-Edwards escreveu:
As the increases er completed on row 2. The marker remains at its original position? Correct. Thanks
26.02.2024 - 11:36DROPS Design respondeu:
Dear Mrs Hunt-Edwards, let the marker follow piece so that the increase will be worked on either side of the markers (on each side of the 2 sts with the marker inbetween); work the rounds 1+2 a total of 4-5 times, this means you will work a total of 8-10 rows increasing every other round (every time you work round 2). Happy knitting!
26.02.2024 - 13:58
![]() Sharon Hunt escreveu:
Sharon Hunt escreveu:
Hello is there a mistake in this pattern. The pattern says to knit row 1 and to 4-5 times and the amount of sts on the needle should be 42. Then ie says further to knit 1 more time and the sts count is 40. Last part of the increase says the final stitch count is 40. Which is it? Please note this is an additional question. Hope i don’t be designated as as a spammer. Am make the largest size.
26.02.2024 - 06:59DROPS Design respondeu:
Dear Mrs Hunt, in the first size you get 36 sts then increase only 4 sts (at 2 markers only) to get 40 sts; but in the 2nd size, you get 42 sts after the increases are done. So in the larger size when you get 42 sts just work without increasing anymore until piece measure 22 cm. Happy knitting!
26.02.2024 - 10:03
![]() Sharon HUnt escreveu:
Sharon HUnt escreveu:
Hello Drops am not understanding roun one in this pattern. The pattern says to knit until l sts before the maker, make 1 yarn over, knit 2, make 1 yarn over*, repeat from *-* I end up on the next group of sts. without completing the repeat. Seems like something is not quite correct here. Not sure what am doing wrong. Thanks for your help.
25.02.2024 - 12:47DROPS Design respondeu:
Dear Mrs Hunt, you have inserted 3 markers like this (4 sts, 1 marker) x 3; work now as follows: (knit 3, 1 yo, k2 (marker is between these 2 sts), YO), repeat from (to) to the end of the round. Happy knitting!
26.02.2024 - 09:26
![]() Luisa escreveu:
Luisa escreveu:
C’è un errore: GIRO 1: * lavorare a diritto fino a quando rimane 1 maglia prima del segnapunti, 1 gettato, 2 maglie diritto, 1 gettato *, ripetere *-* fino alla fine del giro (6 aumenti). sono 5 aumenti non 6, manca il gettato dopo la prima maglia del giro
23.01.2024 - 20:33DROPS Design respondeu:
Buonasera Luisa, gli aumenti sono corretti, si lavorano 3 ripetizioni sul giro. Buon lavoro!
17.03.2024 - 19:00
![]() Emmanuelle Poirier escreveu:
Emmanuelle Poirier escreveu:
Concernant la grosseur de l'aiguille, vous mentionner des aiguilles no 12. Est-ce que vos mesure sont en mm ou en us? Car je cherche des 12us et ne trouve pas cette grosseur. Merci
27.01.2023 - 12:46DROPS Design respondeu:
Bonjour Mme Poirier, dans les modèles français, c'est le système métrique qui a été retenu pour la taille des aiguilles - vous pouvez filtrer les modèles par nombre de mailles pour 10 cm (plus simple car la taille des aiguilles dépend aussi de la tension de chacune). Bon tricot!
27.01.2023 - 14:23
![]() Mari escreveu:
Mari escreveu:
Når jeg vrenger lua til rettsiden på slutten, så "hopper" den fire cm lange, vrange stripen som er strikket etter den første vrengingen med opp og er synlig under vrangborden. Hvordan unngår dere det?
28.12.2022 - 21:53DROPS Design respondeu:
Hej Mari, gør det noget? ... du kan evt strikke en vrangpind inden du vender, da vil det blive en glatpind i kanten.
04.01.2023 - 12:18
![]() Laura escreveu:
Laura escreveu:
Cuando aumento me quedan agujeros en las lazadas, el patrón es así o lo estoy haciendo mal? Si lo estoy haciendo mal, qué puedo hacer para que no queden agujeros? Gracias de antemano
25.10.2022 - 19:16DROPS Design respondeu:
Hola Laura, para evitar que se formen agujeros hay que tener el hilo muy tenso al trabajar las lazadas.
06.11.2022 - 23:46
|
|
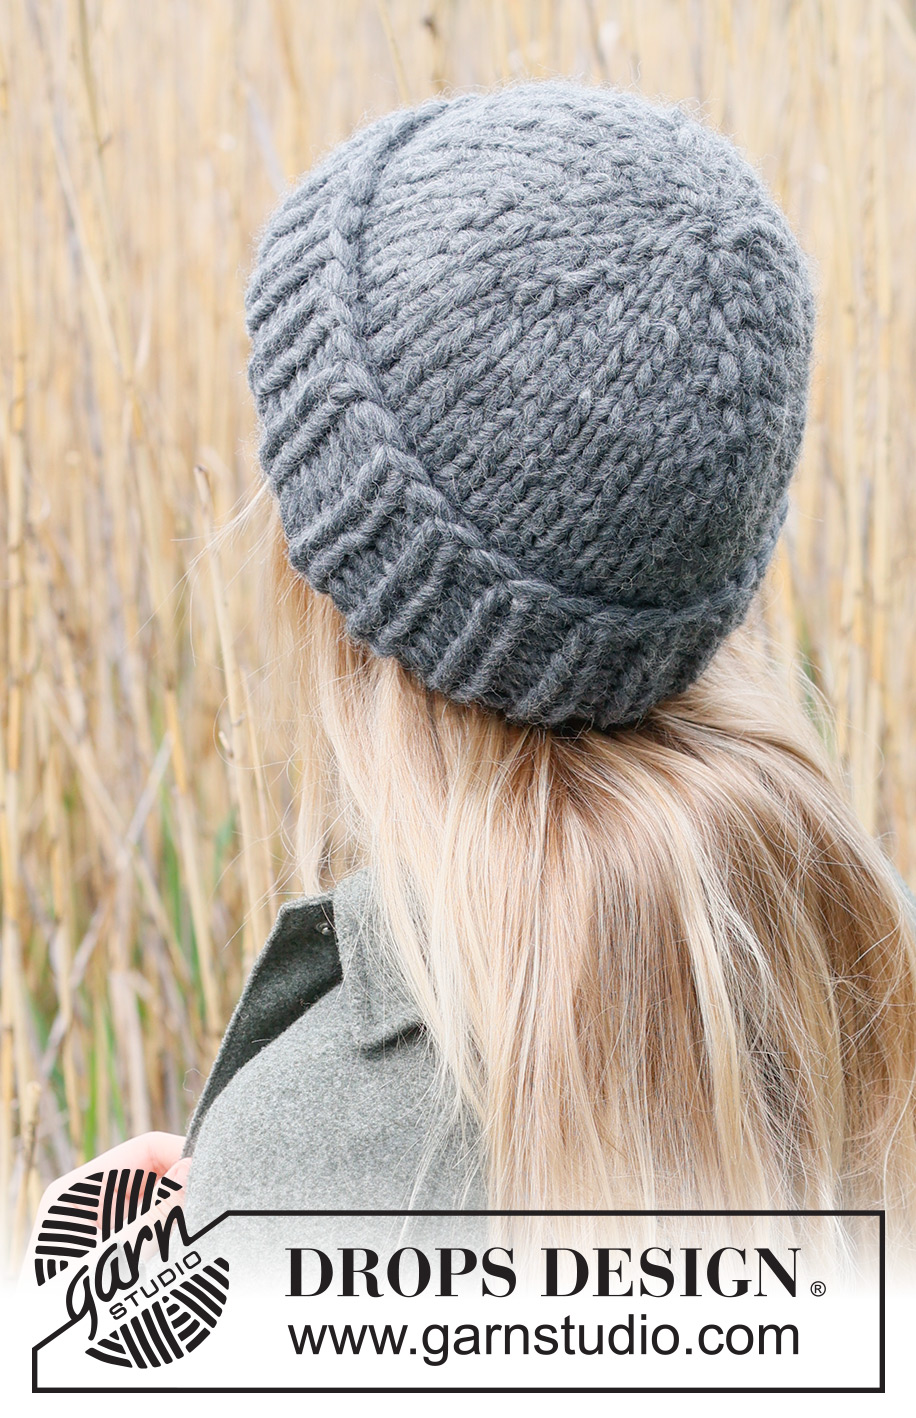
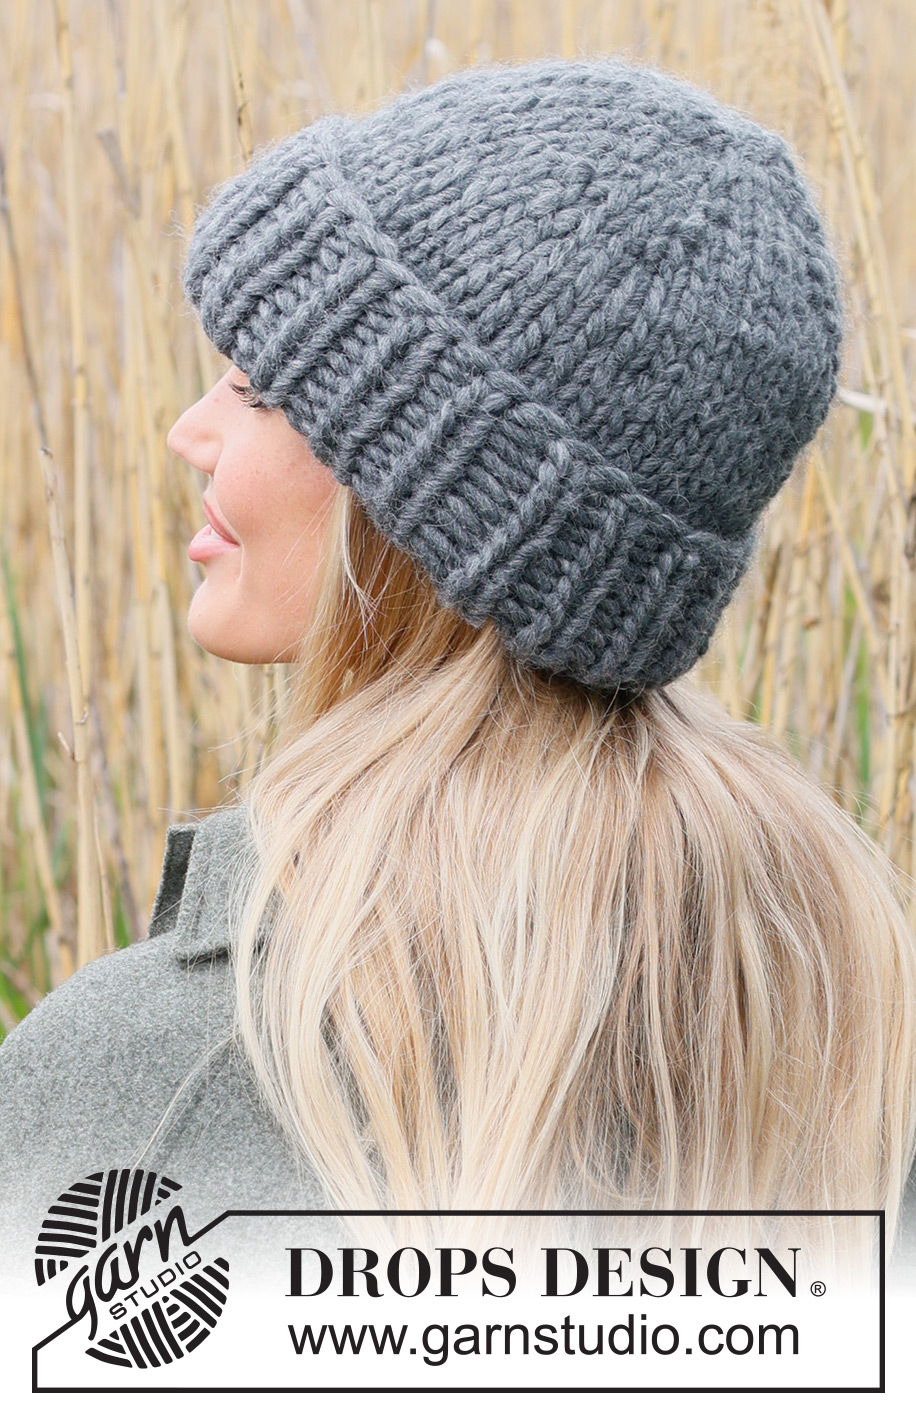
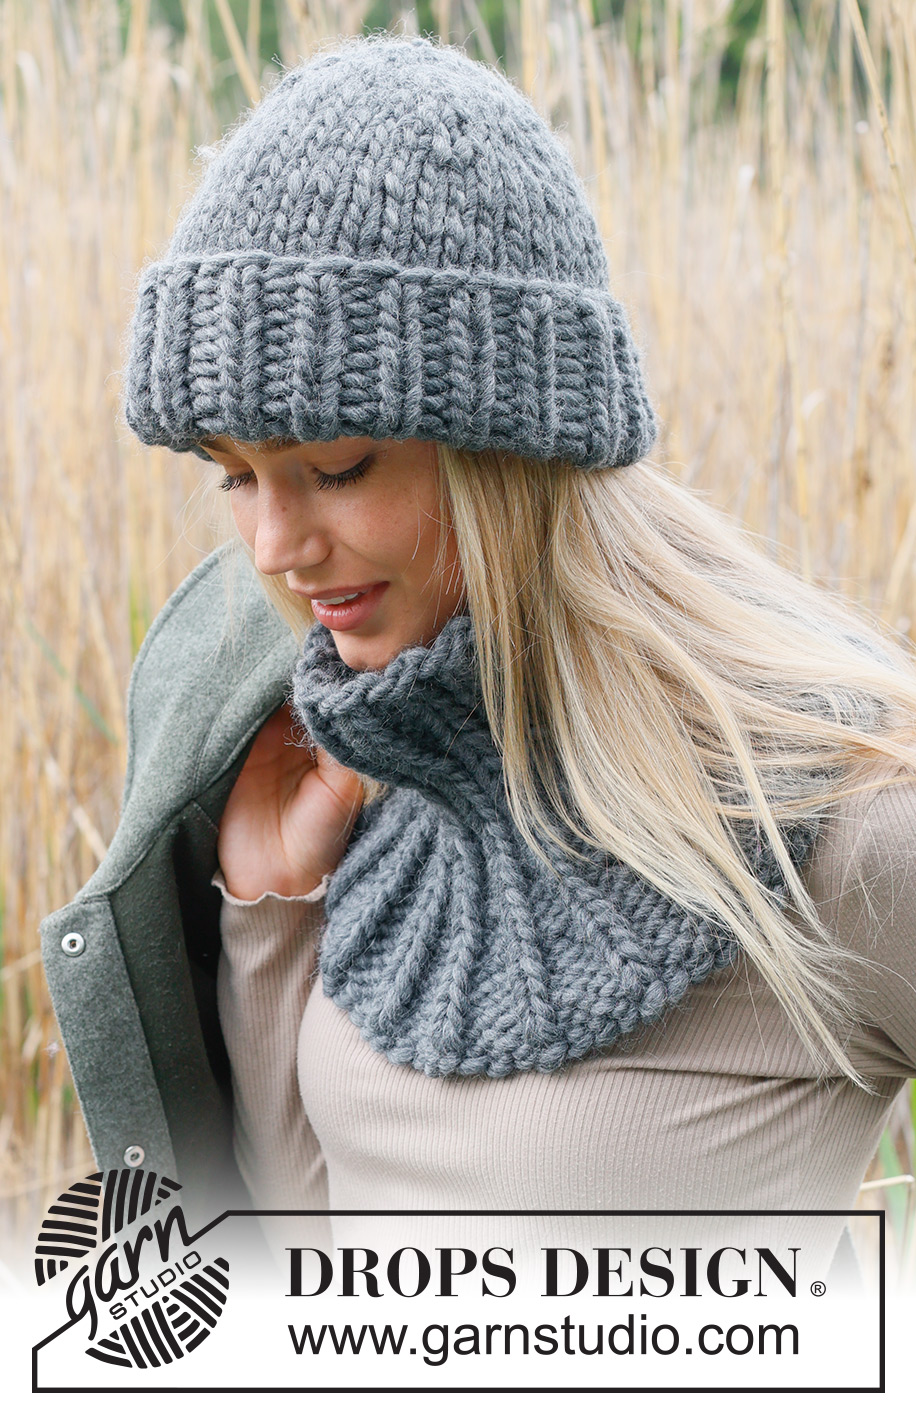
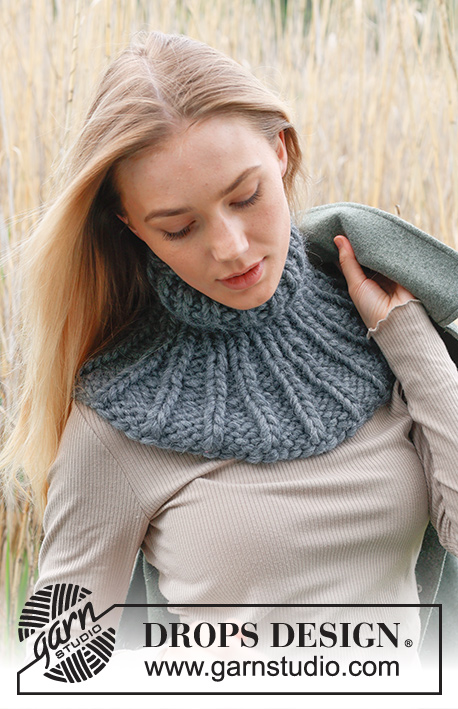
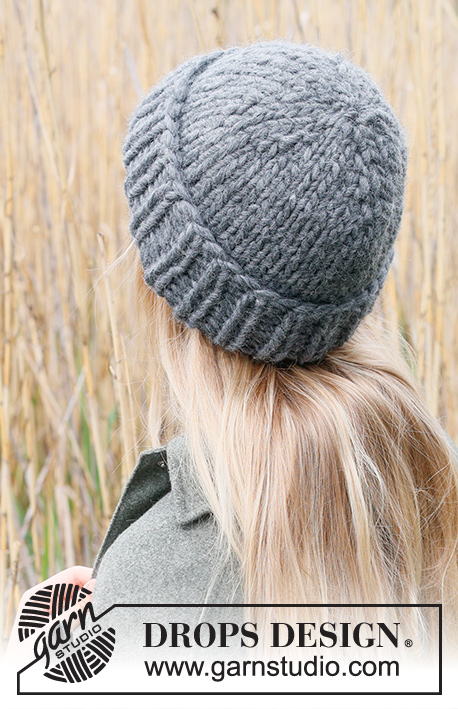
Polar Night Hat#polarnighthat |
|
 |
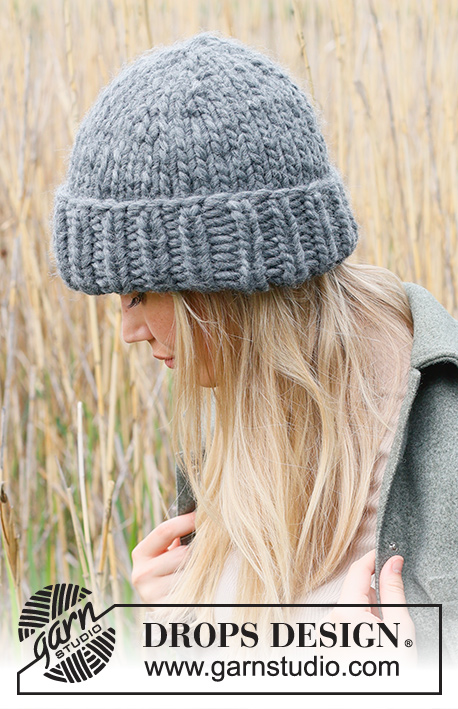 |
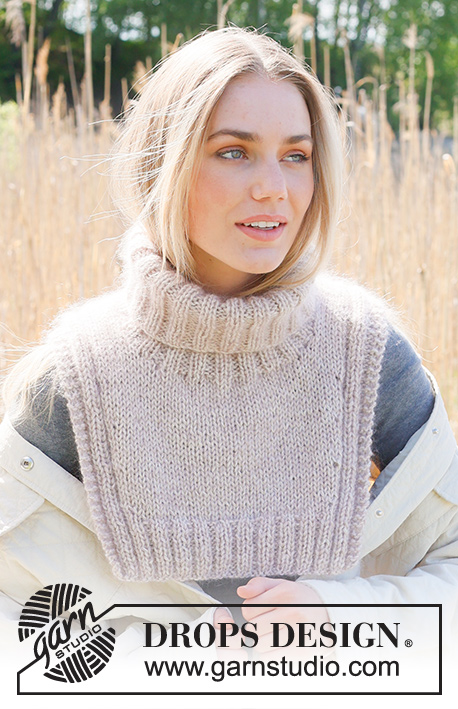
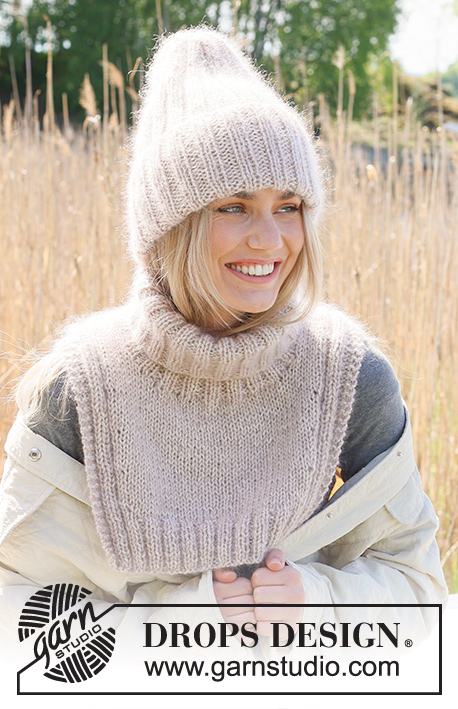
Gorro hipster tricotado de cima para baixo em ponto meia com orla em canelado, em DROPS Polaris.
DROPS 234-34 |
|
|
------------------------------------------------------- TÉCNICAS USADAS: ------------------------------------------------------- GORRO – SUMÁRIO: Tricota-se em redondo, de cima para baixo. GORRO: Montar 12 malhas com as agulhas de pontas duplas 12 mm em DROPS Polaris – deixar cerca de 20 cm para a montagem. Colocar 3 marcadores com um espaço de 4 malhas entre cada um deles. CARREIRA 1: * Tricotar em meia até restar 1 malha antes do marcador, fazer 1 laçada, tricotar 2 malhas meia, fazer 1 laçada*, repetir de * a * até ao fim da carreira (aumentou-se 6 malhas). CARREIRA 2: * Tricotar em meia até ao laçada, tirar a laçada da agulha esquerda e recolocá-la torcida, depois, tricotá-la em meia, na alça da frente (a malha fica inclinada para a direita), tricotar 2 malhas meia, tricotar a laçada seguinte em meia, na alça de trás (a malha fica inclinada para a esquerda) *, repetir de * a * até ao fim da carreira. Repetir 4-5 vezes ao todo as carreiras 1 e 2 = 36-42 malhas. A peça mede cerca de 8-10 cm. MANTER A MESMA TENSÃO DA INDICADA PARA A AMOSTRA! TAMANHO S/M: Tricotar mais 1 vez as carreiras 1 e 2 mas aumentar apenas a 2 dos marcadores = 40 malhas. TODOS OS TAMANHOS: = 40-42 malhas. Continuar em ponto meia mas sem aumentar até a peça medir 21-22 cm. Virar o gorro pelo avesso e tricotar em meia pelo avesso durante 4 cm. Continuar com as agulhas de pontas duplas 10 mm e tricotar em canelado (1 malha meia, 1 malha liga) durante 8 cm. Arrematar as malhas meia em meia e as malhas liga em liga - ter atenção para que as malhas arrematadas não fiquem demasiado apertadas. O gorro mede cerca de 33-34 cm a partir da carreira de montagem. Virar o gorro pelo direito e dobrar o canelado da parte de baixo. MONTAGEM: Com a ponta do fio do princípio da peça, fechar a abertura da parte de cima do gorro. |
|
Terminou este projecto?Então, identifique as suas fotos com as tags #dropspattern #polarnighthat ou mostre-as na galeria #dropsfan. Precisa de ajuda para este modelo?Encontrará 19 turotiais em vídeo, uma rubrica Comentários/Perguntas e muito mais ao visitar a página do modelo em www.garnstudio.com © 1982-2026 DROPS Design A/S. Todos os direitos reservados. Este documento, incluuindo as suas su-secções, tem copyrights. Saia mais o que pode fazer com os nossos modelos no fim de cada uma das páginas do nosso site. |
|


Com mais de 40 anos no design de modelos de tricô e de croché, a DROPS Design oferece uma das mais vastas colecções demodelos gratuitos na Internet - traduzidos em 17 línguas. Neste dia de hoje, temos 324 catálogos e 12290 modelos - dos quais 12271 estão traduzidos em português.
Trabalhamos com muito empenho para lhe proporcionar o melhor que o tricô e o croché têm para oferecer, para lhe fornecer inspiração e conselhos bem como fios da mais elevada qualidade a preços incríveis! Gostaria de usar os nossos modelos para outros fins que não uso pessoal? Pode ler o que lhe é permitido fazer no Copyright texto que se encontra na parte de baixo de todos os nossos modelos. Bom tricô! Bom croché!
Deixe um comentário acerca do modelo DROPS 234-34
Gostaríamos muito de saber o que tem a dizer-nos acerca deste modelo!
Se deixar uma pergunta acerca do modelo, certifique-se de que escolhe a categoria adequada no formulário abaixo para acelerar o processo relativo à resposta. Os campos obrigatórios estão assinalados com um *.