
Categorias populares
Procura um fio?


Comentários / Perguntas (7)
![]() Mercedes Cuadra escreveu:
Mercedes Cuadra escreveu:
Thanks, this is my first knitting with a diagram. Now I understand well. Another thing that confuses me is if the "knit" symbol in the diagram means the same thing for the right side and the wrong side. The instruction says "knit from the right side, knit from the wrong side". In other words, you don't do a purl on the wrong side, on this 9 stitches. Is that correct? Cheers, Mercedes
20.07.2023 - 22:00DROPS Design respondeu:
Hi Mercedes, there is 1 purl, second yarn over is purled. Happy knitting!
20.07.2023 - 22:27
![]() Mercedes Cuadra escreveu:
Mercedes Cuadra escreveu:
Hello, my question is about how to knit the wrong side of diagram A1. The pattern says that diagram A1 shows all rows from the right side. So, for example, in row 1, how should I knit those 9 stitches from the wrong side? Thank you. Mercedes
20.07.2023 - 17:27DROPS Design respondeu:
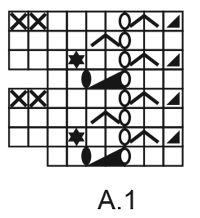
Hi Mercedes, 1st row (on the right side; read the diagram from right to left): knit 3, yarn over, purl 2 together, between 2 stitches make 2 yarn overs, knit 2. 2nd row (on the wrong side; read the diagram from left to right): knit 2, knit 1 in the first yarn over, purl 1 in the 2nd yarn over, knit 2, yarn over, knit 2 twisted together, knit 1 twisted. More about how to read knitting diagrams you will find HERE. Happy knitting!
20.07.2023 - 19:42
![]() Mercedes Cuadra escreveu:
Mercedes Cuadra escreveu:
Hello, thank you for your previous answer. I am a beginner in knitting, so I appreciate your help with another question, When I finish the first row I have 86 stitches in total, I understand that there are 9, A1 stitches, (instead of 7), 76 stockinette and 1 garter. I understand that I am going to knit these 9 stitches like this: 3 garter stitch, 1 purl (2nd YO), and 5 garter stitches. Let me know is that's right. Have a nice day. Mercedes
19.07.2023 - 19:37DROPS Design respondeu:
Dear Mercedes, the first row is correct. Now we work as follows: knit 3, purl 1 in the 2nd yo, knit 2, 1 yarn over, knit 2 stitches twisted together and knit 1 stitch twisted. Now work over the stockinette stitches and the garter stitch as before. Happy knitting!
20.07.2023 - 12:18
![]() Mercedes Cuadra escreveu:
Mercedes Cuadra escreveu:
Hi, its a pleasure to greet you! Thank you for your help. 1. When you say that I have to do 76 stockinette stitches on the first row, do you mean knit 76 stitches on the right side, and make purl stitches (84) on the back or 2nd row? 2. The diagram shows 7 stitches on the first row and 9 stitches on the next 3 rows. Does this mean that every four rows on the RS, I am going to repeat those stitches after knitting 76 or 74 stitches? Thank you again. Mercedes
09.07.2023 - 22:10DROPS Design respondeu:
Hi Mercedes, Yes, stockinette is knitted on the right side and purled on the wrong side. You work 1 garter stitch at the beginning of the row, stockinette over the middle 76 stitches and A.1 over the last 7 stitches on the right side. This will be reversed from the wrong side, with A.1 first, then 76 stockinette (purl) and finish with 1 garter stitch. Happy knitting!
10.07.2023 - 07:41
![]() Cornelia escreveu:
Cornelia escreveu:
Hallo.Kann ein Fehler in der Strickschrift sein?In der 4.Reihe (Hinreihe) nach den zwei M rechts abketten ist es nicht möglich 4 M rechts zu Stricken, es ist eine zu viel angegeben. Zum abketten von 2 M am Rundenbeginn benötigt man 3 M nicht zwei. Zählt man das Muster kommt man auf 8 nicht auf 7 LG
12.05.2022 - 08:01DROPS Design respondeu:
Liebe Cornelia, ja richtig, bei der 4. Reihe (= Rückreihe), ketten Sie 2 Maschen ab, dann stricken Sie insgesamt 4 Maschen links, aber die erste ist schon auf der Nadel nach der Abketten, so stricken Sie nur 3 Maschen links (es sind 4 glatt rechte Maschen auf der rechten Nadel). Viel Spaß beim stricken!
12.05.2022 - 09:16
![]() Agnes escreveu:
Agnes escreveu:
Hej Skulle ni vilja lägga upp en video på hur man stickar diagrammet. Får ingen rätsida på det
14.12.2021 - 09:20
![]() Hannelore Goormans escreveu:
Hannelore Goormans escreveu:
Wie kann ich eine Anleitung per PDF runter laden
16.07.2021 - 10:26DROPS Design respondeu:
Liebe Frau Goormans, unsere Anleitungen können nur ausgedruckt werden, aber wenn Sie eine virtuelle Drucker wählen, dann können Sie als .PDF speichern. Viel Spaß beim stricken!
16.07.2021 - 11:42
|
|||||||||||||||||||||||||
Warm Delights#warmdelightsbag |
|||||||||||||||||||||||||
 |
 |
||||||||||||||||||||||||
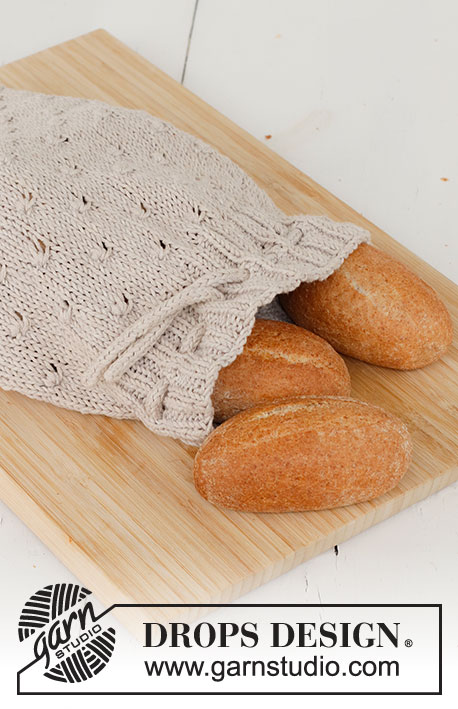
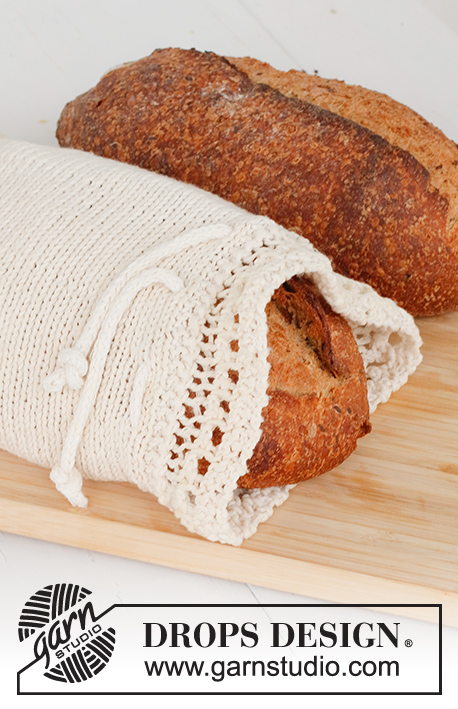
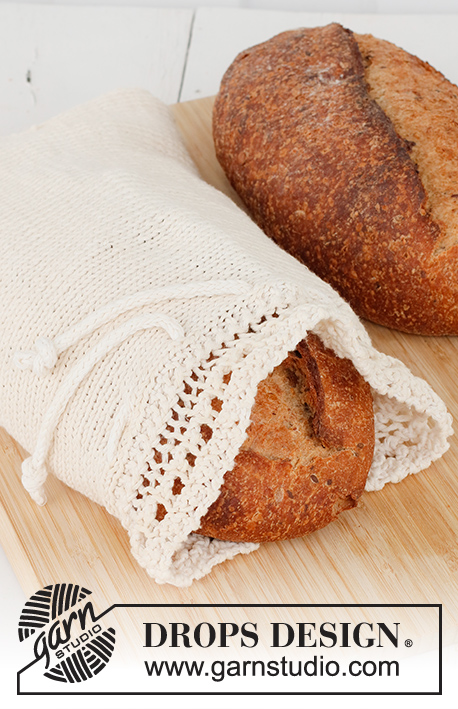
Saco para o pão tricotado com folhos, em DROPS Cotton Light.
DROPS 221-53 |
|||||||||||||||||||||||||
|
------------------------------------------------------- TÉCNICAS USADAS: ------------------------------------------------------- PONTO JARRETEIRA (em idas e voltas): Tricotar todas as carreiras em meia. 1 barra jarreteira = tricotar 2 carreiras meia. PONTO FANTASIA: Ver diagrama A.1. O diagrama mostra todas as carreiras do ponto fantasia, vistas pelo direito. ------------------------------------------------------- A PEÇA COMEÇA AQUI: ------------------------------------------------------- SACO PARA O PÃO – SUMÁRIO DA PEÇA: Tricota-se de um lado ao outro, em idas e voltas com uma costura ao longo do lado e no fundo. SACO PARA O PÃO: Montar 84 malhas com as agulhas 4,5 mm em DROPS Cotton Light. Tricotar 2 BARRAS JARRETEIRA em todas as malhas – ver acima. Colocar 1 marcador – MEDIR A PEÇA A PARTIR DAQUI. Tricotar a carreira seguinte da seguinte maneira pelo direito: 1 malha ourela em ponto jarreteira, 76 malhas em ponto meia e A.1 por cima das 7 últimas malhas. MANTER A MESMA TENSÃO DA INDICADA PARA A AMOSTRA! Continuar desta maneira com A.1 de um lado, em ponto meia e ponto jarreteira do outro lado até a peça medir cerca de 48 cm a partir do marcador – ajustar a altura para arrematar depois de uma carreira 4 ou 8 de A.1. Tricotar 2 barras jarreteira em todas as malhas. Arrematar frouxamente, cortar o fio. CORDÃO: Tricota-se em idas e voltas na agulha circular. Montar 3 malhas com a agulha circular 3,5 mm em DROPS Cotton Light. Tricotar 3 malhas meia, *não virar mas empurrar as malhas para a outra extremidade da agulha, passar o fio para trás das malhas, puxar e tricotar novamente as malhas em meia pelo direito*, tricotar de * a * até o cordão medir cerca de 60 cm, arrematar, cortar e entretecer o fio. MONTAGEM: Dobrar a peça ao meio para que os folhos fiquem, uns contra as outros; é a abertura do saco. Costurar as malhas arrematadas às malhas da carreira de montagem na alça mais exterior das malhas. Dobrar a peça para que esta costura fique ao meio. Costurar o fundo a 1 malha ourela dos rebordos. Enfiar o cordão nas malhas em ponto meia alguns cm abaixo de A.1 – ver foto. Dar um nó em cada ponta do cordão. |
|||||||||||||||||||||||||
Explicações do diagrama |
|||||||||||||||||||||||||
|
|||||||||||||||||||||||||
 |
|||||||||||||||||||||||||
Terminou este projecto?Então, identifique as suas fotos com as tags #dropspattern #warmdelightsbag ou mostre-as na galeria #dropsfan. Precisa de ajuda para este modelo?Encontrará 18 turotiais em vídeo, uma rubrica Comentários/Perguntas e muito mais ao visitar a página do modelo em www.garnstudio.com © 1982-2026 DROPS Design A/S. Todos os direitos reservados. Este documento, incluuindo as suas su-secções, tem copyrights. Saia mais o que pode fazer com os nossos modelos no fim de cada uma das páginas do nosso site. |
|||||||||||||||||||||||||


Com mais de 40 anos no design de modelos de tricô e de croché, a DROPS Design oferece uma das mais vastas colecções demodelos gratuitos na Internet - traduzidos em 17 línguas. Neste dia de hoje, temos 324 catálogos e 12290 modelos - dos quais 12271 estão traduzidos em português.
Trabalhamos com muito empenho para lhe proporcionar o melhor que o tricô e o croché têm para oferecer, para lhe fornecer inspiração e conselhos bem como fios da mais elevada qualidade a preços incríveis! Gostaria de usar os nossos modelos para outros fins que não uso pessoal? Pode ler o que lhe é permitido fazer no Copyright texto que se encontra na parte de baixo de todos os nossos modelos. Bom tricô! Bom croché!
Deixe um comentário acerca do modelo DROPS 221-53
Gostaríamos muito de saber o que tem a dizer-nos acerca deste modelo!
Se deixar uma pergunta acerca do modelo, certifique-se de que escolhe a categoria adequada no formulário abaixo para acelerar o processo relativo à resposta. Os campos obrigatórios estão assinalados com um *.