
Popular categories
Looking for a yarn?


European shoulder (sleeve)
In this lesson we show you step-by-step how to pick up stitches for the sleeves, work short rows for the sleeve cap and how to decrease under the sleeve. We follow the pattern for a children’s jumper Sweet Peppermint (DROPS Children 47-12) in size 2 years, but remember to follow the stitch numbers/increases for your chosen size!
At the bottom of the page you'll find a video which might be of help. as well as a form where you can ask our experts for help if you were to need it!
Let’s get started!
We have already worked the body and are now ready to work the sleeves.
We are working with 2 yarn qualities, DROPS Lima colour no. 9029, sage green and DROPS Kid-Silk colour no 45, soft mint, using needle size 5 mm. We are using 1 strand of each quality, or the yarn and stitch number given in the pattern you are working on.

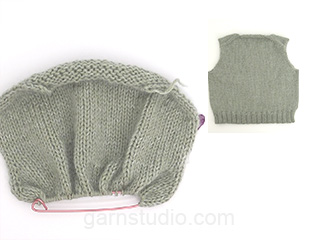
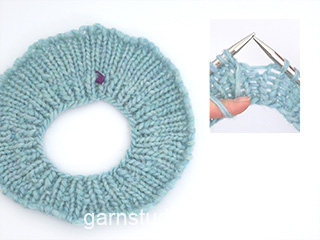
Lay the piece flat and insert 1 marker at the top of the armhole (NOTE! This is not where stitches were knitted up for the front piece but approx. 3 cm down the front piece, which is top of shoulder). The picture shows the back piece.

Use circular needle size 5 mm and 1 strand of each quality, start in the middle of the cast-on stitches under the left sleeve and knit up 42 stitches around the left armhole – making sure there are equal stitches on each side of the marker.


Work stocking stitch back and forth with short rows across the sleeve cap. This gives the sleeve a better shape. Row 1 (right side): Work to 4 stitches past the marker, turn.

Row 2 (wrong side): Work to 4 stitches past the marker, turn.

Row 3 (right side): Work to 8 stitches past the marker, turn.

Row 4 (wrong side): Work to 8 stitches past the marker, turn.

Row 5 (right side): Work to 12 stitches past the marker, turn.

Row 6 (wrong side): Work to 12 stitches past the marker, turn.

Row 7 (right side): Work to beginning of round.

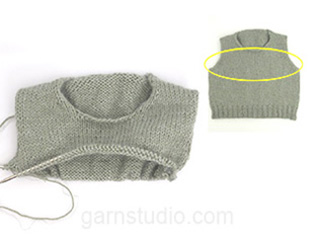
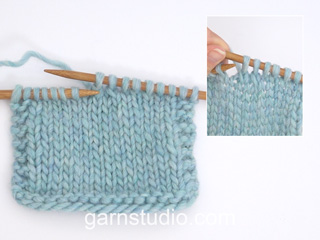
The purple stitch-markers show where we turned after each short row (apart from the top one).

Continue with stocking stitch in the round over all stitches. Insert 1 marker-thread at the beginning of the round (mid-under sleeve) and allow the marker-thread to follow your work onwards.

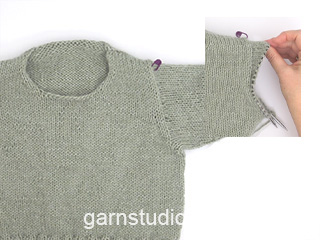
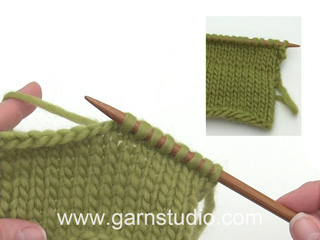
Start at the marker-thread and work stocking stitch. When the sleeve measures 5 cm from the knitted-up stitches, decrease 2 stitches under the sleeve – read DECREASE TIP below. Decrease like this every 3 cm a total of 5 times = 32 stitches.
DECREASE TIP:
Decrease 1 stitch on each side of the marker-thread as follows: Work until there are 3 stitches left before the marker-thread, knit 2 together, knit 2 (marker-thread sits between these 2 stitches), slip 1 stitch knit-wise, knit 1 and pass the slipped stitch over the knitted stitch.

Continue working until the sleeve measures 20 cm from the knitted-up stitches. There is 6 cm left to finished length; try the jumper on and work to desired length before the rib.

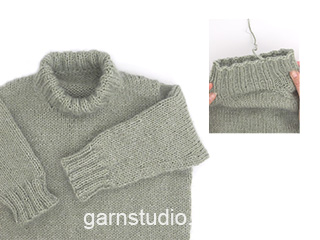
Knit 1 round and increase 8 stitches evenly spaced = 40 stitches. Increasing before the rib gives a neat transition between the sleeve and the rib.
Change to double pointed needles size 3.5 mm.

Work rib (knit 2, purl 2) for 6 cm. Cast off a little loosely with rib. The sleeve measures approx. 26 cm from the marker.

RIGHT SLEEVE:
Worked in the same way as left sleeve.

The jumper is now nearly finished!
The final stage is to work the neck. See how in our next lesson: European shoulder (neck).
Do you need help?
If you require further information about different stitches or techniques, you will find a list of videos and lessons here, which might be of help:


With over 40 years in knitting and crochet design, DROPS Design offers one of the most extensive collections of free patterns on the internet - translated to 17 languages. As of today we count 325 catalogues and 12298 patterns translated into English (UK/cm).
We work hard to bring you the best knitting and crochet have to offer, inspiration and advice as well as great quality yarns at incredible prices! Would you like to use our patterns for other than personal use? You can read what you are allowed to do in the Copyright text at the bottom of all our patterns. Happy crafting!