
Populaarsed kategooriad
Otsid lõnga?


Kommentaarid / Küsimused (71)
![]() Jennie kirjutas:
Jennie kirjutas:
Jag måste ha förstått helt fel när man gör ökningarna i sidorna. Det hade vart enklare om jag kunde visa en bild, men de första maskorna man ökar i slutet av varv 6 får ju ett extra varv med stolpar jämfört med ökningarna i andra sidan och blir ju en helt centimeter längre/bredare beroende på hur man mäter. Trodde detta skulle kompenseras för när man slutar virka de extra maskorna men då slutar man ju virka alla samtidigt. Ska det se ut så?
04.07.2025 - 18:37DROPS Design vastas:
Hei Jennie. Det kan bli en liten "høyde" forskjell på radene, men den skal ikke være av noe stor betydning. Har du mulighet må du må gjerne ta et bilde eller ta med deg hele jakken til en butikk som selger DROPS garn. Da er det lettere for dem å se mer nøyaktig hva du mener. mvh DROPS Design
07.07.2025 - 11:30
![]() Caroline kirjutas:
Caroline kirjutas:
Je l’achète à qui arrive à me le faire 🤗
30.04.2024 - 01:47
![]() Gabriela kirjutas:
Gabriela kirjutas:
Ich verstehe nicht, wie die Seiten zusammengenäht werden müssen, ansonsten gefällt mir das Modell sehr gut
14.04.2024 - 16:37DROPS Design vastas:
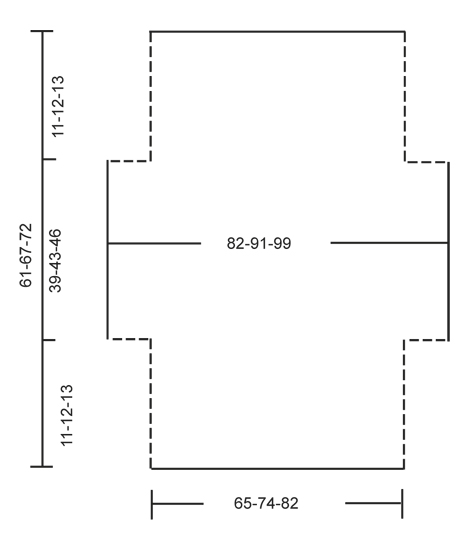
Liebe Gabriela, falten Sie die Arbeit in 2 in der Mitte (wo die 82-91-99 cm in der Maßskizze geschrieben sind), dann nähen Sie zusammen die ersten und die lezten 11-12-13 cm (links und rechts) zusammen, dann nähen Sie die neuen angeschlagenen Maschen mit den abgenommenen Maschen zusammen = es bleibt eine Öffnung an den mittleren 39-43-46 cm für die Arme. Viel Spaß beim Fertigstellen!
15.04.2024 - 08:18
![]() Lesley kirjutas:
Lesley kirjutas:
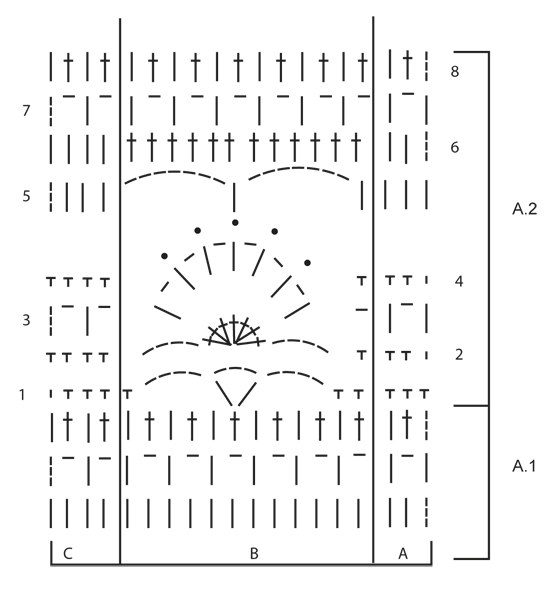
I can work the diagram until the picots in Row 5. The key says start the picot with a dc in a chain space, but there are 6 ch spaces and only 5 picots and the diagram makes it look like you start the picot in the treble st and not the ch space . I'm not sure where to put my picots!
13.09.2023 - 16:36DROPS Design vastas:
Dear Lesley, do you mean row called 4 in the diagram? You will start the diagram B with 1 dc in the chain, then crochet the dc in the next ch-space, work 3 ch, and worked 1 treble crochet in the 1st of this 3 chains, then crochet 1 dc in next ch-space to start next picot. that way, the picot will be over the treble crochets from previous row. Happy crocheting!
14.09.2023 - 09:40
![]() Nicole Rebiffé kirjutas:
Nicole Rebiffé kirjutas:
Bonjour, Dans le point Picot, il faut faire une bride ou une maille serrée?. Dans les explications ci-dessus, vous indiquez la bride, mais dans la vidéo , c'est une maille serrée.. Merci de votre réponse
20.08.2023 - 19:09DROPS Design vastas:
Bonjour Mme Rebiffé, selon le diagramme, c'est bien 1 bride dans la 1ère des 3 mailles en l'air qu'il faut faire, merci pour votre retour, j'ai transféré à notre équipe vidéo. Bonne continuation!
21.08.2023 - 09:12
![]() Mini Varkey kirjutas:
Mini Varkey kirjutas:
Am I supposed to reduce 12 stitches from row 6 on either side once I reach 55 cms.
01.08.2022 - 21:51DROPS Design vastas:
Hi Mini, Yes, you do not work the 12 stitches on each side. Happy crocheting!
02.08.2022 - 06:53
![]() Mini Mathew Varkey kirjutas:
Mini Mathew Varkey kirjutas:
How do you decrease after you reach 55 cm
01.08.2022 - 21:43DROPS Design vastas:
Dear Mr Varkey, cut the yarn at the end of the row when you reach 55 cm and turn piece, skip the first 12 sts at the beg of next row, join the yarn and work the next 103 sts (12 sts remain at the end of the row). Alternately you can also slip stitch over the first 12 sts if you want to avoid cutting the yarn. Happy crocheting!
02.08.2022 - 09:00
![]() Diana De Witt kirjutas:
Diana De Witt kirjutas:
In het patroon staat bij de picot 1 stk in de 1 e van de 3 l. Dit is waarschijnlijk verkeerd vanuit het engels naar het nederlands vertaald dit moet zijn 1 vaste in de 1 e van de 3 lossen. Uk = 1 dc en us 1 sc = een vaste in nl
17.06.2021 - 17:56
![]() Pranali kirjutas:
Pranali kirjutas:
There is a discrepancy in the video for A2 and the diagram key for the picot.. the video shows it as' sc in chain space- ch3- 1 sc in 1st ch' where the key writes it as 'sc in ch space - ch3 - 1 dc in the 1st ch'
18.01.2021 - 11:51DROPS Design vastas:
Dear Mrs Pranali, make sure you are following correct English pattern, there is a difference between US-English terms and UK-English terms, for ex 1 dc (= UK) = 1 sc (= US). check language under picture. Happy crocheting!
18.01.2021 - 15:31
![]() Magalie Weber kirjutas:
Magalie Weber kirjutas:
Bonjour c est normal que je sois en décalé quand je fais les augmentations à la fin du rang 5 ( 14 Lm) et à la fin du rang 6 ( 15Lm). Merci par avance pour votre aide
24.07.2020 - 10:56DROPS Design vastas:
Bonjour Mme Weber, vous ne devez pas être décalée au rang après les mailles en l'air, vous crochetez les nouvelles mailles en l'air ( = 12 brides au total de chaque côté) et le rang suivant de A.2 comme avant au-dessus des mailles de A.2. Vous continuez ensuite avec A.2A au-dessus des 3 premières mailles, A.2B au-dessus des 9 mailles suivantes + les 3 mailles de A.2A des rangs précédents), A.2B comme avant en crochetant le dernier A.2B au-dessus des 3 m de A.2C + les 9 m suivantes puis A.2C au-dessus des 3 dernières mailles. Bon crochet!
29.07.2020 - 09:39
|
||||||||||||||||
Blue Wonder#bluewondershoulderpiece |
||||||||||||||||
 |
 |
|||||||||||||||
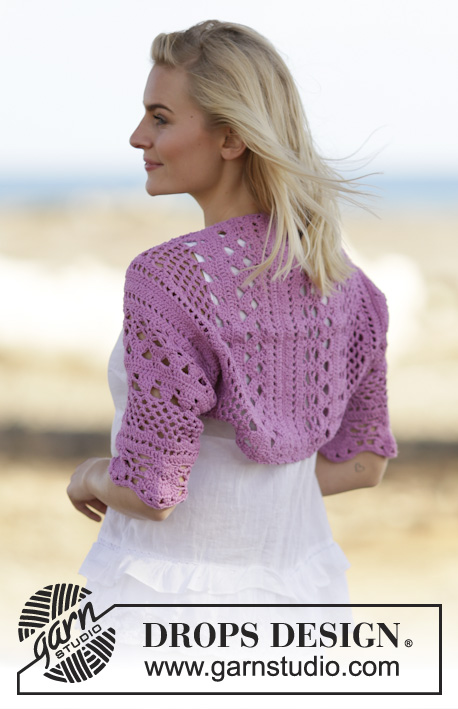
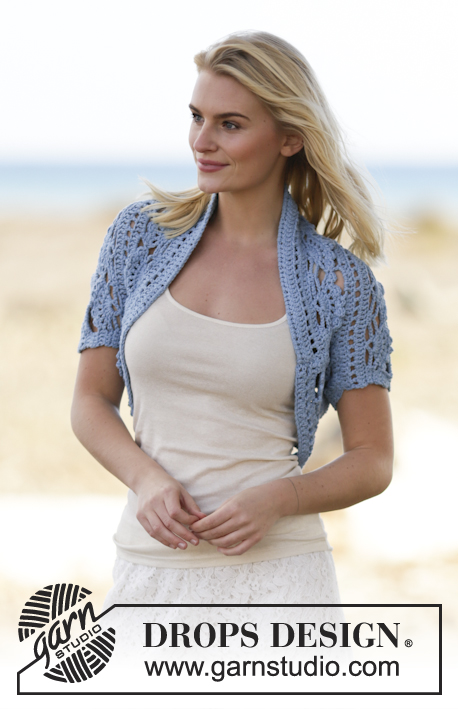
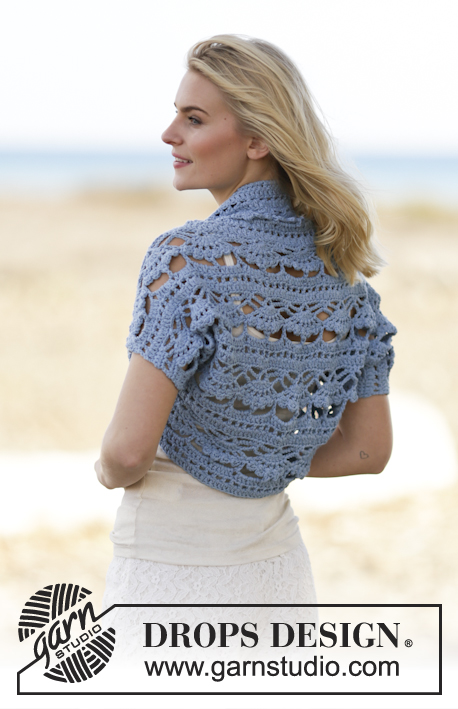
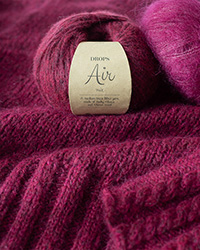
DROPS Paris lõngast heegeldatud boolero
DROPS 162-34 |
||||||||||||||||
|
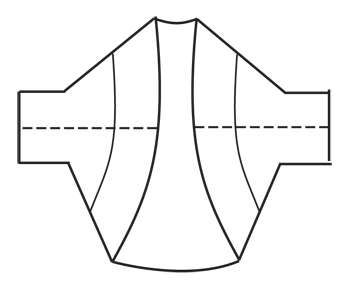
MUSTER Vaata skeeme A.1 ja A.2. BOOLERO Heegelda 110-125-139 ahels 5 mm heegelnõelaga ja Paris lõngaga. 1. RIDA: pööra ja tee 1 ühekordne sammas (sm) neljandasse ahels-sse heegelnõelast (= 2 sm), tee 1 sm igasse järgmisesse 4-1-3 ahels-sse, * jäta vahele 1 ahels, tee 1 sm igasse järgmisesse 5 ahels-sse *, korda * kuni * = 91-103-115 sm. 2. RIDA: siis heegelda vastavalt skeemile A.1 nii: skeemi A.1 A, skeemi A.1 B kokku 7-8-9 korda, lõpus tee skeemi A.1 C. Kui skeem A.1 on tehtud 1 kord vertikaalselt, korda skeemi A.2 ülespoole. SAMAL AJAL, kui töö pikkus on u. 11-12-13 cm (järgmine rida on 6. rida skeemil A.2), tee 14 ahels rea lõpus (= 5. rida). Pööra ja tee 1 sm neljandasse ahels heegelnõelast, siis tee 1 sm igasse järgmisesse 10 uude ahels-sse. Jätka 6. reaga skeemil A.2, rea lõpus tee 15 uut ahels. Pööra ja tee 1 sm kuuendasse ahels heegelnõelast, * tee 1 ahels, jäta vahele 1 ahels, 1 sm järgmisesse ahels-sse *, korda * kuni* kuni järgmise 9 uue ahelsilmuseni, lõpus tee 1 ahels. Heegelda ülejäänud rida vastavalt skeemile A.2. Järgmisel real heegelda nagu enne, kuni uute silmusteni rea lõpus, tee 1 sm igasse ahels-kaarde ja 1 sm igasse sambasse. 12 sm on kasvatatud mõlemal küljel = 115-127-139 sm. Siis jätka 8. rida nii: tee skeemi A.2 A, skeemi A.2 B kokku 9-10-11 korda, lõpus tee skeemi A.2 C. Kui töö pikkus on u. 50-55-59 cm (järgmine rida on 7. rida), ära heegelda mõlemal küljel 12 samba kohale = 91-103-115 sm. Jätka nii: tee skeemi A.2 A, skeemi A.2 B kokku 7-8-9 korda, lõpus tee skeemi A.2 C. Jätka, kuni töö pikkus on u. 61-67-72 cm - lõpeta pärast tervet mustrikordust A.2. Katkesta ja kinnita lõng. VIIMISTLUS Õmble külje- ja käealused õmblused ühe õmblusena ääresilmuse kõrvalt. |
||||||||||||||||
Skeemi seletused |
||||||||||||||||
|
||||||||||||||||
 |
||||||||||||||||
 |
||||||||||||||||
 |
||||||||||||||||
Kas oled teinud seda mustrit?Lisa oma piltidele viide #dropspattern #bluewondershoulderpiece või saada link projektile meie #dropsfan galeriisse. Vajad abi selle mustriga?Garnstudio.com kodulehel on 7 õppevideot, küsimuste/vastuste osa ja muudki. © 1982-2025 DROPS Design A/S. Kõik õigused kaitstud. See dokument, ning selle alajaotused on kaitsud autoriõigustega. Loe rohkem, mida meie mustritega võib teha, iga mustrilehe alt meie kodulehel. |
||||||||||||||||


Tegeledes üle 40 aasta kudumise ja heegeldamise disainidega, pakub DROPS Design ühte suurimat tasuta mustrite kollektsiooni internetis - tõlgituna 17 keelde. Tänaseks on meil 319 kataloogi ja 12042 mustrit - millest 9197 on tõlgitud Eesti keelde.
Me anname endast parima, et tuua teieni kõike mida kudumine ja heegeldamine võib pakkuda - inspiratsiooni, nõuandeid ning ka kvaliteetseid lõngu parima hinnaga! Soovid kasutada mustreid muukski, kui ainult oma tarbeks? Loe infot meie Copyright osas iga lehekülje all. Rõõmsat loomist!
Jäta kommentaar mustrile DROPS 162-34
Ootame kommentaare selle mustri kohta!
Kui soovid midagi küsida, siis kiiremaks vastuse saamiseks veendu, et valid õige kategooria alloleval formil. Vajaliku väljad *.