Komentáře / Otázky (10)
![]() Monika Imberger napsala:
Monika Imberger napsala:
Ich habe 2 Fragen: Wie werden denn die Randmaschen gestrickt? Wenn ich den Schulterwärmer breiter haben möchte, so dass er tiefer in den Rücken geht, kann ich dann einfach Maschen hinzufügen? Aufteilung dann z. B. 18 - 12 - 18? und müsste ich dann den Schlitz länger machen oder würde sich daran nichts ändern? Ist es sinnvoll auf beiden Seiten mehr Maschen zu haben oder wäre es besser, diese dann nur auf einer Seite zu haben? Danke für die Hilfe im Voraus.
22.10.2021 - 10:32Odpověď DROPS Design :
Liebe Frau Imberger, bei diesem Modell werden alle Maschen im Perlmuster gestrickt, dh es gibt keine extra Randmaschen. Leider können wir nicht jede Anleitung nach jedem individuellen Frage anpassen und einzelne Modelle auf individuellen Wunsch hin umrechnen. Wenn sie Hilfe damit brauchen, wenden Sie sich bitte an Ihrem DROPS Laden - auch telefonisch oder per E-Mail, dort hilft man Ihnen gerne weiter. Danke im voraus für Ihr Verständnis. Viel Spaß beim stricken!
22.10.2021 - 16:50
![]() Nanamarni napsala:
Nanamarni napsala:
When you knit the first separated 14 stitches and put them on holder, how do you then start knitting the next section with no adjacent tail from the preceding stitch?
21.03.2014 - 03:08Odpověď DROPS Design :
Dear Mrs Nanamarni, when first part on the first 14 sts is done, cut the yarn and put sts aside. Work then the next 14 sts with new tail of yarn and repeat as for 1st part. Happy knitting!
23.03.2014 - 17:03
![]() DROPS Design napsala:
DROPS Design napsala:
The pattern for the shawl is right underneath the patter for the ear warmer.
07.12.2011 - 10:00Maryam napsala:
Please send me the pattern how to worked this shawl
07.12.2011 - 07:41
![]() Bronwen napsala:
Bronwen napsala:
Thanks for your help. I've taken a closer look at the picture and can now see the holes are folded together and the end is slotted through both
16.09.2011 - 00:29
![]() DROPS Design napsala:
DROPS Design napsala:
Hi Bronwen, in one end there are 2 holes, in the other end no holes, and that end is pulled through the 2 holes in the other side when wearing the shawl.
15.09.2011 - 22:57
![]() Bronwen Richards napsala:
Bronwen Richards napsala:
I can't understand why two holes are made in the scarf if the scarf isn't then divided into two sections at the other end that will be threaded through these holes. I would appreciate some advice
15.09.2011 - 22:27
![]() DROPS Design NL napsala:
DROPS Design NL napsala:
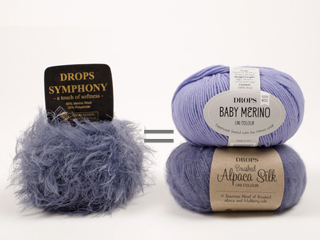
U kunt de hoeveelheid garen berekenen met behulp van de looplengtes van beide garens (zie overzicht van garens) U moet de stekenverhouding van het patroon aanhouden. Dus in dit geval moet u de naald gebruiken om 19 st x 38 nld of 15 st x 30 nld in gerstekorrel te krijgen. Maar Symphony is een veel dikkere garen dan Delight, dus ik zou een dubbele draad Delight gebruiken voor een mooier resultaat. Succes. Gr. Tine
14.07.2010 - 09:27
![]() Jacqueline napsala:
Jacqueline napsala:
Graag wil ik nr. ww-037 breien met delight, kan dat? zo ja welke naalden, hoeveel wol moet ik dan gebruiken?
13.07.2010 - 19:24
![]() Cajito napsala:
Cajito napsala:
Zajimave reseni krasneho salu
13.06.2010 - 08:05
DROPS 123-26 |
|
|
|
|
DROPS čelenka a šála pletená perličkovým vzorem z příze "Symphony".
DROPS 123-26 |
|
|
ERLIČKOVÝ (HRÁŠKOVÝ) VZOR: 1. řada: *1 oko hladce, 1 oko obrace *, vzor mezi *-* opakujeme. 2. řada: oka pleteme opačně, než se jeví - nad okem hladce tedy pleteme obrace, nad okem obrace pleteme hladce; tuto řadu stále opakujeme. ---------------------------------------------------------------------- ČELENKA: Pleteme v řadách. Na jehlice č.3,5 nahodíme přízí Symphony 21 ok a pleteme perličkovým vzorem. DBÁME NA ROVNOMĚRNÉ NAPĚTÍ PŘÍZE! Ve výši 48 cm oka uzavřeme a čelenku sešijeme. ŠÁLA: Pleteme v řadách. Na jehlice č.6 nahodíme přízí Symphony 38 ok a pleteme perličkovým vzorem. DBÁME NA ROVNOMĚRNÉ NAPĚTÍ PŘÍZE! Ve výši 16 cm pleteninu rozdělíme na tři díly, abychom vytvořili dva velké otvory, a pokračujeme takto: nad prvními 14 oky pleteme v řadách perličkovým vzorem do výše 23 cm, pak oka odložíme na pomocnou jehlici. Nyní pleteme v řadách perličkovým vzorem nad následujícími 10 oky do stejné výše (POZN.: končíme stejnou řadou vzoru!). Pak opět oka odložíme na pomocnou jehlici. Nad posledními 14 oky pleteme rovněž v řadách perličkovým vzorem do stejné výše. V následující řadě připlétáme i oka z pomocných jehlic – pleteme tedy opět v řadách perličkovým vzorem nad všemi 38 oky. Otvory v pletenině měří asi 7 cm. Pokračujeme do celkové výše asi 130 cm, pak oka uzavřeme. |
|
Dokončili jste tento model?Pak označte své fotky tagem #dropspattern nebo je pošlete do galerie #dropsfan. Potřebujete s tímto návodem poradit?Otevřete-li si návod na stránce garnstudio.com, najdete tam 10 výukových video-ukázek, Komentáře/Dotazy a další užitečné informace. © 1982-2026 DROPS Design A/S. Vyhrazujeme si veškerá práva. Tento dokument, včetně všech jeho dílčích částí, podléhá autorským právům. Podrobnější komentář k možnostem užití našich návodů najdete dole pod každým návodem na našich stránkách. |


Přidejte komentář k návodu DROPS 123-26
Rádi bychom věděli, co si o tomto modelu myslíte!
Pokud se chcete na něco zeptat, dbejte prosím na to, abyste ve formuláři níže vybrali správnou kategorii - díky tomu se dříve dozvíte, co potřebujete vědět. Povinná pole jsou označena *.