
Categorias populares
Procura um fio?


Comentários / Perguntas (7)
![]() CHANDELIER escreveu:
CHANDELIER escreveu:
Bonjour , Nous souhaitons savoir combien de pelotes commander pour réaliser l'écharpe Sunday Susie en Mérino extra fine . Merci de nous l'indiquer car pas trouvé cette info dans la fiche technique sur votre site , Vous remerciant , Mme Chandelier
29.10.2025 - 16:59DROPS Design respondeu:
Bonjour Mme Chandelier, retrouvez la quantité nécessaire à la réalisation de cette écharpe sous l'onglet "Explications" en haut de page, autrement dit, il faut ici 250 g DROPS Merino Extra Fine/50 g la pelote = 5 pelotes. Bon crochet!
30.10.2025 - 18:49
![]() Amandine escreveu:
Amandine escreveu:
Bonjour! Comment commencer à crocheter la partie 2 dans la chaînette de 46 ml ? Faut-il faire un noeud avec le nouveau fil dans la maille en l’air ? Merci!!
17.02.2022 - 11:17DROPS Design respondeu:
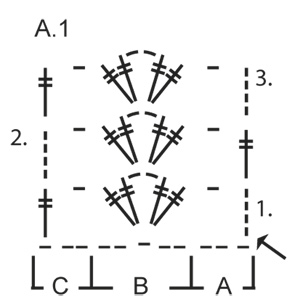
Bonjour Amandine, joignez le fil dans la 1ère maille en l'air de la chaînette (cf flèche dans A.1A) en faisant une maille coulée, puis continuez le diagramme: comme vous l'avez fait pour la première partie. Bon crochet!
17.02.2022 - 13:19
![]() Tracy escreveu:
Tracy escreveu:
Please can you tell me the reason for part 2 of the pattern as I do not understand it at all, could you not just carry on till desired finished length . Apologies for asking the same question as Jan above but I still didn’t understand answer given Many thanks
24.07.2020 - 14:30DROPS Design respondeu:
Dear Tracy, staring the 2nd part in the foundation chain will allow you to get both ends of scarf being the same, if you work a long rectangle, one end will be the foundation chain + 1st row in A.1 while the other end will look like row 3 or 2 in diagram. Happy crocheting!
29.07.2020 - 09:41
![]() Maja Petersen escreveu:
Maja Petersen escreveu:
Jeg har problemer med at forstå opskriften. Når jeg har lavet 1. del er halstørklædet halv bredte og længde. Hvis jeg har forstået det rigtig. Hvordan kommer jeg videre med 2. del?
11.01.2015 - 22:15DROPS Design respondeu:
Hej Maja. Du gaar tilbage til de förste 46 lm fra begyndelsen og haekler 2. del herfra.
12.01.2015 - 16:18
![]() Jan escreveu:
Jan escreveu:
So I slip stitch in the 46th chain, chain 5 and continue ROw 1... THis will double the length of the scarf and thus the 46 chains is the center seam? SOrry to be so dense. THanks Jan
24.10.2014 - 18:15DROPS Design respondeu:
Dear Jan, that's correct, that's how the scarf is done. Happy crocheting!
25.10.2014 - 09:28
![]() Jan escreveu:
Jan escreveu:
I do not understand what is to be done for the Part 2 section of this pattern. Could I have more explicit instruction. Thank you!
23.10.2014 - 00:37DROPS Design respondeu:
Dear Jan, the section 2 of the scarf is worked from the fundation ch from part 1, ie start with row 1 of A.1 in the 46 ch from beg of 1st part. Happy crocheting!
23.10.2014 - 10:20DANIELLE LAMBERT escreveu:
I really hope this one will come out soon, I want it badly. My Favorite !!!!!
01.07.2014 - 02:47
|
||||||||||
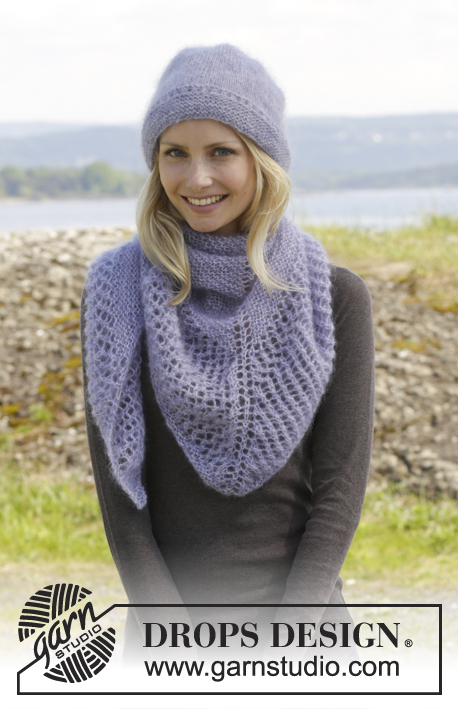
Sunday Susie#sundaysusiescarf |
||||||||||
|
|
||||||||||
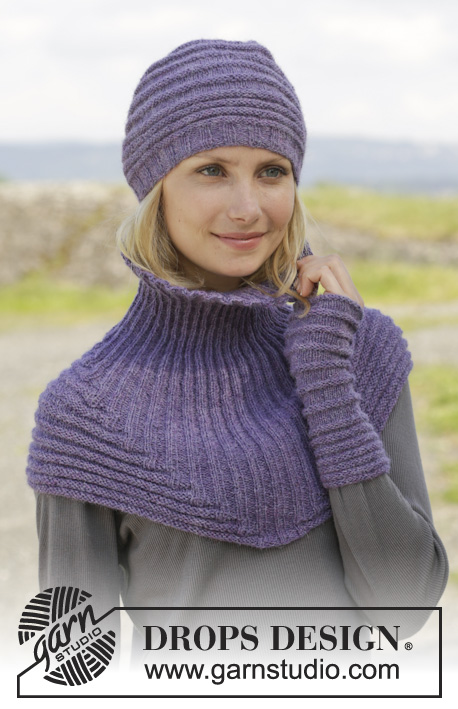
Cachecol DROPS em ponto com ajours e pontos altos, em ”Merino Extra Fine”.
DROPS 158-7 |
||||||||||
|
---------------------------------------------------------- NOTA: Existem termos diferentes de tricô e croché em português de Portugal e do Brasil. TRICÔ : Malha = Ponto Canelado = Barra Ponto Jarreteira = Cordões de Tricô Ponto Liga = Ponto Tricô CROCHÉ : mpa – meio ponto alto pa – ponto alto pad – ponto alto duplo pat – ponto alto triplo pb – ponto baixo pbx – ponto baixíssimo pc – ponto corrente ---------------------------------------------------------- PONTO FANTASIA: Ver diagrama A.1. ---------------------------------------------------------- CACHECOL: Faz-se em 2 partes a partir do meio das costas. Montar uma corrente de 46 pc com a agulha de croché 6 mm em Merino Extra Fine. PARTE 1: Crochetar seguindo o diagrama A.1, ou seja, da seguinte maneira: CARREIRA 1: 5 pc, 2 pad + 2 pc + 2 pad no 11.º pc a partir da agulha de croché, *saltar 4 pc, 2 pad + 2 pc + 2 pad no pc seguinte*, repetir de * a * 7 vezes ao todo, 1 pc, saltar 4 pc, 1 pad no pc seguinte = 8 grupos de pa. Virar. CARREIRA 2: 5 pc, *2 pad + 2 pc + 2 pad no aro seguinte*, repetir de * a * 8 vezes ao todo, 1 pc, saltar 1 pc, 1 pad no 4.º pc da carreira precedente. Virar. CARREIRA 3: 5 pc, *2 pad + 2 pc + 2 pad no aro seguinte*, repetir de * a * 8 vezes ao todo, 1 pc, saltar 1 pc, 1 pad no 4.º pc da carreira precedente. Virar. Repetir as carreiras 2 e 3 até a peça medir cerca de 87 cm de altura – NÃO ESQUECER DE MANTER A MESMA TENSÃO DA INDICADA PARA A AMOSTRA. Arrematar. PARTE 2: Crochetar 1 outra parte igual (continuar no lado oposto do fim da 1.ª parte, ou seja, na corrente de 46 pc do princípio). |
||||||||||
Explicações do diagrama |
||||||||||
|
||||||||||
 |
||||||||||
Terminou este projecto?Então, identifique as suas fotos com as tags #dropspattern #sundaysusiescarf ou mostre-as na galeria #dropsfan. Precisa de ajuda para este modelo?Encontrará 3 turotiais em vídeo, uma rubrica Comentários/Perguntas e muito mais ao visitar a página do modelo em www.garnstudio.com © 1982-2026 DROPS Design A/S. Todos os direitos reservados. Este documento, incluuindo as suas su-secções, tem copyrights. Saia mais o que pode fazer com os nossos modelos no fim de cada uma das páginas do nosso site. |
||||||||||


Com mais de 40 anos no design de modelos de tricô e de croché, a DROPS Design oferece uma das mais vastas colecções demodelos gratuitos na Internet - traduzidos em 17 línguas. Neste dia de hoje, temos 324 catálogos e 12290 modelos - dos quais 12271 estão traduzidos em português.
Trabalhamos com muito empenho para lhe proporcionar o melhor que o tricô e o croché têm para oferecer, para lhe fornecer inspiração e conselhos bem como fios da mais elevada qualidade a preços incríveis! Gostaria de usar os nossos modelos para outros fins que não uso pessoal? Pode ler o que lhe é permitido fazer no Copyright texto que se encontra na parte de baixo de todos os nossos modelos. Bom tricô! Bom croché!
Deixe um comentário acerca do modelo DROPS 158-7
Gostaríamos muito de saber o que tem a dizer-nos acerca deste modelo!
Se deixar uma pergunta acerca do modelo, certifique-se de que escolhe a categoria adequada no formulário abaixo para acelerar o processo relativo à resposta. Os campos obrigatórios estão assinalados com um *.