
Categorias populares
Procura um fio?


Comentários / Perguntas (67)
![]() Diane Dulong escreveu:
Diane Dulong escreveu:
Combien de pelotes exigées pour ce modèle?
01.10.2025 - 22:40DROPS Design respondeu:
Bonjour Diane, la laine Drops Silke Alpaca n'est plus en vente. Pour trouver des alternatives utilisez notre conversisseur ICI. Bon crochet!
02.10.2025 - 09:12
![]() Nelly Nabil escreveu:
Nelly Nabil escreveu:
Dear Sir , I am stuck with the picot line in which stitch do I start and on which stitch does the side ends and how many picot stitch do I get after finishing round 10 and how do I count them . Thank you in advance
24.07.2024 - 19:44DROPS Design respondeu:
Dear Nelly, please read the Picot edge section. You start in the middle of the corner of one square and work alongside one side of this square and the same side of the next square. Work as many picots as indicated for your size: 12-15-21 picots. As indicated in the pattern, the last stitch should be: 1 dc around next dtr. Happy crochetting!
27.07.2024 - 20:30
![]() Janice L Zhou escreveu:
Janice L Zhou escreveu:
It says to place a stitch in the side to hold it together. Just ONE stitch? Where does that stitch go? I also figured out that the row 2 of picot edge should skip 1 picot after chaining 6. I made as stated and had to rip that row.
12.08.2023 - 00:28DROPS Design respondeu:
Dear Mrs Zhou, you will sew the bottom stitch on 2 squares, to shape armholes (see picture). On 2nd row of picot edge, you will crochet 1 sc (US-crochet terminology) in the top of each picot, with 6 chains in between (starting in the 2nd chain of the last picot worked). Happy crocheting!
14.08.2023 - 08:55
![]() Angelica escreveu:
Angelica escreveu:
I really love this pattern …thank you lots… so I’ve not crocheted anything like this….so I’m wishing myself luck… please keep up the good designing God Bless
06.08.2021 - 18:21
![]() Virg escreveu:
Virg escreveu:
I am American. Are there triple crochets or double crochets in this pattern? After reading all these questions, I am just wondering.
06.02.2019 - 22:43DROPS Design respondeu:
Dear Virg, make sure to read the US-English pattern using the US-crochet terminology to be sure editing the language by clicking on the arrow (drop menu) under the picture. Happy crocheting!
07.02.2019 - 10:00
![]() Eli Blålid escreveu:
Eli Blålid escreveu:
Er omg 8 riktig? Skal det ikke være noe mellom dobbeltstavene i de 8 første dobbeltstavene og de i lm buene? Arbeidet strammer seg slik det er forklart.
04.07.2018 - 20:15DROPS Design respondeu:
Hei Eli. Ja dette stemmer: det skal være en dobbelstav i hver av de 8 dobbelstavene, og 1 dobbelstav rundt hver av de 8 første luftmaskebuene. God fornøyelse.
06.07.2018 - 15:39
![]() April escreveu:
April escreveu:
I'm attempting to begin the picot edging, and I'm a bit confused. The instructions state to complete 1 sc AROUND the first treble. What does AROUND mean? I would typically work into the stitch not around the stitch. Also mid corner? Which stitch do I use? So please clarify for me. Here are the instructions I'm referring to. Crochet as follows (begin mid corner): 1 sc around first tr,
27.04.2017 - 19:00DROPS Design respondeu:
Dear April, you can work in the tr - there is no picots in the corners, you are working picot edging along either 1 or 2 sides, and not in the corner. Happy crocheting!
28.04.2017 - 09:02
![]() Denise escreveu:
Denise escreveu:
Overall, the translation to American terminology is a bit different than we're used to seeing, but an experienced hooker can figure it out with a bit of effort (understanding that where pattern says "around" in the picot edges it means "in", because they do not mean the same in American terminology). Pretty shrug, though, so here's hoping I can finish it up after my alterations. Thanks for the freebie.
01.04.2016 - 08:18
![]() Denise escreveu:
Denise escreveu:
Coming rather late to the comments, but for anyone coming after me, this really doesn't make a "square", which at least one of the other comments also indicated. It's more of a round-sided motif with stitches that you can call corners, but aren't really "square" corners. That was frustrating me, so I basically abandoned the pattern after round 6 and made my own round 7 & 8 to actually make it "square".
01.04.2016 - 08:14
![]() FATIMA escreveu:
FATIMA escreveu:
GOSTARIA DE DETALHES DO DESIGNE DO SQUARE.OBRIGADO
16.09.2015 - 16:15
|
|
Lake Erie#lakeeriebolero |
|
|
|
|
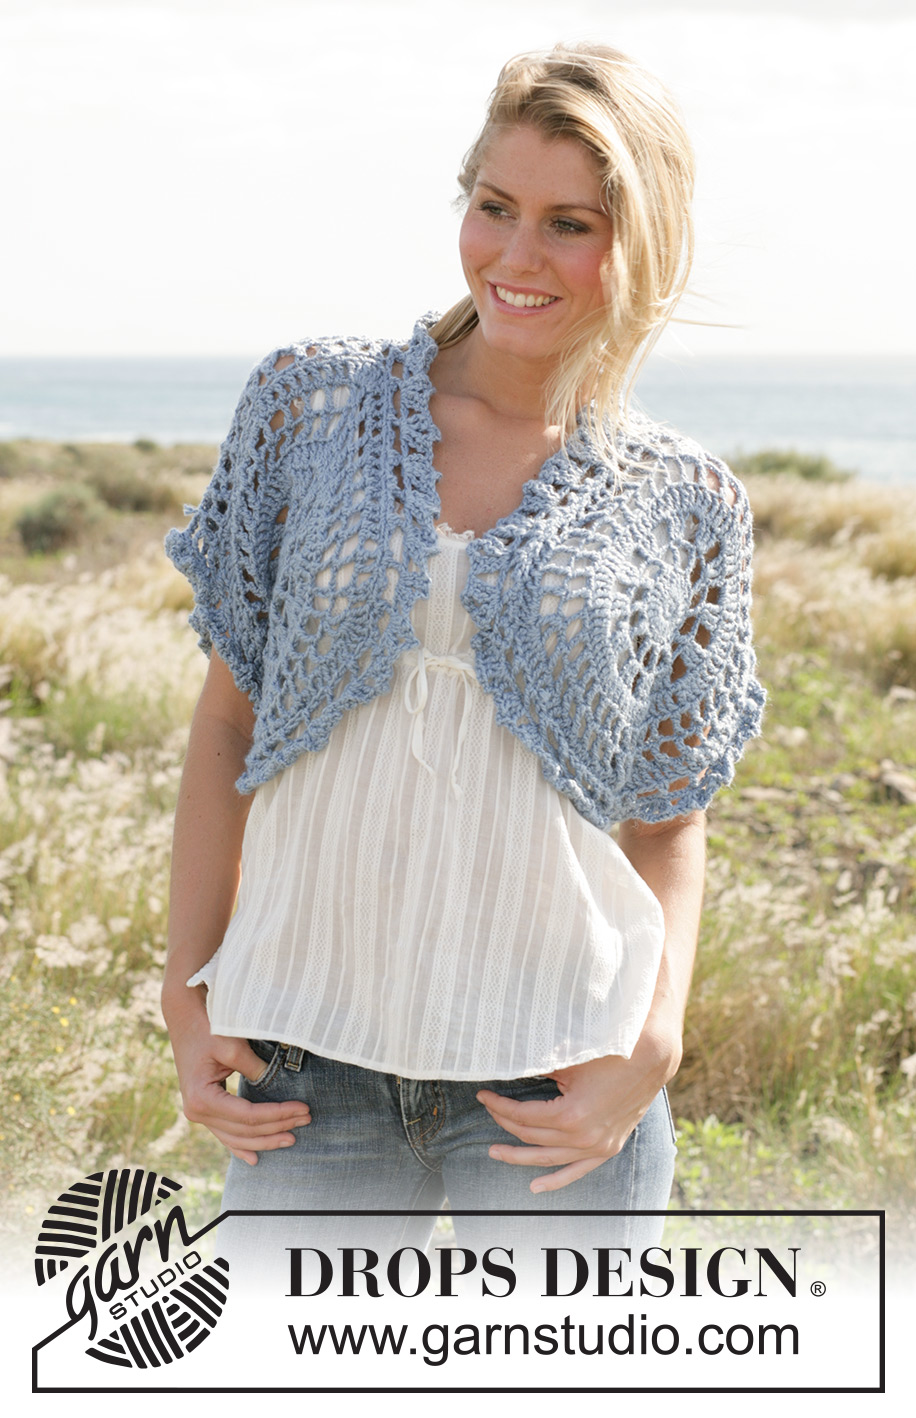
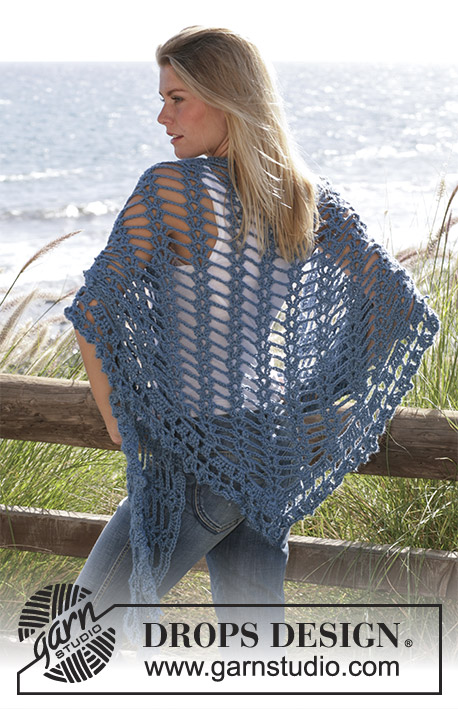
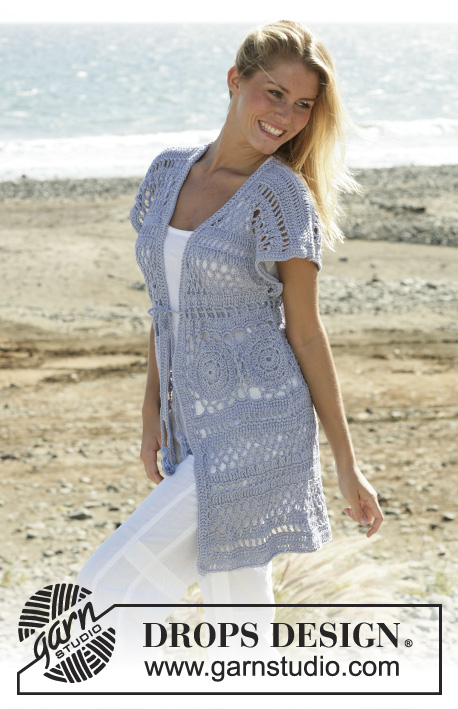
Míni Capa DROPS em croché em “Silke Alpaca”
DROPS 99-20 |
|
|
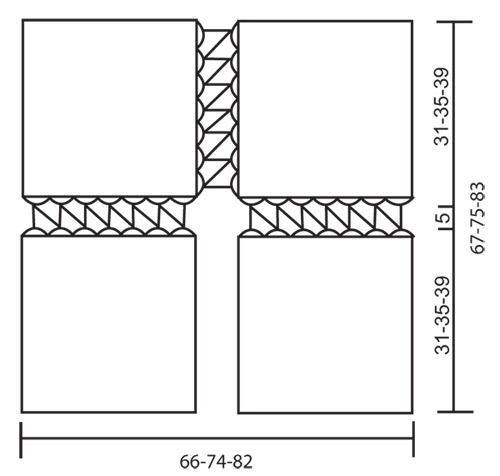
NOTA: Existem termos diferentes de tricô e croché em português de Portugal e do Brasil. TRICÔ : Malha = Ponto Canelado = Barra Ponto Jarreteira = Cordões de Tricô Ponto Liga = Ponto Tricô CROCHÉ : mpa – meio ponto alto pa – ponto alto pad – ponto alto duplo pat – ponto alto triplo pb – ponto baixo pbx – ponto baixíssimo pc – ponto corrente AMOSTRA 3 carreiras do motivo = 6 cm Depois de 5 carreiras, o motivo mede cerca de 18 cm de diâmetro DICA CROCHÉ Substituir o 1.º pad da carreira por 4 pc Substituir o 1.º pb de cada carreira por 1 pc Unir as carreiras com 1 pbx no 1.º ponto da carreira INSTRUÇÕES Tamanho S/M : fazer as carreiras 1 a 8 inclusive Tamanho L : fazer as carreiras 1 a 9 inclusive Tamanho XL/XXL : fazer as carreiras 1 a 10 inclusive MOTIVOS Montar 4 pc, e formar um aro com 1 pbx no 1.º pc C 1 : 8 pb no aro – ver dica croché C 2 : 3 pad em cada pb = 24 pad C 3 : 1 pad, * 3 pc, saltar 1 pad, 1 pad no pad seguinte * repetir de * a * e unir com 1 pbx : 12 pad C 4 : 3 pad no 1.º pad, * 3 pc, saltar 3 pc, 3 pad no pad seguinte * repetir de * a * e terminar a carreira com 3 pc, e 1 pbx para unir = 36 pad C 5 : 1 pad em cada pad e 3 pad em cada aro = 72 pad O motivo mede, agora, 18 cm de diâmetro C 6 : 1 pad no 1.º pad, *3 pc, saltar 1 pad, 1 pad no pad seguinte * repetir de * a * e terminar com 3 pc, 1 pbx para unir = 36 pad C 7 : *1 pad e 3 pc em cada um dos 8 primeiros pad, 1 pad no pad seguinte, 3 pc, 1 pad no mesmo pad (= canto), 3 pc * repetir de * a * num total de 4 vezes, e unir com 1 pbx C 8 : *1 pad em cada um dos 8 pad e em cada um dos 8 primeiros aros, 2 pad no pad seguinte, 3 pad no aro, 2 pad no pad seguinte (= canto), 1 pad no aro seguinte * repetir de * a * 4 vezes e unir com 1 pbx = 96 pad Tamanho S/M : parar aqui; o aro mede 31 cm de diâmetro C 9 : 1 pad em cada pad. Nos 7 pad dos cantos fazer : 2 pad em cada um dos 3 primeiros pad, 3 pad no pad seguinte, 2 pad em cada um dos 3 pad seguintes = 128 pad Tamanho L : parar aqui ; o quadrado mede cerca de 35 cm de um lado ao outro. C 10 : 1 pad em cada pad, nos 15 pad dos cantos fazer : 2 pad em cada um dos 7 primeiros pad, 3 pad no pad seguinte, 2 pad em cada um dos 7 pad seguintes = 192 pad Tamanho XL/XXL : parar aqui; o quadrado mede cerca de 39 cm de um lado ao outro. Fazer mais 3 motivos iguais ORLA PICOT Para 2 motivos, fazer a orla picot ao longo dos 2 lados Para os 2 outros motivos, fazer a orla picot ao longo de um só lado (ver diagrama das medidas) Unir a meio do canto : 1 pb à volta do 1.º pad, * 1 picot (= 3 pc, 1 pbx no 3.º pc a partir da agulha de croché), saltar 1 pad, 1 pb à volta do pad seguinte * repetir de * a * num total de12-15-21 vezes = 12-15-21 picots. Virar, e fazer uma 2.ª carreira da seguinte maneira : crochetar pbx até ao 2.º pc do último picot feito, *6 pc, 1 pb no 2.º pc do picot seguinte * repetir de * a *, cortar e arrematar o fio MONTAGEM Colocar os quadrados, um por cima do outro e crochetá-los um ao outro – ver diagrama. Crochetar nos aros da orla picot da seguinte maneira : 1 pb no 1.º aro do 1.º quadrado, 2 pc, 1 pb no 1.º aro do 2.º quadrado, * 3 pc, 1 pb no aro seguinte do 1.º quadrado, 2 pc, 1 pb no aro seguinte do 2.º quadrado * repetir de * a * até os motivos estarem unidos no lado ORLA Com a agulha de croché 5 mm, fazer a seguinte orla a toda a volta dos ombros : C 1 : 1 pad no 1.º pad, * 2 pc, saltar 3 pad, 1 pad no pad seguinte * repetir de * a * e terminar com 3 pc, 1 pbx para unir C 2 : 2 pad no 1.º pad, * 4 pc, 2 pad no mesmo pad, 1 pc, 2 pad no pad seguinte * repetir de * a * e terminar com 4 pc, 2 pad no mesmo pad, 1 pc, 1 pbx no 1.º pad. Dobrar a míni capa em 2 e costurar 1 ponto em cada canto. |
|
 |
|
Terminou este projecto?Então, identifique as suas fotos com as tags #dropspattern #lakeeriebolero ou mostre-as na galeria #dropsfan. Precisa de ajuda para este modelo?Encontrará 9 turotiais em vídeo, uma rubrica Comentários/Perguntas e muito mais ao visitar a página do modelo em www.garnstudio.com © 1982-2026 DROPS Design A/S. Todos os direitos reservados. Este documento, incluuindo as suas su-secções, tem copyrights. Saia mais o que pode fazer com os nossos modelos no fim de cada uma das páginas do nosso site. |


Com mais de 40 anos no design de modelos de tricô e de croché, a DROPS Design oferece uma das mais vastas colecções demodelos gratuitos na Internet - traduzidos em 17 línguas. Neste dia de hoje, temos 324 catálogos e 12290 modelos - dos quais 12271 estão traduzidos em português.
Trabalhamos com muito empenho para lhe proporcionar o melhor que o tricô e o croché têm para oferecer, para lhe fornecer inspiração e conselhos bem como fios da mais elevada qualidade a preços incríveis! Gostaria de usar os nossos modelos para outros fins que não uso pessoal? Pode ler o que lhe é permitido fazer no Copyright texto que se encontra na parte de baixo de todos os nossos modelos. Bom tricô! Bom croché!
Deixe um comentário acerca do modelo DROPS 99-20
Gostaríamos muito de saber o que tem a dizer-nos acerca deste modelo!
Se deixar uma pergunta acerca do modelo, certifique-se de que escolhe a categoria adequada no formulário abaixo para acelerar o processo relativo à resposta. Os campos obrigatórios estão assinalados com um *.