
Suositut kategoriat
Etsitkö tiettyä lankaa?


Kommentit / Kysymykset (68)
![]() Amy kirjoitti:
Amy kirjoitti:
To whom it may concern: I was wondering when I am knitting the 12 stitches do I knit both ends of the row in garter stitch or just the last stitch of the row. Thank you in advance for your help Amy
31.10.2015 - 16:27DROPS Design vastasi:
Dear Amy, when you are working the 12 sts for mid upper part, work the 1st and last st in garter st. See also the video in previous answer. Happy knitting!
31.10.2015 - 18:20
![]() Amy kirjoitti:
Amy kirjoitti:
To whom it may concern: The problem I am having is I have the 10 stitches on my needle for the top portion of the slipper but when I reach the 7 cm am I suppose to increase on those 10 stitches to reach the number 61 stitches that I need or do I start increasing after after the 7 cm. It says to pick up 12 stitches after I reach the 7 cm on either side of the edge stitch. That is where I am having the problem. Thank you again for your help
29.10.2015 - 04:56DROPS Design vastasi:
Dear Amy, after you have worked the 7 cm over the mid sts, and 10 sts left, pick up 12 sts along both side of the upper foot (along right side of the middle part + along left side of the middle part) + slip sts from thread back on needle = you have a total of 61 sts on needle and your work looks like as in video, time code 5:18 approx. Happy knitting!
29.10.2015 - 09:32
![]() Amy kirjoitti:
Amy kirjoitti:
To whom it may concern: I am still confused as to how many rows I need because there is no explanation for when I go to start the pattern 2 portion of the slipper part and how many increases I need to reach the required amount of sts as well. I tried to watch the video but it was hard to follow when the sped up the knitting part. Thank you again for your help Amy
28.10.2015 - 16:04DROPS Design vastasi:
Dear Amy, wijth pattern 2 portion of the slipper part, do you mean the edge around leg? Work first 4 ridges in garter st (= 8 K rows) but on the 8th K row increase 6 sts evenly - see here how to increase evenly. Then work following A.1 until 35-38 cm, work 4 ridges (8 K rows), but on the 1st of these 8 rows, decrease 6 sts evenly. Happy knitting!
28.10.2015 - 18:26
![]() Amy kirjoitti:
Amy kirjoitti:
Amy 25.10.2015 kl. 00:38: To whom it may concern: I am currently working on the slipper boot pattern and am wondering how I am suppose to do the heel of the slipper when it doesn't say how many rows to do it just say to work back and forth on the needles. If you could let me know it would be appreciated Thank you in advance for your help
25.10.2015 - 15:33
![]() Amy kirjoitti:
Amy kirjoitti:
To whom it may concern: I am currently working on the slipper boot pattern and am wondering how I am suppose to do the heel of the slipper when it doesn't say how many rows to do it just say to work back and forth on the needles. If you could let me know it would be appreciated Thank you in advance for your help
25.10.2015 - 00:38
![]() Yvonne kirjoitti:
Yvonne kirjoitti:
Kan ik de slof ook op 2 pennen breien ?
10.06.2015 - 23:26DROPS Design vastasi:
Hoi Yvonne. Nee, enkele delen van deze slof worden in de rondte gebreid.
11.06.2015 - 13:44
![]() Trudy kirjoitti:
Trudy kirjoitti:
I guess I did not make myself clear. I understand about putting the stitches back on the needles, although I am not sure if we are using three now or four. If we are using four - then I need to know how many stitches are put onto the fourth needle which would be the heal area of the boot.
12.04.2015 - 17:54DROPS Design vastasi:
Dear Trudy, distribute the sts on 4 needle or as in the video, making sure the markers are on the correct places. Happy knitting!
13.04.2015 - 09:32
![]() Elaine Langille kirjoitti:
Elaine Langille kirjoitti:
I don't understand "knit over knit" and "purl over purl" I watched the video, but still didn't know how to do it
11.02.2015 - 03:56DROPS Design vastasi:
Dear Mrs Langille, you work pattern 2 over the 12 sts as follows from RS: 1 edge st in garter st, *K2,P2* over the next 10 sts and finish with 1 edge st in garter st. On next row from WS work 1 edge st in garter st, *P2/K2* over the next 2 sts, 1 edge st in garter st. Happy knitting!
11.02.2015 - 09:14
![]() M Damen kirjoitti:
M Damen kirjoitti:
Een opmerking niet over de sloffen maar over de gebruikte taal. gecontroleerd is met 1 L niet met 2. Deze fout staat al enkele jaren bij ieder patroon.
04.01.2015 - 20:21Dianne Perrin kirjoitti:
Drops 158-47 pattern no an-025 I do not understand the directions for A.1 which is the first row and which x box is a p from rs and which x box is k from ws and which blank box is k from rs and which blank box is p from ws
16.12.2014 - 07:15DROPS Design vastasi:
Dear Mrs Perrin, please click here to read more about diagrams. Row 1 = K5, (P2, K2) repeat (to) a total of 5 times, K3. Row2= K3, (P2, K2) repeat (to) a total of 5 times, P2, K3. Happy knitting!
16.12.2014 - 09:58
|
|||||||
One Step Ahead#onestepaheadslippers |
|||||||
 |
 |
||||||
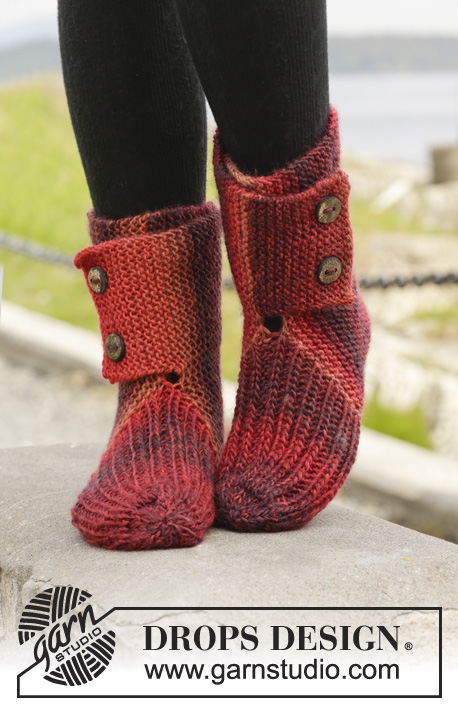
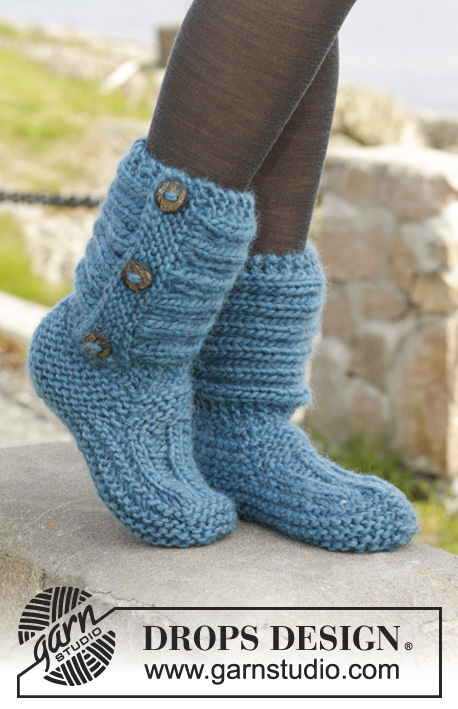
Neulotut DROPS tohvelit ”Andes”-langasta.
DROPS 158-47 |
|||||||
|
AINAOIKEINNEULE suljettuna neuleena: Neulo vuorotellen 1 krs oikein ja 1 krs nurin. AINAOIKEINNEULE tasona: Neulo kaikki kerrokset oikein. MALLINEULE: Katso ruutupiirros A.1. MALLINEULE 2: 1. krs (= oikea puoli): *2 o, 2 n*, toista *-* kunnes jäljellä on 2 s, 2 o. 2. krs (= nurja puoli): Neulo s:t siten miltä ne näyttävät. Toista 2. krs:ta. ---------------------------------------------------------- TOHVELI: Neulo aluksi varren alaosan reunus, neulo sitten jalkaosa. Neulo lopuksi varsi poikittain. VARSI: Luo 37-37-39 s sukkapuikoille nro 6 Andes-langalla. Neulo AINAOIKEAA suljettuna neuleena (kts. selitys yllä), kunnes työn pituus on n. 4 cm ja olet viimeksi neulonut nurjan krs:n. TARKISTA NEULETIHEYS! JALKAOSA: Neulotaan tasona. Jätä ensimmäiset 10 s työhön, siirrä loput 27-27-29 s apulangalle. Neulo nyt työn 10 s:lla päällisosa MALLINEULEENA 2 (kts. selitys yllä) ja luo SAMALLA 2 seuraavan krs:n loppuun 1 reunas (reunasilmukoilla neulotaan AINAOIKEAA, kts. selitys yllä) = 12 s. Kun päällisosan pituus on 7-8½-10 cm, päätä kummankin reunan reunas = 10 s. Ota apulangalla odottavat s:t takaisin työhön ja poimi päällisosan kummastakin reunasta (yhden reunasilmukan sisäpuolelta) 12-14-16 s = 61-65-71 s. KAIKKI MITAT OTETAAN JATKOSSA TÄSTÄ! Kiinnitä 1 merkkilanka päällisosan 10 s:n keskelle (= kärjen keskietu) ja 1 merkkilanka kantapään keskelle = 30-32-35 s kummassakin reunassa merkkilankojen välissä. Jatka neulomalla ainaoikeaa suljettuna neuleena. Kun työn pituus on 2 cm, neulo kummankin merkkilangan molemmin puolin 2 s oikein yhteen (työstä kapeni 4 s). Toista tällaiset kavennukset joka 2. krs, kunnes työn pituus on 5-5-6 cm. Päätä loput s:t kerralla. Ompele sauma jalan alta uloimmista silmukanreunoista, jottei saumasta tulisi paksu. POIKITTAIN NEULOTTU VARSI: Neulotaan tasona. Luo 22 s puikoille nro 6 Andes-langalla. Neulo 8 krs ainaoikeaa ja lisää SAMALLA viimeisellä krs:lla tasavälein 6 s = 28 s. Neulo sitten mallineuletta piirroksen A.1 mukaisesti (= 28 s), kunnes työn pituus on n. 35-36-38 cm. Neulo 8 krs ainaoikeaa ja kavenna SAMALLA 1. krs:lla tasavälein 6 s = 22 s. Päätä s:t. Aseta päätösreuna luomisreunan päälle ja kiinnitä 3 koristenappia varren ainaoikein -neuleeseen. VIIMEISTELY: Kiinnitä poikittain neulottu varsi jalkaosan varren luomisreunaan (eli ohjeen alussa tehdyn varren luomisreunaan) siten, että napit jäävät tohvelin ulkoreunaan ja aukko jää työn takaosaan (ompele työn nurjalta puolelta, jotta sauma jäisi huomaamattomaksi). Neulo toinen tohveli samoin ja tarkista, että varren aukko tulee työn vastakkaiseen sivuun. |
|||||||
Ruutupiirroksen selitykset |
|||||||
|
|||||||
 |
|||||||
Oletko tehnyt tämän mallin?Tägää tällöin kuviasi #dropspattern #onestepaheadslippers tai lähetä kuvat #dropsfan galleriaan. Tarvitsetko apua tämän ohjeen kanssa?Löydät 18 ohjevideota, kommentteja/kysymyksiä ja muuta osoitteessa www.garnstudio.com © 1982-2026 DROPS Design A/S. Pidätämme kaikki oikeudet. Tämä tiedosto ja kaikki sen alatiedostot on suojattu tekijänoikeuslailla. Lue lisää siitä, mitä voit tehdä ohjeillamme, verkkosivujemme jokaisen ohjeen alaosasta. |
|||||||


DROPS Design on toiminut neule- ja virkkausalalla yli 40 vuotta ja meillä on yksi kaikkein laajin valikoima ilmaisia ohjeita verkossa - käännettynä 17 kielelle. Tänään meiltä löytyy 324 lehteä ja 12290 ohjetta - joista 11709 ohjetta on käännetty suomeksi.
Työskentelemme ahkerasti, jotta voisimme antaa teille kaikkein parhaimpia neule- ja virkkausohjeita, inspiraatiota ja neuvoja sekä korkealaatuisia lankoja todella edulliseen hintaan! Haluaisitko käyttää ohjeitamme muuhun kuin henkilökohtaiseen käyttöön? Voit lukea säännöistä ohjeiden Tekijänoikeus -tekstissä, joka löytyy kaikkien ohjeidemme alapuolelta. Hauskoja hetkiä käsitöiden parissa!
Lisää kommentti ohjeeseen DROPS 158-47
Haluamme mielellämme kuulla mielipiteesi tästä ohjeesta!
Mikäli haluat esittää kysymyksen, valitse oikea kategoria alla olevasta valikosta - tällä tavoin saat vastauksen nopeammin. Pakolliset kentät on merkitty tähdellä *.