
Suositut kategoriat
Etsitkö tiettyä lankaa?


Kommentit / Kysymykset (114)
![]() Carole Saidah kirjoitti:
Carole Saidah kirjoitti:
Bonjour, pour le bandeau, est ce que les diminutions se font sur l'endroit du travail comme pour les augmentations ? Merci pour votre réponse
27.12.2022 - 19:55DROPS Design vastasi:
Bonjour Mme Saidah, tout à fait, on doit diminuer le nombre de mailles envers, vu sur l''endroit, on va tricoter ainsi 2 m ens à l'envers sur l'endroit. Bon tricot!
02.01.2023 - 10:33
![]() Brenda kirjoitti:
Brenda kirjoitti:
Any chance of doing a video tutorial on you-tube. I really like this headband, but am confused with the written pattern.
01.12.2022 - 01:02DROPS Design vastasi:
Dear Brenda, you will find videos relative to the techniques used in that pattern at the bottom of the pattern, feel free to ask your question here so that we can help you further in the part of the pattern you don't understand. Happy knitting!
01.12.2022 - 11:46
![]() Kathy kirjoitti:
Kathy kirjoitti:
I am on the first increase row to 24 stitches and following the established rib pattern but there are not enough stitches to complete the rib pattern! What do I do?
11.10.2021 - 01:08DROPS Design vastasi:
Hi Kathy, You increase all P1 to P2 (5 stitches increased) which gives you 24 stitches. You now have 1 stitch in garter stitch, 5 x K2, P2 (20 stitches), K2 and 1 stitch in garter stitch = 24 stitches. Happy knitting!
11.10.2021 - 07:04
![]() Iris kirjoitti:
Iris kirjoitti:
Hallo! Ich bin ziemliche Anfängerin und komme mit der Anleitung nicht ganz zurecht. Betrifft das Fertigstellen des Stirnbands mit den Maschen auf einem Hilfsfaden. Habe leider auch kein passendes Videotutorial dazu finden können. Wie lange muß der Hilfsfaden sein? und wird er mithineingenäht? Danke im Voraus für die Hilfe!
01.01.2021 - 22:03DROPS Design vastasi:
Liebe Iris, die stillgelegten Maschen werden wie in diesem Video zusammen mit der Anschlagskante - wie in diesem Video zusammen genäht, dh so eine "Mischung" je nach den Maschen. Viel Spaß beim zusammennähen!
04.01.2021 - 14:43
![]() Diana Connolly kirjoitti:
Diana Connolly kirjoitti:
This increase is called a make 1 in English. If you’d written it like this many here wouldn’t have had so many problems, make 1 is a term used when you increase by picking up the loop between stitches. Hope this helps.
27.10.2020 - 21:20
![]() Kirsty kirjoitti:
Kirsty kirjoitti:
Hi, wow many thanks for your helpful video reply. I really appreciate it. Love your site. Well wishes, Kirsty
28.06.2020 - 20:24
![]() Sherie Rodrigues kirjoitti:
Sherie Rodrigues kirjoitti:
To all the knitters who commented and asked questions, and to all the staff who answered the questions, I say THANK YOU. Without your help I may not have worked the pattern out by myself, but I am so glad I did. It is simple, when the light bulb goes off. I would suggest you look at the questions and answers until it makes sense. I do so LOVE this pattern . Thanks again everyone. Regards and happy knitting.
10.06.2020 - 15:30
![]() Karren kirjoitti:
Karren kirjoitti:
Thank you so much for the guidance in my pattern. I am almost finished and think I will love it. Karren
18.04.2020 - 01:05
![]() Karren kirjoitti:
Karren kirjoitti:
I do not understand what I am supposed to do on the wrong side of the pattern in between the increase rows. The increases occur on the right side. Does the ribbing continue through out the whole pattern?
17.04.2020 - 00:53DROPS Design vastasi:
Dear Karren, you increase in the P-sections seen from RS (these sts are worked K from WS), when working from WS you will K over K and P over P, and the number of K stitches from WS will increase (then decrease on the 2nd half of piece) as the P stitches from WS increases. Happy knitting!
17.04.2020 - 09:01
![]() Judith kirjoitti:
Judith kirjoitti:
I was sold a yarn that gets 2 st/inch on an 8 needle and is not too stiff. will the pattern work as written? Do I knit first stitch, then do the edge stitch? hat seem strange to me, so I am asking. I thought the edge stitch would be first. Thank you
16.12.2019 - 04:45DROPS Design vastasi:
Dear Judith, please check your tension - read more here about tension. Pattern is worked in rib with 1 edge stitch in garter stitch on each side. Happy knitting!
16.12.2019 - 09:10
|
|
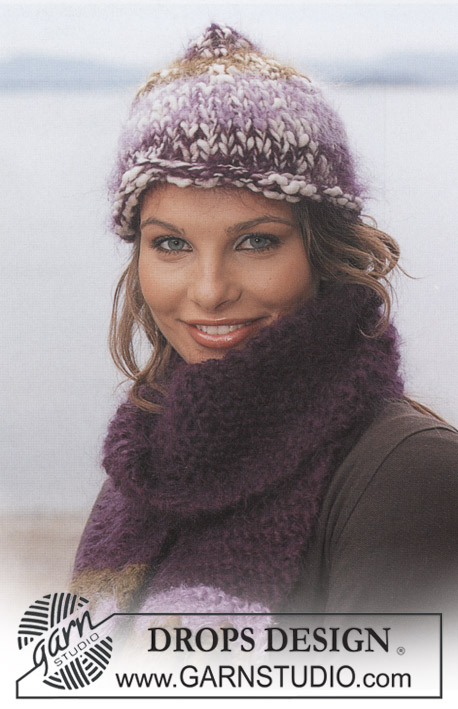
Saturn Rings |
|
|
|
|
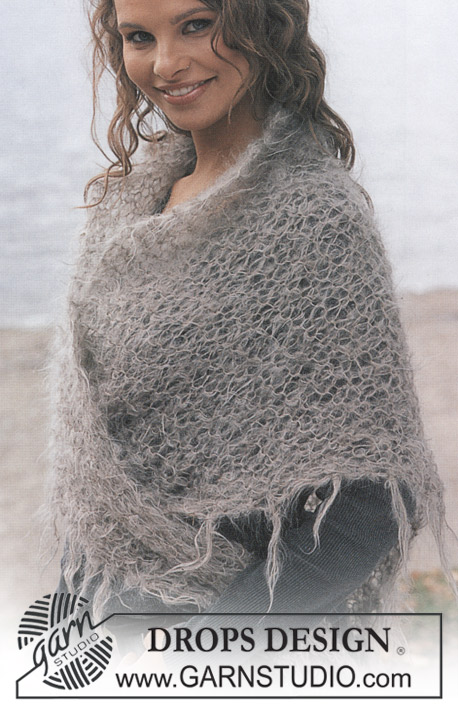
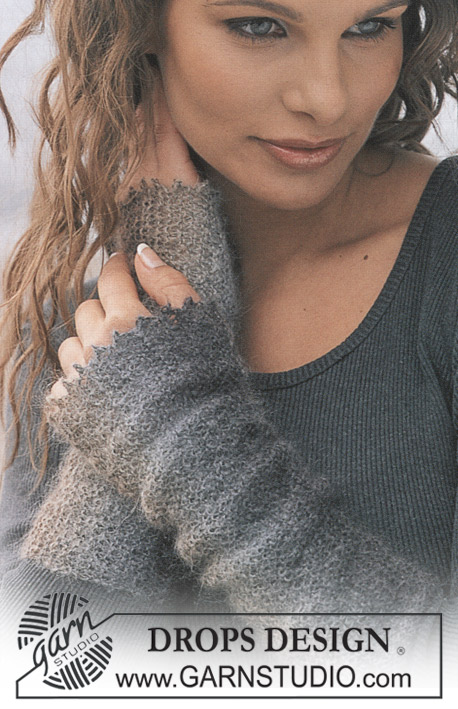
PANTA Alaska langasta
DROPS 86-10 |
|
|
Neuletiheys: 18 s ja 23 krs sileää puikoilla nro 4,5 = 10 x 10 cm. Ainaoikeinneule: Neulo kaikki krs:t oikein. Työohje: Aloita keskeltä takaa. Luo 19 s ja neulo: 1 s ainaoikeinneuletta, 5 x *2 o, 1 n*, 2 o, 1 s ainaoikeinneuletta. Kun työ on 8 cm, lisää 1 s jokaisessa nurjassa raidassa = *2 o, 2 n* = 24 s. Kun työ on 14 cm, lisää 1 s jokaisessa nurjassa raidassa = *2 o, 3 n* = 29 s. Kun työ on 18 cm, lisää 1 s jokaisessa nurjassa raidassa = *2 o, 4 n* = 34 s. Kun työ on 21 cm, lisää 1 s jokaisessa nurjassa raidassa = *2 o, 5 n* = 39 s. Kun työ on 24 cm, kiinnitä merkkilanka työhön = keskikohta. Neulo toinen puolikas peilikuvana, ts. kavenna nurjissa raidoissa aina 1 s samoissa kohdissa missä lisättiin kunnes puikolla on taas 19 s. Kun työ on 48 cm, ompele s silmukkapistoin aloitusreunaan. |
|
Oletko tehnyt tämän mallin?Tägää tällöin kuviasi #dropspattern tai lähetä kuvat #dropsfan galleriaan. Tarvitsetko apua tämän ohjeen kanssa?Löydät 16 ohjevideota, kommentteja/kysymyksiä ja muuta osoitteessa www.garnstudio.com © 1982-2026 DROPS Design A/S. Pidätämme kaikki oikeudet. Tämä tiedosto ja kaikki sen alatiedostot on suojattu tekijänoikeuslailla. Lue lisää siitä, mitä voit tehdä ohjeillamme, verkkosivujemme jokaisen ohjeen alaosasta. |


DROPS Design on toiminut neule- ja virkkausalalla yli 40 vuotta ja meillä on yksi kaikkein laajin valikoima ilmaisia ohjeita verkossa - käännettynä 17 kielelle. Tänään meiltä löytyy 325 lehteä ja 12298 ohjetta - joista 11792 ohjetta on käännetty suomeksi.
Työskentelemme ahkerasti, jotta voisimme antaa teille kaikkein parhaimpia neule- ja virkkausohjeita, inspiraatiota ja neuvoja sekä korkealaatuisia lankoja todella edulliseen hintaan! Haluaisitko käyttää ohjeitamme muuhun kuin henkilökohtaiseen käyttöön? Voit lukea säännöistä ohjeiden Tekijänoikeus -tekstissä, joka löytyy kaikkien ohjeidemme alapuolelta. Hauskoja hetkiä käsitöiden parissa!
Lisää kommentti ohjeeseen DROPS 86-10
Haluamme mielellämme kuulla mielipiteesi tästä ohjeesta!
Mikäli haluat esittää kysymyksen, valitse oikea kategoria alla olevasta valikosta - tällä tavoin saat vastauksen nopeammin. Pakolliset kentät on merkitty tähdellä *.