
Popular categories
Looking for a yarn?


|
|||||||||||||||||||
Jude |
|||||||||||||||||||
 |
 |
||||||||||||||||||
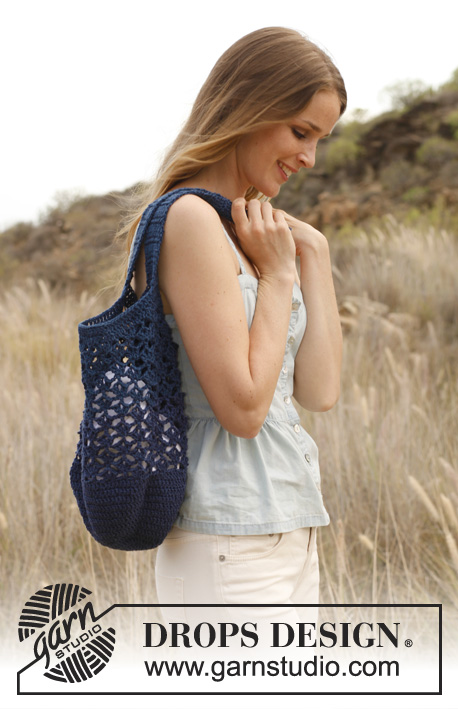
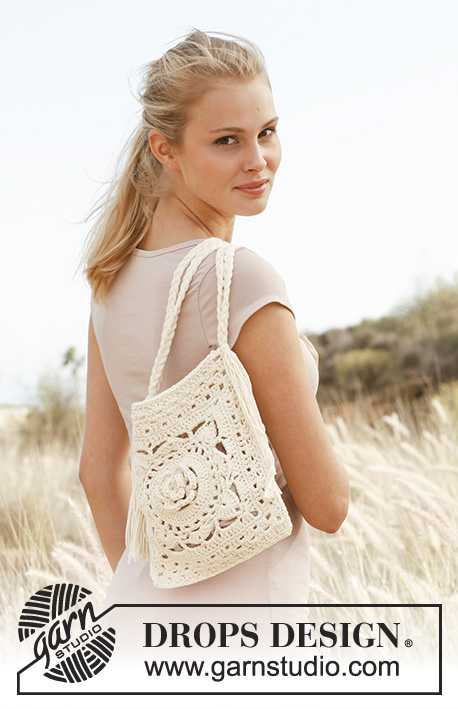
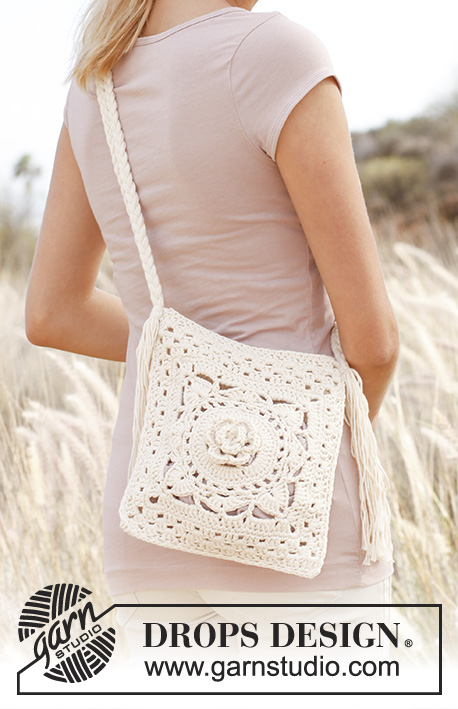
Crochet DROPS bag with plaited shoulder strap in ”Paris”.
DROPS 146-13 |
|||||||||||||||||||
|
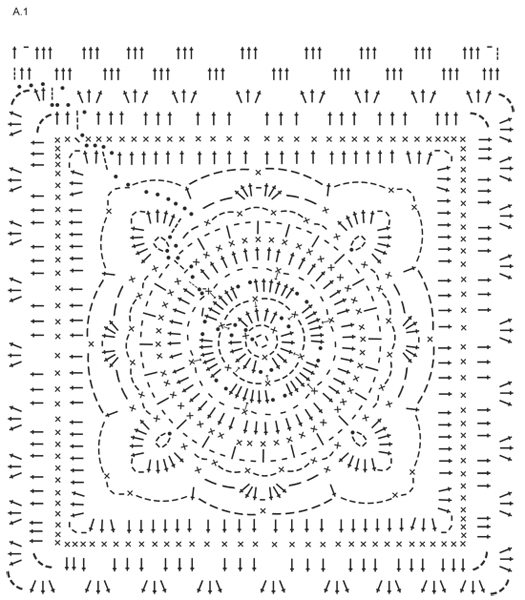
CROCHET INFO: At beg of sc round, replace first sc with 1 ch and finish round with 1 sl st in ch from beg of round. Replace first dc at beg of dc round with ch 3, finish the round with 1 sl st in 3rd ch from beg of round. ---------------------------------------------------------- BAG: Beg with a crochet flower in 2 layers and then continue outwards to 1 square. CROCHET SQUARE WITH FLOWER: See diagram A.1, i.e. work as follows: With Paris ch 4 on hook size 4 mm / G/6 and form a ring with 1 sl st in first ch. ROUND 1: Work * 1 sc in ch-ring, ch 3 *, repeat from *-* a total of 3 times and finish with 1 sl st in first sc from beg of round = 3 ch-spaces. ROUND 2: Work as follows in every ch-space: 1 sl st, 5 dc and 1 sl st = 3 leaves. Turn piece - work next round on the back of the flower. ROUND 3: ch 1, work 1 sc around first sc from 1st round, ch 4, work 1 sc at the bottom in the middle of first leaf from 2nd round, * ch 4, work 1 sc around next sc from 1st round, ch 4, work 1 sc at the bottom in the middle of next leaf from 2nd round *, repeat from *-* until a total of 5 ch-spaces have been worked, finish with 4 ch and 1 sl st in first sc from beg of round = 6 ch-spaces. Turn piece - work next round on the front of the flower. ROUND 4: Work as follows in every ch-space: 1 sl st, 6 dc and 1 sl st = 6 leaves. Turn piece - work next round on the back of the flower. ROUND 5: ch 1, 1 sc in the middle of bottom on 1st leaf, * ch 5, 1 sc in the middle of bottom on next leaf *, repeat from *-* a total of 5 times and finish with ch 5 and 1 sl st in first sc from beg of round = 6 ch-spaces. Turn piece - work next round and every round onwards on the front of the flower. ROUND 6: ch 1, 1 sl st in first ch-space, ch 3 (= 1 dc), 7 dc in same ch-space, then work 8 dc in every ch-space, finish with 1 sl st in 3rd ch from beg of round = 48 dc. ROUND 7: ch 1, then work 1 sc in every dc from previous round, finish round with 1 sl st in first sc from beg of round = 48 sc. ROUND 8: 4 ch (= 1 hdr + 2 ch), skip 1 sc, * 1 hdr in next sc, 2 ch, skip 1 sc*, repeat from *-* the entire round and finish with 1 sl st in 2nd ch from beg of round = 24 hdr with 2 ch between each. ROUND 9: 1 sl st in first ch-space, * ch 5, 1 sl st in 5th ch from hook, 1 sc in next ch-space, ch 2, 1 sc in next ch-space, ** ch 3, 1 sc in next ch-space **, repeat from **-** 3 times in total, ch 2, 1 sc in next ch-space *, repeat from *-* 4 times in total but finish last repetition with 1 sl st in sl st at beg of round (instead of 1 sc in next ch-space). ROUND 10: 1 sl st in 5-ch-space, ch 3 (= 1 dc), in same ch-space work 4 dc + ch 3 + 5 dc (= 1 corner), * 1 sc in next ch-space, ch 2, skip 1 ch-space, in next 3-ch-space work 3 dc + ch 1 + 3 dc, ch 2, ** skip 1 ch-space, 1 sc in next ch-space, in 5-ch-space work 5 dc + ch 3 + 5 dc *, repeat from *-* 4 times in total but finish last repetition after **, then work 1 sl st in 3rd ch from beg of round. ROUND 11: Work sl sts until ch-space in the middle of first dc-group in the corner. Ch 4 (= 1 sc + 3 ch), 1 sc in same ch-space, * ch 6, 1 dc in next sc, ch 5, 1 sc in ch in the middle of next dc-group, 5 ch **, 1 dc in next sc, ch 6, in ch-space in the middle of dc-group in the corner work 1 sc + ch 3 + 1 sc *, repeat from *-* 4 times in total but finish last repetition after **, then work 1 sl st in 1st ch from beg of round. ROUND 12: 1 sl st in ch-space in the corner, ch 3 (= 1 dc), 2 dc + ch 3 + 3 dc in same ch-space, * 6 dc in next ch-space, 4 dc in next ch-space, 4 dc in next ch-space, 6 dc in next ch-space **, in ch-space in the corner work 3 dc + ch 3 + 3 dc *, repeat from *-* 4 times in total but finish last repetition after **, then work 1 sl st in 3rd ch from beg of round. ROUND 13: Work sl sts until ch-space in the corner, ch 1, 5 sc in same ch-space, then work 1 sc in every dc and 6 sc in ch-space in every corner the entire round, finish round with 1 sl st in ch from beg of round = 128 sc. ROUND 14: ch 3 (= 1 dc), 1 dc in each of the next 2 sc, ch 3, 1 dc in each of the next 3 sc (= corner), * skip 2 sc, (1 dc in each of the next 3 sc, skip 1 sc) **, repeat from (-) 6 times in total, 1 dc in each of the next 3 sc, ch 3, 1 dc in each of the next 3 sc (= corner) *, repeat from *-* 4 times in total but finish last repetition after **, then work 1 sl st in 3rd ch from beg of round. ROUND 15: Work sl sts until ch-space in the corner, ch 3 (= 1 dc) 2 dc + ch 3 + 3 dc in same ch-space, then work 3 dc between every dc-group and 3 dc + ch 3 + 3 dc in ch-space in every corner, finish round with 1 sl st in 3rd ch from beg of round. Now work back and forth only over one side of square as follows (= at the top of bag): ROW 1: Work sl sts until the middle of ch-space in the corner, turn piece, ch 3 (= 1 dc), 2 dc in same ch-space, then work 3 dc between every dc-group from previous row and finish with 3 dc in ch-space in the corner, turn piece = 10 dc-groups. ROW 2: ch 4 (= 1 dc + 1 ch), then work 3 dc between every dc-group until 9 dc-groups have been worked, finish row with ch 1 and 1 dc in last dc on row. Fasten off. Work another square with flower. Place the 2 squares tog, WS against WS, and work tog along three of the sides as follows (i.e. do not work along the one side with 2 extra rows and work through both squares at the same time): 1 sl st in outermost st, ch 1, skip 1 st, 1 sc in next st, * ch 1, 1 sc before next dc-group, ch 1, 1 sc in the middle dc in dc-group *, repeat from *-* along the 3 sides on bag (where square was made longer = opening at the top of bag). Then work a finishing edge around the opening on bag with 1 sc in every st the entire round. PLAITED SHOULDER STRAP: Cut 18 strands Paris of 2 m/2.2 yds each and hold the strands tog. Make a loose knot approx. 30 cm / 12" in from the end. Divide the long strands in 3 equal parts with 6 strands in each part and plait a classic plait until approx. 30 cm / 12" strands remain, make a loose knot at the end. Plait another plait the same way (2 plaits = approx. 1 ball Paris). Undo the knots in each end, hold the 2 plaits tog. Take a new strand and wrap it tightly around these 2 plaits (approx. 30 cm / 12" in from the end), fasten the strand tightly (the 2 plaits have now been locked). Take a new strand and wrap it tightly around plaits the same way in the other end, fasten the strand tightly. Sew the 2 plaits on the bag in each side of bag, fasten tightly. Cut the yarn ends to desired length. |
|||||||||||||||||||
Diagram explanations |
|||||||||||||||||||
|
|||||||||||||||||||
|
|||||||||||||||||||
|
Have you made this or any other of our designs? Tag your pictures in social media with #dropsdesign so we can see them! Do you need help with this pattern?You'll find tutorial videos, a Comments/Questions area and more by visiting the pattern on garnstudio.com. © 1982-2024 DROPS Design A/S. We reserve all rights. This document, including all its sub-sections, has copyrights. Read more about what you can do with our patterns at the bottom of each pattern on our site. |
|||||||||||||||||||


With over 40 years in knitting and crochet design, DROPS Design offers one of the most extensive collections of free patterns on the internet - translated to 17 languages. As of today we count 304 catalogs and 11422 patterns - 11417 of which are translated into English (US/in).
We work hard to bring you the best knitting and crochet have to offer, inspiration and advice as well as great quality yarns at incredible prices! Would you like to use our patterns for other than personal use? You can read what you are allowed to do in the Copyright text at the bottom of all our patterns. Happy crafting!
Comments / Questions (46)
Soy principiante gracias por sus enseñanzas seria de gran ayuda el tutorial
20.10.2019 - 07:57Skvělý návod, děkuji - taška vypadá moc hezky :-)
01.08.2019 - 07:04Hi, I have just finished making this beautiful bag and now I am trying to figure out how to do the strap. I have no idea what a plait braid is so I went to youtube to find some answers but can't seem to find one. So I started using another flat braid technique, which I would be ok with but your instructions tell you to cut 18 strands, divide into 3 sections with 6 strands a piece. Then it tells you to make two plait braids, what am I supposed to do with the other 6 strands? 6 strands left.
18.07.2019 - 16:08DROPS Design answered:
Dear Mrs Bureau, you are making a total of 2 plaits, with each plait made of 18 strands (3 sections of 6 threads). Happy crocheting!
19.07.2019 - 07:24Can I substitute Sugar n Cream yarn for the yarn listed in the pattern?
05.07.2019 - 17:23DROPS Design answered:
Dear Stephanie, the DROPS patterns are written and made available free to support the DROPS yarns. I hope you will understand that we cannot help you with substitutions of yarns made by other companies. However, you should always make a swatch, check gauge and make necessary changes accordingly. Happy Crafting!
07.07.2019 - 17:17Can you tell me please the actual shade of the pink bag.
23.06.2019 - 16:03DROPS Design answered:
Dear Barbara, in fact I am not sure which "pink" do you mean - this bag is all crochet with off white. But you can choose your favorite colour from actual color shade of DROPS Paris - here . Happy crocheting!
23.06.2019 - 16:46On pattern Jude the bag states crochet in two layers. Does this mean two strands of yarn. The yarn is doubled?
08.06.2019 - 13:15DROPS Design answered:
Dear Diane, the yarn is not doubled, you work with just one strand. Two layers only means two layers of leaves in central flower. Happy crocheting!
08.06.2019 - 20:09Ilana Siaxate wrote:
Can I make this pattern to sell online for charity?
16.06.2018 - 07:20DROPS Design answered:
Dear Mrs Siaxate, you will find all relevant informations under our copyright at the very bottom of the page. Happy crocheting!
18.06.2018 - 08:03På varv 14 står det efter **: "upprepa från (-) totalt 6 ggr" men varken - eller (-) finns i texten... Vad är det som ska upprepas just där? Senare står att man ska upprepa *-* men avsluta sista rep vid **
21.01.2018 - 15:00DROPS Design answered:
Vid (-) ska du upprepa det som står inom parenteserna, vid *-* ska du upprepa det som står mellan stjärnorna och sedan avsluta den sista rapporten vid de två stjärnorna **.
22.01.2018 - 17:53Vad är måttet på den färdiga axelremmen enligt er beskrivning? Jag vill gärna använda väskan "cross-over" så den måste vara tillräckligt lång.... Tack för underbart mönster!
05.10.2015 - 09:43DROPS Design answered:
Hej Marika, har tyvärr inte måttet, men tror det räcker fåor "cross-over". Lycka till!
05.10.2015 - 15:15Was ist mit dieser Anleitung gemeint ich komme mit den Sternchen nicht zurecht? Mfg
13.08.2015 - 15:03DROPS Design answered:
Die Sternchen zeigen immer an, was wiederholt werden soll. Das, was in Sternchen steht, ist ein Rapport, den Sie so oft wie genannt häkeln. Nur als Beispiel: * 1 Lm, 1 fM *, von *-* weitere 3 x wdh, dann häkeln Sie immer 1 Lm, 1 fM, bis Sie das insgesamt 4 x gemacht haben. Sie können das Viereck aber auch nach dem Diagramm häkeln, wenn Sie damit besser zurechtkommen, die schriftliche Anleitung entspricht dem Diagramm.
16.08.2015 - 17:45