
Suositut kategoriat
Etsitkö tiettyä lankaa?















Kommentit / Kysymykset (202)
 Pitschon Martine kirjoitti:
Bonjour, je viens de terminer ce joli gilet en taille 6 ans. Mais il fait des jaloux(ses) chez les plus grand(e)s... Ne pourrait-on pas avoir les explications en tailles femmes ?... Merci !!!
30.04.2018 - 17:57DROPS Design vastasi:
Bonjour Mme Pitschon, vous avez ici un modèle femme dont la construction est différente mais qui ressemble à celui-ci. Bon tricot!
02.05.2018 - 09:24Lesley Baker kirjoitti:
I am confused about the increase to either side of the inserted marker. I am knitting the size 6-9 months cardigan. I have increased by 2 stitches 22 times (so 44 stitches) but have now reached the 9cm point and am supposed to only continue knitting over the left 65 stitches? But I am equally still supposed to increase next to the marker another 18 times (I.e. 40 times in total) - how is that done if I am not knitting these stitches at present?
25.04.2018 - 23:45DROPS Design vastasi:
Dear Mrs Baker, make sure to get and keep correct tension (= 24 sts x 38 rows = 10 x 10 cm) - you increase in 2nd size on every other row a total of 40 times on each side of the st with marker and at the same time when piece measures 9 cm work over the 65 sts on the left side (seen from RS = end of row from RS) for back piece, put all remaining sts on a st holder, they will be worked back later for front piece. Happy knitting!
26.04.2018 - 08:49
 Kerry Patton kirjoitti:
I have completed the first half of the sweater, however the front half is about 2 inches wider than the back half. Not sure how to fix this! Any suggestions are welcome! Thanks!
25.04.2018 - 17:10DROPS Design vastasi:
Dear Mrs Patton, did you get and kept the correct tension? Front piece should be somewhat longer than back piece for button band, maybe you can arrange then the width when sewing the buttons on front piece. Happy knitting!
26.04.2018 - 08:30
Sandrine kirjoitti:
Je suis à l'étape où je dois insérer un marqueur dans la 2è maille (appelons ce rang le rang n°2), puis augmenter de part et d'autre. Or je ne comprends pas car si j'insère le marqueur dans la maille, ce marqueur reste au niveau du rang n°2, et lorsque je tricote le rang 3 puis que je dois augmenter au rang n° 4, le marqueur est 2 rangs en-dessous. Dois-je comprendre qu'il faut placer le marqueur après la 1ère maille au lieu de "dans la 2è maille"?
17.03.2018 - 12:08DROPS Design vastasi:
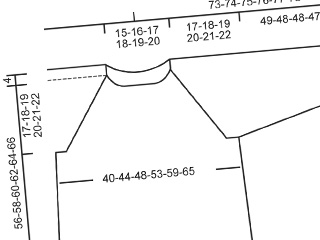
Bonjour Sandrine, votre marqueur doit rester dans cette maille tout du long des augmentations, cette maille avec le marqueur correspond à la ligne diagonale dans le schéma des mesures: vous augmentez ensuite avant cette maille et après cette maille = le nombre de mailles avant le marqueur va donc augmenter. Bon tricot!
19.03.2018 - 09:22
Sandrine kirjoitti:
Je suis à l'étape où je dois insérer un marqueur dans la 2è maille (appelons ce rang le rang n°2), puis augmenter de part et d'autre. Or je ne comprends pas car si j'insère le marqueur dans la maille, ce marqueur reste au niveau du rang n°2, et lorsque je tricote le rang 3 puis que je dois augmenter au rang n° 4, le marqueur est 2 rangs en-dessous. Dois-je comprendre qu'il faut placer le marqueur après la 1ère maille au lieu de "dans la 2è maille"?
17.03.2018 - 11:53
Gaby kirjoitti:
Sorry for the confusion. I understand the increasing at each end. But is 1 row equals to just one RS? or one RT and one WS?
08.03.2018 - 16:40DROPS Design vastasi:
Dear Gaby, 1 row is when you work all sts on needle either from RS or from WS. When you work 2 rows (= 1 from RS + 1 from WS) you get a ridge of the garter st. Happy knitting!
09.03.2018 - 09:40
Gaby Swank kirjoitti:
Sorry for the confusion. I understand the increasing at each end. But is 1 row equals to just one RS? or one RT and one WS?
08.03.2018 - 16:23
Gaby Swank kirjoitti:
When doing the sleeve it says to add a stitch at each end every 8th row. Do you count one row to as one right and one wrong side or is it counted as one row being a ½ row?
08.03.2018 - 14:55DROPS Design vastasi:
Dear Mrs Swank, when increasing 1 st on each side of sleeve, increase 1 st at the beg of row from RS and 1 st at the end of the same row, work 7 rows without increasing and repeat these 8 rows starting from RS. Happy knitting!
08.03.2018 - 15:29
Nicole kirjoitti:
En suivant les explications le devant du gilet se présente en pointe ; il me manque la partie inférieure qui semble être tricotée dans le sens horizontal. Comment puis-je y parvenir ?
25.02.2018 - 22:56DROPS Design vastasi:
Bonjour Nicole, veillez à bien augmenter de chaque côté de la maille avec le marqueur, le nombre de mailles avant le marqueur va augmenter et la ligne diagonale dans le schéma représente cette maille avec le marqueur. La partie droite (avant le marqueur) est crée par le début/la fin des rangs avant ce marqueur (avec les augmentations qui forme l'angle). Bon tricot!
26.02.2018 - 09:58
 Pam kirjoitti:
I have made it through the sleeve and to the part where one increases on either side of stitch to form the front. In the photo, there seems to be a discernible diagonal line. I’ve only knitted 5 increase rows so far., but I don’t see any sign of this yet. I made increases by yo and have been knitting in the back to avoid a hole. It occurs to me that here the hole may be needed to give the desired effect. Any useful information would be appreciated.
05.02.2018 - 05:25DROPS Design vastasi:
Dear Pam, the diagonal is made through the sts increased on each side of the st with marker (see dotted line in chart), ie marker should stay in this st and increase should be worked on each side of this st (there will be always more st before the st with marker, seen from RS). YO's should be worked twisted on next row to avoid holes. Happy knitting!
05.02.2018 - 10:14
|
||||
Tamzyn#tamzynjacket |
||||
 |
 |
|||
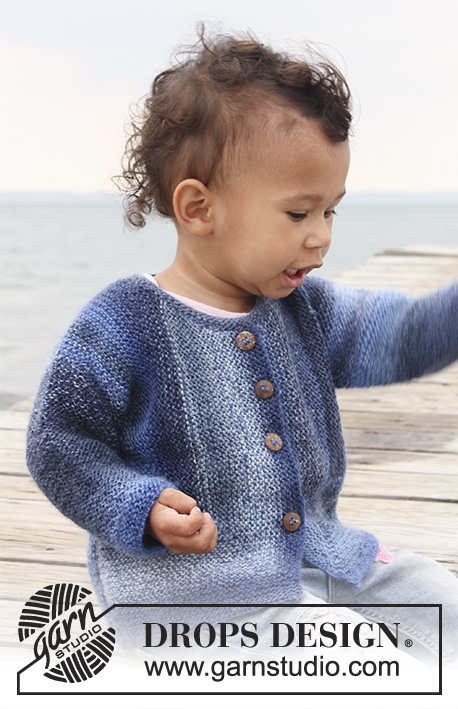
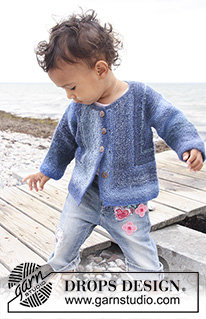
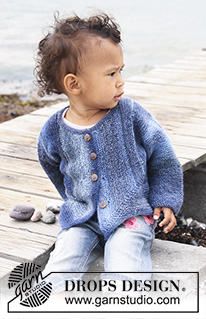
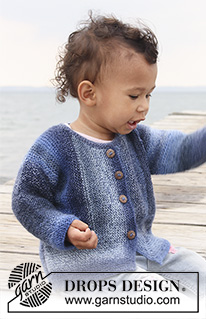
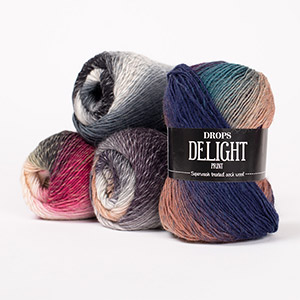
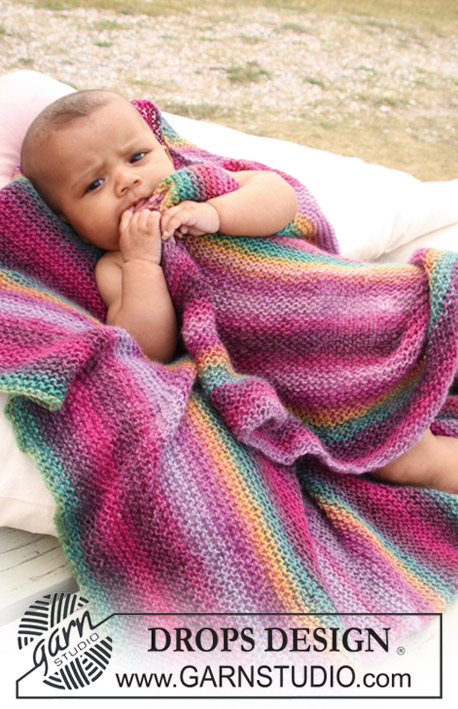
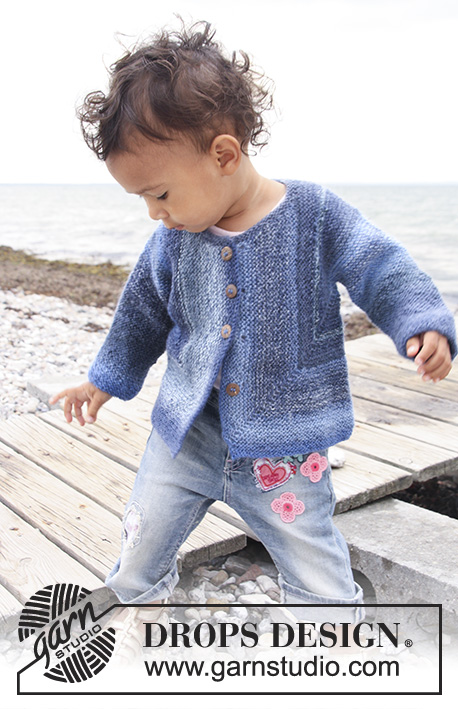
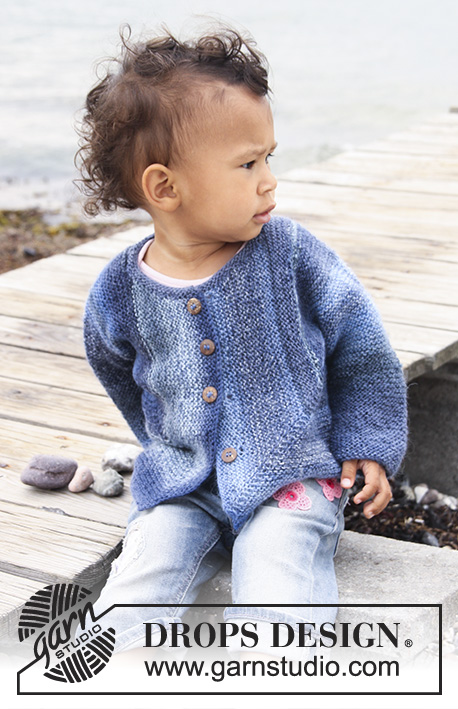
Vauvan ja lapsen neulottu jakku DROPS Delight-langasta. Työssä on ainaoikeinneuletta.
DROPS Baby 20-15 |
||||
|
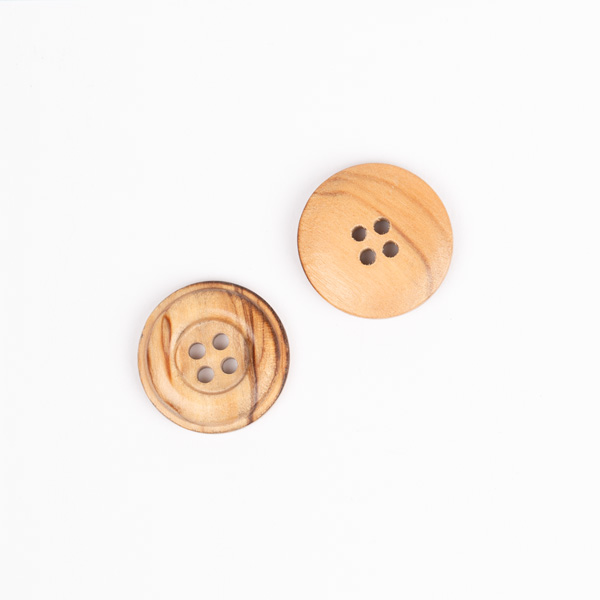
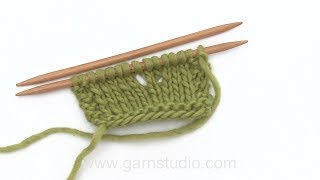
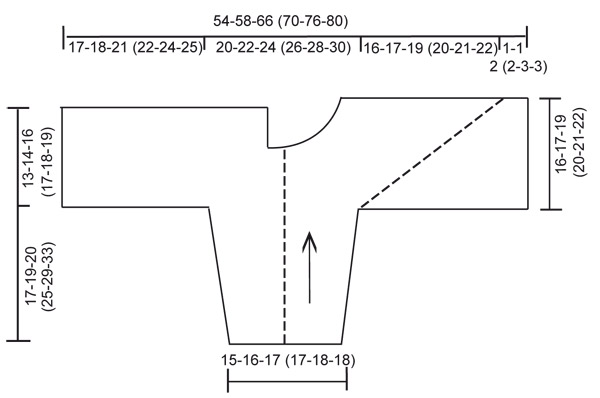
LISÄYSVINKKI: Lisää merkityn s:n molemmin puolin 1 s tekemällä 1 langankierto puikolle. Seuraavalla krs:lla langankierto neulotaan kiertäen oikein (eli neulo s takakautta), jottei muodostuisi reikää. ---------------------------------------------------------- JAKKU: Neulotaan poikittain. Neulo 2 kappaletta ja ompele lopuksi kappaleet yhteen keskeltä takaa. Osat neulotaan hihansuusta alkaen kohti jakun keskikohtaa. OIKEA PUOLIKAS: Neulotaan tasona pyöröpuikolla. Luo 36-38-40 (40-42-44) s pyöröpuikolle nro 3 Delight-langalla. Neulo tasona kaikki kerrokset oikein lopulliseen mittaan asti (= ainaoikeinneule). TARKISTA NEULETIHEYS! Kun työn pituus on 6-6-5 (5-6-6) cm, lisää kumpaankin reunaan 1 s. Toista tällaiset lisäykset joka 8. krs yht. 6-7-9 (11-13-14) kertaa = 48-52-58 (62-68-72) s. Neulo kunnes työn pituus on 17-19-20 (25-29-33) cm ja olet viimeksi neulonut nurjan puolen krs:n. ETU- JA TAKAKAPPALE: Neulo 1 krs oikein (= oikea puoli), luo krs:n loppuun 41-43-50 (53-58-60) s (= takakappale) = 89-95-108 (115-126-132) s. KAIKKI MITAT OTETAAN JATKOSSA TÄSTÄ! Neulo 1 krs takaisin, käännä työ. Kiinnitä 1 merkkilanka oikean puolen krs:n 2. s:aan (= oikea sivu). Jatka neulomista ja lisää SAMALLA merkityn s:n molemmin puolin 1 s. Toista tällaiset lisäykset joka 2. krs yht. 38-40-46 (48-50-52) kertaa (KS. LISÄYSVINKKI). SAMANAIKAISESTI kun työn pituus on 8½-9-10½ (11-12-13) cm, jatka neulomista vain vasemman reunan viimeisillä 60-65-74 (79-86-91) s:lla (oikealta puolelta katsottuna) = takakappale. Siirrä loput s:t apulangalle. TAKAKAPPALE: Neulo kunnes työn pituus takakappaleen luomisreunasta mitattuna on 13-14-16 (17-18-19) cm. Päätä s:t. ETUKAPPALE: Ota apulangalla odottavat s:t takaisin työhön, jätä kuitenkin takakappaleen reunassa 9-10-10 (10-12-12) s vielä apulangalle odottamaan pääntietä varten. Jatka lisäyksiä joka 2. krs kuten aiemmin. Kavenna SAMALLA pääntien reunassa (eli apulangalla odottavien silmukoiden vieressä) joka 4. krs: 6-7-7 (7-7-7) x 1 s. SAMANAIKAISESTI kun työn pituus etukappaleen ensimmäisestä lisäyskerroksesta mitattuna on 14-15-17 (18-19-20) cm, tee tasavälein 3-4-4 (5-5-5) napinläpeä seuraavasti (pääntien reunasta alkaen, eli työn nurjalta puolelta): neulo 2 s, päätä 2 s, *neulo 12-9-11 (9-10-10) s, päätä 2 s*, toista *-* yht. 2-3-3 (4-4-4) kertaa, neulo loput s:t oikein. Luo seuraavalla krs:lla päätettyjen silmukoiden tilalle aina 2 s. Kun kaikki tarvittavat kavennukset ja lisäykset on tehty, työssä on jäljellä 90-93-109 (115-121-126) s. Kun kaikki oikean reunan lisäykset on tehty, päätä seuraavalla nurjan puolen krs:lla pääntien reunasta alkaen 51-52-62 (66-70-74) s = 39-41-47 (49-51-52) s jäljellä työssä. Neulo näillä silmukoilla tasona n. 1-1-2 (2-3-3) cm ainaoikeaa (taita työ kaksinkerroin olan kohdalta ja tarkista, että etukappale on saman pituinen kuin takakappale). Päätä s:t. VASEN PUOLIKAS: Neulo oikean puolikkaan peilikuvaksi, mutta ilman napinläpiä. Tämä kappale viimeistellään nurja puoli ulospäin. VIIMEISTELY: Aseta kappaleet vastakkain ja ompele yhteen keskeltä takaa (ompele reunat vastakkain, jottei saumasta tulisi paksu). Taita jakku kaksinkerroin ja ompele hiha- ja sivusaumat uloimmista silmukanreunoista. Kiinnitä napit. PÄÄNTIEN REUNUS: Poimi pääntien reunasta 55-80 s (sis. apulangoilla odottavat s:t) pyöröpuikolle nro 3 Delight-langalla. Neulo tasona 3 krs ainaoikeaa. Päätä s:t. |
||||
Ruutupiirroksen selitykset |
||||
|
||||
 |
||||
Oletko tehnyt tämän mallin?Tägää tällöin kuviasi #dropspattern #tamzynjacket tai lähetä kuvat #dropsfan galleriaan. Tarvitsetko apua tämän ohjeen kanssa?Löydät 7 ohjevideota, kommentteja/kysymyksiä ja muuta osoitteessa www.garnstudio.com © 1982-2026 DROPS Design A/S. Pidätämme kaikki oikeudet. Tämä tiedosto ja kaikki sen alatiedostot on suojattu tekijänoikeuslailla. Lue lisää siitä, mitä voit tehdä ohjeillamme, verkkosivujemme jokaisen ohjeen alaosasta. |
||||
DROPS Design on toiminut neule- ja virkkausalalla yli 40 vuotta ja meillä on yksi kaikkein laajin valikoima ilmaisia ohjeita verkossa - käännettynä 17 kielelle. Tänään meiltä löytyy 333 lehteä ja 12548 ohjetta - joista 12034 ohjetta on käännetty suomeksi.
Työskentelemme ahkerasti, jotta voisimme antaa teille kaikkein parhaimpia neule- ja virkkausohjeita, inspiraatiota ja neuvoja sekä korkealaatuisia lankoja todella edulliseen hintaan! Haluaisitko käyttää ohjeitamme muuhun kuin henkilökohtaiseen käyttöön? Voit lukea säännöistä ohjeiden Tekijänoikeus -tekstissä, joka löytyy kaikkien ohjeidemme alapuolelta. Hauskoja hetkiä käsitöiden parissa!
Lisää kommentti ohjeeseen DROPS Baby 20-15
Haluamme mielellämme kuulla mielipiteesi tästä ohjeesta!
Mikäli haluat esittää kysymyksen, valitse oikea kategoria alla olevasta valikosta - tällä tavoin saat vastauksen nopeammin. Pakolliset kentät on merkitty tähdellä *.