
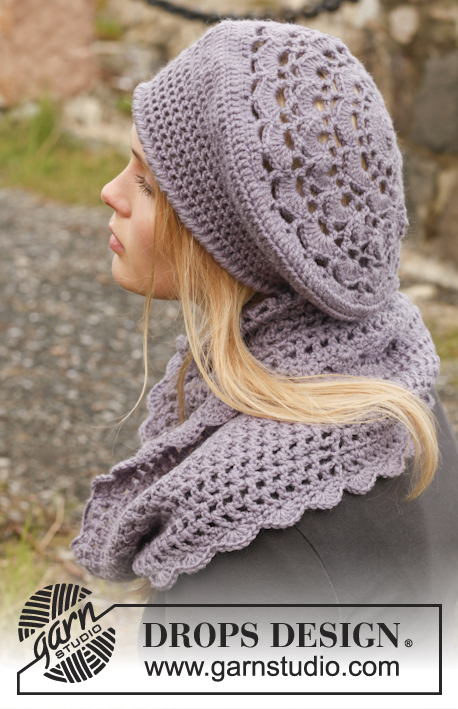
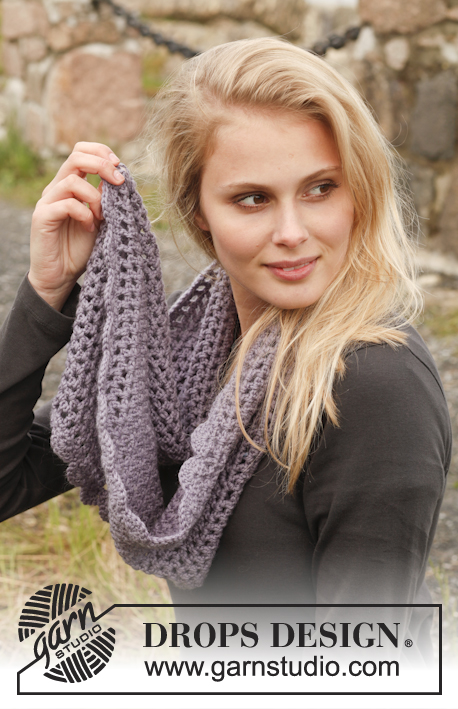
Popular categories
Looking for a yarn?


|
|||||||||||||
Victoriana |
|||||||||||||
 |
 |
||||||||||||
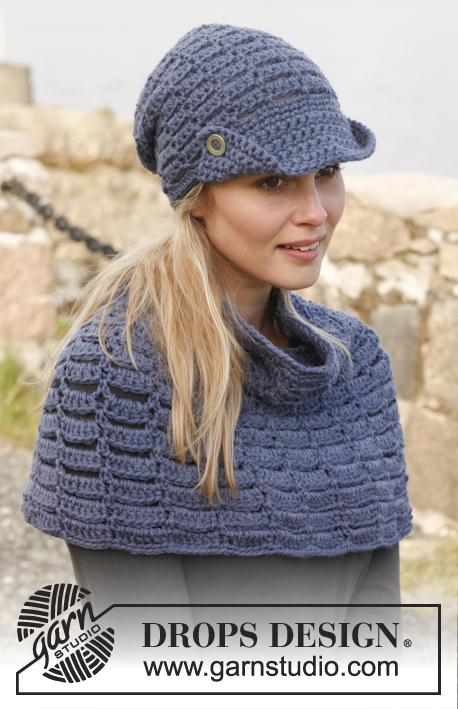
Set consists of: Crochet DROPS beret and neck warmer in ”Karisma”.
DROPS 149-8 |
|||||||||||||
|
CROCHET INFO: Replace first sc on round with 1 ch. Finish with 1 sl st in ch from beg of round. Replace first dc on a dc round with 3 ch. Finish with 1 sl st in 3rd ch. PATTERN: See diagram A.1. REVERS CROCHET: Work as sc but backwards. I.e. crochet around from left to right ROUNDS WITH DC AND CH: Work every round with dc and ch as follows: Turn piece so that WS is towards you, work 4 ch (= 1st dc + 1st ch), skip 1st ch-space (= last ch from previous round), * 1 dc in next ch-space, ch 1 *. Repeat from *-*, finish round with 1 dc in last ch-space (= ch-space with 4 ch from previous round), 1 sl st in ch-space with 4 ch from beg of round - i.e. work alternately from RS and WS to get a nice finish/beg on round. ---------------------------------------------------------- BERET: The piece is worked top down. ROUND 1: Ch 4 on hook size 4 mm / G/6 with Karisma and form a ring with 1 sl st in first ch, work 8 sc in ch-ring - READ CROCHET INFO. ROUND 2: Work 2 sc in every sc the entire round = 16 sc. REMEMBER THE CROCHET GAUGE! ROUND 3: * 1 sc in first sc, 2 sc in next sc *, repeat from *-* = 24 sc. ROUND 4: * 1 sc in each of the next 2 sc, 2 sc in next sc *, repeat from *-* = 32 sc. Then work according to A.1 (= 4 repetitions on round). When A.1 has been worked 1 time vertically, there are 32 ch-spaces on round. Continue to work as follows: ROUND 1: Work 4 dc in every ch-space = 128 dc. ROUND 2: Work 1 dc in every dc AT THE SAME TIME dec 2 dc evenly = 126 dc. ROUND 3: Work 1 dc in every dc but work every 13th and 14th dc tog = 117 dc. ROUND 4: Work 1 dc in every dc but work every 12th and 13th dc tog = 108 dc. ROUND 5: Work 1 dc in every dc but work every 11th and 12th dc tog = 99 dc. ROUND 6: Work 1 dc in every dc AT THE SAME TIME dec 11 dc evenly = 88 dc. ROUND 7-10: Work 1 dc in every dc the entire round. ROUND 11: Work with a double thread. Work a round with REVERSE CROCHET - see explanation above. --------------------------------------------------------- NECK WARMER: Work in the round with Karisma on hook size 4 mm / G/6, work 1 loose ch-row with 228 ch, finish with 1 sl st in 1st ch. Ch 4 (= 1st dc + 1st ch), * skip 1 ch, 1 dc in next ch, 1 ch *, repeat from *-* the entire round and finish with 1 sl st in ch-space with 4 ch from beg of round = 114 dc + ch. Then work ROUNDS WITH dc AND CH – see explanation above. Continue like this until piece measures 18 cm / 7" vertically. Then work a fan edge as follows: ROUND 1: Work 1 ch in 1st sc, 1 sc in every dc and 1 sc in every ch the entire round and finish with 1 sl st in first ch = 228 sc. ROUND 2: Work 1 ch in 1st sc, * skip 2 sc, 6 dc in next sc, skip 2 sc, 1 sc in next sc *, repeat from *-* the entire round and finish with 1 sl st in first ch = 38 fans. Work the same way in the other side. Fasten off. |
|||||||||||||
Diagram explanations |
|||||||||||||
|
|||||||||||||

|
|||||||||||||
|
Have you made this or any other of our designs? Tag your pictures in social media with #dropsdesign so we can see them! Do you need help with this pattern?You'll find tutorial videos, a Comments/Questions area and more by visiting the pattern on garnstudio.com. © 1982-2024 DROPS Design A/S. We reserve all rights. This document, including all its sub-sections, has copyrights. Read more about what you can do with our patterns at the bottom of each pattern on our site. |
|||||||||||||


With over 40 years in knitting and crochet design, DROPS Design offers one of the most extensive collections of free patterns on the internet - translated to 17 languages. As of today we count 304 catalogs and 11422 patterns - 11417 of which are translated into English (US/in).
We work hard to bring you the best knitting and crochet have to offer, inspiration and advice as well as great quality yarns at incredible prices! Would you like to use our patterns for other than personal use? You can read what you are allowed to do in the Copyright text at the bottom of all our patterns. Happy crafting!
Comments / Questions (93)
I am looking at the Beret instructions here. Where it says to continue to diagram A 1, where do I find this? The diagram is not showing up on this page, nor on the printable instructions page. No images of the project are loading either. Do I assume that the diagram is one of the images that is failing to load on this page?
12.02.2020 - 00:20DROPS Design answered:
Hi Kushla, our website is now working OK. Please try to open the pattern again.
12.02.2020 - 07:13Hello, I would have loved to make this hat but, this is a horrible pattern! Rounds 1-4, and then follow A.1???!!! What is that... And then the rounds start over at round 1 again... ?? WHAAT.... I give up. I'm an experienced crocheting and pattern reader, but this one's awful to try and follow. Just write out the pattern! I'm going too try something else! This is not worth the time when there are so many other options too use.
02.12.2019 - 05:40DROPS Design answered:
Dear Elizabeth, The DROPS patterns are knitted and crocheted by thousands and thousands of people around the world. We understand however that in certain countries, with different knitting/crochet traditions than Scandinavia, our patterns might be written in a way that differs from what some are used to. But of course we want everyone to understand our patterns, so that’s why we have created an extensive library of tutorial videos as well as step by step lessons that explain how to follow the techniques we use and how to read the diagrams in our patterns. Give them a try!
02.12.2019 - 10:26I am lost on this part. When A.1 has been worked 1 time vertically, there are 32 ch-spaces on round. Once the diagram is worked through, I have many more chain spaces than 32. Could you clarify this for me please?
19.10.2019 - 03:18Niki answered:
I figured it out! Lovely pattern!
19.10.2019 - 20:56Hello, Can this pattern be made with a fingering yarn? Would you start with 12 sc instead of 8 so it sits flat?
16.04.2019 - 06:26DROPS Design answered:
Dear Margherita, the original yarn, DROPS Karisma is a light DK weight yarn, not much thicker than the fingering weight you ask for. Unfortunately, we cannot recalculate every pattern for each individual request, but I would suggest to make a small trial piece and make the necessary modifications, recalculations accordingly. Happy Crafting!
16.04.2019 - 15:38Bij de patroon staat dat het patroon is gecorrigeerd en dat de toeren 1 tm 4 vasten moeten worden inplaats van stokjes. Maar om welke 4 toeren gaat dit is dat van het telpatroon A1 of van de andere 4 toeren
05.01.2019 - 16:40DROPS Design answered:
Dag Heidi,
Waar vasten hadden moeten staan, stonden eerst stokjes in het patroon, maar je kunt gewoon het online patroon gebruiken, want de correcties zijn hierin al doorgevoerd.
05.01.2019 - 20:29Mme Gromelle Pour moi le pb de taille se ressoud en prenant un crochet un peu plus gros (4,5 ou 5) et de prėvoir un rab de laine. J'adore ce modèle. J'ai dėja fait ce modèle et je recommence pour ma fille ! Bon crochet
04.12.2018 - 08:10Bonjour, ce modèle de bonnet est trop petit. Est-il possible de le faire plus grand ? avec peut-être une laine différente et un crochet plus gros ? Il me faudrait une taille L - tour de tête 59cm. Merci pour votre retour d'information. Cordialement.
20.10.2018 - 19:54DROPS Design answered:
Bonjour Mme Gromelle, nous ne sommes malheureusement pas en mesure de pouvoir adapter chacun de nos modèles à chaque demande. N'hésitez pas à contacter - même par mail ou téléphone - le magasin où vous avez acheté votre laine pour toute assistance. Bon crochet!
22.10.2018 - 08:21Bonjour j’ai fini A1 mais je ne comprends pas les tour 4 et 5. Pourriez vous m’expliquer s’il vous plaît
12.10.2018 - 20:41DROPS Design answered:
Bonjour Caroline, aux tours 4 et 5 après A.1 on va diminuer ainsi: Tour 4: *1 bride dans chacune des 11 brides suivantes, écoulez les 2 brides suivantes ensemble*, répétez de *-* tout le tour. Tour 5: *1 bride dans chacune des 10 brides suivantes, écoulez les 2 brides suivantes ensemble*, répétez de *-* tout le tour. Bon crochet!
15.10.2018 - 08:07Hi - I am relatively new at crochet and I absolutely LOVE this set and want to make a couple. Do you consider it to be easy enough for a beginner? Also, is the size of the yarn 100g the weight? Thanks, Zila
11.10.2018 - 17:33DROPS Design answered:
Dear Zila, you'll find some videos explaining the different techniques used in that pattern, follow diagram as explained in the written pattern starting from the bottom corner on the right side towards the left on every round. You'll find here all informations about the yarn, feel free to contact your DROPS store - even per mail or telephone - for any individual assistance. Happy crocheting!
12.10.2018 - 07:33Cloudy wrote:
Yaaay I finished the beret and it's perfect. For those who found it was too big i had the same problem so I continued decreasing in the final rounds after knitting tog 11th and 12th stitches I decreased 10th and 11th, 9th and 10th until I got the desired fit and then did the last row which was the REVERSE CROCHET .....perfect!!
03.08.2018 - 09:16