
Popular categories
Looking for a yarn?


|
|||||||||||||||||||
Mathilda |
|||||||||||||||||||
 |
 |
||||||||||||||||||
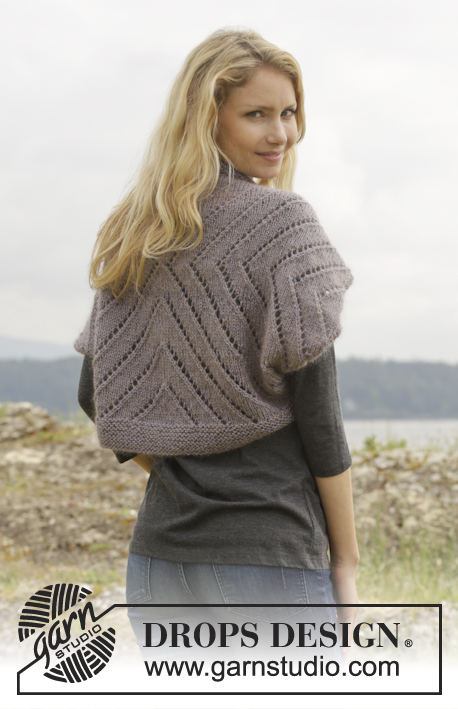
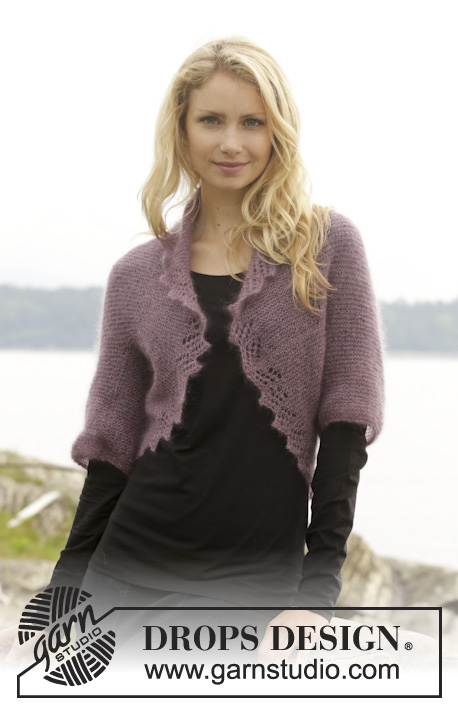
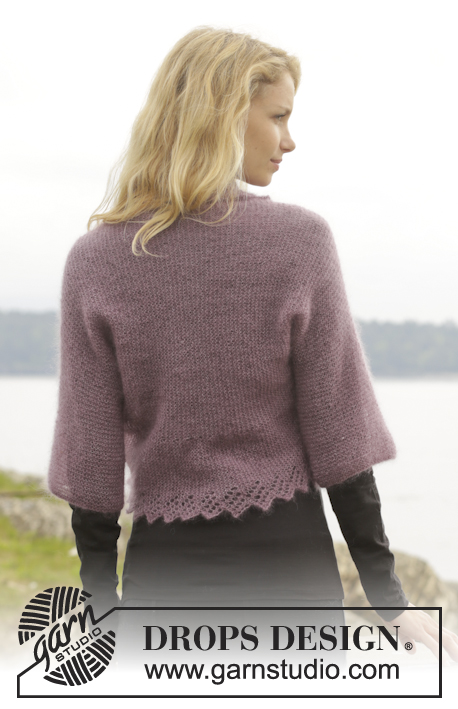
Knitted DROPS bolero in garter st with lace edge in ”Kid-Silk”. Size S-XXXL.
DROPS 156-34 |
|||||||||||||||||||
|
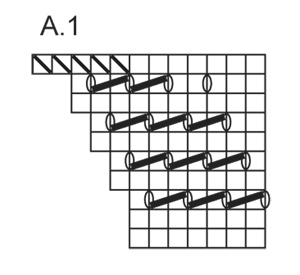
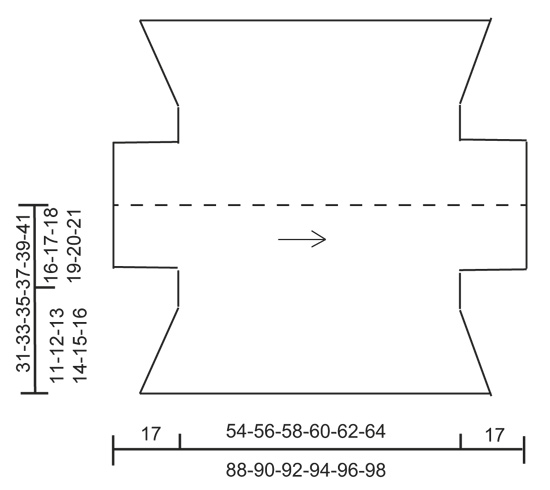
GARTER ST (back and forth on needle): K all rows. 1 ridge = K2 rows. PATTERN: See diagram A.1. To make the pattern the same in each side, work first row in diagram at the end of first row from RS and at the end of the second row from WS. I.e. all rows where YOs and sts-tog are worked, must be worked at the end of row. No of sts in diagram will vary from 7 to 12. SHORT ROWS: Work 6 rows over all sts, * work until marker in one side, turn, tighten yarn and work the rest of row. Work 1 row over all sts, turn, work until marker in the other side, turn, tighten yarn and work the rest of row. Work 5 rows over all sts *, repeat from *-*. I.e. work 6 rows (= 3 ridges) over the middle 90-96-102-106-112-116 sts and 8 rows (4 ridges) over sts in each side in every repetition. ---------------------------------------------------------- BOLERO: Worked sideways back and forth on circular needle. Beg with right sleeve, cast on sts for back and collar in both sides of piece, bind off again for left sleeve. Then fold double and sew sleeve and side seams. Cast on 74-78-82-88-92-96 sts with 2 strands Kid-Silk on circular needle size 3.5 mm / US 4. Remove 1 strand and work in GARTER ST - see explanation above! REMEMBER THE GAUGE! When piece measures 17 cm / 6 3/4'' (= sleeve), loosely cast on 34-37-40-41-44-46 new sts in each side at the end of the next 2 rows = 142-152-162-170-180-188 sts. Insert 1 marker in piece 26-28-30-32-34-36 sts in from each side (= 90-96-102-106-112-116 sts between markers). Then work A.1 over the outermost 7 sts in each side of piece – READ PATTERN – and garter st over the remaining sts – AT THE SAME TIME work SHORT ROWS – see explanation above. When piece measures approx. 71-73-75-77-79-81 cm / 28''-28¾''-29½''-30 3/8''-31''-32'' (from cast-on edge), adjust after 1 whole repetition of A.1, loosely bind off 34-37-40-41-44-46 sts in each side at beg of the next 2 rows = 74-78-82-88-92-96 sts. Continue in garter st over sleeve. When sleeve measures 17 cm / 6 3/4'', loosely bind off with 2 strands. Piece measures approx. 88-90-92-94-96-98 cm / 34½"-35½"-36 1/4"-37"-37 3/4"-38½". ASSEMBLY: Fold the bolero double. Sew sleeve and side seams in outer loops of edge sts, and make sure to avoid a tight edge. |
|||||||||||||||||||
Diagram explanations |
|||||||||||||||||||
|
|||||||||||||||||||
|
|||||||||||||||||||
|
|||||||||||||||||||
|
Have you made this or any other of our designs? Tag your pictures in social media with #dropsdesign so we can see them! Do you need help with this pattern?You'll find tutorial videos, a Comments/Questions area and more by visiting the pattern on garnstudio.com. © 1982-2024 DROPS Design A/S. We reserve all rights. This document, including all its sub-sections, has copyrights. Read more about what you can do with our patterns at the bottom of each pattern on our site. |
|||||||||||||||||||


With over 40 years in knitting and crochet design, DROPS Design offers one of the most extensive collections of free patterns on the internet - translated to 17 languages. As of today we count 304 catalogs and 11422 patterns - 11417 of which are translated into English (US/in).
We work hard to bring you the best knitting and crochet have to offer, inspiration and advice as well as great quality yarns at incredible prices! Would you like to use our patterns for other than personal use? You can read what you are allowed to do in the Copyright text at the bottom of all our patterns. Happy crafting!
Comments / Questions (58)
Bonjour, j'ai fait un échantillon pour le diagramme et comprendre ce modèle. Si je suis le sens de la flèche le point se dirige vers le haut et non vers le bas. Je ne comprends pas? J'ai déjà demandé à mon fournisseur de laine. Pourriez vous m' aidez s' il vous plaît ? Par avance merci
03.01.2017 - 15:40DROPS Design answered:
Bonjour Mme Prevost, le diagramme se lit en commençant en bas à droite, de droite à gauche sur l'endroit et de gauche à droite sur l'envers. Ce modèle se tricote d'une manche à l'autre, avec pour le corps du boléro, le motif A.1 de chaque côté et les rangs raccourcis comme indiqué. Bon tricot!
04.01.2017 - 08:37Merci de votre réponse. J ai bien compris que l on coud les manches et les côtés, mais ou est l ouverture ? Ça représente 2 morceau l un sur l autre sans ouverture Comment puis je trouver le tutoriel je n y arrive pas .merci de me donner. la marche à suivre.Cordialement. Monique
15.05.2016 - 23:15DROPS Design answered:
Bonjour Mme Guivel, l'ouverture du boléro est composée par la bordure ajourée de chaque côté soit en bas et en haut sur le schéma (en pointes sur les photos du forum). Bon assemblage!
17.05.2016 - 10:36Moi aussi je fais ce boléro et je ne vois pas quel aspect il aura une fois cousu je ne sais pas comment trouver le tutoriel qui correspond au boléro merci de bien vouloir m éclairer,Je réalise beaucoup de vos modèles mais là je suis bloquée Monique
13.05.2016 - 10:59DROPS Design answered:
Bonjour Mme Guivel, ce tuto en images sur le forum DROPS montre comment le boléro sera assemblé puis porté. Bon tricot!
13.05.2016 - 11:44Mi correggo, ho 64 m alla fina della manica
10.02.2016 - 22:13DROPS Design answered:
Buongiorno Elena,lavorando con filato e campione diversi deve far riferimento al suo filato e al suo campione per ottenere le dovute proporzioni. Buon lavoro!
11.02.2016 - 12:12Un'altra cosa. Le cuciture dei fianchi rimangono perfettamente verticali, cioe' lungo i fianchi o una volta indossato salgono verso il petto. X quanto riguarda il filato non corrisponde al campione. Lavoro coi ferri 4 1/2 e ho avviato 42m all'inizio per arrivare a 81m alla fine della manica
10.02.2016 - 21:55DROPS Design answered:
Buongiorno Elena, Le cuciture sono laterali e sono dritte, seguono la forma del modello. Per quanto riguarda l'altra domanda, lavorando con filato e campione diversi deve far riferimento al suo filato e al suo campione per ottenere le dovute proporzioni. Buon lavoro!
11.02.2016 - 12:11A 2/3 dal lavoro mi sono accorta che ho fatto i ferri accorciati dopo 7ferri e non dopo 5, cambia qualcosa per il risultato del modello? Inoltre, siccome sto lavorando con un filato diverso e lo sto facendo a maniche lunghe e un pò più lungo. Come mi regolo per sapere quando devo intrecciare per iniziare l'altra manica?
10.02.2016 - 12:08DROPS Design answered:
Buongiorno Elena, in questo modo la parte a ferri accorciati sarà un pò più ampia, deve valutare se le piace il risultato finale. Per il filato, il campione corrispondeva a quello indicato? In questo caso può seguire le istruzioni indicate altrimenti deve rifare le dovute proporzioni. Buon lavoro!
10.02.2016 - 15:10J'ai terminé mon tricot mais je ne parviens pas à l'assembler. Je vais mettre des lettres aux pièces pour que vous me disiez comment assembler : manche (ligne de montage) A et A1- B et B1 pour l'autre manche - ensuite C - D - E - F pour les 4 autres angles du tricot (le motif se trouvant en haut et en bas) - Merci de m'éclairer car je voudrais bien ne pas avoir réalisé tout ce travail pour rien !
26.11.2015 - 16:45DROPS Design answered:
Bonjour Mme Charvieux, ce tuto en images sur le forum DROPS montre avec un peu plus de détail comment procéder à l'assemblage de ce modèle. N'hésitez pas à rejoindre le forum pour toute question complémentaire. Bon assemblage!
27.11.2015 - 10:45Merci pour l'info concernant le motif, j'ai bien compris Toutefois, en suivant les explications, nous obtenons un tricot en une seule pièce et je ne comprends pas comment le plier car il n'y a pas de place pour la tête, ou alors j'ai fait une erreur - Merci d'avance pour votre aide..
20.11.2015 - 14:04DROPS Design answered:
Bonjour Mme Charvieux, c'est exact, le boléro se tricote bien en 1 seule piece, dans le sens de la longueur, d'une manche à l'autre (voir flèche dans le schéma). On assemble ensuite les côtés entre eux: on plie en double au niveau du pointillé et on fait la couture à partir du bord des manches, sous la manche, le long de la partie droite puis la partie évasée (vers le motif ajouré) de chaque côté. L'ouverture du boléro = mailles montées et mailles rabattues. Bon tricot!
20.11.2015 - 14:42Je rencontre un problème pour les rangs raccourcis : pour tricoter les 6 rangs mousse entre les marqueurs, doit-on laisser en attente les mailles destinées à la bande ajourée ? si oui, comment les récupérer ensuite, je ne comprends pas.
30.10.2015 - 16:03DROPS Design answered:
Bonjour Mme Charveieux, tricotez les rangs raccourcis ainsi: 6 rangs sur toutes les mailles, puis *1 rang jusqu'au marqueur d'un côté, tournez et tricotez le rang retour. 1 rang sur toutes les mailles. 1 rang jusqu'au marqueur (= le 2ème marqueur, pas le même qu'auparavant), tournez et tricotez le rang retour, puis 5 rangs sur toutes les mailles*, répétez de *-*: vous tricotez 2 rangs sur les mailles de chaque côté (du bord jusqu'au marqueur) et les autres rangs sur toutes les mailles. Bon tricot!
31.10.2015 - 17:24Bonjour. Je souhaite faire ce modèle mais je crains que la taille S ne soit trop grande. À quelle taille du commerce correspond elle? Je fais du 34 / 36 en France. Puis je réduire sans difficultés le nombre de mailles? Merci d'avance
06.09.2015 - 11:15DROPS Design answered:
Bonjour Lili, vous trouverez en bas de page toutes les mesures de l'ouvrage terminé, prises à plat d'un côté à l'autre. Comparez ces mesures à un ouvrage similaire que vous avez et dont vous aimez la forme pour trouver la taille à suivre (vous pouvez vous aider d'un modèle plus "classique" du même catalogue). Pour toute assistance personnalisée, merci de bien vouloir contacter votre magasin DROPS. Bon tricot!
07.09.2015 - 11:18