
Categorías populares
¿Buscas un hilo?


Comentarios / Preguntas (61)
![]() Marchand escribió:
Marchand escribió:
Bonjour , je ne comprend pas les diminutions épaule et encolure Merci
09.09.2025 - 16:43DROPS Design respondió:
Bonjour Mme Marchand, il n'y a pas de diminutions/rangs raccourcis pour les épaules ici (elle ne sont pas biaisées), ainsi, vous allez simplement diminuer pour l'encolure V pour les devants, et, en même temps, vous allez rabattre les mailles de l'emmanchure de l'autre côté du devant (côté dos). Si j'ai mal compris votre question, n'hésitez pas à reformuler, merci pour votre compréhension. Bon tricot!
11.09.2025 - 12:02
![]() Margo Grootendorst escribió:
Margo Grootendorst escribió:
Hoe minder je bij de V-hals?
17.04.2025 - 11:26
![]() Claire Girard escribió:
Claire Girard escribió:
Désolée pour ma question précédente inutile, je viens de voir la légende.
14.11.2024 - 00:26
![]() Claire Girard escribió:
Claire Girard escribió:
Dans le diagramme du modèle Sarah's Delight que signifie les grandes lignes noires droites et les grandes lignes qui ont un côté surélevé?
14.11.2024 - 00:21DROPS Design respondió:
Bonjour Mme Girard, retrouvez la signification des symboles de ces lignes noires obliques dans la légende: 3ème symbole (torsade sur 6 mailles) et 4ème / 5ème symbole (torsade sur 4 mailles). Bon tricot!
14.11.2024 - 10:03
![]() Moureau escribió:
Moureau escribió:
Pour le modèle 141-40, sur le devant droit pour le A3.Comment doit-on tricoter les 14 mailles sur l’envers.
09.05.2024 - 20:17DROPS Design respondió:
Bonjour Mme Moureau, suivez simplement la légende des symboles correspondant pour les rangs sur l'envers autrement dit, en lisant de gauche à droite: 6 mailles endroit (= point mousse), 2 mailles endroit, 2 mailles envers, 2 mailles endroit, 1 m envers (7 mailles en côtes) et 1 maille endroit (point mousse). Bon tricot!
10.05.2024 - 08:53
![]() Céspedes escribió:
Céspedes escribió:
Apres avoir tricoter A.1 et A.2, dois ke continuar avec A.2?
05.11.2023 - 17:41DROPS Design respondió:
Bonjour Mme Céspedes, tout à fait, quand A.1 est terminé, vous tricotez A.2 et vous répétez A.2 en hauteur jusqu'à la fin. Bon tricot!
06.11.2023 - 08:45
![]() Lillan I Bradley escribió:
Lillan I Bradley escribió:
Hello, I have received an email answer from you to my last question regarding pattern 141-40. Unfortunately, I did NOT understand what I was told i.e., "garter" stich & "stocking" stich, etc. The patterns A3 through A6 refer to KNIT/PURL stitches on right side and wrong side. Would you be so kind and read my question again and, hopefully,, I'll receive a different answer. Thank you very much!
22.06.2023 - 22:04DROPS Design respondió:
Dear Mrs Bradley, I'm sorry, I might have misunderstood your question then; A.5 and A.6 is just a mirrored pattern from A.3 and A.4; work the stitches the same way as explained in the diagram key: the white squares are knitted from RS and purled from WS and the dots are purled from RS and knitted from WS. If it doesn't help, please try to reword your question as it is misunderstood. Thanks for your comprehension.
23.06.2023 - 07:42
![]() Lillan escribió:
Lillan escribió:
Hello, the store in California where I used to buy your yarn and ask questions when needed, has closed down:( I now order yarn from Woolwarehouse in UK. Since they knit differently, I have to ask your web site again: Drops 141-40 Sarah's Delight; LEFT SIDE Pattern A.5, after knitting the pattern from right side, the last two stiches 13 &14 then show two KNIT sts rather than ONE knit & one purl like in the right front piece??? Thank you very much for your response :) Lillan
22.06.2023 - 00:33DROPS Design respondió:
Dear Lillan, the 13rd stitch in A.5/A.6 is a stocking stitch and the last stitch is worked in garter stitch; as the 1st stitch in A..3 was worked in garter stitch and the 2nd stitch in A.3 was a stocking stitch. This 14th/1st stitch is knitted from RS and knitted from WS.Can this help or did I misunderstand your question?
22.06.2023 - 10:07
![]() Lillan Bradley escribió:
Lillan Bradley escribió:
After reading all the English answers re: right front piece with cable, I am still not understanding the following: AT THE SAME TIME when piece measures 33cm (XL) dec 1 stitch TOWARDS MID FRONT??? repeat decrease every cm 22 more times. Also: READ DECREASE TIP: Dec as follows AFTER A4.....??? Hope this makes sense and thanks for your reply. Lillan
12.06.2023 - 03:11DROPS Design respondió:
Dear Mrs Bradley, when piece measures 33 cm you will start decreasing for neck, on right front piece you will decrease after A.4 (as explained under decrease tip), ie work the A.4 stitches, then slip 1 as if to K, K1 and psso. Repeat this decrease 22 more times on every 1 cm (decrease from RS only). Happy knitting!
12.06.2023 - 09:12
![]() Barbara escribió:
Barbara escribió:
Pattern 140-141. On the right front how many stitches should remain after decreasing on the front. I have to work 43 rows (22 times) if decreasing one stitch every half inch on right side only. I need to know how many stitches before I start the armhole bind off.
12.07.2022 - 08:51DROPS Design respondió:
Dear Barbara, after the decreases on back piece, there are 47-51-55-61-67-73 sts, then after cast off/decreases for armhole and neck , there are 19-20-21-22-23-24 sts left and before casting off, there are 17-18-19-20-21-22 sts left. Happy knitting!
12.07.2022 - 09:02
|
|||||||||||||||||||
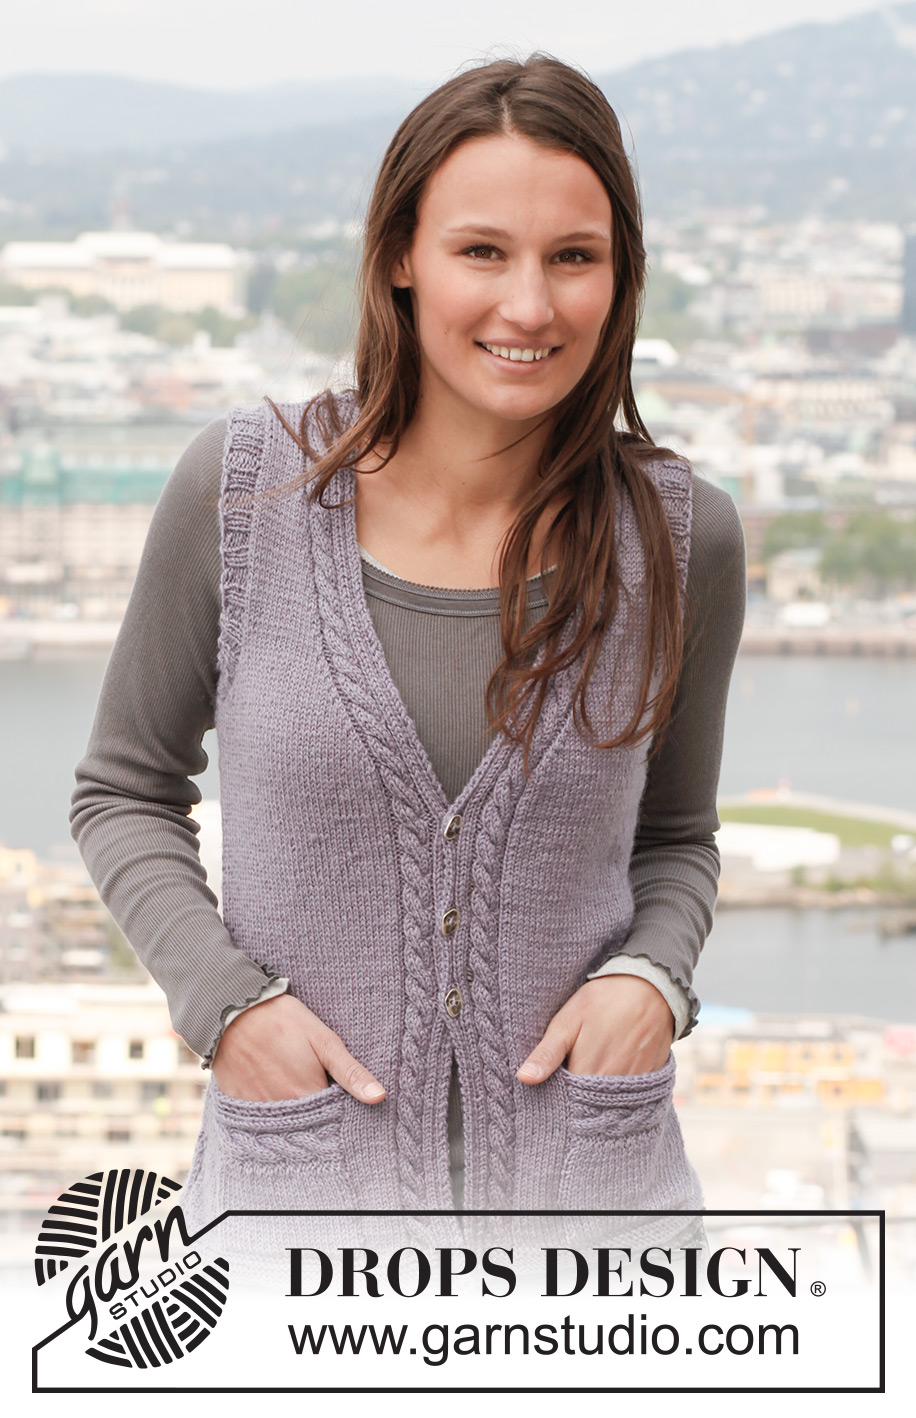
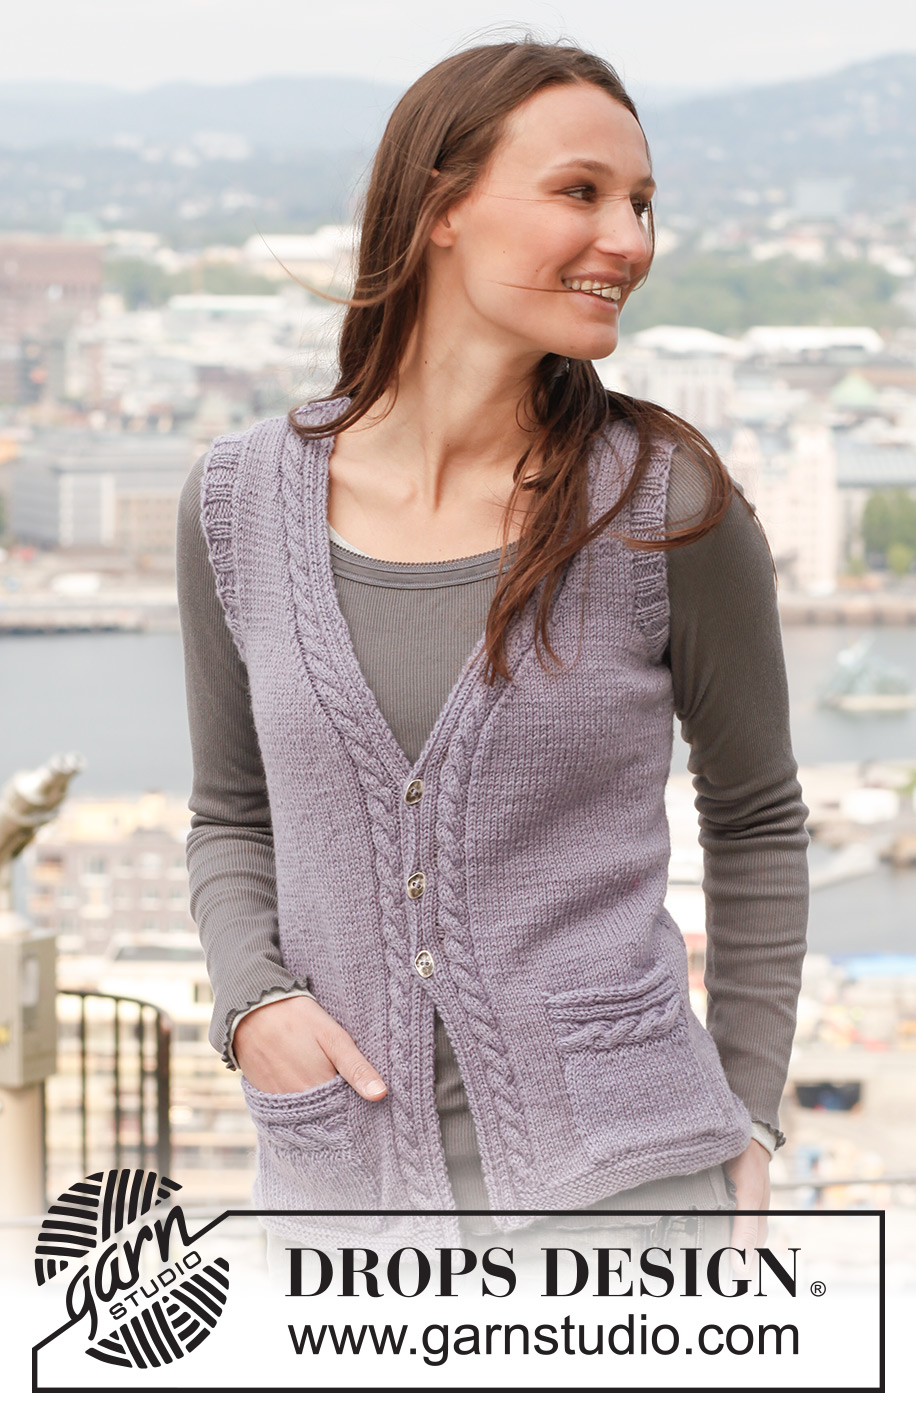
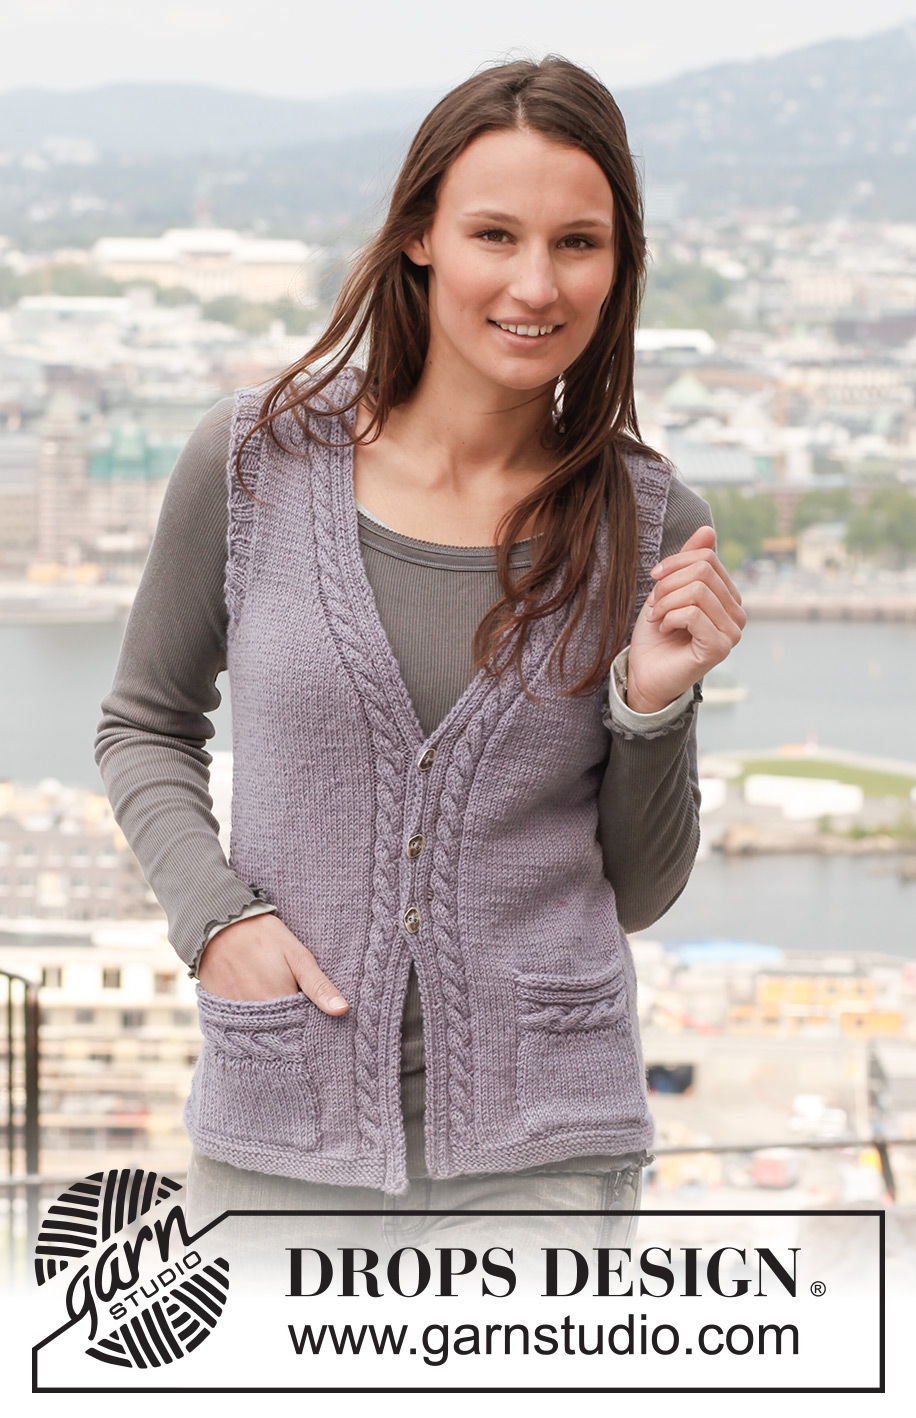
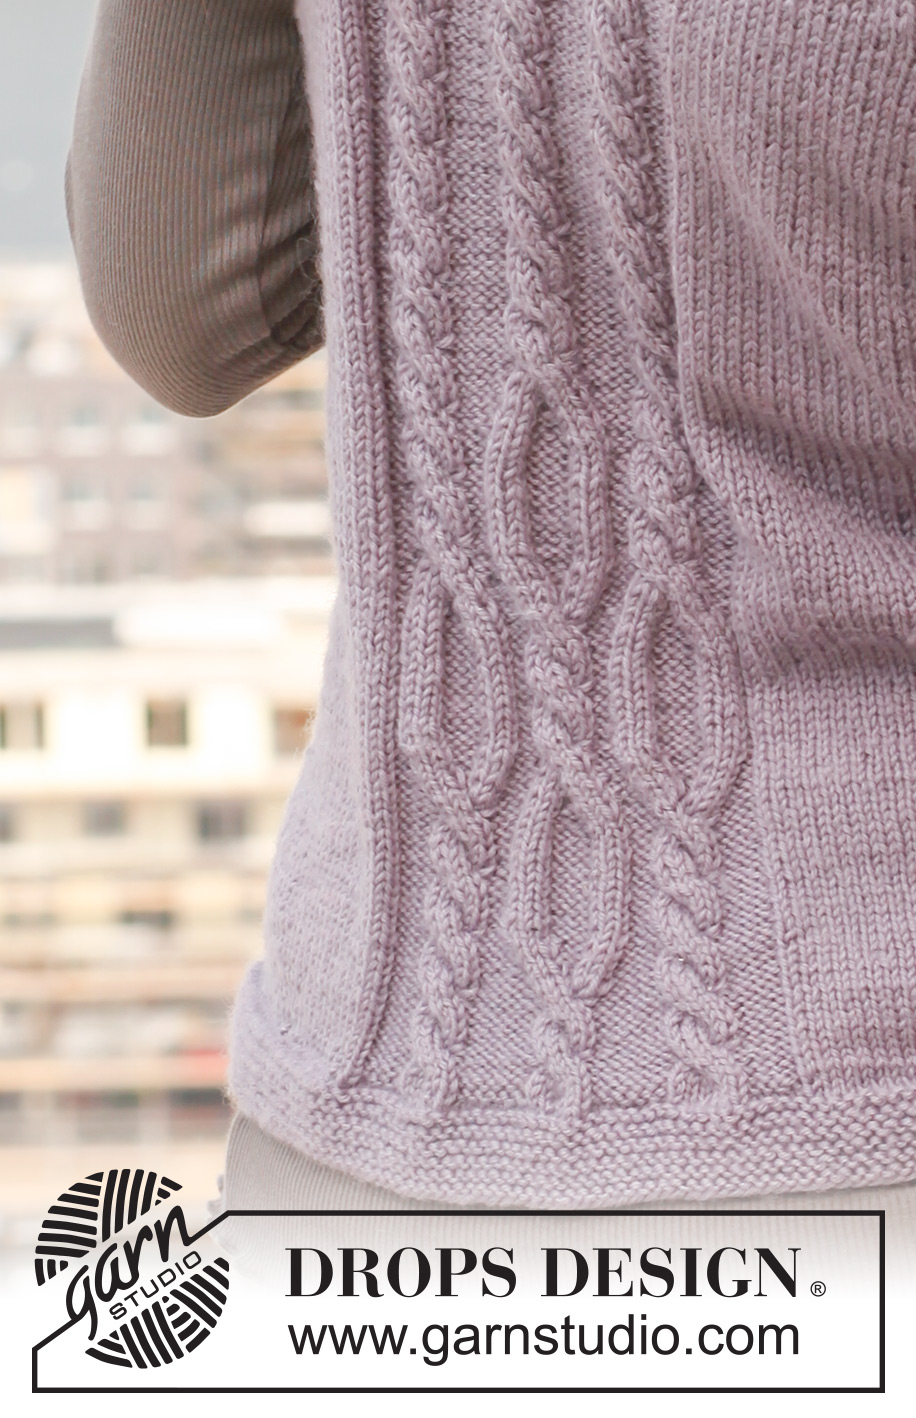
Sarah's Delight#sarahsdelightvest |
|||||||||||||||||||
 |
 |
||||||||||||||||||
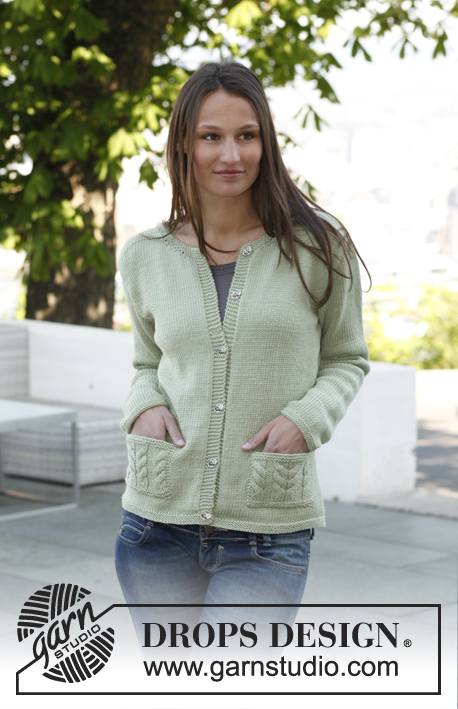
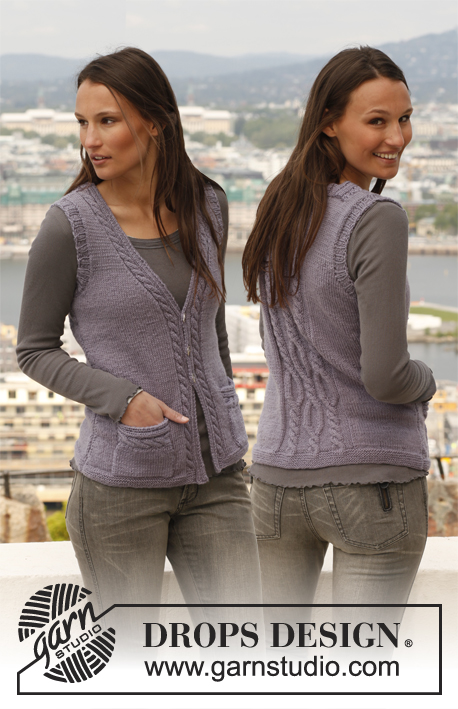
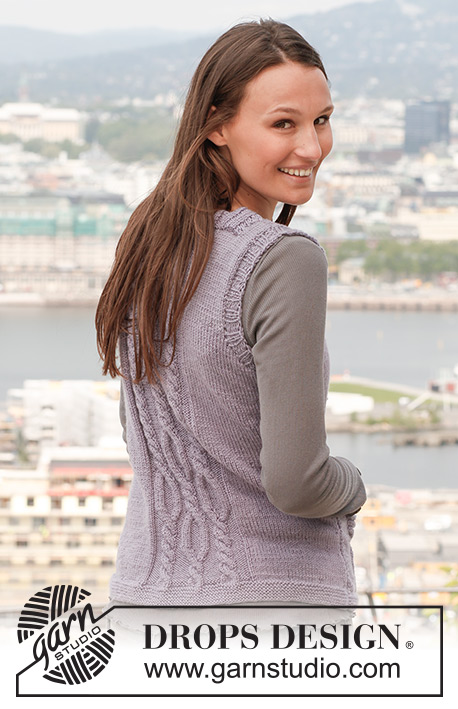
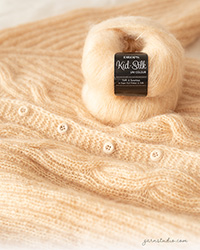
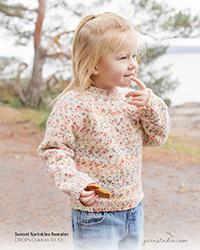
Chaleco DROPS tejido con torsadas, en “Karisma”. Talla: S – XXXL.
DROPS 141-40 |
|||||||||||||||||||
|
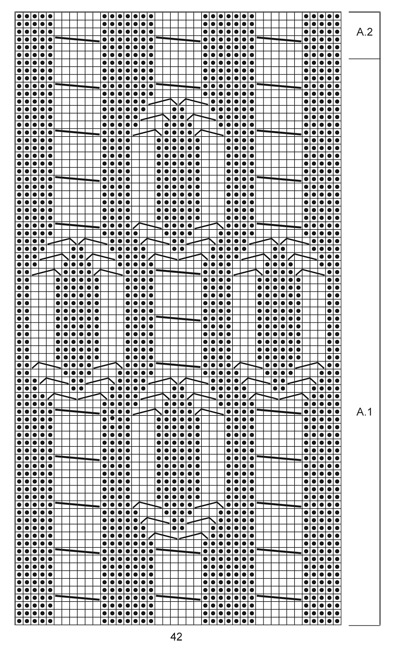
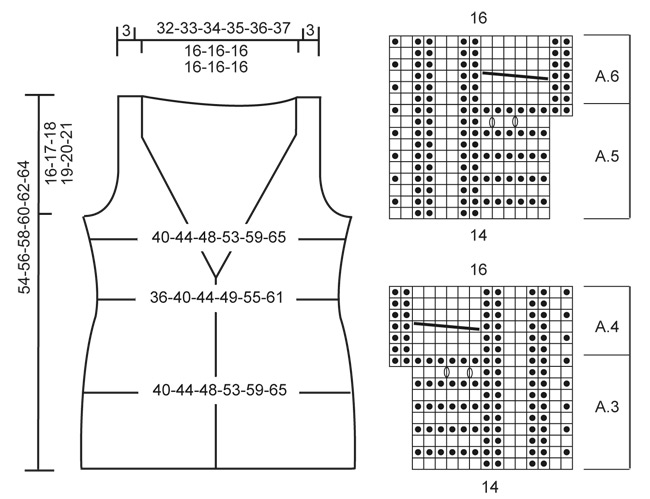
PT MUSGO (de ida y vuelta en la ag): Tejer todas las hileras de derecho. 1 surco = 2 hileras tejidas de derecho. PATRÓN: Ver diagramas A.1 a A.6. Los diagramas muestran todas las hileras en el patrón, vistas por el LD. TIP PARA DISMINUCIÓN: Dism antes/después de A.4/A.6. Todas las dism son hechas por el LD! Dism de la manera sig antes de A.6: Tejer 2 pjd. Dism de la manera sig después de A.4: Deslizar 1 pt de derecho, 1d, pasar el pt desl por encima. OJALES: Rem para los ojales en el borde derecho. 1 ojal = tejer juntos de derecho el 3º y 4º pt a partir del centro del frente y hacer 1 HEB (lazada). Rem para los ojales cuando la pieza mida: TALLA S: 16, 22 y 28 cm TALLA M: 16, 23 y 29 cm TALLA L: 17, 23 y 30 cm TALLA XL: 18, 24 y 31 cm TALLA XXL: 18, 25 y 32 cm TALLA XXXL: 19, 26 y 33 cm ------------------------------------------------------ ESPALDA: Tejida de ida y vuelta en la ag. Mon 86-94-102-114-126-138 pts (incl 1 pt de orillo en cada lado) en ag tamaño 3 mm con Karisma. Tejer 5 surcos en PT MUSGO – ver explicación arriba. Tejer la hilera sig de la manera sig (por el LD): 1 pt de orillo en pt musgo, 25-29-33-39-45-51 pts derechos, 34 pts derechos y, AL MISMO TIEMPO, aum 8 pts distribuidos equitativamente sobre estos pts, 25-29-33-39-45-51 pts derechos y 1 pt de orillo en pt musgo = 94-102-110-122-134-146 pts. Cambiar a ag tamaño 4 mm y tejer la hilera sig, de la manera sig, por el LR: 1 pt de orillo en pt musgo, 25-29-33-39-45-51 pts reveses, A.1 (= 42 pts), 25-29-33-39-45-51 pts reveses y 1 pt de orillo en pt musgo. Continuar con A.1 y en pt jersey sobre 25-29-33-39-45-51 pts y 1 pt de orillo en pt musgo en cada lado. AL MISMO TIEMPO, cuando la pieza mida 5 cm, dism 1 pt en cada lado, repetir las dism a cada 3 cm 3 veces más = 86-94-102-114-126-138 pts. Cuando A.1 ha sido tejido 1 vez verticalmente, continuar con A.2 sobre los pts de A.1. AL MISMO TIEMPO, cuando la pieza mida 20 cm, aum 1 pt en cada lado, repetir los aum a cada 5-5½-5½-6-6½-6½ cm 3 veces más = 94-102-110-122-134-146 pts. Cuando la pieza mida 38-39-40-41-42-43 cm, rem para las sisas, al inicio de cada hilera, en cada lado, de la manera sig: 3 pts 1-1-1-2-2-2 veces, 2 pts 2-3-4-5-6-8 veces y 1 pt 2-3-4-4-7-8 veces = 76-78-80-82-84-86 pts. Cuando la pieza mida 50-52-54-56-58-60 cm, dism 8 pts distribuidos equitativamente sobre los 42 pts centrales = 68-70-72-74-76-78 pts. En la hilera sig, por el LD, tejer de la manera sig: 9-10-11-12-13-14 pts en pt jersey, * 2r, 2d *, repetir de *a* sobre los 48 pts sig, 2r, 9-10-11-12-13-14 pts en pt jersey. Cuando la pieza mida 52-54-56-58-60-62 cm, rem los 34 pts centrales = 17-18-19-20-21-22 pts restantes en cada hombro. Terminar cada hombro por separado. Continuar con 9-10-11-12-13-14 pts en pt jersey, 2r, 2d, 2r, 1d y 1 pt en pt musgo del lado del escote, rem con derecho sobre derecho y revés sobre revés cuando la pieza mida 54-56-58-60-62-64 cm. DELANTERO DERECHO: Mon 49-53-57-63-69-75 pts (incl 1 pt de orillo en el lado) en ag tamaño 3 mm con Karisma. Tejer de la manera sig – por el LD: A.3 (= 14 pts), tejer en pt musgo sobre los últimos 35-39-43-49-55-61 pts. Continuar este patrón hasta que A.3 ha sido tejido 1 vez verticalmente = 51-55-59-65-71-77 pts. Cambiar a ag tamaño 4 mm. Ahora tejer de la manera sig, por el LD: A.4 (= 16 pts), pt jersey sobre los últimos 34-38-42-48-54-60 pts, 1 pt de orillo en pt musgo. Continuar este patrón en dirección hacia arriba y, cuando la pieza mida 5 cm, dism en el lado como lo hizo en la pieza de la espalda = 47-51-55-61-67-73 pts. Cuando la pieza mida 16-16-17-18-18-19 cm, empezar a rem para los OJALES – ver explicación arriba. Cuando la pieza mida 20 cm, aum en el lado como lo hizo en la pieza de la espalda. AL MISMO TIEMPO, cuando la pieza mida 29-30-31-32-33-34 cm, dism 1 pt del lado del centro del frente – LEER TIP PARA DISMINUCIÓN, repetir las dism a cada 1 cm 22 veces más. AL MISMO TIEMPO, cuando la pieza mida 38-39-40-41-42-43 cm, rem y dism para la sisa, en el lado, como lo hizo en la pieza de la espalda. Después que todos los rem y dism para la sisa y escote estén hechos, se tienen 19-20-21-22-23-24 pts en la ag. Cuando la pieza mida aprox 53-55-57-59-61-63 cm, dism 2 pts distribuidos equitativamente sobre la torsada de A.4 = 17-18-19-20-21-22 pts restantes en la ag. En la hilera sig, rem con derecho sobre derecho y revés sobre revés. DELANTERO IZQUIERDO: Tejer como la pieza del delantero derecho, pero a la inversa. En vez de A.3 y A.4, tejer A.5 y A.6. No rem para ojales. TERMINACIÓN: Hacer las costuras de los hombros. ORILLA DE LA MANGA: Levantar 90-94-98-102-106-110 pts en ag tamaño 3 mm a lo largo de la sisa. Tejer 1 hilera de derecho por el LR, después tejer resorte 2d/2r con 1 pt de orillo en cada lado. Continuar hasta que la orilla de la manga mida 3 cm, rem con derecho sobre derecho y revés sobre revés. TERMINACIÓN: Hacer las costuras laterales a 1 pt del pt de orillo. Coser los botones. BOLSILLO: Mon 16 pts en ag tamaño 4 mm con Karisma. Tejer de acuerdo a A.6, rem cuando la pieza mida 11 cm. Levantar aprox 23 pts a 1 pt del último pt revés de A.6. Tejer en pt jersey con 1 pt de orillo en pt musgo en cada lado. Rem cuando la pieza mida 12 cm en total. Tejer el otro bolsillo. Coser los bolsillos al centro de las piezas del frente, directamente arriba de los surcos en pt musgo. |
|||||||||||||||||||
Explicaciones del diagrama |
|||||||||||||||||||
|
|||||||||||||||||||
 |
|||||||||||||||||||
 |
|||||||||||||||||||
¿Terminaste este patrón?Entonces, etiqueta tus fotos con #dropspattern #sarahsdelightvest o envíalas a la galería #dropsfan. ¿Necesitas ayuda con este patrón?Encontrarás 11 videos tutoriales, un espacio para comentarios/preguntas y más visitando la página del patrón en garnstudio.com © 1982-2026 DROPS Design A/S. Todos los derechos reservados. Este documento, incluyendo todas sus sub-secciones, está protegido por los derechos de autor (copyright). Lee más acerca de lo que puedes hacer con nuestros patrones en la parte de abajo de cada patrón de nuestro sitio. |
|||||||||||||||||||
Con más de 40 años en el diseño de modelos de punto y de ganchillo, DROPS Design ofrece una de las más vastas colecciones de patrones gratuitos en el internet - traducidos en 17 idiomas. Al día de hoy, contamos con 324 catálogos y 12199 patrones - de los cuales 11579 están traducidos en español.
Nosotros trabajamos con mucho esmero para brindarte lo mejor que las labores de punto y ganchillo tienen para ofrecer,inspiración y consejos, así como hilos de magnífica calidad a precios increíbles! Te gustaría usar nuestros patrones para otro fin además del uso personal? Puedes leer acerca de lo que estás permitida a hacer en el texto de Copyright en la parte de abajo de todos nuestros patrones. Felices labores!
Escribe un comentario sobre DROPS 141-40
¡Nos encantaría saber qué piensas acerca de este patrón!
Si quieres escribir una pregunta referente al patrón, por favor asegúrate de elegir la categoría correcta en el formulario debajo, para acelerar el proceso de respuesta. Los campos obligatorios están marcados con un *.