
Suositut kategoriat
Etsitkö tiettyä lankaa?


Kommentit / Kysymykset (18)
![]() Michaela Lindahl kirjoitti:
Michaela Lindahl kirjoitti:
Hej! Jag förstår inte hur jag ska maska av när jag är färdig med öglan. Dvs jag förstår inte ” Nu stickas m från fram- och baksidan räta tills 2 och 2 SAMTIDIGT som de maskas av.” Och jag hittar tyvärr inte någon video som förklarar. Tack för att ni alltid hjälper till!
12.01.2025 - 21:20DROPS Design vastasi:
Hej Michaela, du stikker højre pind ind i første maske på den ene pind og ind i første maske på den anden pind, strikker maskerne sammen og lukker af efterhånden :)
14.01.2025 - 14:35
![]() Etta Otten kirjoitti:
Etta Otten kirjoitti:
Bovenstaand tel patroon hoort niet bij bovenstaande foto, maar bij Mandoline 1987’s Kitted Potholder #1. De foto staat hieronder.
04.04.2023 - 16:12
![]() Etta Otten kirjoitti:
Etta Otten kirjoitti:
Graag wil ik de pannenlappen DROPS 159-25 DROPS design: Model nr. r-683 breien, maar als ik naar de foto kijk, mis ik een paar telpatronen in de werkbeschrijving. Alleen A.1 is te zien. Moet ik de rest op een andere plek zoeken? Graag hoor ik van u. Vriendelijke groet.
03.04.2023 - 22:08DROPS Design vastasi:
Dag Etta,
Er is ook maar 1 patroon, alleen A.1. Alle kabels e.d. zijn hierin verwerkt.
05.04.2023 - 07:45
![]() Antje Konopka kirjoitti:
Antje Konopka kirjoitti:
Ich verstehe leider das Diagramm nicht. Wie stricke ich denn A1 in der Mitte? Also in den ersten 4 Reihen?
18.04.2022 - 23:55DROPS Design vastasi:
Liebe Frau Konopka, die Zöpfe und das Lochmuster werden nicht genauso in der Höhe wiederholt, dh das Lochmuster in der Mitte wiederholen Sie wenn die ersten 8 Reihen fertig sind, aber die Zöpfe beidseitig stricken Sie wie zuvor (= in jede 6. Runde). Viel Spaß beim stricken!
19.04.2022 - 11:53
![]() Claudia Mackenzie kirjoitti:
Claudia Mackenzie kirjoitti:
Well I have started the Pattern A1 but noticed that where the marker was at the first start of round 1 by the time I did the 56 stitchs it did not reach the marker(where we increased 9 on the knit 1-49ers) so I thought just do the 56 sts so I went to the next round and noticed that the same thing happened. I guess what confusing me is are the 56st in pattern A1 suppose to reach the marker each time? Or do we just knit the pattern A1 and when the stitches end we knit to the marker then due P
15.01.2022 - 03:36DROPS Design vastasi:
Dear Mrs Mackenzie, after you have increased between 1st and 2nd marker the 2nd marker is now in the 58th stitch (not in the 49th anymore because of the increases), and you work: K1, A.1 (= 56 sts), K1, P2, K43, P2 - there are more sts on front piece because of the cable but width will be the same on front and back. Hope it will help. Happy knitting!
19.01.2022 - 10:18
![]() Claudia Mackenzie kirjoitti:
Claudia Mackenzie kirjoitti:
Thank you for your response.it is helpful and I looked at the lesson .I know each square is a stitch so when you have the lines going through 2 of the square does that mean when do it twice or just one time. Example 1st round in A1: purl ,purl (slip1st as if to knit,K1,Psso) do we do it twice?Then you do a 1Yo,K2 tog ,purl,purl.This is how I’m reading the pattern. Now 2nd round in pattern A1: purl,purl,knit,knit,purl,knit 6,purl,knit2,purl2,knit9,purl,purl,knit,knit,
13.01.2022 - 00:42DROPS Design vastasi:
Hi Claudia, If you mean the 2 squares side by side with a diagonal line through, then this means the explanation covers 2 stitches (you do not do it twice). !st row in A.1 is : P2, psso, 1 yarn over, P1, K6, P1, 1 yarn over, K2 together, P2 and so on. You are correct in your reading of row 2. Happy knitting!
13.01.2022 - 07:54
![]() Claudia Mackenzie kirjoitti:
Claudia Mackenzie kirjoitti:
In the pattern for this pot holder in the 56 stitch. you in the first row purl twice then you slip one as if to knit then do your 6 cables then purl then knit2 together.then the next row purl2,Knit 2,Purl1 then do you do a cable or knit?after that you Purl 1 then K2 or do you knit 2together.In other words do you only do the cables or slip 1 or knit togeather where the vertical lines are? I see that in the middle of the 56 stitches you have some vertical lines and can see that it is in di
12.01.2022 - 09:43DROPS Design vastasi:
Dear Mrs Mackenzie, in diagram A.1 you will have decreases and yarn over (see 4th and 5th symbol for decreases) and at the same time you will work cables (as shown in next to last + last symbol). When the lace pattern in the middle of A.1 is done, repeat from first row, while continuing the cables on each side, ie the middle panel is worked over 8 round but the cables are worked over every 6th round (and the small lace pattern on each side on every other round). This lesson might help you understanding how to read diagrams. Happy knitting!
12.01.2022 - 15:55
![]() Claudia Mackenzie kirjoitti:
Claudia Mackenzie kirjoitti:
So when do you start the pattern in A1?Do you do the purl 1 round then knit 1 round first then when you get to the 5th round is that when you start the increases of 9 sts. Or do you start the increases at each knit 1 round?
08.01.2022 - 04:18DROPS Design vastasi:
Dear Mrs Mackenzie, cast on the stitches, then purl 1 round, knit 1 round, purl 1 round, knit 1 round and purl 1 round. Insert the 2 markers without working the stitches, on next round, knit all stitches increasing between 1st and 2nd marker. On next round, start working A.1 between first 2 markers. Happy knitting!
10.01.2022 - 07:43
![]() MJ kirjoitti:
MJ kirjoitti:
Hei! Så nydelige grytekluter! Men jeg trenger litt hjelp med diagrammet. Hvorfor er det tegnet flere omganger på sidene?? Hva gjør man da med maskene i midten?
26.07.2019 - 00:50DROPS Design vastasi:
Hej, ja vist er de fine :) du fortsætter bare de midterste masker fra starten igen. Det er fordi de yderste snoninger i hver side skal strikkes på hver 6.pind. God fornøjelse!
02.08.2019 - 09:37
![]() Maria kirjoitti:
Maria kirjoitti:
Hei! Blir disse tykke og trygge grytekluter som beskytter hendene, eller vil hullmønsteret gjøre at de først og fremst er dekorative? Jeg står mellom å strikke disse eller strikke "sun-baked" en gang til.
10.04.2018 - 21:02DROPS Design vastasi:
Hei Maria. Disse gryteklutene strikkes rundt så de blir dobble. Du kan derfor helt fint bruke dem. God fornøyelse
12.04.2018 - 15:50
|
||||||||||||||||||||||
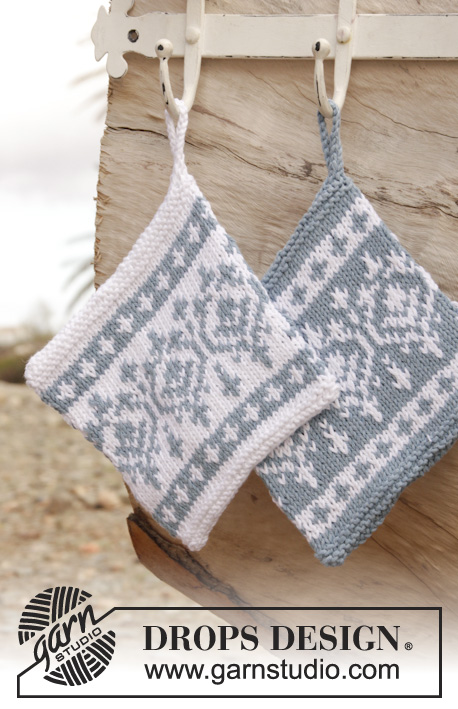
Helping Hand#helpinghandpotholder |
||||||||||||||||||||||
|
|
||||||||||||||||||||||
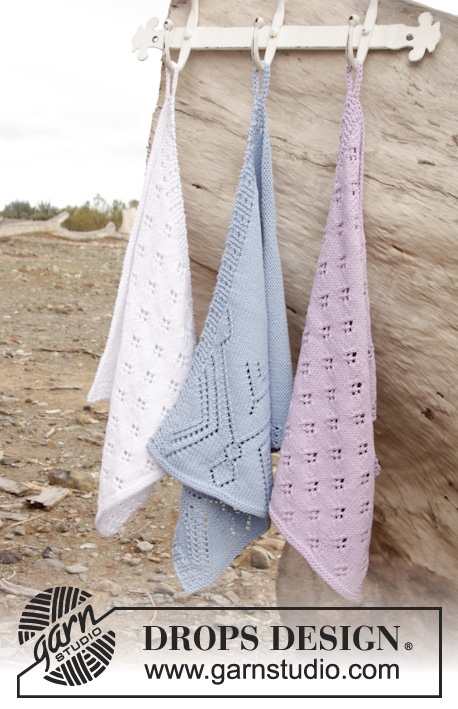
Pitsineuleiset DROPS patalaput ”Muskat”-langasta.
DROPS 159-25 |
||||||||||||||||||||||
|
MALLINEULE: Katso ruutupiirros A.1. ---------------------------------------------------------- PATALAPPU: Neulotaan suljettuna neuleena pyöröpuikolla. Luo 96 s pyöröpuikolle nro 3 Muskat-langalla. Neulo 1 krs nurin, 1 krs oikein, 1 krs nurin, 1 krs oikein ja 1 krs nurin. Kiinnitä 1 merkkilanka krs:n 1. s:aan ja 1 merkkilanka krs:n 49. s:aan (= keskellä kummassakin sivussa). Neulo 1 krs oikein ja lisää SAMALLA 1. ja 2. merkkilangan väliin tasavälein 9 s (etukappaleessa on nyt enemmän silmukoita kuin takakappaleessa, koska pitsineule tekee työstä kapeamman) = 105 s työssä. Ensimmäinen krs neulotaan seuraavasti: 1 o (= merkitty s), neulo mallineuletta piirroksen A.1 mukaisesti (= 56 s), 1 o (= merkitty s), 2 n, 43 s sileää neuletta ja 2 n. Neulo mallineuletta tähän tapaan, kunnes työn pituus on n. 19 cm ja olet neulonut kokonaisen piirroksen A.1 keskellä olevan osuuden mallikerran loppuun. Neulo 1 krs oikein ja kavenna SAMALLA 1. ja 2. merkkilangan välissä tasavälein 9 s (etu- ja takakappaleessa on nyt yhtä monta s) = 96 s. Neulo 1 krs nurin, 1 krs oikein ja 1 krs nurin. Neulo sitten 1 krs oikein ja luo SAMALLA krs:n loppuun ripustussilmukkaa varten 20 s. Käännä työ, päätä luodut 20 s. Aseta sitten patalappu kaksinkerroin siten, että merkkilangat ovat kummassakin sivussa. Neulo sitten etu- ja takakappaleen s:t pareittain oikein yhteen SAMALLA kun päätät s:t. Ompele patalapun pohja yhteen pienin siistein pistoin (ompele luomisreunan sisäpuolelta). Kiinnitä ripustussilmukan pää patalapun kulmaan. Neulo toinen patalappu samoin. |
||||||||||||||||||||||
Ruutupiirroksen selitykset |
||||||||||||||||||||||
|
||||||||||||||||||||||
 |
||||||||||||||||||||||
Oletko tehnyt tämän mallin?Tägää tällöin kuviasi #dropspattern #helpinghandpotholder tai lähetä kuvat #dropsfan galleriaan. Tarvitsetko apua tämän ohjeen kanssa?Löydät 15 ohjevideota, kommentteja/kysymyksiä ja muuta osoitteessa www.garnstudio.com © 1982-2026 DROPS Design A/S. Pidätämme kaikki oikeudet. Tämä tiedosto ja kaikki sen alatiedostot on suojattu tekijänoikeuslailla. Lue lisää siitä, mitä voit tehdä ohjeillamme, verkkosivujemme jokaisen ohjeen alaosasta. |
||||||||||||||||||||||


DROPS Design on toiminut neule- ja virkkausalalla yli 40 vuotta ja meillä on yksi kaikkein laajin valikoima ilmaisia ohjeita verkossa - käännettynä 17 kielelle. Tänään meiltä löytyy 324 lehteä ja 12290 ohjetta - joista 11712 ohjetta on käännetty suomeksi.
Työskentelemme ahkerasti, jotta voisimme antaa teille kaikkein parhaimpia neule- ja virkkausohjeita, inspiraatiota ja neuvoja sekä korkealaatuisia lankoja todella edulliseen hintaan! Haluaisitko käyttää ohjeitamme muuhun kuin henkilökohtaiseen käyttöön? Voit lukea säännöistä ohjeiden Tekijänoikeus -tekstissä, joka löytyy kaikkien ohjeidemme alapuolelta. Hauskoja hetkiä käsitöiden parissa!
Lisää kommentti ohjeeseen DROPS 159-25
Haluamme mielellämme kuulla mielipiteesi tästä ohjeesta!
Mikäli haluat esittää kysymyksen, valitse oikea kategoria alla olevasta valikosta - tällä tavoin saat vastauksen nopeammin. Pakolliset kentät on merkitty tähdellä *.