
Suositut kategoriat
Etsitkö tiettyä lankaa?


Kommentit / Kysymykset (119)
![]() Carol Cooley kirjoitti:
Carol Cooley kirjoitti:
Thank for your helpful comments. Naturally I would consider ordering from yourselves as you make it very easy to find a substitute. I cannot say the same about Captcha which is always a struggle, with blurred small images and often using items a non-USA person would not necessarily recognize. At my time of life anything to m ake life easier helps. Have a nice day. Is that last image a store front or garage?
26.05.2019 - 09:01
![]() Carol Cooley kirjoitti:
Carol Cooley kirjoitti:
Is there either another similar pattern or has this one being rewritten please? *Cassie by DROPS Design Knitted DROPS bolero with lace pattern in ”Big Merino”. Size: S - XXXL* I use mainly acrylic as wool can irritate, alpaca-etc are ok. Any low cost substitutes for wool are welcomed for a practice piece. Maybe garter and st.st to start off then go ahead for lace. Thank you.
14.05.2019 - 13:29DROPS Design vastasi:
Dear Carol, you can find many patterns for bloeros on our site with the search word "bolero". https://www.garnstudio.com/search.php?action=search&w=bolero&c=0&k=0&y=0&lang=en You have to understand that these patterns are written to suppoirt DROPS yarns, we cannot make alterations or suggestions for other yarns, sorry. Happy Crafting!
25.05.2019 - 10:27
![]() Pam kirjoitti:
Pam kirjoitti:
I'm having trouble with row 15 could you please write it in full for me
10.05.2019 - 20:07DROPS Design vastasi:
Hi Pam, Row 15 reading from right to left, so from the right side, - K4, 1 yarn over, slip 1 stitch, knit 2 together and pass the slipped stitch over the knitted together stitches, 1 yarn over, K7, 1 yarn over, slip 1 stitch, K2 together and pass the slipped stitch over the knitted together stitches, 1 yarn over and finally K4. Happy knitting!
11.05.2019 - 11:47
![]() Ava Goei-Vujovich kirjoitti:
Ava Goei-Vujovich kirjoitti:
I have tried a sample swatch: using 21 stitches and interpreting A1. Its a total of 21 stitches but using your explanation above: first row in A: K3, K2 tog, YO - then B: YO, slip 1 as if to K, K1, psso, K5, K2 tog, YO, K1, and C: YO, slip 1 as if to K, K1, psso, K3. I end up with 23 sts and not 21 sts
07.03.2019 - 12:40DROPS Design vastasi:
Dear Mrs Goei-Vujovich, on first row A.1A is worked as follows: K3, K2 tog, YO, K1 (= 6 sts), then work B over the next 10 sts: YO, slip 1 as if to K, K1, psso, K5, K2 tog, YO, K1, then work C: YO, slip 1 as if to K, K1, psso, K3 (= 5 sts) = 21 sts in total. You can insert a marker between each repeat to make sure you always get the correct number of sts in each part of the diagram. Happy knitting!
07.03.2019 - 14:19
![]() Ava Goei-Vujovich kirjoitti:
Ava Goei-Vujovich kirjoitti:
I don't understand why a K1 is added at the end of section B - there isn't a K1 added at the end of section A if I am to read the diagram explanation as shown in A1 Row 1. I understand B is a 10 sts repeat: *YO, slip 1 as if to K, K1, psso, K5, K2 tog, YO, K1*, repeat from *-*.
07.03.2019 - 12:35
![]() Ava Goei-Vujovich kirjoitti:
Ava Goei-Vujovich kirjoitti:
First row in A: K3, K2 tog, YO = 6sts. then B: YO, slip 1 as if to K, K1, psso, K5, K2 tog, YO, K1 = 12 sts (repeat B), and work C: YO, slip 1 as if to K, K1, psso, K3 = 5sts. B should only be multiples of 10, not 12.
07.03.2019 - 11:35DROPS Design vastasi:
Dear Mrs Goei-Vujovich, when working B you decrease 1 stitch 2 times (slip 1, K1, psso + K2 tog) and increase with 2 YOs = number of sts is the same = 10 sts. See previous answer for whole repeats on the row. Happy knititng!
07.03.2019 - 12:19
![]() Ava Goei-Vujovich kirjoitti:
Ava Goei-Vujovich kirjoitti:
I believe your reply at 9:43 is incorrect. I have just tried in in a total of 21 stitches for a A,B,C section. It makes the entire section of section B : 12 stitches for a standard repeat when it should be 10! Standard repeat of 10 stitches and section C is 5.
07.03.2019 - 11:27DROPS Design vastasi:
Dear Mrs Goei-Vujovich, B is a 10 sts repeat: *YO, slip 1 as if to K, K1, psso, K5, K2 tog, YO, K1*, repeat from *-*. And you will work: 3 sts in garter st, A.1A (= 6 sts), repeat A.1B a total of 9-10-11-12 times (= over the 90-100-110-112 next sts), work A.1C (= 5 sts) and finish with 3 sts in garter st. Happy knitting!
07.03.2019 - 12:18
![]() Ava Goei-Vujovich kirjoitti:
Ava Goei-Vujovich kirjoitti:
In section B, row 1, I start off with a *1 YO, sl1, K1, psso, k5, k2tog, 2 YO*, and then repeat from* to * for the next 90-100-etc stitches, until the last 5 stitches of that row?
07.03.2019 - 06:16DROPS Design vastasi:
Hi Ava, You are right, apart from at the end of the sequence it is 1 YO, K1, 1 YO, not 2 YOs. This sequence is repeated until the last 8 stitches, finishing with A.1 C (5 stitches) and 3 stitches in garter stitch. Happy knitting!
07.03.2019 - 08:06
![]() Ava Goei-Vujovich kirjoitti:
Ava Goei-Vujovich kirjoitti:
Agree not a well worded pattern & diagram explanations. In section A, I K2tog (4 & 5th stitch together), then immediately following: do I do 2 times YO followed by a sl1, K1, psso?
07.03.2019 - 06:07DROPS Design vastasi:
Dear Mrs Goei-Vujovich, on first row in A.1, work A.1A as follows: K3, K2 tog, YO - then work B: YO, slip 1 as if to K, K1, psso, K5, K2 tog, YO, K1 (repeat B), and work C: YO, slip 1 as if to K, K1, psso, K3. On row 15, work the last 2 sts in A tog with the next st in B, then work the last 2 sts in B with next st in next B / in C. Happy knitting!
07.03.2019 - 09:43
![]() Marcia Ebert kirjoitti:
Marcia Ebert kirjoitti:
I have started knitting this pattern and realize that there are directions for knitting the RS but not for wrong side. Is this done in stockinette stitch except for pattern stitches? Garter stitch is the border stitches but what do you do on the wrong side in the middle. It looks like every other row of the pattern stitch on the diagram is plain so is it purl on the wrong side. Is this correct?
21.01.2019 - 04:51DROPS Design vastasi:
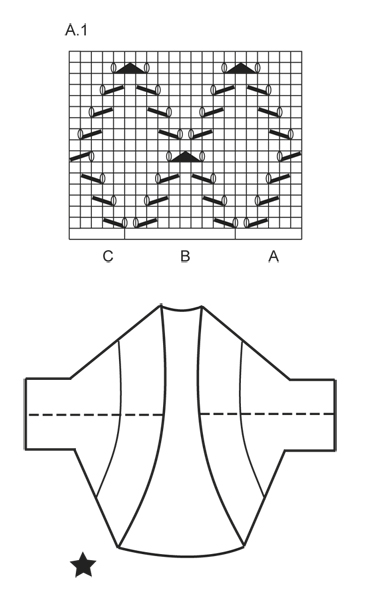
Hi Marcia, All the rows in the diagram show the stitches from the right side, so between the lace pattern you work stocking stitch (knit from the right side and purl from the wrong side). Happy knitting!
21.01.2019 - 07:01
|
|||||||||||||||||||
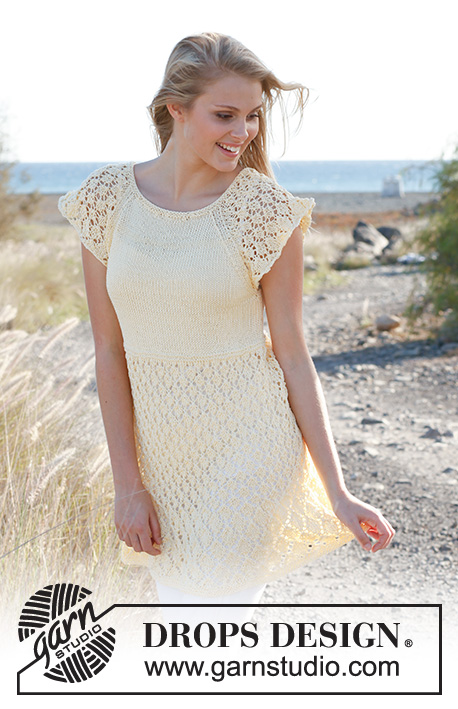
Cassie#cassiebolero |
|||||||||||||||||||
 |
 |
||||||||||||||||||
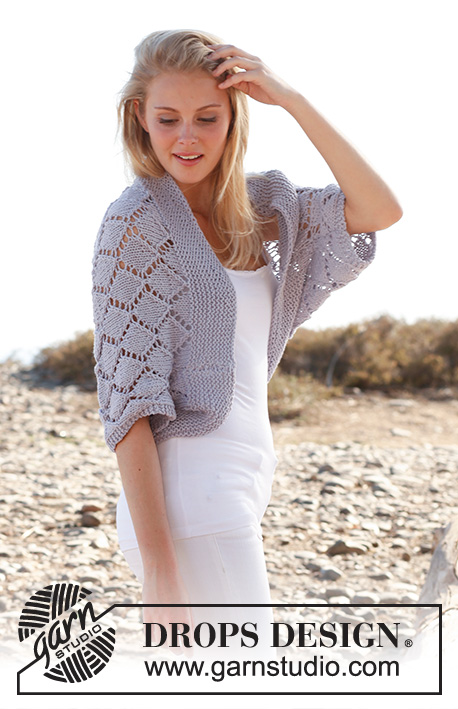
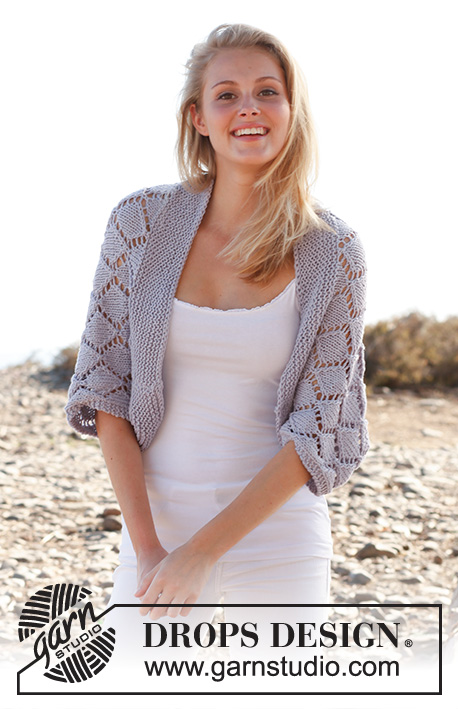
DROPS pitsineulebolero ”Big Merino” -langasta. Koot S-XXXL.
DROPS 146-16 |
|||||||||||||||||||
|
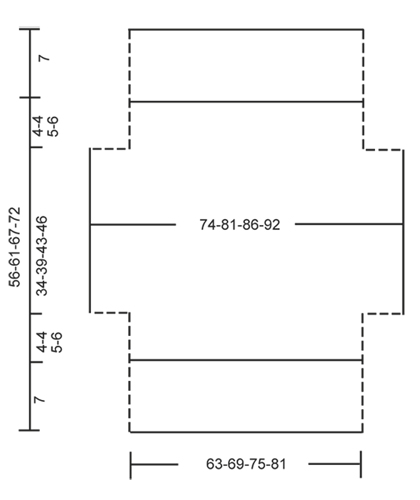
AINAOIKEINNEULE tasona: Neulo kaikki kerrokset oikein. MALLINEULE: Katso ruutupiirros A.1. Piirros näyttää mallineuletta oikealta puolelta katsottuna. --------------------------------------------------------- BOLERO: Neulotaan tasona pyöröpuikolla, jotta kaikille silmukoille olisi tilaa. Luo 107-117-127-137 s pyöröpuikolle nro 5 Big Merino -langalla. Neulo ainaoikeaa, kunnes työn pituus on 7 cm. Seraava krs (= oikea puoli) neulotaan näin: 3 s AINAOIKEAA (ks. selitys yllä), A.1A (= 6 s), neulo seuraavilla 90-100-110-120 s:lla mallineuletta piirroksen A.1 B mukaisesti, neulo lopuksi piirros A.1 C (= 5 s) ja 3 s ainaoikeaa. Jatka mallineuletta tähän tapaan ja neulo kummassakin reunassa 3 s:lla ainaoikeaa. TARKISTA NEULETIHEYS! Kun työn pituus on 11-11-12-13 cm, luo 2 seuraavan krs:n loppuun hihoja varten 10 s = 127-137-147-157 s. Jatka neulomalla seuraavasti: 3 s ainaoikeaa, A.1A (= 6 s), neulo seuraavilla 110-120-130-140 s:lla mallineuletta piirroksen A.1 B mukaisesti, neulo lopuksi piirros A.1 C (= 5 s) ja 3 s ainaoikeaa. HUOM! Tarkista, että piirroksen A.1 pitsikuviot jatkuvat rikkoutumattomina! Jatka mallineuletta tähän tapaan. Kun työn pituus on 45-50-55-59 cm, päätä 2 seuraavan krs:n alusta 10 s = 107-117-127-137 s. Neulo sitten seuraavasti: 3 s ainaoikeaa, A.1A (= 6 s), neulo seuraavilla 90-100-110-120 s:lla mallineuletta piirroksen A.1 B mukaisesti, neulo lopuksi piirros A.1 C (= 5 s) ja 3 s ainaoikeaa. Jatka mallineuletta tähän tapaan. Kun työn pituus on 49-54-60-65 cm, neulo kaikilla silmukoilla ainaoikeaa. Päätä s:t kerralla, kun työn pituus on 56-61-67-72 cm. VIIMEISTELY: Ompele sivu- ja hihasaumat yhden reunasilmukan päästä (ks. mittapiirroksen katkoviiva). |
|||||||||||||||||||
Ruutupiirroksen selitykset |
|||||||||||||||||||
|
|||||||||||||||||||
 |
|||||||||||||||||||
 |
|||||||||||||||||||
Oletko tehnyt tämän mallin?Tägää tällöin kuviasi #dropspattern #cassiebolero tai lähetä kuvat #dropsfan galleriaan. Tarvitsetko apua tämän ohjeen kanssa?Löydät 15 ohjevideota, kommentteja/kysymyksiä ja muuta osoitteessa www.garnstudio.com © 1982-2026 DROPS Design A/S. Pidätämme kaikki oikeudet. Tämä tiedosto ja kaikki sen alatiedostot on suojattu tekijänoikeuslailla. Lue lisää siitä, mitä voit tehdä ohjeillamme, verkkosivujemme jokaisen ohjeen alaosasta. |
|||||||||||||||||||


DROPS Design on toiminut neule- ja virkkausalalla yli 40 vuotta ja meillä on yksi kaikkein laajin valikoima ilmaisia ohjeita verkossa - käännettynä 17 kielelle. Tänään meiltä löytyy 324 lehteä ja 12290 ohjetta - joista 11694 ohjetta on käännetty suomeksi.
Työskentelemme ahkerasti, jotta voisimme antaa teille kaikkein parhaimpia neule- ja virkkausohjeita, inspiraatiota ja neuvoja sekä korkealaatuisia lankoja todella edulliseen hintaan! Haluaisitko käyttää ohjeitamme muuhun kuin henkilökohtaiseen käyttöön? Voit lukea säännöistä ohjeiden Tekijänoikeus -tekstissä, joka löytyy kaikkien ohjeidemme alapuolelta. Hauskoja hetkiä käsitöiden parissa!
Lisää kommentti ohjeeseen DROPS 146-16
Haluamme mielellämme kuulla mielipiteesi tästä ohjeesta!
Mikäli haluat esittää kysymyksen, valitse oikea kategoria alla olevasta valikosta - tällä tavoin saat vastauksen nopeammin. Pakolliset kentät on merkitty tähdellä *.