
Popular categories
Looking for a yarn?


Comments / Questions (37)
![]() Mariethe House wrote:
Mariethe House wrote:
Merci! je comprends maintenant!
04.07.2014 - 17:19
![]() Mariethe House wrote:
Mariethe House wrote:
Aïe! Je ne comprends pas les explications pour l'encolure! l'information générale, dans la rubrique: diminutions, me dit de diminuer à 5 m des bords :2m ensemble 5m et ensuite 2m ensemble. ça, c'est clair!Mais quand je me reporte au paragraphe: LIRE ATTENTIVEMENT LA SUITE AVANT DE CONTINUER,Il est dit de placer un marqueur et de mesurer à partir de ce marqueur! Là je ne comprends pas! Où faut-il placer le marqueur?
04.07.2014 - 12:42DROPS Design answered:
Bonjour Mme House, Le marqueur se place quand on a tricoté les derniers volants ensembles, l'ouvrage mesure 22 cm en taille S, on a 163 m et 2 marqueurs à 43 m de chaque côté. Ce nouveau marqueur est un repère pour la hauteur cette fois. Bon tricot!
04.07.2014 - 17:04
![]() Mariethe House wrote:
Mariethe House wrote:
Bonjour. Y-a-t-il 4 volants pour toutes les tailles?Je viens de remarquer ça:TAILLE XL, XXL et XXXL : 4ème VOLANT : Comme pour le 3ème volant.Pouvez-vous me donner des explications pour la taille S... COmbien y a t il de volants en tout pour cette taille là en particulier? Merci.
20.06.2014 - 21:32DROPS Design answered:
Bonjour Mme House, effectivement, le 4ème volant ne concerne que les 3 dernières tailles, dans les 3 premières, il n'y a que 3 volants. Bon tricot!
21.06.2014 - 09:45
![]() Karen wrote:
Karen wrote:
Absolutely beautiful and wonderfully feminine!
10.07.2013 - 16:51
![]() Beth wrote:
Beth wrote:
Is it possible to make this longer as I do't wear the short things & love it. Any help would be appreciated. Thanks Beth
13.06.2011 - 23:30
![]() Pömppö wrote:
Pömppö wrote:
Söpöin kaikista näistä malleista!
27.02.2010 - 22:54Jeeranun wrote:
Very beautiful
26.01.2010 - 01:21
![]() Ellada wrote:
Ellada wrote:
Very, very nice. I wont it knitt
25.01.2010 - 07:42
![]() Gorelych wrote:
Gorelych wrote:
Super Model! Gefällt mir sehr gut! Ich hätte gerne Strickmuster! Danke im Voraus!
21.01.2010 - 21:15
![]() Irene Almqvist wrote:
Irene Almqvist wrote:
Jättesöt,men volangerna kanske ska sitta lite mer under bysten,ser ut som dom börjar mitt på bysten !
21.01.2010 - 12:50
|
|||||||||||||
Sweet Pea#sweetpeacardigan |
|||||||||||||
 |
 |
||||||||||||
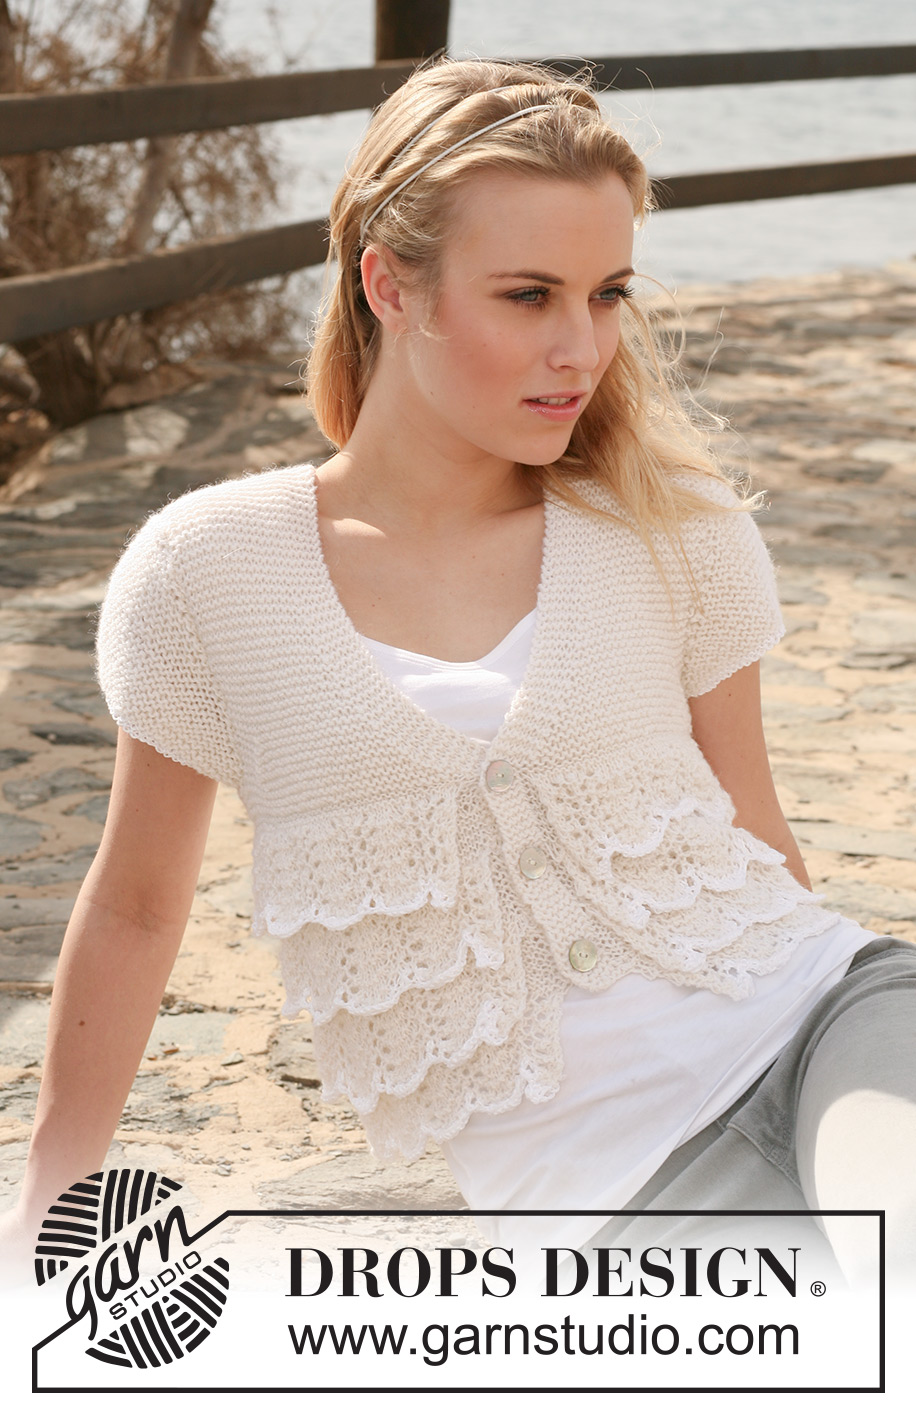
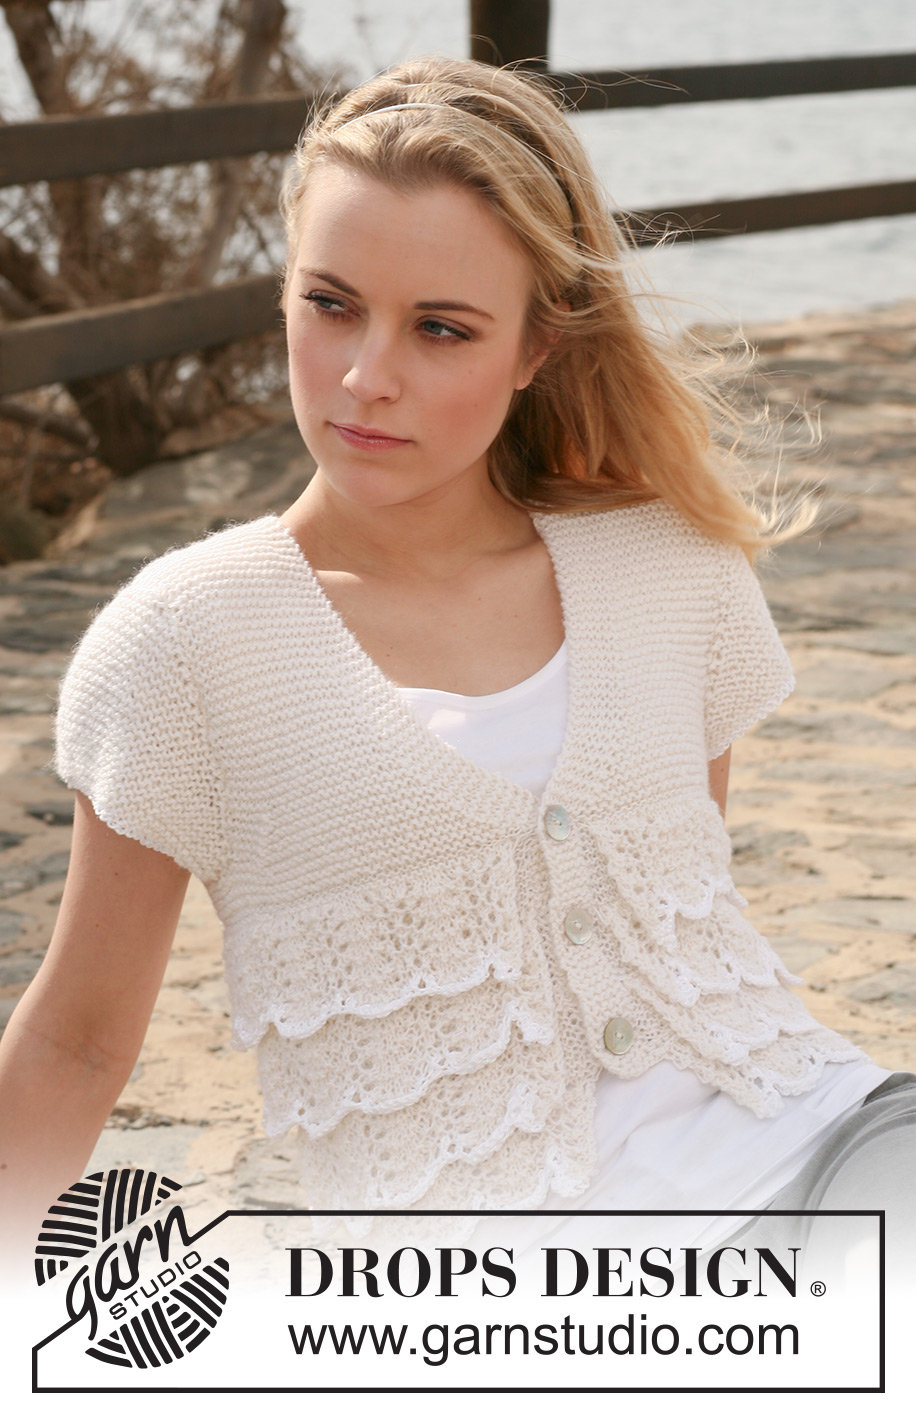
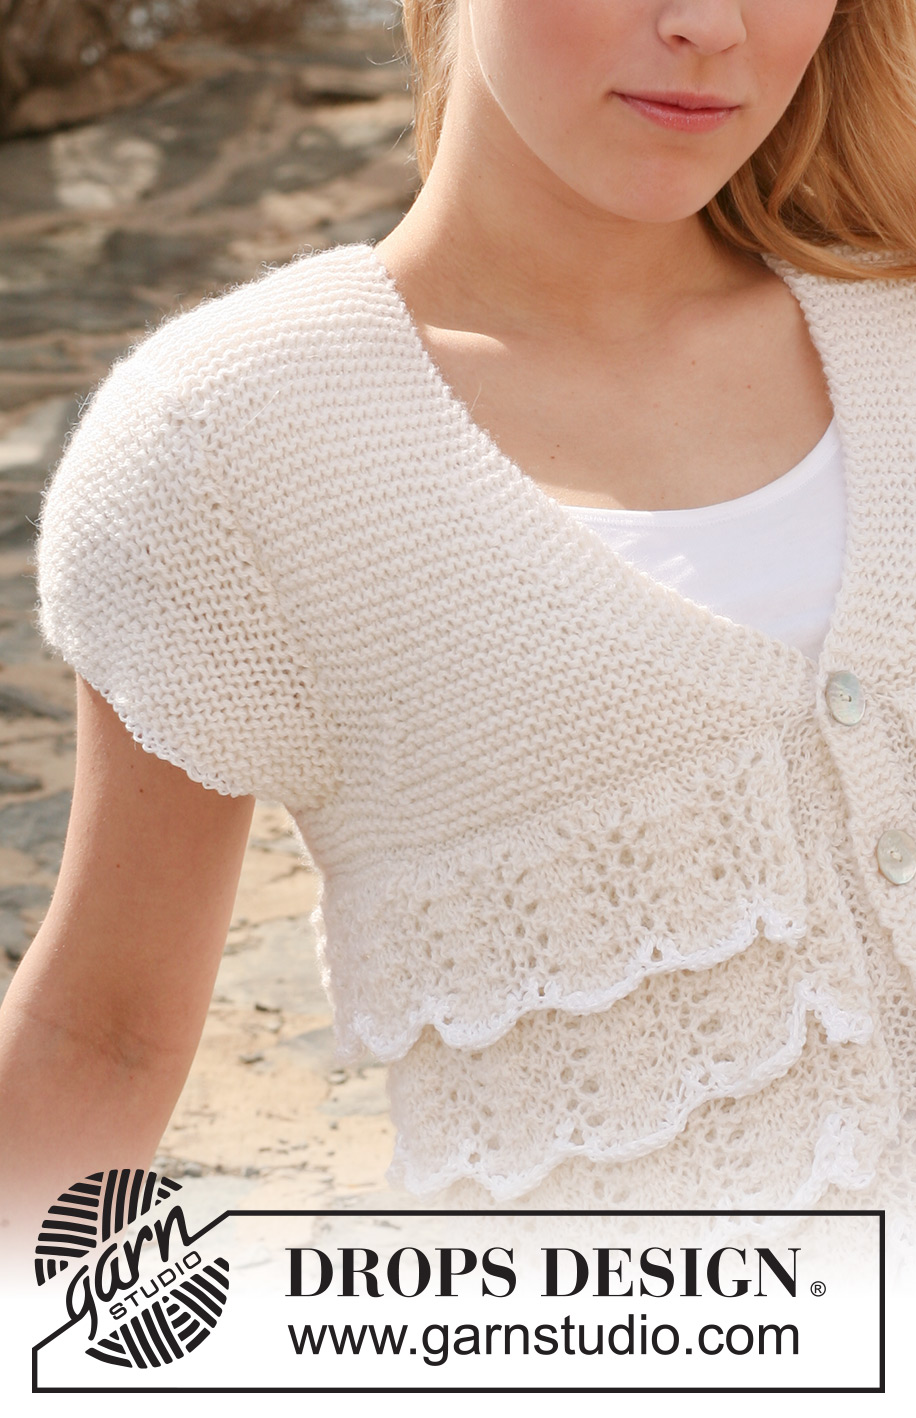
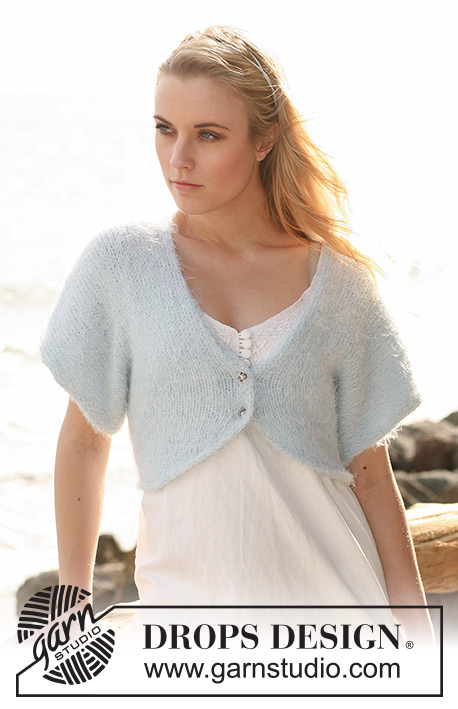
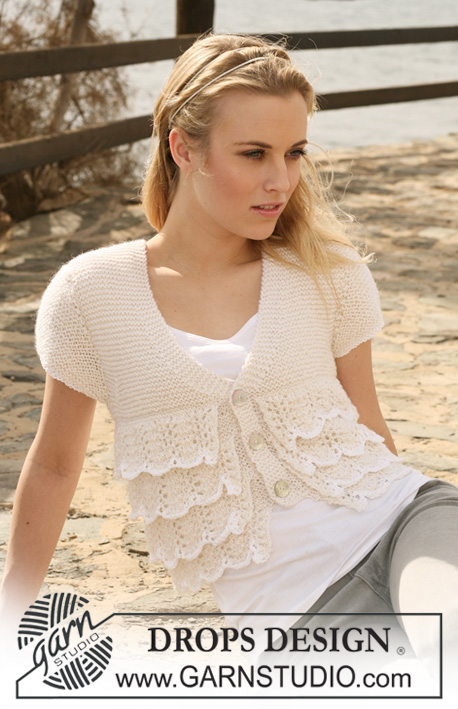
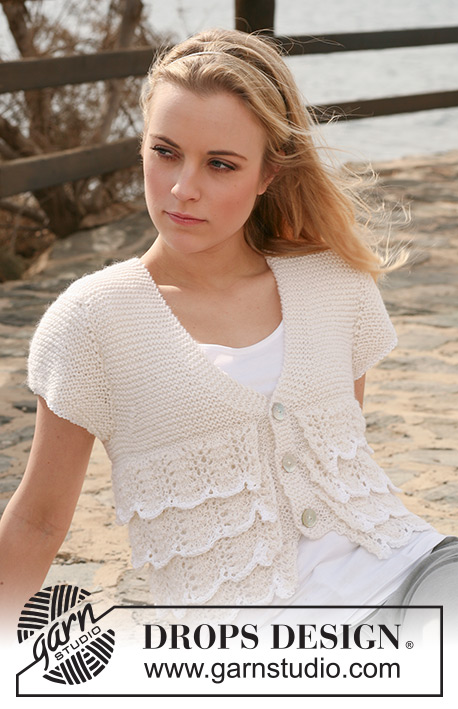
DROPS jacket with short sleeves and wavy flounces in ”Alpaca” and ”Cotton Viscose”. Size S to XXXL.
DROPS 119-20 |
|||||||||||||
|
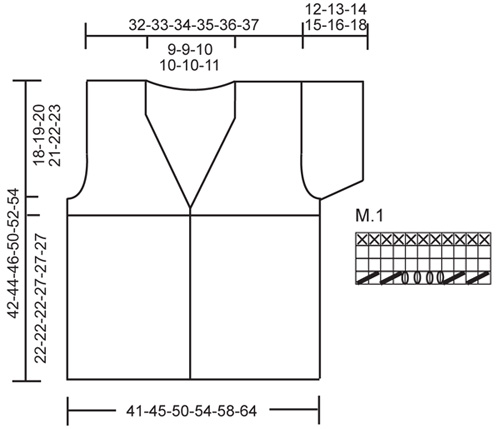
PATTERN: See diagram M.1. Diagram shows 1 vertical pattern repeat from RS. GARTER ST (back and forth on needle): K all rows. FRONT BAND: Worked in garter st with 2 strands of yarn. At the bottom part of body piece have an extra ball of yarn each side. For neatest result work front bands a little tight. DECREASING TIP (applies to neck and armholes): Dec from RS inside 5 sts. Dec as follows before and after 5 sts: K2 tog. BUTTONHOLES: Make buttonholes on right front band. 1 buttonhole = bind off 3rd front band st from mid front and cast on 1 new st on next row. Make buttonholes when FRONT BAND measures: SIZE S, M and L: 3, 9 and 15 cm / 1⅛", 3½" and 6". SIZE XL, XXL and XXXL: 2, 8, 14 and 20 cm / ¾", 3⅛", 5½" and 8". -------------------------------------------------------- -------------------------------------------------------- JACKET: Worked back and forth on circular needle from mid front. The bottom part of body pieces comprises 4 flounces, layered over one another. FLOUNCE 1: Loosely cast on 216-240-264-288-312-336 sts on circular needle size 4 mm / US 6 with 1 thread Cotton Viscose. Work first row from WS as follows: K5, K2 tog, * K10, K2 tog *, repeat from *-*, and finish with K5 = 198-220-242-264-286-308 sts. Now work the first 2 rows of M.1. Change to 1 thread Alpaca and continue in M.1 until there are 5 vertical repeats. Work the first 2 rows of M.1 and then work next rows as follows from RS: K 9-12-10-7-11-15 sts, * K2 tog, K 5 sts *, repeat from *-* until 7-12-8-5-9-13 sts remain, K these = 172-192-210-228-248-268 sts, AT THE SAME TIME at the end of row cast on 5 new sts for front band (cast these on with 2 threads Alpaca - see above under FRONT BAND – work the rest of the piece with 1 thread Alpaca). K 1 row from WS (= last row in M.1), cast on 5 new sts at the end of row with 2 threads (= front band the other side) = 182-202-220-238-258-278 sts. Work 5 cm / 2" GARTER ST - see above - finish with 1 row from WS. NOTE! Remember BUTTONHOLES when front band measures 3-3-3-2-2-2 cm / 1⅛"-1⅛"-1⅛"-¾"-¾"-¾" - see above. Cut 1 thread, leave the extra thread for front band in piece. Put flounce aside, it measures approx 12 cm / 4¾". FLOUNCE 2: Like FLOUNCE-1 until there are 172-192-210-228-248-268 sts on needle, do not cast on new sts for front band, but K 1 row on all sts from WS (= last row in M.1). KNITTING FLOUNCES TOG: Now place Flounce-2 on top of Flounce-1 and work them tog from RS as follows: Work 5 front band sts in garter st from Flounce-1 (worked with 2 threads), then continue with 1 thread only as follows: K tog 1 st from Flounce-1 with 1 st from Flounce-2, and continue across the row until all sts have been K tog, work the last 5 sts on front band with 2 threads = 182-202-220-238-258-278 sts. Work 5 cm / 2" garter st on all sts (front bands with 2 threads as before) NOTE! Remember buttonholes. Finish with 1 row from WS, cut 1 thread, leave the extra thread for front band in piece. Put flounce aside. FLOUNCE-3: Like Flounce-2, and work Flounce-3 tog with Flounce-2 as described above. Make sure to have the same number of garter st rows after M.1 in each flounce. NOTE! Remember buttonholes. SIZE XL, XXL and XXXL: FLOUNCE- 4: Like Flounce-3. ALL SIZES: LAST FLOUNCE: Like Flounce-3. Work Flounces tog as before, but after K them tog from RS work next row from WS as follows: 5 front band sts as before, K 4-5-4-3-3-3, * K2 tog, K 7-7-8-8-8-8 *, repeat from *-* until 11-12-11-10-10-10 sts remain, work these as follows: K2 tog, K 4-5-4-3-3-3 and 5 front band sts as before = 163-181-199-215-233-251 sts. Piece now measures approx 22-22-22-27-27-27 cm / 8¾"-8¾"-8¾"-10⅝"-10⅝"-10⅝". Insert a marker 43-48-52-56-61-65 sts in from each side (= 77-85-95-103-111-121 sts between markers on back piece). READ ALL OF THE FOLLOWING SECTION BEFORE CONTINUING! Insert a marker, and now measures piece from here. Continue in GARTER ST with 2 threads on all sts. REMEMBER THE GAUGE! AT THE SAME TIME when piece measures 1 cm / ⅜" from marker dec 1 st each side towards mid front for neck - see DECREASING TIP! Repeat the dec on every other row a total of 5-6-6-6-8-7 times and then on every 4th row a total of 8 times. AT THE SAME TIME when piece measures 2-3-4-2-3-4 cm / ¾"-1⅛"-1½"-¾"-1⅛"-1½" from marker bind off 8 sts each side for armhole (= 4 sts each side of marker) and complete front and back pieces separately. LEFT FRONT PIECE: Continue dec for neck, AT THE SAME TIME bind off for armhole at the side on every row from RS – see DECREASING TIP: 1 st 4-7-11-14-17-21 times. When all dec for armhole and neck are complete there are 22-23-23-24-24-25 sts left on shoulder. Bind off when armhole measures approx 18-19-20-21-22-23 cm / 7"-7½"-8"-8¼"-8¾"-9" (piece measures a total of approx 42-44-46-50-52-54 cm / 16½"-17¼"-18"-19¾"-20½"-21¼"). RIGHT FRONT PIECE: Like left front piece, but mirrored. BACK PIECE: = 69-77-87-95-103-113 sts. Bind off for armhole each side on every row from RS as described for front piece = 61-63-65-67-69-71 sts left on needle. Continue until armhole measures approx 17-18-19-20-21-22 cm / 6¾"-7"-7½"-8"-8¼"-8¾". Now bind off the middle 17-17-19-19-21-21 sts for neck and complete each shoulder (= 22-23-23-24-24-25 sts) separately. Bind off as described for front piece. SLEEVE: Worked back and forth on needle. Cast on 50-54-60-66-70-74 sts (includes 1 edge st each side) on needle size 4 mm / US 6 with Cotton Viscose. K 2 rows. Change to 2 threads Alpaca. K 1 row from RS, AT THE SAME TIME inc 10 sts evenly = 60-64-70-76-80-84 sts. Work garter st until piece measures 2 cm / ¾". Now bind off 3 sts each side for sleeve cap and bind off 1 each side at beg of every row until piece measures 11-12-13-14-15-17 cm / 4⅜"-4¾"-5⅛"-5½"-6"-6¾". Now bind off 3 sts each side 1 time and bind off remaining sts. Piece measures approx 12-13-14-15-16-18 cm / 4¾"-5⅛"-5½"-6"-6¼"-7". ASSEMBLY: Sew shoulder seams. Set in sleeves and sew sleeve seams. Sew buttons on left front band. |
|||||||||||||
Diagram explanations |
|||||||||||||
|
|||||||||||||
 |
|||||||||||||
Have you finished this pattern?Tag your pictures with #dropspattern #sweetpeacardigan or submit them to the #dropsfan gallery. Do you need help with this pattern?You'll find 16 tutorial videos, a Comments/Questions area and more by visiting the pattern on garnstudio.com. © 1982-2026 DROPS Design A/S. We reserve all rights. This document, including all its sub-sections, has copyrights. Read more about what you can do with our patterns at the bottom of each pattern on our site. |
|||||||||||||


With over 40 years in knitting and crochet design, DROPS Design offers one of the most extensive collections of free patterns on the internet - translated to 17 languages. As of today we count 324 catalogs and 12272 patterns - 12262 of which are translated into English (US/in).
We work hard to bring you the best knitting and crochet have to offer, inspiration and advice as well as great quality yarns at incredible prices! Would you like to use our patterns for other than personal use? You can read what you are allowed to do in the Copyright text at the bottom of all our patterns. Happy crafting!
Post a comment to pattern DROPS 119-20
We would love to hear what you have to say about this pattern!
If you want to leave a question, please make sure you select the correct category in the form below, to speed up the answering process. Required fields are marked *.