Front edge in double yarn
Keywords: kant,

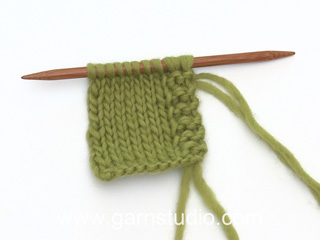
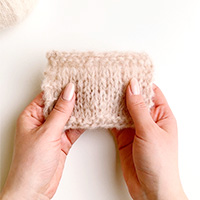
To make the front edge nice thick and firm on e.g. a knitted cardigan you can use 2 threads of the yarn when working the first two sts towards the edge. After the 2 sts let go of one of the threads, and then pick it up again on the way back.
The video above can be used in the following patterns
Comments (16)
![]() Joanne M Seitz wrote:
Joanne M Seitz wrote:
When doing front edge double yarn, how should you cast on ? So that you have the 2 double stitches at the beginning of the row? Or do you just do regular cast on and then add the double stitches with the next row?
05.09.2023 - 01:55DROPS Design answered:
Dear Mrs Seitz, you can cast on with 2 strands the number of stitches you will then work with double yarn, so that you are sure these stitches won't be too tight. Happy knitting! 05.09.2023 - 14:07
![]() Ev wrote:
Ev wrote:
I have a question about the increase in the front pieces. wool warehouse has not answered so I hope someone else will. The pattern says 'increase 1st for lapel towards mid front' Is that before the 2 edge stitches or are we increasing the edge for the lapel?
24.05.2019 - 03:24DROPS Design answered:
Dear Ev, the increases will be worked inside the 2 edge sts - pattern has been edited, thanks for your feedback. Happy knitting! 27.05.2019 - 13:28
![]() Hanne wrote:
Hanne wrote:
Der skal strikkes to masker dobbelt i begge sider med dobbelt garn. Skal jeg så strikke med 6 nøgler kørende samtidig?
01.06.2017 - 22:04DROPS Design answered:
Hej Hanne, Nej den ene tråd i den ene side er den du strikker frem og tilbage med, den ekstra tråd skal du have et mindre ekstra nøgle af i hver side. God fornøjelse! 12.07.2017 - 14:35Florence wrote:
Félicitation pour vos informations. J'ai besoin d'aide concernant un modèle que je suis entrain de faire, le numéro 0-813 il dise de tricoter 1 rang env sur l'envers puis le rang suivant ainsi sur l'endroit: 2 m de bordure au point mousse ensuite 2 m end/2m env, répéter de X.X jusqu'à ce qu'il reste 4 m et terminer pas 2 m end et 2 m de bordure au point mousse. j'ai besoin d'aide merci de me renseigner comment faire ce travail.... Merci à l'avance
02.10.2012 - 06:07DROPS Design answered:
Bonjour Florence, une réponse vous a été envoyée par mail. Bon tricot ! 02.10.2012 - 08:42
![]() Rahel wrote:
Rahel wrote:
Alles klar, herzlichen DANK für die tollen Muster, Videos, Anleitungen usw.! Das Strickfieber packt mich schon wieder...
14.08.2012 - 09:48Viviana Reyes Arenas wrote:
Gracias por todos los videos y patrones, están bellísimos, me gustaría mucho que a mi país llegaran sus lanas.
18.06.2012 - 19:41
![]() Marion wrote:
Marion wrote:
Na super, ne voll tolle Lösung, hatte schon oft ein Problem damit....DANKE
23.03.2012 - 17:51
![]() Carmen wrote:
Carmen wrote:
Ideal nunca lo hubiese imaginado ,es genial.
28.02.2012 - 18:36Carmen-Lucia wrote:
Me encantan los videos y este truco esta especialmente útil, pocas veces estaba a gusto con las orilla cuando hacia sacos abiertos. Gracias
27.02.2012 - 17:54Lourdes wrote:
Me gustan sus videos, pero creo que en algunos casos les falta el sonido para la explicación
09.11.2011 - 04:33
![]() Yvette wrote:
Yvette wrote:
Gäller dette för nederkant på plagg där man börjar med sletstickning eller finns det ett annat sett att få en stadig kant vid slätstickning
03.11.2011 - 15:12GABRIELA wrote:
Muy interesante... gracias.
18.07.2011 - 01:16
![]() Cathy wrote:
Cathy wrote:
Tricoteuse chevronnée, je ne pensais pas avoir encore grand chose à apprendre. Votre site me prouve le contraire ! Un grand bravo et merci pour tout !
12.04.2011 - 23:01
![]() Janke wrote:
Janke wrote:
How very helpfull! thanks a lot.
05.04.2011 - 11:58Susana wrote:
Me parece totalmente distinto nunca se me ocurrio tejer de esta manera Ahora lo intentare Gracias por sus enseñanzas
08.02.2011 - 14:32


The question that I just posted was in regards to pattern Drops 112-4. Thanks so much for all your awesome patterns❤️
24.05.2019 - 03:44