
Categorías populares
¿Buscas un hilo?


Comentarios / Preguntas (47)
![]() Gail escribió:
Gail escribió:
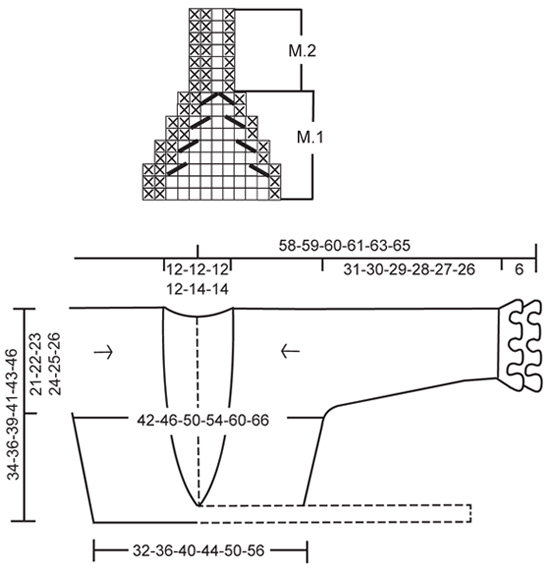
I don't understand what M.1 and M.2 mean. Do they refer to the diagrams on p.4? If yes, what are you supposed to do? Flounce 1 and 2
29.07.2025 - 21:10DROPS Design respondió:
Dear Gail, M.1 and M.2 refer to the diagram at the bottom of the page; M.1 = 9 rows at the bottom of diagram and M.2 = 7 rows - just as shown on the right side of diagram. Read more about diagrams here. Happy knitting!
30.07.2025 - 09:03
![]() Gail escribió:
Gail escribió:
How many yards of yarn for each size?
15.07.2025 - 23:38DROPS Design respondió:
Hi Gail, DROPS Safran 1 Ball (50g) = 160 m/174 yd. For sizes S – M – L- XL – XXL – XXXL you will need 250-300-300-350-400-450 g > it means 870-1044-1044-1218-1392-1566 yd of yarn. Happy knitting!
16.07.2025 - 14:33
![]() Carole escribió:
Carole escribió:
Remember me body piece: 125 sts - cast on new sts for body piece at the end of every row each side as follows: 5 sts 7 times, then 9 sts 1 time = 213. Does this mean cast on 5 sts at the beginning and end of the row on the rs and ws for the next 7 rows and then 9 sts at the beginning and end of next row or cast on 5 sts at the end of next 14 rows and 9 sts at the end of next 2 rows please?
04.03.2023 - 12:34DROPS Design respondió:
Dear Carole, you cast on at the end of the row, but both on rows from the right side and from the wrong side. Each time accounts for 2 rows: 1 from the right side and 1 from the wrong side. So, you would work as the second option you indicated: cast on 5 sts at the end of next 14 rows and 9 sts at the end of next 2 rows. Happy knitting!
05.03.2023 - 20:59
![]() Carole escribió:
Carole escribió:
Remember me sleeve: 79 sts - inc 1 st each side by K2 in st inside edge st, and repeat the inc on every 4th row a total of 14 times and then on every other row 9 times = 125 sts? Does this mean increase 1 st at the beginning of next 2 rows then beginning of ever 4th and 5th row 14 times or increase 1 st either end of next and every 4th row then at the beginning of every other row 9 times? I end up with 127 sts instead of 125 sts if I do this? Thanks for your help.
28.02.2023 - 12:29DROPS Design respondió:
Dear Carole, you will increase by knitting 2 stitches in the 2nd stitch + in the next-to last stitch on a row from RS, then work 3 rows without increasing, repeat these 4 rows a total of 14 times; then increase the same way on every other row (= on every row from the right side) a total of 9 times. You have then: 79 sts + 28 sts + 18 sts = 125 sts. In total. Happy knitting!
28.02.2023 - 13:34
![]() Lena escribió:
Lena escribió:
Jeg vil gerne strikke boleroen ca. 15 cm længere, så den når til livet. Pandebåndet skal stadig sidde det samme sted. Hvordan gør jeg dette?
23.06.2020 - 02:12DROPS Design respondió:
Hej Lena, tror det letteste vil være at samle masker op under bindebåndet. Vi hardesværre ikke mulighed for at ændre i opskriften. God fornøjelse!
25.06.2020 - 09:34
![]() Ria Abee escribió:
Ria Abee escribió:
Maat xxl: 243 st. is 1 steek te weinig voor telpatroon. Moet daarna 20 schulpen hebben, zijn er 22 en het stekenaantal klopt ook niet. Volgens patroon 83, het zijn er maar 68. WAT DOE IK FOUT???
31.07.2016 - 08:30DROPS Design respondió:
Het klopt precies: Ga verder als volgt (eerste nld = goede kant): 1 kant st in RIBBELST – zie boven, 1 st av, M.1 16-17-18-19-20-21 keer over de nld en 1 kant st in ribbelst. == > dus u hebt aan elke kant een kantsteek en aan het begin 1 st av, dus 240 st over, dat is 20 keer 12 st. Aan het eind van het telpatroon is elk groepje van 12 st nog maar 4 st, dus dan heb u 3 st (2 kanst + 1 av) = 20 x 4 = 83 st. Veel breiplezier.
05.08.2016 - 10:37
![]() Lelletta escribió:
Lelletta escribió:
Grazie mille!!
12.05.2015 - 21:01
![]() Lelletta escribió:
Lelletta escribió:
Buonasera! Avrei bisogno di un chiarimento:ho avviato le nuove maglie per il corpo(taglia S) x 7 volte ed ora devo aumentare le altre 6+6 all'interno di M2. Vanno inserite sempre ai lati o lungo tutto il ferro?Vi ringrazio per la cortese e sempre rapida risposta! saluti!!!!!!!!!!
12.05.2015 - 19:07DROPS Design respondió:
Buonasera Lelletta. Le 6 m vanno aumentate ai lati. Mano mano che aumenta, lavora le nuove m come indicato nel diagramma M.2. Buona lavoro!
12.05.2015 - 20:08
![]() Nina escribió:
Nina escribió:
Jeg forstår ikke hvor i oppskriften arm og volang nr. 2 lages? Er i ferd med å avslutte på bolen, str. L, ved å strikke til arbeidet måler 54 cm.
15.09.2013 - 22:34DROPS Design respondió:
Hej Nina. Du strikker först höyre side. Du starter med 2 volanger og strikker ermet til midt bak (BAKSTK) og midt foran (FORSTK). Derefter starter du forfra og strikker VENSTRE SIDE paa samme maade (men spejlvendt - se opskrift). Du slutter af med at montere de to dele midt bak.
17.09.2013 - 17:28
![]() Nicole escribió:
Nicole escribió:
Ich verstehe nicht ganz, weshalb ich die Maschen vom Rückenteil zum Schluss auf einen Hilfsfaden legen soll, da ich doch beide Teile im Rücken zusammen"nähe". Und: wie näht man mit Maschenstich etwas zusammen? Ich kenne das nur als Zierstich, und das Video von Drops erklärt nur dieses.
02.07.2013 - 22:31DROPS Design respondió:
Liebe Nidole, Sie haben Recht, es wurde das falsche Video verlinkt, wir werden dies gleich beheben. Das richtige Video heisst "Unsichtbare Naht". Dort sehen Sie auch, warum das Teil nicht abgekettet wird, sondern die Maschen nur stillgelegt werden.
03.07.2013 - 09:34
|
|||||||||||||||||||
Remember Me#remembermebolero |
|||||||||||||||||||
 |
 |
||||||||||||||||||
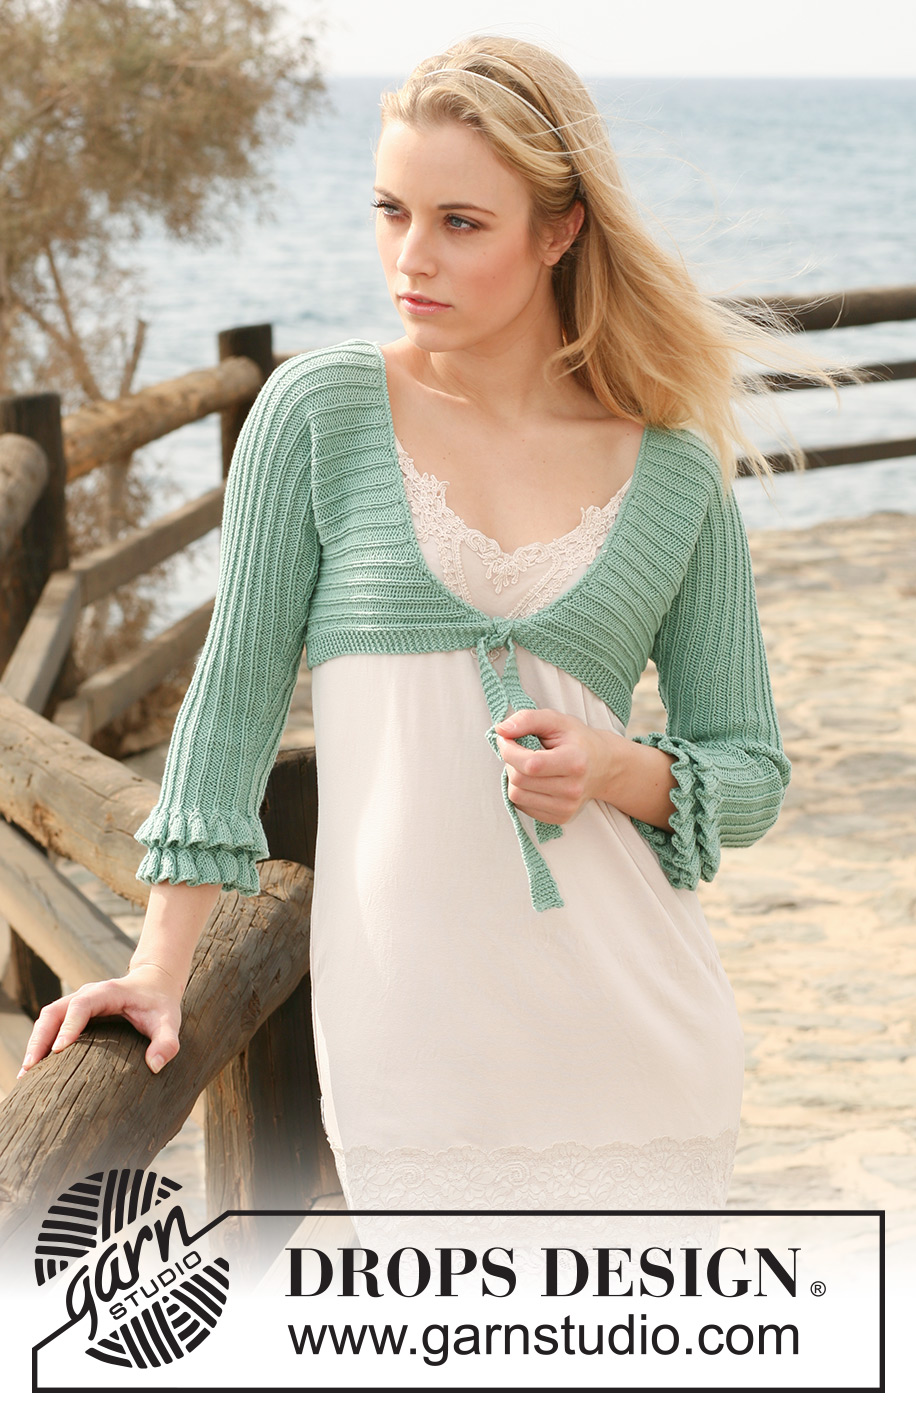
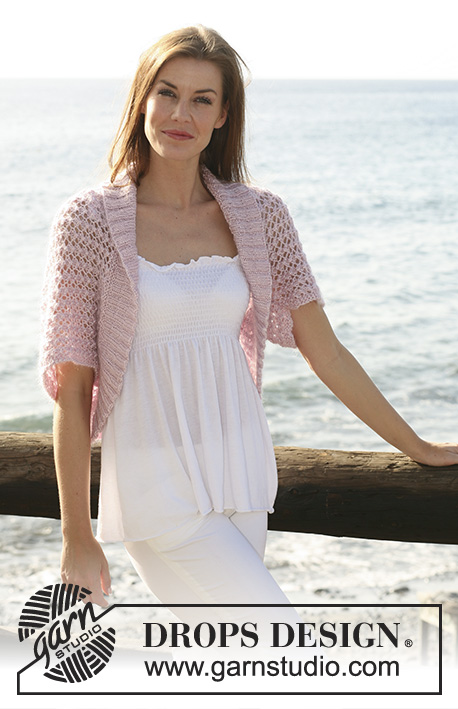
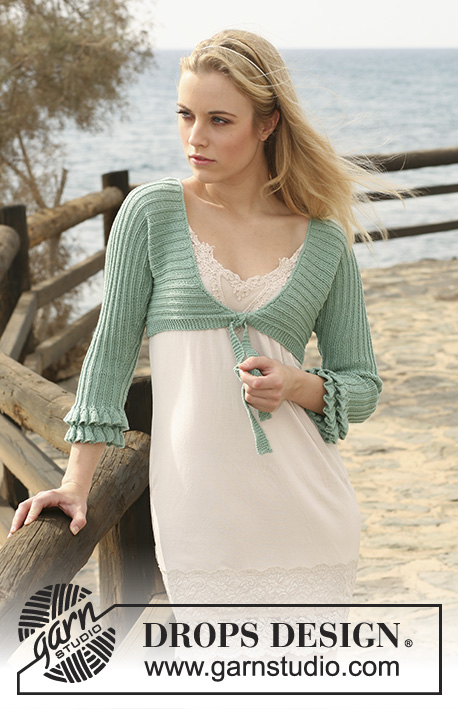
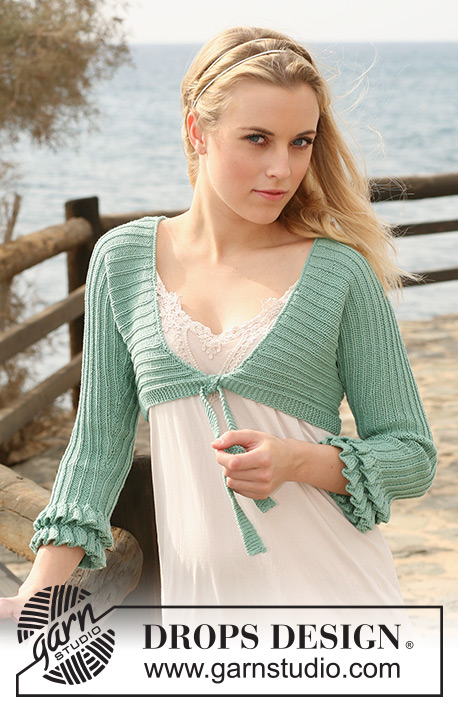
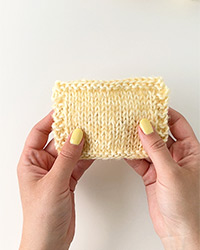
Bolero DROPS en “Safran”, tejido de lado a lado con volantes en las orillas de las mangas. Talla S a XXXL Diseño DROPS: Patrón No. E-143
DROPS 119-29 |
|||||||||||||||||||
|
PUNTO MUSGO (de ida y vuelta en ag): Todas las vtas del derecho. PATRÓN: Ver diagrama M.1 y M.2 – el Diagrama muestra el patrón por el LD! ------------------------------------------------------ ------------------------------------------------------ LADO DERECHO: Se teje desde la parte inferior de la manga al centro posterior/delantero central. Para que quepan todos los pts tejer la pieza de ida y vuelta en ag circular. VOLANTE-1: Mon 195-207-219-231-243-255 pts (incl 1 pt de orillo en cada lado) en ag circular tamaño 3 mm con Safran. Cont como sigue (primera vta = LD): 1 pt de orillo en PT MUSGO – ver arriba, 1r, M.1 16-17-18-19-20-21 veces en toda la vta y 1 pt de orillo en pt musgo. Después de M.1 deberá tener 67-71-75-79-83-87 pts en la ag. Cont como sigue: 1 pt de orillo en pt musgo, 1r, M.2 sobre M.1 y 1 pt de orillo en pt musgo hasta que la pieza mida un total de 6 cm – terminar con 1 vta por el LR, dejar la pieza a un lado. VOLANTE-2: Mon pts y tejer como el volante-1 hasta el final de M.1, tejer 1 vta por el LR con derecho sobre derecho y revés sobre revés. Tejer los 2 volantes juntos para la manga como sigue por el LD: MANGA: Colocar el volante-2 sobre el volante-1 y tejer derechos o reveses (de acuerdo a M.2) juntos 1 pt de cada volante en toda la vta = 67-71-75-79-83-87 pts. Cont en M.2 como antes. RECUERDE MANTENER LA MISMA TENSIÓN DE TEJIDO DE LA MUESTRA – es importante alcanzar las medidas correctas. Cuando la pieza mida un total de 12 cm, aum 1 pt en cada lado tejiendo 2 derechos en el pt después del pt de orillo al inicio de la vta y antes del pt de orillo al final de la vta. Repetir el aum cada 4ª vta un total de 21-18-17-14-13-10 veces y luego en vtas alternas 0-4-5-9-10-14 veces (incorporar los pts aum en M.2 conforme avanza en el tejido) = 109-115-119-125-129-135 pts. La pieza ahora mide aprox 37-36-35-34-33-32 cm (más corta para las tallas más grandes debido a medidas del cuerpo más anchas). CUERPO: A cont mon pts nuevos para la pieza del cuerpo al final de cada vta en cada lado como sigue: 4-4-4-5-5-5 pts 7 veces, luego 6-9-13-9-13-16 pts 1 vez (incorporar los pts aum en M.2 conforme avanza en el tejido, pero tejiendo el pt de orillo en cada lado en pt musgo) = 177-189-201-213-225-237 pts. Cont como sigue (por el LD): 6 pts musgo, 1d, 2r, M.2 hasta tener 8 pts restantes, 1r, 1d y 6 pts musgo. Cuando la pieza mida un total de 52-53-54-55-56-57 cm tejer la sig vta así (por el LD): 48-52-57-61-66-71 pts en el patrón como antes (= pieza delantera), rem 41-43-44-46-47-48 pts, tejer 88-94-100-106-112-118 pts en el patrón como antes (= pieza de la espalda). A cont completar las piezas delantera y espalda por separado. ESPALDA: = 88-94-100-106-112-118 pts. Cont en el patrón y pt musgo como antes, AL MISMO TIEMPO rem 2 pts en la sig vta desde el cuello = 86-92-98-104-110-116 pts. Cont hasta que la pieza mida un total de 57.5-58.5-59.5-60.5-62.5-63.5 cm (5.5-5.5-5.5-5.5-6.5-6.5 cm desde donde la pieza fue dividida), a cont tejer 2 vtas del derecho en todos los pts y desl los pts a un gancho o seguro aux. DELANTERO: = 48-52-57-61-66-71 pts. Cont en el patrón y pt musgo como antes, AL MISMO TIEMPO rem al inicio de cada vta desde el hombro: 14 pts 1-1-1-2-2-2 v eces, 10 pts 1-1-2-1-1-1 veces, 6 pts 1-1-1-1-1-2 veces, 4 pts 1-2-1-1-2-2 veces, 2 pts 2-3-2-2-3-3 veces y 1 pt 4-2-3-3-2-1 veces = 6 pts musgo restantes en la ag. Cont en pt musgo en estos pts para el cordón de amarre por aprox 25 cm, rem pts. LADO IZQUIERDO: Mon pts y tejer como el lado derecho hasta que la pieza mida 52-53-54-55-56-57 cm. A cont tejer la sig vta así por el LD: tejer 88-94-100-106-112-118 pts en el patrón como antes (= pieza de la espalda), rem 41-43-44-46-47-48 pts y tejer 48-52-57-61-66-71 pts en el patrón como antes (= pieza delantera). Cont en las piezas delantera y espalda por separado como se describe para el lado derecho. TERMINACIÓN: Unir los 2 lados con la técnica del remallado (pts de los ganchos o seguros aux) por el centro posterior. Coser las costuras de manga y laterales dentro del pt de orillo. Levantar pts a lo largo de la línea del escote en ag circular tamaño 3 mm con Safran como sigue: empezar en la parte inferior del lado derecho (justo arriba de los 6 pts musgo para el cordón de amarre), cont a lo largo de la línea del escote en la pieza de la espalda y hacia abajo a lo largo del lado izquierdo hasta arriba del cordón de amarre. Levantar aprox 190 a 250 pts (= aprox 24 pts en 10 cm). Tejer 3 vtas del derecho de ida y vuelta en ag y rem pts. Asegurar la orilla de cada lado con el cordón de amarre. |
|||||||||||||||||||
Explicaciones del diagrama |
|||||||||||||||||||
|
|||||||||||||||||||
 |
|||||||||||||||||||
¿Terminaste este patrón?Entonces, etiqueta tus fotos con #dropspattern #remembermebolero o envíalas a la galería #dropsfan. ¿Necesitas ayuda con este patrón?Encontrarás 19 videos tutoriales, un espacio para comentarios/preguntas y más visitando la página del patrón en garnstudio.com © 1982-2026 DROPS Design A/S. Todos los derechos reservados. Este documento, incluyendo todas sus sub-secciones, está protegido por los derechos de autor (copyright). Lee más acerca de lo que puedes hacer con nuestros patrones en la parte de abajo de cada patrón de nuestro sitio. |
|||||||||||||||||||


Con más de 40 años en el diseño de modelos de punto y de ganchillo, DROPS Design ofrece una de las más vastas colecciones de patrones gratuitos en el internet - traducidos en 17 idiomas. Al día de hoy, contamos con 324 catálogos y 12199 patrones - de los cuales 11579 están traducidos en español.
Nosotros trabajamos con mucho esmero para brindarte lo mejor que las labores de punto y ganchillo tienen para ofrecer,inspiración y consejos, así como hilos de magnífica calidad a precios increíbles! Te gustaría usar nuestros patrones para otro fin además del uso personal? Puedes leer acerca de lo que estás permitida a hacer en el texto de Copyright en la parte de abajo de todos nuestros patrones. Felices labores!
Escribe un comentario sobre DROPS 119-29
¡Nos encantaría saber qué piensas acerca de este patrón!
Si quieres escribir una pregunta referente al patrón, por favor asegúrate de elegir la categoría correcta en el formulario debajo, para acelerar el proceso de respuesta. Los campos obligatorios están marcados con un *.