


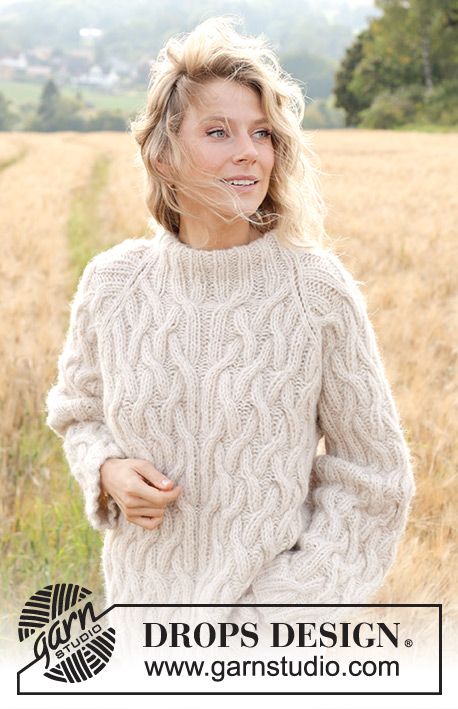
Zopf
Keywords: Zopf,

Beim Stricken eines Zopfes wird die Position von Maschen vertauscht (Verkreuzungen). Je mehr Maschen Sie verkreuzen, desto breiter wird der Zopf.
Im Video stricken wir einen nach links verkreuzten Zopf, indem wir die zu verkreuzenden Maschen auf einer Zopfnadel vor die Arbeit legen. Der nächste Zopf ist nach rechts verkreuzt, dafür legen wir die Maschen auf eine Zopfnadel hinter die Arbeit. Die Maschen beidseitig des Zopfes werden auf der Vorderseite links und auf der Rückseite rechts gestrickt, dadurch tritt der rechts gestrickte Zopf plastischer hervor.
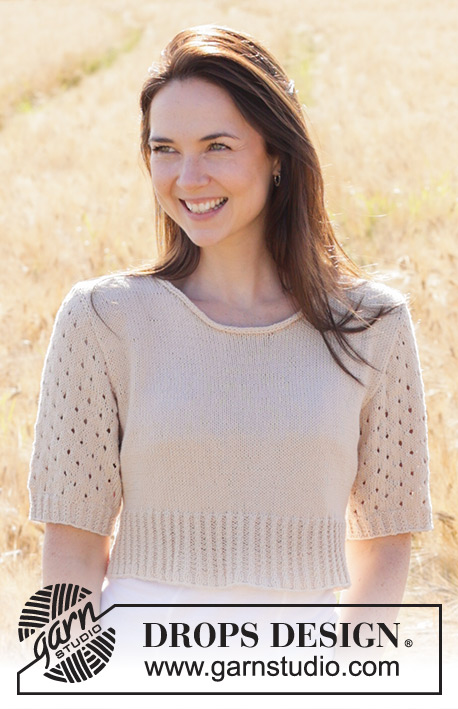
Das Video oben kann bei folgenden Anleitungen verwendet werden


Kommentare (57)
![]() Tammy Lebel wrote:
Tammy Lebel wrote:
I’m trying to do drops 109-3, size large, I can get the sleeve graph to cooperate,,,when I increase 6 stitches evenly do I do thAt in the reverse stockingnette part of the pattern??
10.10.2017 - 07:34DROPS Design answered:
Dear Mrs Lebel, M.1 should be worked on sleeve just as under body - see also answer to your question under this pattern. The 6 sts increased evenly in size L should be increased in the reversed stockinette sts, ie not over diagram M.1. Happy knitting! 10.10.2017 - 09:57
![]() Molly Jokulsdottir wrote:
Molly Jokulsdottir wrote:
Er að vinna að ,,Litla explorer" og í leiðbeiningum fyrir berustykkið eftir fyrstu umferð með köflum stendur ,, Prjójið eina umferð frá röngu". Á þessi umferð þá bara að prjonast slétt? Eða skal eg endurtaka fyrri umferð? Kveðja Molly
22.08.2017 - 06:47DROPS Design answered:
Blessuð Molly, ég get ekki betur séð en að það eigi að prjóna eina umferð slétt frá röngu. 22.09.2017 - 19:34
![]() Jennifer O'Dell wrote:
Jennifer O'Dell wrote:
Hi, I just started drops 108-14 ear warmer. Do you have a video for m1?
01.05.2017 - 14:22DROPS Design answered:
Dear Mrs O'Dell, you can watch this video where row 1 in diagram ear warmer = row 3 pattern worked in the video, and so on, but pattern is the same. Happy knitting! 02.05.2017 - 13:41
![]() Carmen wrote:
Carmen wrote:
Do you have a video tutorial for Drops Baby 16-2 pattern?
12.02.2016 - 05:54DROPS Design answered:
Dear Carmen, the cables in b16-12 are done the same way, but over 4 sts instead of 6 in the video, ie put 2 sts onto cable needle either in front of/behind work and continue as shown in video/explained in pattern/diagram. Happy knitting! 12.02.2016 - 12:26
![]() Connie wrote:
Connie wrote:
Do you do the cable from the right side and the wrong side or just the right side?
12.02.2016 - 05:52DROPS Design answered:
Dear Connie, cables are usually done from RS. Happy knitting! 12.02.2016 - 12:23
![]() Betty Brimble wrote:
Betty Brimble wrote:
Just need to know what m2 is in cable pattern for dog coat
11.09.2015 - 16:17DROPS Design answered:
Dear Mrs Brimble, M.2 may be the name of the diagram you have to follow in the pattern. For example in DROPS 102-43 M2 is the cable worked over 4 sts and 8 rows - click here to read more about diagrams. Happy knitting! 14.09.2015 - 10:22
![]() Christina Bryggfjell wrote:
Christina Bryggfjell wrote:
Hur hårt/löst drar ni tråden på baksidan i själva "skiftet"? Varierar det mycket med bredden på flätan?
03.05.2015 - 19:53DROPS Design answered:
Hej Christina, gör ett litet stickprov först, så du känner dig säker på hur du vill ha det. Lycka till! 20.05.2015 - 15:00Mary Whitehead wrote:
Re earlier enquiry. I have sorted out the missing cable instructions!!!
04.12.2014 - 11:01Mary WHITEHEAD wrote:
Drops pattern- 126-6 Cable pattern is missed off instructions in English altogether. I cannot access comments section on pattern page for some reason. Please help as I have already knitted the back section-cable is on front and sleeve only. Thanks, Mary
04.12.2014 - 10:15DROPS Design answered:
Dear Mrs Whitehead, you will find cable diagram and text to diagram for DROPS 126-6 at the bottom of the page - click here to read more about diagrams. Happy knitting! 04.12.2014 - 11:33
![]() Cheryl wrote:
Cheryl wrote:
Trying to knit these little red riding slippers , and go to your Video for help but the video's do not work can you help thanks
09.10.2014 - 04:24DROPS Design answered:
Dear Cheryl, Please make sure you have installed the newest version of Adobe Flash Player, if the problem persists, please take a look at Vimeo's FAQ. Happy knitting! 15.10.2014 - 14:44
![]() Kerli wrote:
Kerli wrote:
Videos ei ole seda näidatud aga kas pr pidine pool tuleb niisama läbi kududa või tuleb seal ka palmikut teha?
01.10.2014 - 02:04
![]() Irini Karistinos wrote:
Irini Karistinos wrote:
Hoe zit het dan als je rondbreit normaal brei je een teruggaande naald zoals de steken zich voordoen maar beirondbreien staat daar niets oververmeld zoals bei teltekening m1 zoals bij patroon 108-36
16.02.2014 - 11:53
![]() Anneliese Büttner wrote:
Anneliese Büttner wrote:
Bei einem Muster- Diagramm wäre es hilfsreich zu schreiben, dass man die Maschen der Rückreihe so strickt wie sie erscheinen..
20.03.2013 - 16:35DROPS Design Deutschland answered:
At Frau Büttner: Beachten Sie bitte, dass in unseren Musterdiagrammen alle Reihen abgebildet werden, daher steht dieser Satz nicht. 24.03.2013 - 09:21
![]() Carolyn Seeger wrote:
Carolyn Seeger wrote:
Wow it is great
05.02.2013 - 03:26
![]() Irma wrote:
Irma wrote:
Palmikut on võimalik kududa ka ilma abivardata, kus selle videot on võimalik näha?
03.01.2013 - 10:29
![]() Jemsann wrote:
Jemsann wrote:
Vad händer när man börjar på nästa varv? Jag antar att alla maskor före, mellan och efter flätorna ska vara rätmaskor, men ska flätmaskorna stickas som rm eller am? Och om flätan är vänstervriden i första varvet, ska den då vara högervriden i nästa varv?
11.10.2012 - 01:22
![]() Pia wrote:
Pia wrote:
Yksi rivi on ihan selvä. mutta tehdäänkö kierre joka riville? tehdäänkö se käänteisesti palatessa? se juju jäi ymmärtämättä.
13.09.2012 - 21:33
![]() Helga Strobl wrote:
Helga Strobl wrote:
Na toll, sogar ich hab das jetzt kapiert. danke, danke!!!!
05.09.2012 - 09:59
![]() Camilla wrote:
Camilla wrote:
When reading a scheme which direction do you follow. I have reasoned that it must be from bottom up but is it left to right or right to left?
15.02.2012 - 19:41DROPS Design answered:
Dear Camilla, you usually read a diagram from bottom up, starting on the bottom corner at the right side towards the left from RS and from the left towards the right from WS - Note that when you work in the round, you will read all rows from the right towards the left. Happy knitting! 15.10.2014 - 14:49Camile wrote:
Thank you so much for the explanations. Now it made total sense, i guess i wasn't reading the scheme correctly.
22.01.2012 - 04:39Camile wrote:
Hello, this tutorial was very helpful, however i am having trouble with cable pattern from drops pattern 135-136 (men's sweater. Could you please tell me if i am understanding it the right way? Knit the cable starting from row 6, diagram M.2 and always knit the cable from WS and RS? Thank you
19.01.2012 - 17:06DROPS Design answered:
The cabel starts at 7. row an is then knittet in each 12. row from RS. 20.01.2012 - 09:05
![]() Joanna wrote:
Joanna wrote:
Kan man visa videon lite långsammare så skulle det vara bra
08.01.2012 - 18:21Geula wrote:
Hello i'm having trouble understanding this patterns Diagram m.2 if you can please explain me it Thank you DROPS hat and shoulder wrap knitted from side to side with cables and garter st in ”Eskimo”.
13.12.2011 - 10:50DROPS Design answered:
Which pattern are you working on? 14.12.2011 - 08:31


Hola buenas tardes me podría decir cuántas vueltas se devén hacer para volver a hacer el cruce de la trenzas
12.02.2017 - 01:20