
Catégories populaires
Vous cherchez un fil?


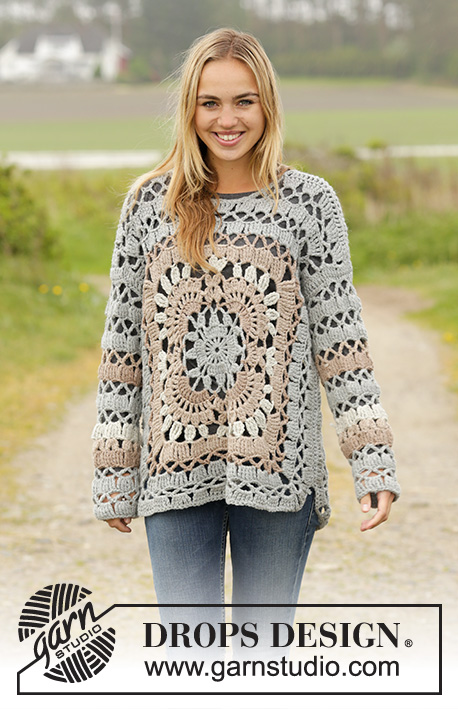
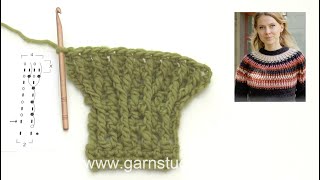
Comment crocheter les épaules, DROPS 171-35

Il vous faudra également lire les explications pour pouvoir suivre la vidéo. Vous trouverez ce modèle en cliquant sur la photo ci-dessous.
Modèles utilisant cette technique
Vidéo #1047, classé dans: Tutoriels Modèles, Femme, Tutoriels vidéo, modèles crochet, Pulls, Gilets & Vestes / Modèles crochet
Nos vidéos n'ont pas de son. Nous sommes une entreprise internationale et nos vidéos sont regardées par des personnes parlant différentes langues et beaucoup d'entre elles ne comprennent pas le français. Comme on ne peut utiliser aucune langue déterminée, nous avons des instructions écrites pour accompagner la vidéo, et il n'y a pas de son perturbant lorsque vous regardez la vidéo.
Vous pouvez ajuster la vitesse de la vidéo en cliquant sur l'icône sur la barre de lecture.
Écrire un commentaire ou une question à propos de cette vidéo
Votre adresse mail ne sera pas publiée. Les champs obligatoires sont indiqués par une *.
Continuer à regarder


Vous pourriez aussi aimer...


Avec plus de 40 ans dans la conception de modèles tricot et crochet, DROPS Design offre l'une des plus vastes collections de modèles gratuits sur internet - traduits dans 17 langues. À ce jour, on compte 325 catalogues et 12298 modèles en français.
Nous nous efforçons de vous apporter le meilleur de ce que le tricot et le crochet peuvent vous offrir, inspiration et conseils mais également des fils de haute qualité à des prix incroyables! Vous souhaiteriez utiliser nos modèles autrement que pour un usage personnel? Vous pouvez lire ce que vous êtes autorisés à faire dans le Copyright en bas de page de chacun de nos modèles. Bon tricot!
Thank you for answering my first query, however I’m still not clear about a few things. Is there a video for chart A9 I don’t know where this fits? Can I just work rows along the top neck for the back, not the bottom part as you suggested , and then not crochet all around the square? Do I have to work a complete round after if I just work the top of the back? Is there a video for the sleeves? Thank you
15.07.2022 - 13:57DROPS Design :
Dear Linda, you work A.9 in the sleeves only, working it once over the A.5 repetitions and then continuing repeating A.5 over A.9. There is no video for working the sleeves at the moment. If you add rows with A.5 in the top neck for the back, over the square, instead of in the lower part, the square will be moved downwards and not centered and you will need to recenter the front as well. You have to work around the whole square, to have the appropriate width and length. Happy crocheting!
20.07.2022 - 17:00I do not understand how to finish the back of this design there is no picture or instructions, do I do two rows repeated to match the length of the front ? Also how do I make the garment longer , thank you
15.07.2022 - 09:43DROPS Design :
Dear Linda, for the back, work straight, without decreases for the neck, so you work over all stitches and don't work A.7 or A.8. Unfortunately, to lengthen this garment, you need to modify the pattern. You need to work A.5 back and forth in the lower part of the sweater. When you have the desired length, start working a complete round around all 4 sides of the square. Happy crocheting!
15.07.2022 - 12:22Muy lindo modelo; lo hice y queda hermoso. Muchísimas gracias por los patrones y explicaciones :D
12.07.2021 - 08:05Good morning, thanks for the detailed explanations. I have already performed the 2 central squares of the front and back. I have to add shoulders and sleeves. I saw that the videos should be 6 but I can not find the 6. I miss the part that I do not understand well how to do, the one related to the sleeves. Could you add the video related to the sleeves? Thanks in advance
30.11.2018 - 11:37My question is I'm doing the L/XL and I do not understand the text directions. When do I go around side 2, 3 and 4 after I make the the neck line or during the neckline process? I need clarification. Do I start on the wrong side at the end of the side 1 row then go around ? Please help I'm so lost and want to get through this part I've come so far.
02.10.2017 - 06:59DROPS Design :
Dear Mrs Davidson, you work along the end of side 1 from WS (the middle 9 dtr = neckline) and work back and forth from end of side 1 along side 4, 3, 2 and finish with beg of side 1. (leaving the middle 9 dtr unworked), and continue like this back and forth from shoulders/neckline. Happy crocheting!
02.10.2017 - 13:06Thank you so much for that part of the video. I tried many times with the written instructions, and I can say that I was wrong. Now, I will start again. Would you have a video for the sleeves? Thanks again for your great work.
04.10.2016 - 23:46DROPS Design :
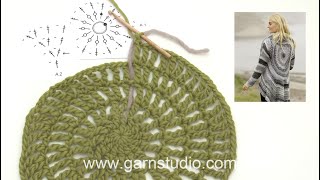
Dear Lynn, on the sleeves you are working A.5 (see this video) and A.9 ie on 1st round in A.9 work: *1 ch, skip next 2 sts, 3 tr tog, 3 ch, 3 tr tog in next st, 1 ch, skip 2 sts*, repeat from *-*. On round 2, work *1 dtr around 1 ch, 3 dtr around 3-ch-space, 1 dtr around next ch*, repeat from *-* (you will have 2 dtr around the 2-ch-space). Happy crocheting!
05.10.2016 - 09:21