
Suositut kategoriat
Etsitkö tiettyä lankaa?


Kommentit / Kysymykset (30)
![]() Louise kirjoitti:
Louise kirjoitti:
Ik begrijp niet goed hoe ik moet meerderen bij de mouwen. Dit omdat wanneer ik meerder, het telpatroon niet meer klopt. Hoe kan ik meerderen en het telpatroon behouden?
11.12.2022 - 22:23DROPS Design vastasi:
Dag Louise,
Het telpatroon wordt inderdaad verbroken door het meerderen onder de mouwen, hier is niets aan te doen. Probeer het telpatroon zo ver mogelijk door te laten lopen, indien mogelijk.
12.12.2022 - 20:31
![]() Francoise Lucienne kirjoitti:
Francoise Lucienne kirjoitti:
Bonsoir encore merci a bientot
07.02.2022 - 17:56
![]() Francoise Lucienne kirjoitti:
Francoise Lucienne kirjoitti:
Bonsoir pourquoi on a au début 232 mailles et après 112 merci bonne soirée
06.02.2022 - 19:57DROPS Design vastasi:
Bonjour Mme Lucienne, vous tricotez d'abord le bas du pull en rond, sur 232 mailles, puis vous rabattez les mailles des emmanchures (4 de chaque côté) et terminez chaque partie séparément soit: 4 mailles rabattues de chaque côté + 112 m pour le devant + 112 m rabattues pour le dos = 4+112+4+112= 232 m. Bon tricot!
07.02.2022 - 11:10
![]() Leen Sels kirjoitti:
Leen Sels kirjoitti:
Welke naalddikte gebruik ik best? Safran geeft volgens het label in tricot op nld3 een verhouding van 24st op 10cm. Ik brei vrij vast en heb nld4 nodig om in tricot deze verhouding te krijgen. Volgens het patroon heb je nld3,5 nodig om met teltekening een verhouding van 23st op 10cm te krijgen. Met nld4 heb ik 30st op 10cm. Met nld5 heb ik 25st op 10cm, maar dit is al vrij los gebreid (doorschijnend en losser dan op de foto) en ik zou nog omhoog moeten gaan naar nld 5,5 of 6. Klopt dit wel?
16.05.2021 - 21:08DROPS Design vastasi:
Dag Leen Sels,
Ja, de stekenverhouding zoals aangegeven in het patroon klopt. Je hebt 23 steken op 10 cm in de breedte. Met name de breedte is van belang in dit geval bij de stekenverhouding. In deze link vind je meer informatie over de stekenverhouding.
20.05.2021 - 16:52
![]() Petra kirjoitti:
Petra kirjoitti:
Wat betekend sm ik dacht 2 samen breien. Daarna een omslag, ik krijg dan gaatjes klopt dit. Gr Petra
03.04.2021 - 14:32
![]() Myrna Laupland kirjoitti:
Myrna Laupland kirjoitti:
Ribbed Fantasy Should I do the neck ribbing and sew in the sleeves before or after blocking? Thank you
08.11.2020 - 05:31DROPS Design vastasi:
Dear Mrs Laupland, some knitters always block, some other never - so this look to be just a personnal question. Contact your DROPS store for any further individual assistance. Happy knitting!
09.11.2020 - 10:42
![]() Fata Viden kirjoitti:
Fata Viden kirjoitti:
Kan jag få beskrivning på svenska tack på förhand Mvh //Fata
20.10.2020 - 17:40DROPS Design vastasi:
Hej. Under bilden kan du ändra språk så att du får mönstret på svenska. Mvh DROPS Design
21.10.2020 - 09:48Carol kirjoitti:
I've finally gotten the courage to pick it up again, but (sorry) I still don't understand how I'm meant to work the front & back separately with new yarn whilst on circular needles. Do I need to work back & forth, front & back separately, on straight needles, keeping half of the work on a stitch holder? I'm getting discouraged. Thanks.
04.12.2017 - 08:39DROPS Design vastasi:
Dear Carol, that's right, just slip the sts on back piece onto a stitch holder/a thread and work the sts for front piece back and forth on straight (or circular) needle. Happy knitting!
04.12.2017 - 10:38Carol kirjoitti:
Thanks for your reply. When you say: "Cut the yarn and continue front piece separately with 1st st on needle for front piece... " you don't take into account that the first stitch on the needle is actually two bound-off stitches away from the front, so there's a hole. If I can figure out a way to overcome that, do I then have to work it back & forth, not in a circle? Do I need extra needles? Thanks for your speedy reply.
27.11.2017 - 20:52DROPS Design vastasi:
Dear Carol, you should bind off the last 2 sts on round so that there are 4 sts bound off on each side for armholes (= no st should remain on the side). Then work each piece separately with new yarn. Happy knitting!
28.11.2017 - 08:58Carol kirjoitti:
I'm just at the point where I'm meant to bind off 2 or 4 stitches to begin the armhole, but I end up left with one stitch in the middle of a bound-off section. I have no idea how to proceed with this, and I've never worked in the round before. Can you explain how I proceed? It says I should work the front and back separately, so does that mean I add another ball of yarn and continue in the round? I'm completely confused! Thanks! Carol
26.11.2017 - 11:18DROPS Design vastasi:
Dear Carol, you bind off for the armholes 2 sts at beg of round (half 1st armhole), 4 sts for 2nd armhole and the last 2 sts on round for 1st armhole (= 2nd half). Cut the yarn and continue front piece separately with 1st st on needle for front piece. Happy knitting!
27.11.2017 - 10:14
|
|||||||
Ribbed Fantasy |
|||||||
 |
 |
||||||
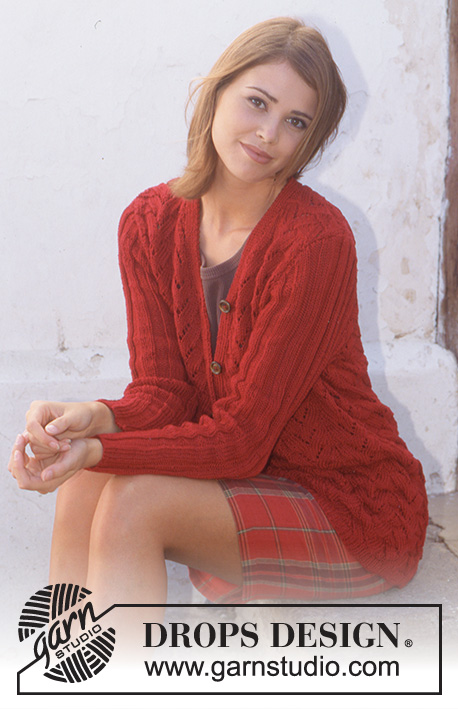
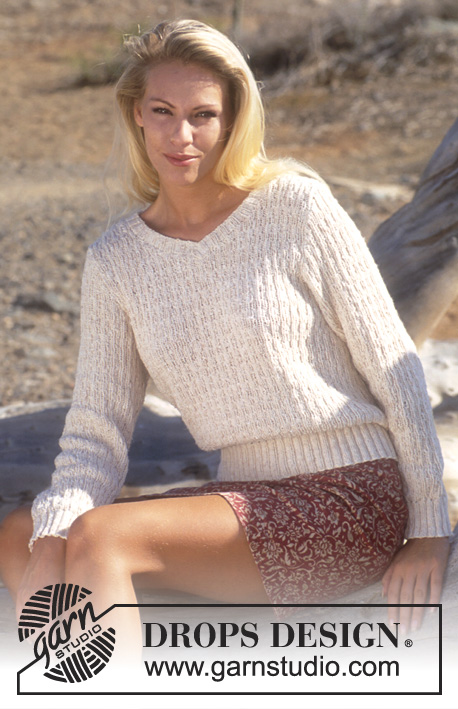
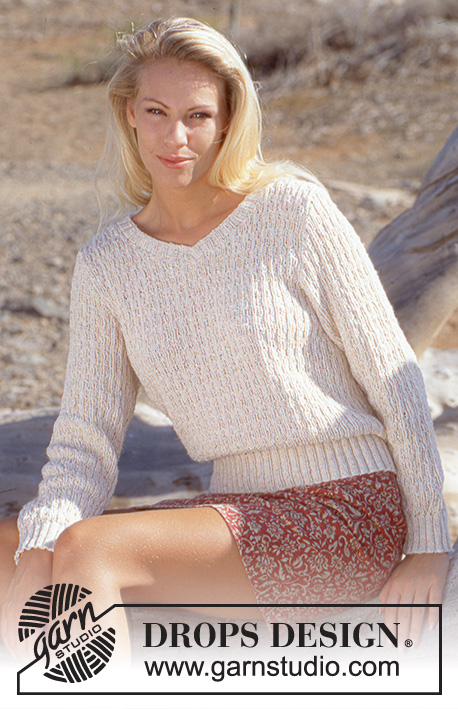
DROPS kohoneulepusero ”Safran”-langasta
DROPS 56-8 |
|||||||
|
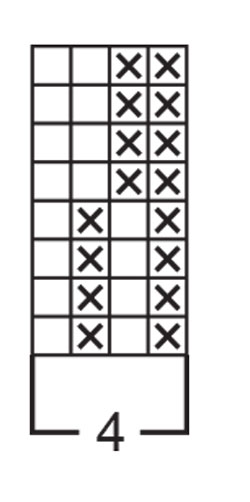
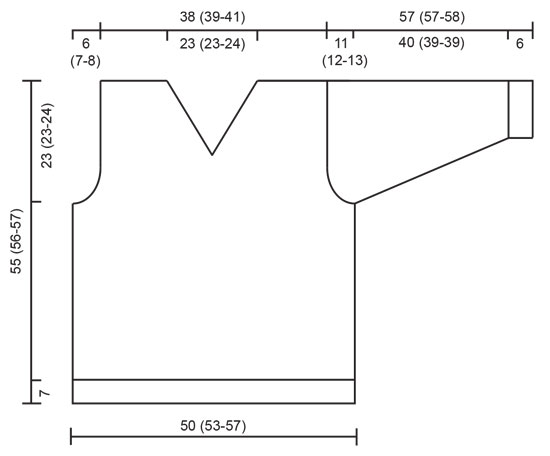
JOUSTINNEULE: *2 o, 2 n*. Toista *-*. MALLINEULE: Katso ruutupiirros (1 piirros = 1 mallikerta). Piirros näyttää mallineuletta oikealta puolelta katsottuna. ETU- JA TAKAKAPPALE: Luo 232 (244-260) s pyöröpuikolle nro 2,5 luonnonkirjavalla langalla ja neulo 7 cm joustinneuletta. Vaihda pyöröpuikkoon nro 3,5 ja neulo seuraava krs näin: *2 s oikein yhteen, 1 langankierto*. Toista * - * koko krs:n ajan. Jatka neulomalla mallineuletta. Tarkista neuletiheys. Kun työn pituus on 32 (33-33) cm, neulo seuraava krs näin: Päätä 2 s kädentietä varten, neulo 112 (118-126) s = etukappale, päätä 4 s kädentietä varten, neulo 112 (118-126) s = takakappale, päätä 2 s kädentietä varten. Neulo osat erikseen. ETUKAPPALE: = 112 (118-126) s. Päätä nyt kummastakin reunasta kädenteitä varten joka 2. krs: 2 x 3 s, 2 (3-3) x 2 s ja 2 (2-4) x 1 s = 88 (90-94) s. Kun työn pituus on 43 (44-45) cm, jaa työ keskeltä edestä V-aukkoa varten. Päätä sitten keskeltä edestä pääntietä varten joka 2. krs: 1 x 3 s, 10 x 2 s, 2 (3-4) x 1 s ja joka 4. krs: 1 x 1 s. Päätä loput s:t kerralla, kun työn pituus on 55 (56-57) cm. Neulo pääntien toinen puoli vastaavasti. TAKAKAPPALE: = 112 (118-126) s. Päätä nyt kummastakin reunasta kädenteitä varten kuten edessä = 88 (90-94) s. Kun työn pituus on 53 (54-55) cm, päätä keskimmäiset 46 (48-50) s pääntietä varten ja neulo molemmat puolet erikseen. Päätä sitten pääntien reunasta joka 2. krs: 1 x 2 s ja 1 x 1 s. Päätä loput s:t kerralla, kun työn pituus on 55 (56-57) cm. Neulo pääntien toinen puoli vastaavasti. HIHA: Luo 60 (64-64) s sukkapuikoille nro 2,5 luonnonkirjavalla langalla ja neulo 6 cm joustinneuletta. Vaihda sukkapuikkoihin nro 3,5 ja neulo seuraava krs näin: *2 s oikein yhteen, 1 langankierto*. Toista * - * koko krs:n ajan. Jatka neulomalla mallineuletta ja lisää SAMALLA keskelle hihan alle 2 s. Toista tällaiset lisäykset 21 (20-21) kertaa koissa S+L: Joka 5. krs, koossa M: Vuorotellen joka 5. ja joka 6. krs = 102 (104-106) s. Kun työn pituus on 46 (45-45) cm, päätä keskeltä hihan alta 4 s ja jatka neulomista tasona. Päätä nyt kummastakin reunasta hihanpyöriötä varten joka 2. krs: 4 (3-3) x 3 s, 8 (11-13) x 2 s ja 4 (3-3) x 3 s. Päätä loput s:t kerralla. VIIMEISTELY: Ompele olkasaumat. Poimi pääntien reunasta n. 142-162 s (4 + 2 s:lla jaollinen) sukkapuikoille nro 2,5 luonnonkirjavalla langalla. Neulo tasona 2,5 cm joustinneuletta keskeltä edestä alkaen. Päätä s:t. Aseta reunuksen oikea pää vasemman päälle ja kiinnitä. Kiinnitä hihat paikoilleen. |
|||||||
Ruutupiirroksen selitykset |
|||||||
|
|||||||
 |
|||||||
 |
|||||||
Oletko tehnyt tämän mallin?Tägää tällöin kuviasi #dropspattern tai lähetä kuvat #dropsfan galleriaan. Tarvitsetko apua tämän ohjeen kanssa?Löydät 18 ohjevideota, kommentteja/kysymyksiä ja muuta osoitteessa www.garnstudio.com © 1982-2026 DROPS Design A/S. Pidätämme kaikki oikeudet. Tämä tiedosto ja kaikki sen alatiedostot on suojattu tekijänoikeuslailla. Lue lisää siitä, mitä voit tehdä ohjeillamme, verkkosivujemme jokaisen ohjeen alaosasta. |
|||||||


DROPS Design on toiminut neule- ja virkkausalalla yli 40 vuotta ja meillä on yksi kaikkein laajin valikoima ilmaisia ohjeita verkossa - käännettynä 17 kielelle. Tänään meiltä löytyy 324 lehteä ja 12290 ohjetta - joista 11712 ohjetta on käännetty suomeksi.
Työskentelemme ahkerasti, jotta voisimme antaa teille kaikkein parhaimpia neule- ja virkkausohjeita, inspiraatiota ja neuvoja sekä korkealaatuisia lankoja todella edulliseen hintaan! Haluaisitko käyttää ohjeitamme muuhun kuin henkilökohtaiseen käyttöön? Voit lukea säännöistä ohjeiden Tekijänoikeus -tekstissä, joka löytyy kaikkien ohjeidemme alapuolelta. Hauskoja hetkiä käsitöiden parissa!
Lisää kommentti ohjeeseen DROPS 56-8
Haluamme mielellämme kuulla mielipiteesi tästä ohjeesta!
Mikäli haluat esittää kysymyksen, valitse oikea kategoria alla olevasta valikosta - tällä tavoin saat vastauksen nopeammin. Pakolliset kentät on merkitty tähdellä *.