
Popular categories
Looking for a yarn?


|
||||||||||
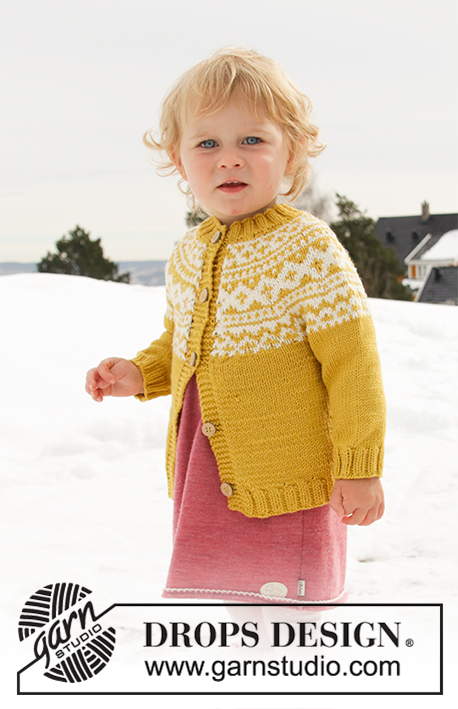
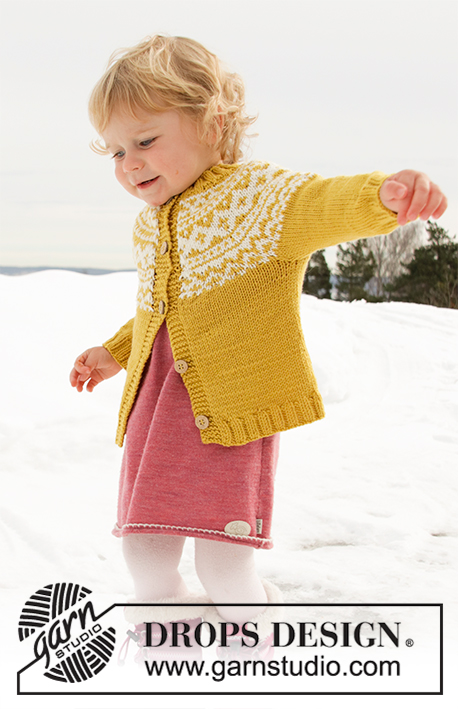
Little Missy Jacket |
||||||||||
 |
 |
|||||||||
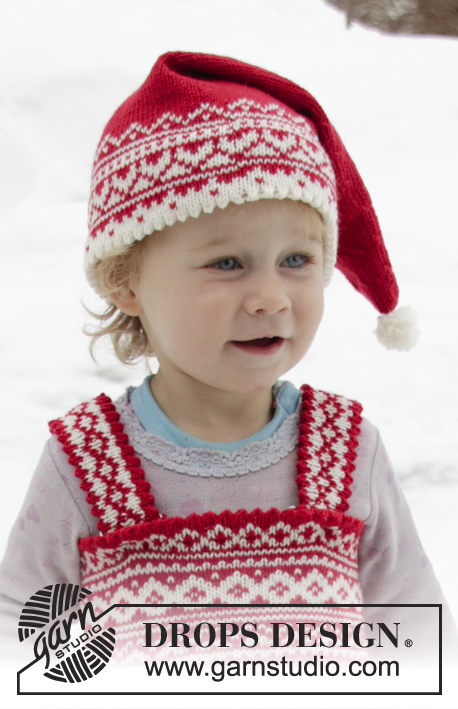
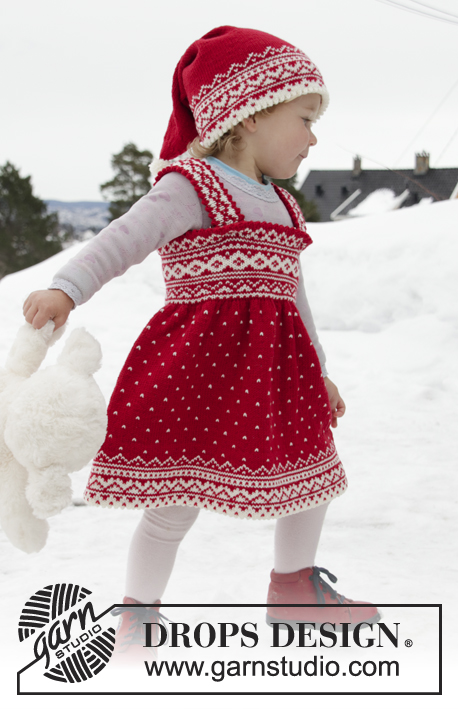
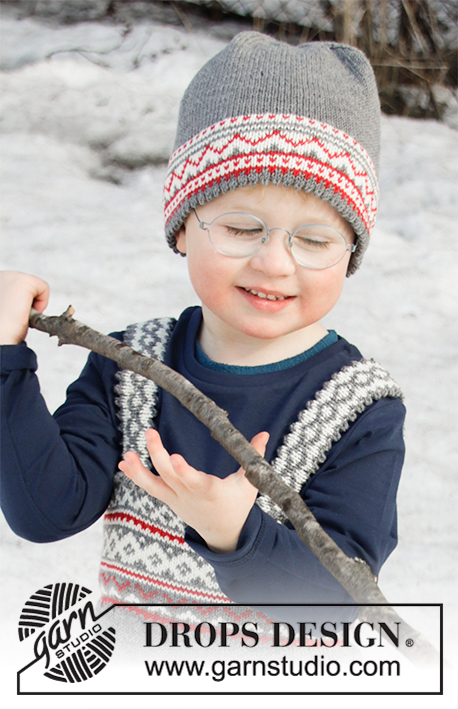
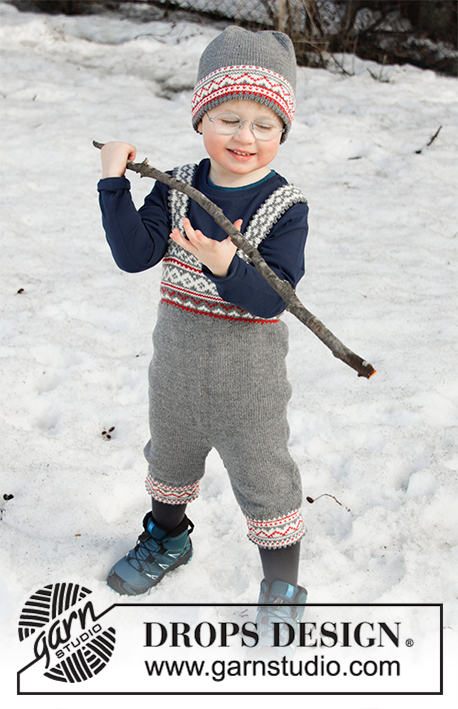
Knitted jacket for babies and children with round yoke in DROPS Lima. The piece is worked top down with Nordic pattern. Sizes 12 months – 12 years.
DROPS Children 32-8 |
||||||||||
|
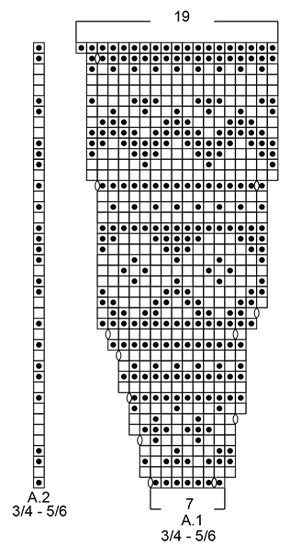
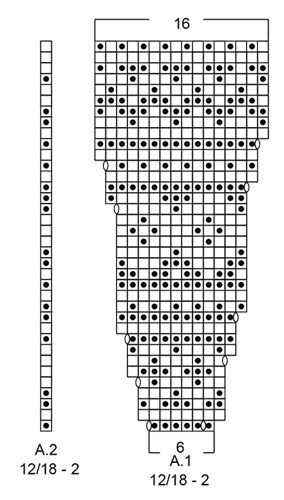
------------------------------------------------------- EXPLANATIONS FOR THE PATTERN: ------------------------------------------------------- RIDGE/GARTER STITCH (worked back and forth): 1 ridge = Knit 2 rows. PATTERN: See diagrams A.1 and A.2. Choose diagram for your size. The whole pattern is worked in stockinette stitch. KNITTING TIP (for bands): The whole of the band is worked in goldenrod. In other words, use 1 ball for each band where needed (i.e. on the rows where goldenrod is not used in the pattern). Change strands between band and yoke (to avoid strand-changes on outside of band). When changing strands, twist the two strands together so that the stitches stay together. DECREASE/INCREASE TIP: To work out how to decrease/increase evenly, count the total number of stitches on the needle (e.g. 84 stitches), minus the bands (= 74 stitches) and divide the remaining stitches by the number of decreases/increases to be made (e.g. 7) = 10.57. In this example, decrease by knitting together alternately each 9th and 10th stitch and each 10th and 11th stitch (approx.); increase by making 1 yarn over after alternately each 10th and each 11th stitch (approx.). The yarn overs are worked twisted on the next row to avoid holes – NOTE: Do not decrease/increase over the bands. INCREASE TIP (for sides of body): Increase 1 stitch on each side of the marker thread as follows: Start 2 stitches before the marker thread, make 1 yarn over, knit 4 (the marker thread sits in the middle of these 4 stitches), make 1 yarn over (= 2 stitches increased). Increase like this at both marker threads (= 4 stitches increased). On the next row work the yarn overs twisted to avoid holes. DECREASE TIP (for mid under sleeve): Decrease 1 stitch on each side of the marker thread as follows: Start 3 stitches before the marker thread, knit 2 together, knit 2 (the marker thread sits in the middle of these 2 stitches), slip 1 stitch as if to knit, knit 1 and pass the slipped stitch over the knitted stitch (= 2 stitches decreased). ELEVATION (back of neck): Skip this section if you do not want an elevation. The first row is worked as follows from the right side. Knit until there are 8 (8-8-10-10-12-12) stitches left on row, turn, tighten strand and purl until there are 8 (8-8-10-10-12-12) stitches left in the other side, turn, tighten strand and knit until there are 16 (16-16-18-18-20-20) stitches left on row, turn, tighten strand and purl until there are 16 (16-16-18-18-20-20) stitches left on other side. Continue by working 8 stitches less each time you turn 2 more times in each side, turn, tighten strand and knit to end of row, then purl 1 row from the wrong side (bands worked in garter stitch). BUTTONHOLES: Work buttonholes on right band (when the garment is worn). 1 buttonhole = start from the wrong side and knit together the 2nd and 3rd stitch from the edge, make 1 yarn over. On the next row knit the yarn over to leave a hole. The first buttonhole is worked when the neck measures approx. 1½-2 cm = ½"-¾", the next 4 (5-5-5-6-6-7) buttonholes are then worked after approx. every 6 (6-6½-7-6½-7-7) cm = 2⅜" (2⅜"-2½"-2¾"-2½"-2¾"-2¾"). ------------------------------------------------------- START THE PIECE HERE: ------------------------------------------------------- JACKET - SHORT OVERVIEW OF THE PIECE: The piece is worked top down. The yoke is worked first, then it is divided for sleeves and body. The body is continued back and forth. The sleeves are worked in the round with double pointed needles. NECK: Cast on 84 (88-92-96-100-108-112) stitches (including 5 band stitches in each side towards mid front) with circular needle size 3 mm = US 2,5 and goldenrod. Purl 1 row from the wrong side with 5 band stitches in GARTER STITCH – read description above, in each side. The next row is worked as follows from the right side: 5 band stitches in garter stitch, * knit 2, purl 2 *, work from *-* until there are 7 stitches left, finish with knit 2 and 5 band stitches in garter stitch. Continue this rib for 3 cm = 1⅛" – remember BUTTONHOLES on right band – read description above and finish after 1 row from the right side. YOKE: Change to circular needle size 4 mm = US 6. Purl 1 row from the wrong side with 5 band stitches in garter stitch in each side and decrease 7 (5-4-1-5-6-10) stitches evenly on row – read DECREASE/INCREASE TIP (purl 2 stitches together = 1 stitch decreased) = 77 (83-88-95-95-102-102) stitches. You can now work an elevation in back of neck so that the yoke is slightly higher at the back. This elevation can be left out; the neck will then be the same front and back – work ELEVATION – read description above or continue working. The next row is worked as follows from the right side: 5 band stitches in garter stitch, work pattern according to A.1 until there are 6 stitches left on row – Note: Choose diagram for your size (= 11 (12-11-12-12-13-13) repeats of 6 (6-7-7-7-7-7) stitches), work A.2 over the next stitch and finish with 5 band stitches in garter stitch. Continue this pattern and increase as shown in the diagram – read KNITTING TIP and REMEMBER THE KNITTING GAUGE! When A.1 and A.2 have been completed there are 187 (203-220-239-251-271-271) stitches on the row. Continue with stockinette stitch with 5 band stitches in garter stitch in each side in golden rod. On the next row from the right side increase 7 (7-10-7-3-0-11) stitches evenly on row (do not increase over bands) = 194 (210-230-246-254-271-282) stitches. When the piece measures 13 (14-15-16-17-18-19) cm = 5⅛" (5½"-6"-6¼"-6¾"-7"-7½") mid front (measured without the neck), divide the piece as follows: Work 29 (31-34-36-38-40-42) stitches as before (= front piece), place the next 42 (46-50-54-54-58-60) stitches on 1 thread for sleeve (without working them), cast on 6 new stitches on the needle, work 52 (56-62-66-70-75-78) stitches (= back piece), place the next 42 (46-50-54-54-58-60) stitches on 1 thread for sleeve (without working them), cast on 6 new stitches on the needle and work the remaining 29 (31-34-36-38-40-42) stitches as before (= front piece) = 122 (130-142-150-158-167-174) stitches. BODY: Insert 1 marker thread 32 (34-37-39-41-43-45) stitches in from each side (= 58 (62-68-72-76-81-84) stitches between marker threads on back piece). THE PIECE IS NOW MEASURED FROM HERE! Continue back and forth with stockinette stitch and 5 band stitches in garter stitch in each side towards mid front – remember BUTTONHOLES on band. When the piece measures 3 cm =1⅛" from where body and sleeves were divided, increase on each side of both marker threads – read INCREASE TIP. Repeat the increase when the piece measures 8 cm from where body and sleeves were divided = 130 (138-150-158-166-175-182) stitches. When the piece measures 11 (13-16-19-22-25-28) cm = 4⅜" (5 1/9"-6¼"- 7½"- 8¾"-9¾"-11") from where body and sleeves were divided, increase 14 (14-14-14-14-13-14) stitches on next row from the right side (do not increase over the bands) = 144 (152-164-172-180-188-196) stitches. Change to needle size 3 mm = US 2,5. The next row is worked as follows from the right side: 5 band stitches in garter stitch, * knit 2, purl 2 *, work from *-* until there are 7 stitches left, finish with knit 2 and 5 band stitches in garter stitch. Continue this rib for 4 cm = 1½", then bind off with garter stitch over garter stitch, knit over knit and purl over purl. The whole jacket measures approx. 34 (37-41-45-49-53-57) cm = 13⅜" (14½"-16⅛"-17¾"-19¼"-21"-22½"), measured from the shoulder. SLEEVE: Place the stitches from the one thread on double pointed needles size 4 mm = US 6 and knit up 1 stitch in each of the 6 stitches cast on under the sleeve = 48 (52-56-60-60-64-66) stitches. Insert 1 marker thread in the middle of these 6 stitches (= mid under sleeve). THE PIECE IS NOW MEASURED FROM HERE! Work stockinette stitch in the round with goldenrod. When the sleeve measures 1 cm = ⅜" from where sleeve and body were divided, decrease 2 stitches mid under sleeve – read DECREASE TIP. Decrease like this every 2 (2½-2½-2½-3½-3½-3½) cm = ¾" (1"-1"-1"-1¾"-1¾"-1¾") a total of 6 (6-8-8-8-8-9) times = 36 (40-40-44-44-48-48) stitches. When the sleeve measures 14 (16-21-24-28-31-35) cm = 5½" (6¼"-8¼"-9½"-11"-12¼"-13¾") from where sleeve and body were divided, change to double pointed needles size 3 mm = US 2,5 and work rib in the round (= knit 2 / purl 2) for 4 cm = 1½" or to desired length. Then bind off with knit over knit and purl over purl. The sleeve measures a total of approx. 18 (20-25-28-32-35-39) cm = 7" (8"-9¾"-11"-12½"-12¾"-15¼") from where sleeve and body were divided. Work the other sleeve in the same way. ASSEMBLY: Sew buttons onto left band. |
||||||||||
Diagram explanations |
||||||||||
|
||||||||||

|
||||||||||
|
||||||||||
|
||||||||||

|
||||||||||
|
Have you made this or any other of our designs? Tag your pictures in social media with #dropsdesign so we can see them! Do you need help with this pattern?You'll find tutorial videos, a Comments/Questions area and more by visiting the pattern on garnstudio.com. © 1982-2024 DROPS Design A/S. We reserve all rights. This document, including all its sub-sections, has copyrights. Read more about what you can do with our patterns at the bottom of each pattern on our site. |
||||||||||


With over 40 years in knitting and crochet design, DROPS Design offers one of the most extensive collections of free patterns on the internet - translated to 17 languages. As of today we count 304 catalogs and 11422 patterns - 11417 of which are translated into English (US/in).
We work hard to bring you the best knitting and crochet have to offer, inspiration and advice as well as great quality yarns at incredible prices! Would you like to use our patterns for other than personal use? You can read what you are allowed to do in the Copyright text at the bottom of all our patterns. Happy crafting!
Comments / Questions (71)
Hallo, ich habe eine Frage zum Rumpfteil. Die Zunahme nach 3 cm ab der Teilung: Ist diese nur einmalig oder muss ich diese in jeder Runde vornehmen? Und auf was bezieht sich die Anzahl von 182 Maschen? (ich stricke die größte Größe). Danke schon jetzt für Ihre Hilfe!
21.09.2019 - 10:43DROPS Design answered:
Liebe Veronika, diese Zunahmen (= 4 Maschen) werden nach 3 cm gestrickt und noch einmal nach 8 cm = 2 Mal insgesamt; Sie hatten 174 M + 4 Zunahmen (3 cm) + 4 Zunahmen (8 cm) = 185 Maschen. Viel Spaß beim stricken!
23.09.2019 - 08:33Hej! förstår inte riktigt hur många garnnystan som ska användas vid mönsterstickningen. Det står under sticktips att 1 nystan av ockra till varje framkant.
17.09.2019 - 08:33DROPS Design answered:
Hej Agneta, du behöver bara 1 nystan till varje framkant. Lycka till :)
17.09.2019 - 14:46Är det tänkt att man ska klippa av garnet varje gång det blir ett ensamt enfärgat varv? Jag stickar oftast runt och behöver inte tänka på sånt 😎
06.09.2019 - 21:08DROPS Design answered:
Hej. Du kan dra tillbaka alla maskor till andra sidan av rundstickan och sticka därifrån med den andra tråden vid de tillfällen det går. Lycka till!
13.09.2019 - 09:14Hej! Nu har jag stickat oket flera gånger och kommer inte upp i rätt maskat al efter det att A1 och A2 är stickat nu senast 220 maskor i str 11-12. Vad kan jag göra för fel hittar inte själv vad det Jan vara. Vet inte om ni har någon idé?
13.07.2019 - 16:45DROPS Design answered:
Hei Carina. Kan det være at du ikke har fått med deg alle økningene i diagram A.1. På noen rader skal det økes 2 masker pr gang A.1 strikkes? Når du starter på diagram A.1 og A.2 skal du ha 102 masker på pinnen i str. 11-12 år. Du strikker diagram A.1 13 ganger. Et tips til deg selv kan være at du regner ut hvor mange masker du skal ha etter hver økning. F.eks etter 1.rad (1 økt maske pr A.1 som strikkes) = 102 masker + 13 økte masker = 115 masker på pinnen. Etter 5.rad: 115 masker + 13 økte masker = 128 masker, etter 7. rad: 128 +26 økte masker = 154 masker osv. God Fornøyelse.
26.08.2019 - 11:44Är det verkligen rätt garnåtgång på storlek 7/8 år? Ockragarnet räcker inte för mig men naturgarnet är över 100g. Ganska irriterande då frakten på ett nystan är dubbelt vad garnet kostar☹️
13.06.2019 - 17:00DROPS Design answered:
Hej Sonja, Vi har faktisk ikke fået andre kommentarer på at der skulle være for lidt af DROPS Lima ockra... Vi har noteret det og hører vi mere skal vi selvfølgelig få lavet en rettelse. Har du samme garn og strikkefasthed som der står i opskriften?
09.07.2019 - 09:50Can I knit the sleeves flat back and forth on circular needles and then sew them together?
11.06.2019 - 16:57DROPS Design answered:
Dear Lisa, sure, you will find more informations about adapting a pattern into straight needles here. Happy knitting!
11.06.2019 - 17:07Ska jag öka 6 maskor innan varvet eller öka dem under varvet? Annars isåfall hur ökar man flera maskor i rad?
10.06.2019 - 23:18DROPS Design answered:
Hej. Var i mönstret är du? Ska du lägga upp 6 nya maskor under ärmarna eller menar du något annat?
11.06.2019 - 07:05Jag har nu nästan stickat klart det här mönstret och inser att garnet är för snålt tilltaget på storlek 8/9 år. Ockra garnet tar slut och ärmen är inte klar. Däremot har jag två nystan över av natur. 🤨☹️
04.06.2019 - 12:23Consegui hacer la chaqueta😅😅
06.05.2019 - 20:59Jag får inte mönstret att få ihop. Ska varannat varv stickas utan mönster?
24.04.2019 - 22:58DROPS Design answered:
Hei Anna. Diagrammene viser alle omgangene, sett fra rettsiden. Det vil si at når du strikker fra vrangsiden må diagrammene strikkes motsatt vei - altså fra venstre mot høyre. God fornøyelse
25.04.2019 - 07:18