DROPS Symphony
DROPS Symphony
65% Wool, 35% Polyamide
Discontinued
find alternatives
DROPS Alpaca
DROPS Alpaca
100% Alpaca
from 4.85 $ /50g
DROPS Super Sale

Hometown

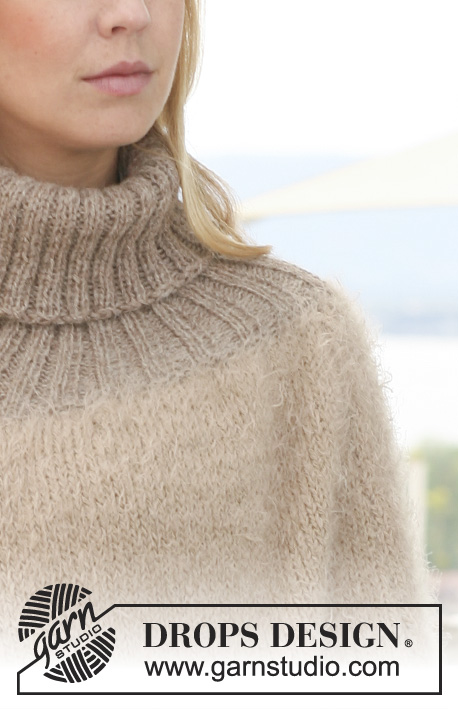
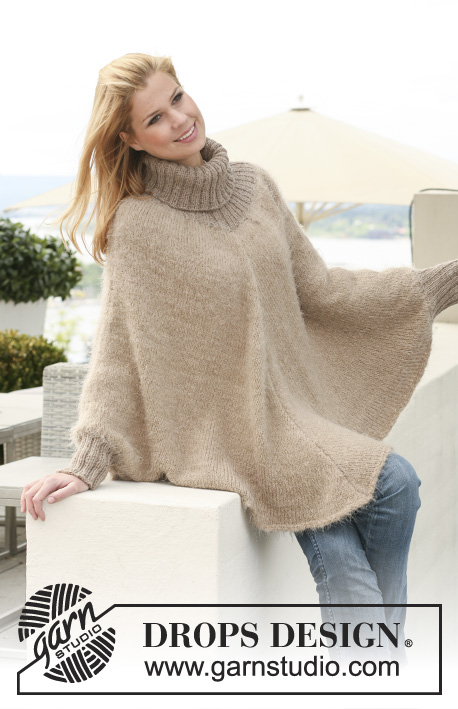
Knitted DROPS poncho in 1 thread ”Symphony”, 1 thread "Melody" or 1 thread "Brushed Alpaca Silk" + 1 thread "Alpaca" with rib in ”Alpaca”. Size S to XXXL.

DROPS 123-28
DROPS design: Pattern no WW-034
--------------------------------------------------------
Size: S/M - L/XL - XXL/XXXL

Materials: DROPS SYMPHONY from Garnstudio
600-650-750 g, color no 02, beige
Or use:
DROPS BRUSHED ALPACA SILK from Garnstudio
150-175-200 g, colour no 05, beige
And: DROPS ALPACA from Garnstudio
450-500-650 colour no 0618m, eco light beige mix (incl. Neck and Sleeve Edges).
Or use:
DROPS MELODY from Garnstudio
300-350-400 g, colour no 15, beige
And: DROPS ALPACA from Garnstudio
200-200-300 g colour no 2020, light camel.

DROPS CIRCULAR NEEDLE (80 cm / 32'') size 6 mm/US 10 – or size needed to get 15 sts x 20 rows in stockinette st with 1 thread Symphony, 1 tread Melody or 1 thread Brushed Alpaca Silk + 1 thread Alpaca = 10 x 10 cm / 4'' x 4''.
DROPS DOUBLE POINTED NEEDLES and CIRCULAR NEEDLE (40 cm / 16'') size 4 mm/US 6 – for rib.

-------------------------------------------------------

Alternative Yarn – See how to change yarns here
Yarn Groups A to F – Use the same pattern and change the yarn here
Yarn usage using an alternative yarn – Use our yarn converter here

-------------------------------------------------------

DROPS Symphony
DROPS Symphony
65% Wool, 35% Polyamide
Discontinued
find alternatives
DROPS Alpaca
DROPS Alpaca
100% Alpaca
from 4.85 $ /50g

DROPS Super Sale

SAVE 30% on 6 cotton favorites!
Valid until 04.12.2024

Pattern instructions

NOTE: This pattern is written in American English. All measurements in charts are in cm. For conversion from inches to cm - click here. There are different terms for crocheting in American and British English. If this pattern includes crochet, click for "crochet terms" here. For this pattern in British English, please click here.
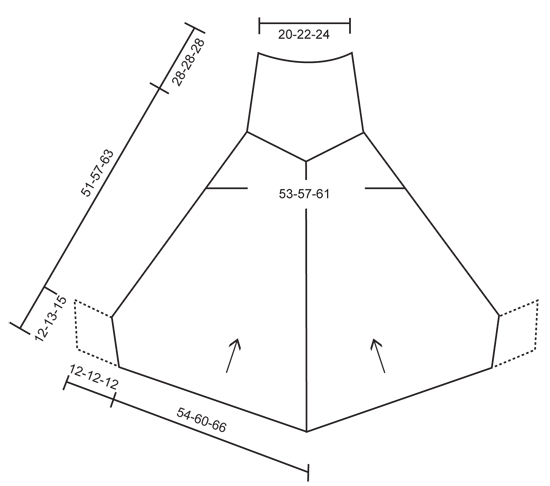
GARTER ST (back and forth on needle): K all rows.

DECREASING TIP 1 (applies to mid front and mid back):
Dec from RS each side of 2 sts.
Dec as follows 3 sts BEFORE marker: K2 tog, K1.
Dec as follows AFTER marker: K1, slip 1 st as if to K, K1, psso.

DECREASING TIP 2 (applies to the side):
Dec by K2 tog before marker and K2 tog into back of loop after marker.

--------------------------------------------------------

PONCHO:
Worked in 2 parts, then parts are put tog and piece completed in the round on all sts. Arrows in diagram show the knitting direction.

BACK PIECE:
Worked back and forth on circular needle from the bottom edge up. Cast on 162-180-198 sts on circular needle size 6 mm / US 10 with with 1 thread Symphony, 1 tread Melody or 1 thread Brushed Alpaca Silk + 1 thread Alpaca. Work 4 rows GARTER ST - see above! Insert a marker in the middle of piece, i.e. after 81-90-99 sts.
READ ALL OF THE FOLLOWING SECTION BEFORE CONTINUING:
REMEMBER THE GAUGE! Continue in stockinette st, AT THE SAME TIME cast on 2 new sts at the end of the next 2 rows for sleeve edges. Repeat the inc at the end of every row a total of 9-10-11 times each side (= 18-20-22 inc sts for sleeve edge each side). AT THE SAME TIME when piece measures 3 cm / 1 1/8'' dec 1 st each side of marker – See DECREASING TIP 1! Repeat the dec on every row from RS a total of 46-52-58 times, and when all inc for sleeve edges are complete (piece measures approx 10-11-12 cm / 4"-4 3/8"-4 3/4") finish with 1 row from WS. Put piece aside.

FRONT PIECE:
Like back piece.

PONCHO:
Slip all sts on the same circular needle and continue in the round. Insert 1 marker at beg of round and 1 after half the sts (to mark the sides). Continue to dec mid front and mid back as before. AT THE SAME TIME when piece measures 12-12-13 cm / 4 3/4"-4 3/4"-5 1/8" dec 1 st each side of marker each side – See DECREASING TIP 2! Repeat the dec at the sides on every 6th round (every 3 cm / 1 1/8'') a total of 13-15-17 times (= until finished measurements). After all dec are complete there are 160-172-184 sts left on needle. Continue until piece measures 51-57-63 cm / 20"-22½"-24 3/4".

NECK:
Change to circular needle size 4 mm / US 6 and 2 strands Alpaca. K 1 round, AT THE SAME TIME K2 tog across the round = 80-86-92 sts. P 1 round and K 1 round, AT THE SAME TIME inc 20-22-24 sts evenly = 100-108-116 sts. Now continue in rib, K2/P2, on all sts. When rib measures 28 cm / 11'' bind off LOOSELY with K over K and P over P.

SLEEVE EDGES:
Worked in the round. Sew the garter st at the bottom of back and front piece tog with a couple of sts each side (sleeve edge now has a circumference of approx 24-26-30 cm / 9½"-10 1/4"-11 3/4"). Pick up 44-48-52 sts round sleeve edge on double pointed needles size 4 mm / US 6 with 2 strands Alpaca. P 1 round and continue in rib, K2/P2, on all sts. When rib measures 12 cm / 4¾'' bind off with K over K and P over P.

Diagram

All measurements in charts are in cm.

diagram measurements
Do you have a question? See a list of frequently asked questions (FAQ)

Knitting tension is what determines the final measurements of your work, and is usually measured per 10 x 10 cm. It is provided like so: number of stitches in width x number of rows in height - eg: 19 stitches x 26 rows = 10 x 10 cm.

The knitting tension is very individual; some people knit/crochet loosely while others work tightly. You adjust the knitting tension with the needle size, which is why the suggested needle size only serve as a guide! You need to adjust this (up or down) to ensure that YOUR knitting tension matches the knitting tension provided in the pattern. If you work with a different knitting tension than provided you will have a different yarn consumption, and your work will have different measurements than what the pattern suggests.

The knitting tension also determines which yarns can replace each other. As long as you achieve the same knitting tension you can replace one yarn with another.

See DROPS lesson: How to measure your tension/gauge

See DROPS video: How to make a gauge tension swatch

The required amount of yarn is provided in grams, eg: 450 g. To calculate how many balls you’ll need you first need to know how many grams are in 1 ball (25g, 50g or 100g). This information is available if you click on the individual yarn quality on our pages. Divide the amount required with the amount of each ball. For example, if each ball is 50g (the most common amount), the calculation will be as follows: 450 / 50 = 9 balls.

The important thing when changing from one yarn to another is that the knitting/crochet tension remains the same. This is so that the measurements of the finished piece will be the same as on the sketch provided. It is easier to achieve the same knitting tension using yarns from the same yarn group. It is also possible to work with multiple strands of a thinner yarn to achieve the knitting tension of a thicker one. Please try our yarn converter. We recommend you to always work a test swatch.

Please NOTE: when changing yarn the garment might have a different look and feel to the garment in the photo, due to individual properties and qualities of each yarn.

See DROPS lesson: Can I use a different yarn than the one mentioned in the pattern?

All our yarns are categorised into yarn groups (from A to F) according to thickness and knitting tension – group A contains the thinnest yarns and group F the thickest. This makes it easier for you to find alternative yarns to our patterns, should you wish to switch yarn. All yarns within the same group have a similar knitting tension and can easily replace each other. However, different yarn qualities have different structures and properties which will give the finished work a unique look and feel.

Click here for an overview of the yarns in each yarn group

At the top of all our patterns you’ll find a link to our yarn converter, which is a helpful tool should you wish to use a different yarn than suggested. By filling in the yarn quality you wish to replace, the amount (in your size) and number of strands, the converter will present good alternative yarns with the same knitting tension. Additionally it will tell you how much you’ll require in the new qualities and whether you’ll need to work with multiple strands. Most skeins are 50g (some are 25g or 100g).

If the pattern is worked with multiple colours, every colour will have to be converted separately. Similarly, if the pattern is worked with several strands of different yarns (for example 1 strand Alpaca and 1 strand Kid-Silk) you will have to find alternatives for each, individually.

Click here to see our yarn converter

Since different yarns have different qualities and textures we have chosen to keep the original yarn in our patterns. However, you can easily find options among our available qualities by using our yarn converter, or simply pick a yarn from the same yarn group.

It is possible that some retailers still have discontinued yarns in stock, or that someone has a few skeins at home that they would like to find patterns for.

The yarn converter will provide both alternative yarn as well as required amount in the new quality.

If you think it's hard to decide what size to make, it can be a good idea to measure a garment you own already and like the size of. Then you can pick the size by comparing those measures with the ones available in the pattern's size chart.

You'll find the size chart at the bottom of the pattern.

See DROPS lesson: How to read size chart

The needle size provided in the pattern serves only as a guide, the important thing is to follow the knitting tension. And since knitting tension is very individual, you will have to adjust the needle size to ensure that YOUR tension is the same as in the pattern – maybe you’ll have to adjust 1, or even 2 needle sizes, up or down to achieve the correct tension. For this, we recommend that you work test swatches.

Should you work with a different knitting tension than the one provided, the measurements of the finished garment might deviate from the measurement sketch.

See DROPS lesson: How to measure your tension/gauge

See DROPS video: How to make a gauge tension swatch

Working a garment top-down provides more flexibility and room for personal adjustment. For example it is easier to try the garment on while working, as well as making adjustments to length of yoke and shoulder caps.

The instructions are carefully explaining every step, in the correct order. Diagrams are adjusted to the knitting direction and are worked as usual.

The diagram depicts all rows/rounds, and every stitch seen from the right side. It is read from bottom to top, from right to left. 1 square = 1 stitch.

When working back and forth, every other row is worked from the right side and every other row is worked from the wrong side. When working from the wrong side, the diagram will have to be worked reversed: from left to right, knit stitches are purled, purl stitches are knit etc.

When working in the round every round is worked from the right side and the diagram are worked from right to left on all rounds.

See DROPS lesson: How to read knitting diagrams

The diagram depicts all rows/rounds, and every stitch seen from the right side. It is worked from bottom to top, from right to left.

When working back and forth every other row is worked from the right side: from right to left and every other row is worked from the wrong side: from left to right.

When working in the round, every row in the diagram are worked from the right side, from right to left.

When working a circular diagram you start in the middle and work your way outwards, counter clockwise, row by row.

The rows usually start with a given number of chain stitches (equivalent to the height of the following stitch), this will either be depicted in the diagram or explained in the pattern.

See DROPS lesson: How to read crochet diagrams

Instructions for working several diagrams after each other on the same row/round, will often be written like so: “work A.1, A.2, A.3 a total of 0-0-2-3-4 times". This means you work A.1 once, then A.2 is worked once, and A.3 is repeated (in width) the number of times provided for your size – in this case like so: S = 0 times, M = 0 times, L=2 times, XL= 3 times and XXL = 4 times.

The diagrams are worked as usual: begin with the first row in A.1, then work the first row in A.2 etc.

See DROPS lesson: How to read knitting diagrams

See DROPS lesson: How to read crochet diagrams

The total width of the garment (from wrist-to-wrist) will be larger in the larger sizes, despite the actual sleeves being shorter. The larger sizes have longer sleeve caps and wider shoulders, so there will be a good fit in all sizes.

The measurement sketch/schematic drawing provides information regarding the full length of the garment. If it’s a jumper or a jacket the length is measured from the highest point on the shoulder (usually closest to the neckline), and straight down to the bottom of the garment. It is NOT measured from the tip of shoulder. Similarly, the length of yoke is measured from the highest point on the shoulder and down to where yoke is split into body and sleeves.

See DROPS lesson: How to read a schematic drawing

Diagrams are often repeated on the round or in height. 1 repeat is the diagram the way it appears in the pattern. If it says to work 5 repeats of A.1 in the round, then you work A.1 a total of 5 times after/next to each other in the round. If it says to work 2 repeats of A.1 vertically/in height you work the entire diagram once, then begin again at the start and work the entire diagram one more time.

Chain stitches are slightly narrower than other stitches and to avoid working the cast-on edge too tight, we simply chain more stitches to begin with. The stitch count will be adjusted on the following row to fit the pattern and measurement sketch.

The rib edge is more elastic and will contract slightly compared to, for example, stocking stitch. By increasing before the rib edge, you avoid a visible difference in width between the rib edge and the rest of the body.

It’s very easy to cast off too tightly, and by making yarn overs while casting off (and simultaneously casting these off) you avoid a too tight cast off edge.

See DROPS video: How to bind off with yarn overs (yo)

To achieve an even increase (or decrease) you can increase on, for example: every 3rd and 4th row alternately, like so: work 2 rows and increase on the 3rd row, work 3 rows and increase on the 4th. Repeat this until the increase is complete.

See DROPS lesson: Increase or decrease 1 st on every 3rd and 4th row alternately

Should you prefer to work in the round instead of back and forth, you may of course adjust the pattern. You’ll need to add steeks mid-front (usually 5 stitches), and follow the instructions. When you would normally turn and work from the wrong side, simply work across the steek and continue in the round. At the end you’ll cut the piece open, pick up stitches to work bands, and cover the cut edges.

See DROPS video: How to knit steeks and cut open

Should you prefer to work back and forth instead of in the round, you may of course adjust the pattern so you work the pieces separately and then assemble them at the end. Divide the stitches for the body in 2, add 1 edge stitch in each side (for sewing) and work the front and back pieces separately.

See DROPS lesson: Can I adapt a pattern for circular needles into straight needles?

Pattern repeats can vary slightly in the different sizes, in order to get the correct proportions. If you’re not working the exact same size as the garment in the photo, yours might deviate slightly. This has been carefully developed and adjusted so that the complete impression of the garment is the same in all sizes.

Make sure to follow instructions and diagrams for your size!

If you have found a pattern you like which is available in women’s size it’s not very difficult to convert it to men’s size. The biggest difference will be the length of sleeves and body. Start working on the women size that you think would fit across the chest. The additional length will be worked right before you cast off for the armhole/sleeve cap. If the pattern is worked top-down you can add the length right after the armhole or before the first decrease on sleeve.

Regarding additional yarn amount, this will depend on how much length you add, but it is better with a skein too many than too few.

All yarns will have excess fibres (from production) that might come off as lint or shedding. Brushed yarns (ie hairier yarns) have more of these loose, excess fibres, causing more shedding.

Shedding also depends on what is worn under or over the garment, and whether this pulls at the yarn fibres. It’s therefore not possible to guarantee that there will be no shedding

Below are some tips on how to get the best result when working with hairier yarns:

1. When the garment is finished (before you wash it) shake it vigorously so the looser hairs come off. NOTE: do NOT use a lint roller, brush or any method that pulls at the yarn.

2. Place the garment in a plastic bag and put it in your freezer - the temperature will cause the fibres to become less attached to each other, and excess fibres will come off easier.

3. Leave in the freezer for a few hours before taking it out and shaking it again.

4. Wash the garment according to the instructions on the yarn label.

Pilling is a natural process that happens to even the most exclusive of fibers. It's a natural sign of wear and tear that is hard to avoid, and that is most visible in high friction areas of your garment like a sweater's arms and cuffs.

You can make your garment look as new by removing the pilling, using a fabric comb or a pill/lint remover.

Still can't find the answer you need? Then scroll down and leave your question so one of our experts can try to help you. This will be done normally within 5 to 10 working days.
In the meantime, you can read the questions and answers that others have left to this pattern or join the DROPS Workshop on Facebook to get help from fellow knitters/crocheters!

Post a comment to pattern DROPS 123-28

We would love to hear what you have to say about this pattern!

If you want to leave a question, please make sure you select the correct category in the form below, to speed up the answering process. Required fields are marked *.

Comments / Questions (157)

country flag Maria Angeles wrote:

Me gustaría mucho saber hasta pronto pero no me lo saben explicar en ninguna tienda que voy a comprar

03.03.2024 - 14:40

DROPS Design answered:

Hola Maria Angeles, si vas a una tienda DROPS (https://www.garnstudio.com/findastore.php?id=23&cid=23) y enseñas la lista de materiales indicadas en la parte superior podrán ayudarte o posiblemente encargarte lanas. El texto del patrón está disponible aquí online.

03.03.2024 - 23:34

country flag Maria Angeles wrote:

Me gustaría hacer este patrón he ido para comprar la lana pero no me lo saben decir no sé si es que no están preparadas pues no quieren

03.03.2024 - 14:39

DROPS Design answered:

Hola Maria Angeles, puedes ver la respuesta debajo.

03.03.2024 - 23:33

country flag Maria Angeles wrote:

Quisiera hacer este poncho pero nadie cuando voy a comprar la lana me dice como se empieza no creo que es que no están preparadas

03.03.2024 - 14:31

country flag Maria Angeles wrote:

Quisiera hacer este poncho pero nadie cuando voy a comprar la lana me dice como se empieza no creo que es que no están preparadas

03.03.2024 - 14:29

country flag Maria Angeles wrote:

Me gustaría muchísimo hacer este poncho pero es que voy a comprar si ustedes me pueden como se mandar un vídeo la verdad la lana cuando tiene que ser me lo explican más tuvo que ver el hecho de que pues una plataforma sí sí me gustaría pero yo lo que quiero hacer es el poncho la lana y no me lo explican como como es y no sé qué hacer

03.03.2024 - 14:28

DROPS Design answered:

Hola Maria Angeles, todos los videos relevantes para poder hacer la labor están indicados en la sección videos, en la parte superior del patrón. La cantidad de hilo está especificada en los materiales; la primera alternativa está ya descatalogada, tienes que usar la de Brushed Alpaca Silk o Melody. La cantidad de hilo depende de la talla; puedes ver las tallas en la sección superior de los materiales y las medidas del poncho para las diferentes tallas en el esquema de medidas/Diagrama. Si vas a una tienda DROPS (https://www.garnstudio.com/findastore.php?id=23&cid=23) y enseñas la lista de materiales indicadas en la parte superior podrán ayudarte o posiblemente encargarte lanas.

03.03.2024 - 23:32

country flag Verena wrote:

Hallo. Ich habe ein kleines Problem mit der Formulierung der Beschreibung : Beginne ich direkt NACH den Krausrippen mit den Zunahmen ? Und beginne ich in der Hinreihe schon direkt mit der Zunahme am Anfang der Reihe oder erst am Ende. Irgendwie fehlt mir da ein bisschen der Durchblick... Danke für eure Mühe

24.01.2023 - 21:21

DROPS Design answered:

Liebe Verena, die 2 ersten neuen Maschen werden am Anfang der 2 nächsten Reihe nach den Krausrippen angeschlagen, und gleichzeitig, nach 3 cm (von der Anschlagskante) beginnen die Zunahmen beidseitig der Markierung - wenn alle neuen Maschen für die Ärmel angeschlagen sind dann legen Sie die Arbeit still und stricken das Vorderteil genauso wie das Rückenteil, dann stricken Sie weiter in Runden und stricken Die Zunahmen wie zuvor weiter. Viel Spaß beim stricken!

25.01.2023 - 11:48

country flag Mia wrote:

Sorry, nochmal nachfragen: also ich nehme 11 x 2 Maschen auf jeder Seite auf und nach 3cm innerhalb der beiden einzelnen Strickstücke fange ich dann mit den 58 Abnahmen an? Wenn ich bei 12cm gesamt (nach x Abnahmen) bin füge ich die zusammen und mache alle 2 Runden die abnahmen einfach weiter? Grüße

01.07.2022 - 21:38

DROPS Design answered:

Liebe Mia, beim Rückenteil nehmen Sie 1 Masche beidseitig der Markierungn bis die Arbeit 12 (3. Größe) cm misst, dann stricken Sie das Vorderteil genauso auch bis 12 cm, dann stricken Sie beide Teile in der Runde weiter und nehmen Sie wie zuvor zu, bis insgesamt 58 Mal zugenommen wurde. Viel Spaß beim stricken!

04.07.2022 - 07:50

country flag Mia wrote:

Hallo, jetzt muss ich doch fragen, weil irgendwie bekomme ich das nicht zusammen. Wann muss ich die Abnahmen 58 Mal wiederholen? 1.Wenn die beiden Teile fertig sind? oder 2. Wenn die Teile zusammengeschlossen auf der Nadel in Runden gearbeitet wird? Danke für die Hilfe

28.06.2022 - 22:03

DROPS Design answered:

Liebe Mia, die Abnahmen beginnen Sie wenn Sie jedes Teil separat stricken (bis die Arbeit 12 cm misst), und dann werden Sie weiter gestrickt, wann die beiden Teilen zusammen gestrickt werden. Viel Spaß beim stricken!

29.06.2022 - 09:17

country flag CarrieB wrote:

This question is in reference to Decreasing Tip 2: The pattern states to start these decreases when piece measures 4 3/4 “ ( for my size) Is this measurement taken at the widest part of piece or the narrowest part ( where the front and back were joined) ? Thank you.

15.03.2022 - 16:53

DROPS Design answered:

Dear CarrieB, measure now from where you joined both parts (front and back pieces) and now start to decrease on the sides. Happy knitting!

16.03.2022 - 08:34

country flag CarrieB wrote:

After joining the front and back panels and proceeding to knit in the round do you then do the decreases EVERY OTHER round?

14.03.2022 - 16:45

DROPS Design answered:

Dear CarrieB, correct when working in the round, decrease now on mid front and on mid back on every other round. Happy knitting!

14.03.2022 - 16:57