
Popular categories
Looking for a yarn?


|
|||||||||||||
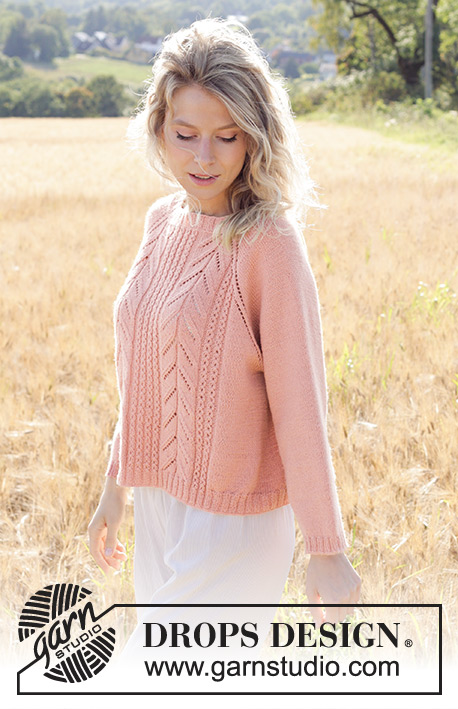
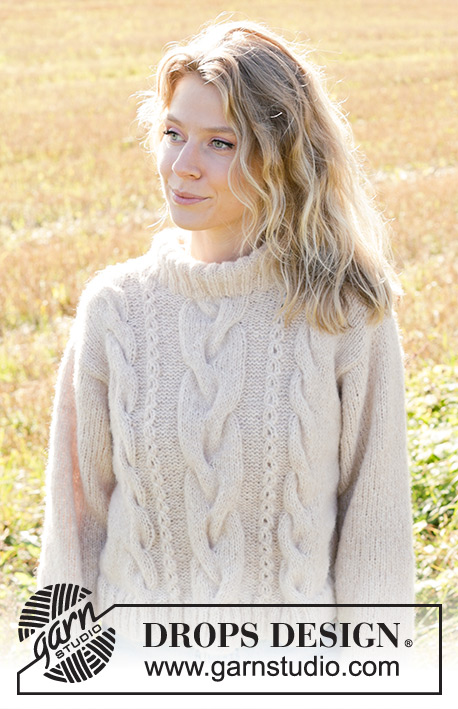
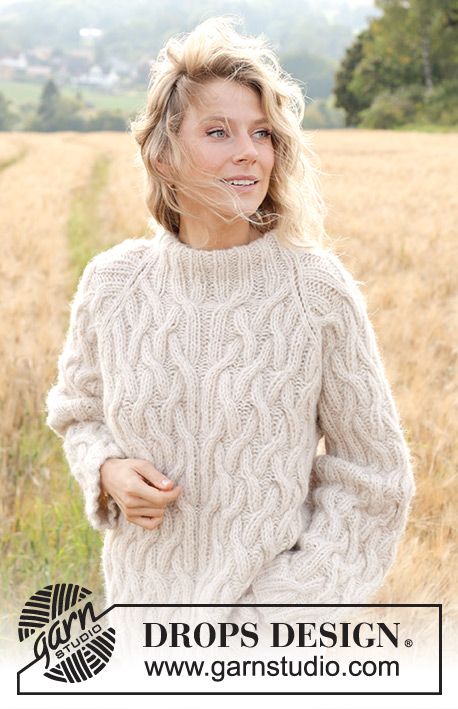
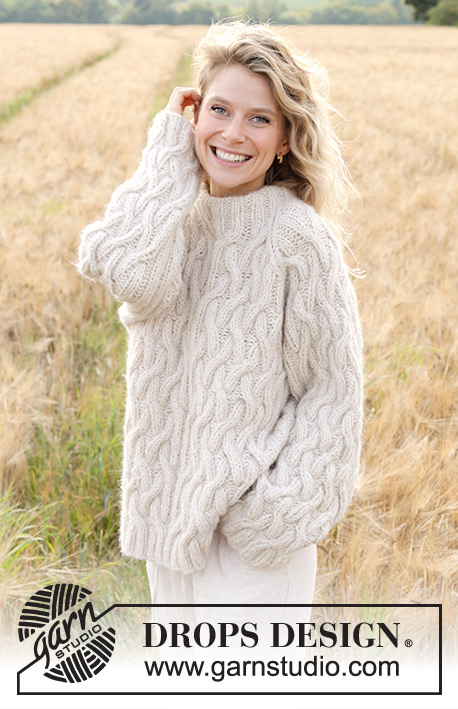
Sand Trails |
|||||||||||||
 |
 |
||||||||||||
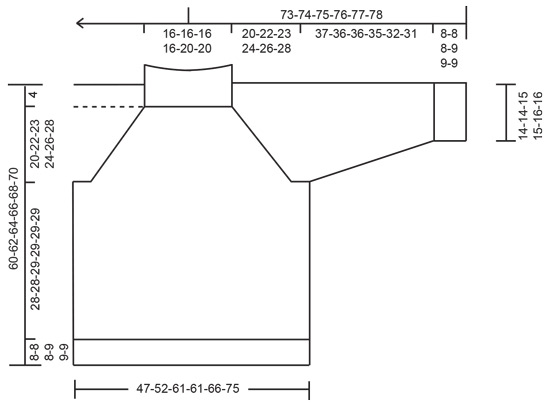
Knitted sweater in DROPS Air and DROPS Brushed Alpaca Silk. The piece is worked bottom up with raglan, cables and double neck. Sizes S - XXXL.
DROPS 248-3 |
|||||||||||||
|
------------------------------------------------------- EXPLANATIONS FOR THE PATTERN: ------------------------------------------------------- KNITTING TIP: If your knitting gauge is too tight vertically the armholes will be too small – this can be adjusted for, if necessary, by working more rounds between the decreases. RAGLAN Decrease as follows before and after the marker-threads: DECREASE AFTER MARKER-THREAD: Slip 1 stitch knit-wise, knit 1, pass slipped stitch over knitted stitch (= 1 stitch decreased). DECREASE BEFORE MARKER-THREAD : Knit 2 together (= 1 stitch decreased). INCREASE TIP (for sleeves): Increase 1 stitch on each side of the marker-thread: Work until there is 1 stitch left before the marker-thread, 1 yarn over, knit/purl 2 as before (marker-thread sits between these 2 stitches), 1 yarn over. On the next round work the yarn overs twisted to avoid holes. Then work the new stitches into the rib (it is important to match the rib already worked on each side of A.1, A.2 and A.3, not towards mid-under sleeve). ------------------------------------------------------- START THE PIECE HERE: ------------------------------------------------------- SWEATER - SHORT OVERVIEW OF THE PIECE: The pattern uses both long and short needles; start with the length which fits the number of stitches and change when necessary. The piece is worked in the round with circular needle, bottom up as far as the armholes. The sleeves are worked in the round, bottom up as far as the armholes. The body and sleeves are placed on the same circular needle and the yoke continued in the round while decreasing for raglan. The neck is worked to finish, folded double and sewn down to the inside. If there is a «0» in your chosen size, skip the information and go straight to the next instruction. BODY: Cast on 160-176-208-208-224-256 stitches with circular needle size 6 mm = US 10, 1 strand DROPS Air and 1 strand DROPS Brushed Alpaca Silk (= 2 strands). Work rib in the round as follows: Purl 1, rib (knit 2, purl 2) until there is 1 stitch left, purl 1. Insert 1 marker-thread at the beginning of the round and 1 marker-thread after 80-88-104-104-*112*-128 stitches, inserting the threads between 2 purled stitches. Work the rib for 8-8-8-9-9-9 cm = 3⅛"-3⅛"-3⅛"-3½"-3½"-3½". Change to circular needle size 8 MM = US 11 and work as follows over the front piece: * Purl 1, rib (knit 2, purl 2) over the next 0-4-4-4-8-8 stitches, A.1, A.2 over the next 24-24-32-32-32-40 stitches, A.3, purl 2 (= mid-front), A.4, A.5 over the next 24-24-32-32-32-40 stitches, A.6, rib (knit 2, purl 2) over the next 0-4-4-4-8-8 stitches, purl 1 *, marker-thread is here, work from *-* 1 more time over the back piece. Continue this pattern onwards. REMEMBER THE KNITTING GAUGE! Work until the body measures approx. 36-36-37-38-38-38 cm = 14¼"-14¼"-14½"-15"-15"-15" – note which round in the pattern was worked on the last row. DIVIDE FOR ARMHOLES: On the next round divide for the front and back pieces as follows: Bind off the first 4-4-5-5-7-7 stitches for the armhole, work 72-80-94-94-98-114 stitches as before, bind off 8-8-10-10-14-14 stitches for the armhole, work 72-80-94-94-98-114 stitches as before and bind off the last 4-4-5-5-7-7 stitches. Cut the strand, lay the piece to one side and work the sleeves. SLEEVES: Cast on 48-48-52-52-56-56 stitches with double pointed needles size 6 MM = US 10 and 1 strand of each quality (= 2 strands). Work rib in the round (knit 2, purl 2) for 8-8-8-9-9-9 cm = 3⅛"-3⅛"-3⅛"-3½"-3½"-3½". Insert 1 marker-thread between the first 2 purled stitches in sizes S, M, XXL and XXXL, and between the first 2 knitted stitches in sizes L and XL – the round starts here. Allow the marker-thread to follow your work onwards; it is used when increasing under the sleeve. Change to double pointed needles size 8 MM = US 11 and work pattern as follows: Rib as before over the first 5-5-7-7-9-9 stitches, A.1, A.2 over the next 24 stitches, A.3, rib as before over the last 5-5-7-7-9-9 stitches. Continue this pattern. When the sleeve measures 10-10-11-12-12-12 cm = 4"-4"-4⅜"-4¾"-4¾"-4¾" from the cast-on edge, increase 2 stitches under the sleeve – read INCREASE TIP. Increase like this every 4-2½-3-2-2-1½ cm = 1½"-1"-1⅛"-¾"-¾"-½" a total of 8-12-10-14-12-16 times = 64-72-72-80-80-88 stitches. Work until the sleeve measures approx. 45-44-44-44-41-40 cm = 17¾"-17¼"-17¼"-17¼"-16⅛"-15¾" – adjust to finish on the same round as for body. Bind off the middle 8-8-10-10-10-10 stitches under the sleeve (4-4-5-5-5-5 stitches on each side of the marker-thread) = 56-64-62-70-70-78 stitches. Work the other sleeve in the same way. YOKE: Place the sleeves on the same circular needle as the body, where stitches were bind off for the armholes = 256-288-312-328-336-384 stitches. Insert 1 marker-thread in each transition between the body and sleeves (= 4 marker-threads, each one inserted between 2 stitches). Start the round at the marker thread before back piece. Continue the pattern in the round. When the yoke measures 1 cm = ⅜" from the division, begin to decrease for raglan at each marker-thread - the decreases are different on the front/back pieces and the sleeves – read RAGLAN-DECREASES ON FRONT/BACK PIECES and RAGLAN-DECREASES ON SLEEVES before continuing. RAGLAN-DECREASES ON FRONT/BACK PIECES: Read RAGLAN and KNITTING TIP above. Decrease a total of 22-26-33-33-31-39 times on each side of the front and back pieces as follows: DECREASE 1: Every 2nd round 7-6-0-2-7-2 times. DECREASE 2: Every round 15-20-33-31-24-37 times. RAGLAN-DECREASES ON SLEEVES: Read RAGLAN and KNITTING TIP above. Decrease a total of 22-26-25-29-29-33 times on each side of the sleeves as follows: DECREASE 1: Every 2nd round 7-6-8-6-9-8 times. DECREASE 2: Every round 15-20-17-23-20-25 times. AFTER LAST DECREASE: After the last decrease there are 80-80-80-80-96-96 stitches. The yoke measures approx. 20-22-23-24-26-28 cm = 8"-8¾"-9"-9½"-10¼"-11" from the join and the sweater measures approx. 60-62-64-66-68-70 cm = 23⅝"-24⅜"-25¼"-26"-26¾"-27½" from the shoulder. There are 28-28-28-28-36-36 stitches between the marker-threads on the front/back pieces and 12 stitches between the marker-threads on the sleeves. NECK: = 80-80-80-80-96-96 stitches. Change to circular needle size 6 MM = US 10. Start from the marker-thread before the back piece: * Knit 1, rib (knit 2, purl 2) – the rib should match the pattern on the front/back pieces, knit 1 before the next marker-thread. Over the 12 sleeve-stitches, work as follows from the marker-thread: Knit 1, purl 2 together two times, knit 2, purl 2 together two times, knit 1 (= 4 stitches decreased, 8 stitches left on sleeve) *, work from *-* 1 more time = 72-72-72-72-88-88 stitches; there is now a regular rib (knit 2, purl 2) all the way round. Continue the rib for 13-13-13-15-15-15 cm = 5⅛"-5⅛"-5⅛"-6"-6"-6". Bind off a little loosely and fold the neck double to the wrong side. Sew down – making sure the seam is elastic to avoid the neck being tight. The neck measures approx. 6-6-6-7-7-7 cm = 2⅜"-2⅜"-2⅜"-2¾"-2¾"-2¾" when folded. ASSEMBLY: Sew together the 8-8-10-10-10-10 bind-off stitches on the sleeves and the 8-8-10-10-14-14 bind-off stitches on the body. |
|||||||||||||
Diagram explanations |
|||||||||||||
|
|||||||||||||

|
|||||||||||||

|
|||||||||||||
|
|||||||||||||
|
Have you made this or any other of our designs? Tag your pictures in social media with #dropsdesign so we can see them! Do you need help with this pattern?You'll find tutorial videos, a Comments/Questions area and more by visiting the pattern on garnstudio.com. © 1982-2024 DROPS Design A/S. We reserve all rights. This document, including all its sub-sections, has copyrights. Read more about what you can do with our patterns at the bottom of each pattern on our site. |
|||||||||||||


With over 40 years in knitting and crochet design, DROPS Design offers one of the most extensive collections of free patterns on the internet - translated to 17 languages. As of today we count 304 catalogs and 11422 patterns - 11417 of which are translated into English (US/in).
We work hard to bring you the best knitting and crochet have to offer, inspiration and advice as well as great quality yarns at incredible prices! Would you like to use our patterns for other than personal use? You can read what you are allowed to do in the Copyright text at the bottom of all our patterns. Happy crafting!
Comments / Questions (67)
Bonjour Tout va bien.je pensais qu’il y avait une erreur dans le nombre de mailles Tout est parfait
24.04.2024 - 10:42Bonjour Pour la TS, combien de torsades dois je faire pour arriver au milieu du devant?(sur 40 mailles ) Merci
23.04.2024 - 10:44DROPS Design answered:
Bonjour Nicole, je ne comprends pas vraiment votre question, à quel niveau en êtes-vous? Vous tricotez la taille S, c'est bien cela? Pouvez-vous nous en dire plus pour que nous puissions vous aider? Merci pour votre compréhension.
23.04.2024 - 12:31Hi, Lovely pattern! Will this pattern instruction be available in finnish? If yes, when might? Or should I just use this english instruction already available?
19.04.2024 - 12:31DROPS Design answered:
Hi Tuija, to get the Finnish instruction, please click on the drop-down menu just under 'Pattern instructions', you will see there all language versions available. Happy knitting!
19.04.2024 - 12:35Hej! När man stickar ärmen, ska man enbart repetera mönstret A1, A2, A3 varvet runt och inte använda A4-A6?
17.04.2024 - 06:46DROPS Design answered:
Hej Ingela, ja det stemmer :)
19.04.2024 - 14:24Can this sweater be knitted flat with sewn-in sleeves? If so, how would I go about it?
11.04.2024 - 20:03DROPS Design answered:
Dear Grace, pleace understand that with many thousands of patterns available on our site, we cannot modify them to each individual request. However, we do have a lesson HERE on adapting patterns to a straight needle that might help you.
12.04.2024 - 02:23Bardz dziekuje i pozdrawiam ,piekne wzory
09.04.2024 - 13:45Sciagacz ogarniam chodzi mi juz o wzor w rozmiarze L jak zaczac czy 1oczko pozniej 8 +32+6+8+32+6+8+1
09.04.2024 - 10:48DROPS Design answered:
Witaj Moniko, zaczynasz od 1 oczka lewego jak wcześniej, czyli od markera: 1 ol + 4 o. (2op, 2 ol) + 8 o. (A.1) + 32 o. (A.2) + 6 o. (A.3) + 2 ol + 8 o. (A.4) + 32 o. (A.5) + 6 o. (A.6) + 4 o. (2op, 2ol) + 1 ol = 104 oczka. Pozdrawiamy!
09.04.2024 - 11:18Dziendobry chodzi mi o rozmiar L Czy na poczatku mam robic 1+8+32+6+8+32+6+8+1 ? Bo inaczej mi nie wychodzi . Dziekuje za odpowiedz.
09.04.2024 - 07:49DROPS Design answered:
Witaj Moniko, 208 dzieli się przez 4 więc przez całe okrążenie będziesz powtarzać sekwencję 2 oczka prawe, 2 oczka lewe. Zaczynasz od 1 oczka lewego, dalej przerabiasz *2 oczka prawe, 2 oczka lewe*, a gdy zostanie 3 oczka do końca okrążenia przerabiasz 2 oczka prawe i 1 oczko lewe. W ten sposób ściągacz jest niezakłócony w okrążeniu. Pozdrawiamy!
09.04.2024 - 08:47Nie moge rozgrysc wzoru na poczatku za sciagaczem inaczej mi wychodz prosze o pomoc
08.04.2024 - 19:32DROPS Design answered:
Witaj Moniko, z czym dokładnie jest problem?
08.04.2024 - 20:58Hej! Jag undrar vad de förskjutna rutorna i mönstret indikerar? Exempelvis i A.2, rad 9 nedifrån. Om jag hoppar över de två räta maskorna och stickar två aviga, så matchar det inte förra raden. Eller ska det vara så?
07.04.2024 - 22:50DROPS Design answered:
Hej Moa, jo du flyttar bara flätan, du har samma antal flätor och samma antal maskor mellan :)
09.04.2024 - 11:15