
Looking for a yarn?


Comments / Questions (36)
![]() Angelika wrote:
Angelika wrote:
Ich stricke die Größe 12 bis 18 Monate und wenn ich alle Zunehmen Zusammenhänge beim Vorderteil komme ich auf 40 Maschen statt 34.....
04.08.2025 - 09:12
![]() Angelika wrote:
Angelika wrote:
Die Angaben beim Vorderteil stimmen nicht...was tun???
03.08.2025 - 11:35DROPS Design answered:
Liebe Angelika, was meinen Sie hier? Welche Größe stricken Sie? Welches Teil stimmt nicht? Danke im voraus für Ihr Verständnis, so kann man am besten helfen.
04.08.2025 - 09:02
![]() Brenda Arriaga wrote:
Brenda Arriaga wrote:
El punto de orillo ya está incluído en el patron o tengo que agregarlo? El punto de orillo es el punto deslizado de cadenas? Gracias
28.10.2024 - 14:52DROPS Design answered:
Hola Brenda, Montar 42-48-54 (60-66) pts (incluye 1 pt de orillo de cada lado); es decir, el punto orillo ya se incluye en los puntos montados, no hay que montar puntos extra. El punto orillo es un punto que se trabaja siempre en punto musgo, de derecho siempre.
03.11.2024 - 12:40
![]() Cristiana wrote:
Cristiana wrote:
Buongio, sto eseguendo il modello per la taglia 3 anni. Non capisco lo schema delle maniche. Quante maglie rimangono alla fine delle diminuzioni? Come si attaccano al corpetto? Cosa significa cucire a 2/3 cm dallo scalfo? Grazie
25.06.2024 - 05:21DROPS Design answered:
Buongiorno Cristiana, sulle maniche deve diminuire fino a raggiungere la lunghezza indicata. Per la confezione deve attaccare le maniche a una distanza di circa 2-3 cm dall'inizio dello scalfo, come può vedere nello schema delle misure. Buon lavoro!
26.06.2024 - 08:04
![]() Nicky wrote:
Nicky wrote:
Hi I would like to do this pattern with Drops Alpaca...using 2 threads.Can you help converting?Is it better to increase needle size or reduce number of stitches..or both?Many thanks,Nicky.
27.07.2022 - 10:20DROPS Design answered:
Hi Nicky, it would be easier to replace original yarn (from Groupe B) to another one from the same group. Using 2 strands of Alpaca you will obtain C. Unfortunately we are not able to adjust our patterns to any individual requests. Should you need any individual assistance, please contact the store where you bought the yarn, even per mail or telephone. Happy knitting!
27.07.2022 - 10:52
![]() Maura Montemerlo wrote:
Maura Montemerlo wrote:
Buongiorno ho eseguito questo modello più volte in taglie diverse sia in lana che in cotone e riuscito sempre benissimo. Ora avrei necessità di farne uno in taglia 11-12 anni. Ho provato a fare io aumentando in lunghezza e larghezza ma il risiltato finale non è stato per niente buono. Potreste gentilmente darmi istruzioni per questa taglia? Grazie per l' aiuto che fornite sempre.
13.07.2022 - 16:58DROPS Design answered:
Buongiorno Maura, questo modello è stato progettato per essere lavorato in quelle taglie, non possiamo svilupparlo su altre. Per un'assistenza così personalizzata può però rivolgersi al suo rivenditore DROPS di fiducia. Buon lavoro!
13.07.2022 - 18:06
![]() Birgit wrote:
Birgit wrote:
Bitte was heisst: \" gehen die Mitte\" und total?
01.03.2021 - 10:25
![]() Birgit wrote:
Birgit wrote:
Warum lässt sich die Anleitung nicht ausdrucken? Was mache ich verkehrt?
28.02.2021 - 18:26DROPS Design answered:
Liebe Birgit, prüfen Sie mal die Druckereinstellungen - versuchen Sie auch die Seite zu aktualisieren oder mit einem anderen Browser zu versuchen. Viel Spaß beim stricken!
01.03.2021 - 09:57
![]() Lucia Battisti wrote:
Lucia Battisti wrote:
Buonasera non comprendo nella spiegazione del davanti sinistro "sul I° ferro aumentare 1 maglia verso il centro davanti". Questo aumento quindi non si fa ai lati ma al centro delle maglie? Mentre gli altri aumenti vengono fatti all'inizio o alla fine e poi come mi comporto con la grana di riso dopo gli aumenti? Grazie a presto
26.02.2021 - 22:30DROPS Design answered:
Buongiorno Lucia, gli aumenti sul davanti sinistro iniziano da centro davanti. Per la grana di riso, incorpora gli aumenti nel lavoro. Buon lavoro!
27.02.2021 - 11:22
![]() Helen wrote:
Helen wrote:
Left front - if I am increasing a stitch on every row mid front, how I’ll the moss stitch match up because each time I will have an extra stitch. Please help. Thanks
08.11.2020 - 13:59DROPS Design answered:
Dear Helen, at the beg of the row, purl the stitch if the next stitch should be knitted or knit the stitch if the next stitch should be purled / at the end of the row, knit the stitch if the previous stitch was purled and purl the stitch if the previous stitch was knitted. Happy knitting!
09.11.2020 - 11:02
|
|
DROPS Extra 0-683 |
|
 |
 |
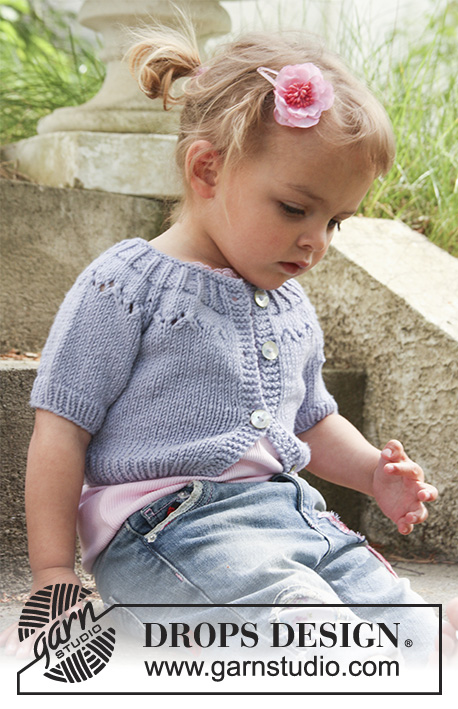
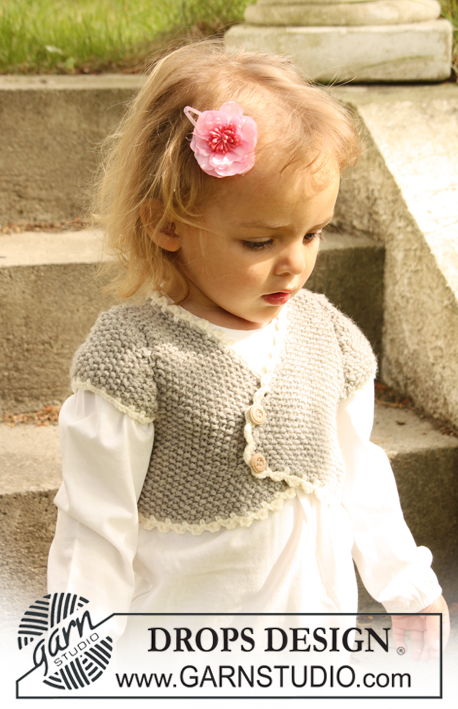
DROPS short jacket with short sleeve in seed st in ”Merino Extra Fine”.
DROPS Extra 0-683 |
|
|
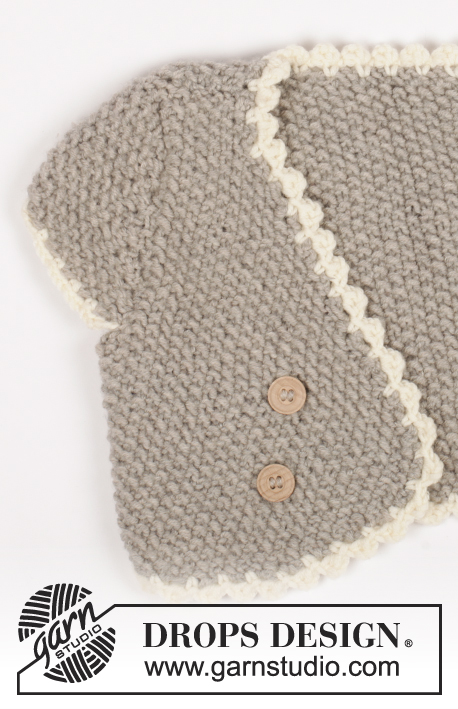
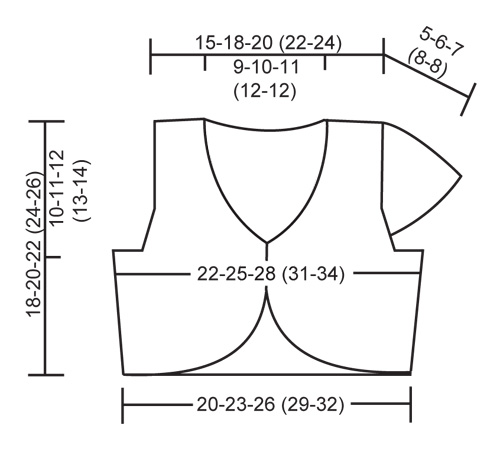
JACKET: SEED ST: Row 1: * K1, P1 *, repeat from *-*. Row 2: K over P and P over K. Repeat row 2. INCREASING TIP: Make all inc in the outermost st by working 2 sts in the same st. DECREASING TIP: Make all dec at beg of row by K/P 2 tog. --------------------------------------------------------- --------------------------------------------------------- BACK PIECE: Cast on 42-48-54 (60-66) sts (includes 1 edge st each side) on needle size 4.5 mm / US 7 with light beige mix. Work SEED ST – see above. REMEMBER THE GAUGE! When piece measures 2-3-3 (4-4) cm / 1½"-1⅛"-1⅛" (1½"-1½") inc 1 st each side – See INCREASING TIP. Repeat the inc each side when piece measures 5-6-7 (8-8) cm / 2"-2⅜"-2¾" (3⅛"-3⅛") = 46-52-58 (64-70) sts. When piece measures 8-9-10 (11-12) cm / 3⅛"-3½"-4" (4⅜"-4¾") bind off 4-4-4 (5-5) sts at the beg of the next 2 rows for armhole and then dec 1 st at the beg of every row a total of 4-4-5 (5-6) times each side – See DECREASING TIP = 30-36-40 (44-48) sts. When piece measures 16-18-20 (22-24) cm / 6¼"-7"-8" (8¾"-9½") cast of the middle 14-16-18 (20-20) sts for neck and complete each shoulder separately. Dec 1 st on neckline on next row, work 1 row without dec and dec 1 st on neckline on next row = 6-8-9 (10-12) sts left on shoulder. Bind off in seed st when piece measures 18-20-22 (24-26) cm / 7"-8"-8¾" (9½"-10¼"). Work the other shoulder in the same way. LEFT FRONT PIECE: Cast on 15-17-19 (21-23) sts (includes 1 edge st at the side) on needle size 4.5 mm / US 7 with light beige mix. READ ALL OF THIS SECTION BEFORE CONTINUING! Work seed st, AT THE SAME TIME on first row inc 1 st towards mid front – See INCREASING TIP! Repeat the inc on every row (i.e. from RS as well as WS) a total of 8-8-7 (5-1) times and then on every other row a total of 3-4-6 (9-14) times. AT THE SAME TIME when piece measures 2-3-3 (4-4) cm / 1½"-1⅛"-1⅛" (1½"-1½") inc 1 st at the side, and repeat the inc when piece measures 5-6-7 (8-8) cm / 2"-2⅜"-2¾" (3⅛"-3⅛"). When all inc are complete there are 28-31-34 (37-40) sts on needle. When piece measures 8-9-10 (11-12) cm / 3⅛"-3½"-4" (4⅜"-4¾") bind off for armhole at the side as described for back piece. AT THE SAME TIME when piece measures 8-9-11 (12-14) cm / 3⅛"-3½"-4⅜" (4¾"-5½") dec 1 st towards mid front for neck – See DECREASING TIP! Repeat the dec on every other row a total of 14-15-16 (17-17) times = 6-8-9 (10-12) sts left on shoulder. Continue until piece measures 18-20-22 (24-26) cm / 7"-8"-8¾" (9½"-10¼") and bind off in seed st. RIGHT FRONT PIECE: Cast on and work like left front piece, but mirrored. SLEEVE: Worked back and forth on needle. Cast on 28-30-34 (38-42) sts (includes 1 edge st each side) on needle size 4.5 mm / US 7 with light beige mix. Work seed st, AT THE SAME TIME at the beg of the first 2 rows dec 1 st – See DECREASING TIP! Repeat the dec at the beg of every row until piece measures approx 4.5 -5.5 -6.5 (7.5 -7.5) cm / 1¾"-2¼"-2½" (2⅞"-2⅞"). Now bind off 2 sts at the beg of the next 2 rows and bind off remaining sts in seed st. ASSEMBLY: Sew shoulder seams. Sew side seams inside 1 edge st and set in sleeves – set in sleeves approx 2-3 cm / ¾"-1" from where armhole beg. Sew buttons on left front band. Use crochet border as buttonholes. CROCHET BORDER: Crochet a border round the opening, including bottom edge, with hook size 4 mm / G/6 and off-white as follows: 1 sc in first st, * ch 3, 1 dc in first ch, skip approx 1-1.5 cm / ⅜"-½", 1 sc in next st *, repeat from *-* and finish with 1 sc in first st Crochet a border along sleeve edges as follows with hook size 4 mm / G/6 and off-white – beg where sleeve is sewn to back piece: 1 sc in first st, * ch 3, skip approx 1-1.5 cm/ ⅜"-½", 1 sc in next st *, repeat from *-*. |
|
 |
|
Have you finished this pattern?Tag your pictures with #dropspattern or submit them to the #dropsfan gallery. Do you need help with this pattern?You'll find 22 tutorial videos, a Comments/Questions area and more by visiting the pattern on garnstudio.com. © 1982-2025 DROPS Design A/S. We reserve all rights. This document, including all its sub-sections, has copyrights. Read more about what you can do with our patterns at the bottom of each pattern on our site. |
|


With over 40 years in knitting and crochet design, DROPS Design offers one of the most extensive collections of free patterns on the internet - translated to 17 languages. As of today we count 320 catalogs and 12095 patterns - 12085 of which are translated into English (US/in).
We work hard to bring you the best knitting and crochet have to offer, inspiration and advice as well as great quality yarns at incredible prices! Would you like to use our patterns for other than personal use? You can read what you are allowed to do in the Copyright text at the bottom of all our patterns. Happy crafting!
Post a comment to pattern DROPS Extra 0-683
We would love to hear what you have to say about this pattern!
If you want to leave a question, please make sure you select the correct category in the form below, to speed up the answering process. Required fields are marked *.