
Popular categories
Looking for a yarn?


Comments / Questions (15)
![]() Victoria wrote:
Victoria wrote:
Hello! first of all, thank you for this pattern! I have so much fun knitting it, but I have a question. in the 24th round of the body it's said to cast off 2, k5, co 2 and k5, but I have 7 remaining stitches (16- casted off -10 worked=2). should I work 6 stitches between the casted off stitches or did I make a mistake somewhere?
26.12.2025 - 03:01
![]() ELENA wrote:
ELENA wrote:
Thank you so much for such a delightful Santa!
11.11.2025 - 01:39
![]() Sue wrote:
Sue wrote:
Great, happy fellow!,
09.11.2025 - 14:25
![]() Toril Thoresen wrote:
Toril Thoresen wrote:
Kroppen får ved økning 50, 60 og 70 masker. Det er vel feil at det blir 48, 56 og 64?
10.12.2016 - 20:58DROPS Design answered:
Hej Toril. Nej, du har f.eks. 48 m og skal strikke: 5 m, øk 1 m i neste m. Dvs, du strikker 6 m og öker til 7 i hver. 48/6 er 8 gange og 8 gange 7 m er 56 m. Det samme gaelder for naeste omg osv.
12.12.2016 - 15:09
![]() Ingrid Rörig wrote:
Ingrid Rörig wrote:
Hallo, ist es richtig, dass der erste rote Streifen incl. Anschlag für der Körper nur 3 Reihen umfasst? Das Grundmuster für Streifen umfasst doch 4 Reihen. MfG I. Rörig
25.10.2016 - 18:14DROPS Design answered:
Liebe Frau Rörig, also für den Körper beginnen Sie die Streifen mit der 4. Runde, dh Anschlagskante + die 3 erste Runde sind mit Rot gestrickt.
26.10.2016 - 08:50
![]() Katri Ahonen wrote:
Katri Ahonen wrote:
Julius tontun ohjeessa on käden kohdalla virhe. Ohjeessa kehotetaan :" Katkaise lanka, vedä se loppujen silmukoiden läpi, kiristä aukko umpeen ja päättele langanpää." Näin ei voi tehdä .
16.12.2015 - 22:45
![]() Mari wrote:
Mari wrote:
Hei Holder på å strikke denne, men kroppen blir bare halvparten av lengda i forhold til illustrasjonsbildet! Har lest igjennom flere ganger, men ender opp med bare 4 grå striper i genseren. Han blir søt alikevell, men den gode magen var noe av det jeg likte med nissen. Tenkte jeg skulle si ifra (og ønske dere god jul i samme slengen :) )
23.12.2013 - 22:35
![]() Roberta wrote:
Roberta wrote:
Salve ho realizzato il modello ma credo ci sia un errore nel passaggio per la testa non è scritto che bisogna rovesciare il corpo e quindi lavorare tutti i ferri a rovescio. Io sono riuscita a farlo solo così.
22.12.2013 - 17:49DROPS Design answered:
Buongiorno Roberta, le istruzioni del modello sono corrette, il corpo non va rovesciato, ma vanno semplicemente riprese le maglie: probabilmente c'è stato qualche problema durante questo passaggio. Buon lavoro!
27.12.2013 - 11:07
![]() Wagner, Johanna wrote:
Wagner, Johanna wrote:
Der Kleine gefällt mir sehr gut. Leider kann ich die Anleitung nicht ausdrucken. Was mache ich falsch?
29.11.2013 - 13:39DROPS Design answered:
Liebe Johanna, gehen Sie auf den Button "DRUCKEN: ANLEITUNG" und dann in der rechten oberen Ecke nochmals auf "Anleitung drucken".
01.12.2013 - 09:48
![]() Lucie wrote:
Lucie wrote:
Pro Janu Nemcakovou: *-* znamená, že se postup mezi hvězdičkami, který byl obvykle popsán v předchozí větě, opakuje (např. * 2hladce, 2 obrace*, *-* opakujeme 3krát znamená, že budete plést 2hl,2obr,2hl,2obr,2hl,2obr)
26.09.2013 - 14:58
|
|
Julius#dropsjulius |
|
 |
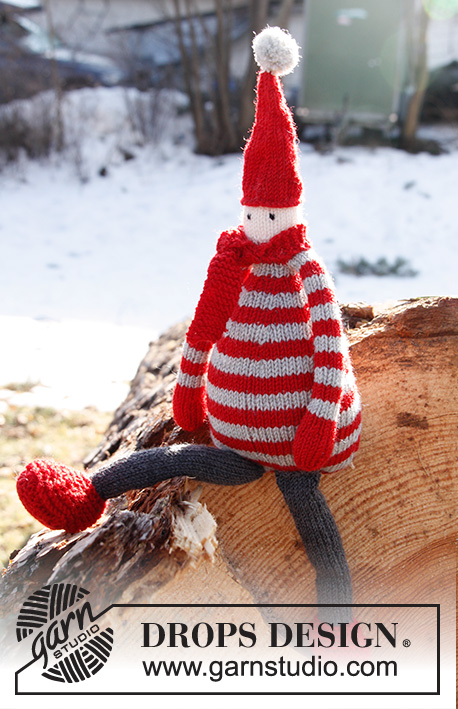 |
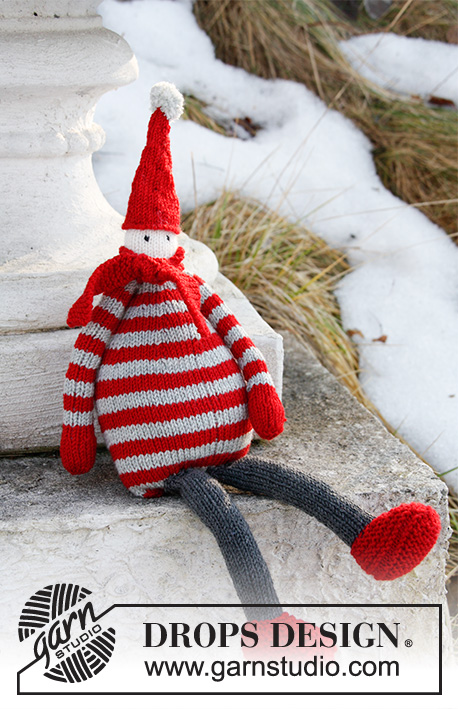
Knitted DROPS Santa in "BabyMerino".
DROPS Extra 0-861 |
|
|
GARTER ST (back and forth on double pointed needles): K all rows. 1 ridge = 2 K rows. GARTER ST (in the round on double pointed needles): * K 1 round and P 1 round *, repeat from *-*. INCREASE TIP: Inc 1 st by working 2 sts in the next st as follows: Work in front and back loop of same st. DECREASE TIP: Dec 1 st by K 2 tog. STRIPES: Work * 4 rounds light gray, 4 rounds red *, repeat from *-*. --------------------------------------------------------- SANTA: Worked on double pointed needles. The body, arms and head are worked in one, and the legs and feet are worked in one. BODY: Worked in stockinette st in the round on double pointed needles. Worked from the bottom and up to head. Cast on 40 sts on 4 double pointed needles size 2.5 mm / US 1.5 with red. ROUND 1: * K4 sts, inc 1 st in next st - Read INCREASE TIP above *, repeat from *-* the entire round = 48 sts (8 sts inc). ROUND 2: * K5 sts, inc 1 st in next st *, repeat from *-* the entire round = 56 sts. ROUND 3: * K6 sts, inc 1 st in next st *, repeat from *-* the entire round = 64 sts. On next round switch to light gray and work STRIPES - see explanation above. When 5 stripes in light gray have been worked, dec in the piece as follows: ROUND 1: Switch to red, *K6 sts, K2 tog *, repeat from *-* the entire round = 56 sts (8 sts dec). ROUND 2-4: K all sts. ROUND 5: Switch to light gray, K5 sts, K2 tog*, repeat from *-* the entire round = 48 sts. ROUND 6-8: K all sts. ROUND 9: Switch to red, *K4 sts, K2 tog*, repeat from *-* the entire round = 40 sts. ROUND 10-12: K all sts. ROUND 13: Switch to light gray, *K3 sts, K2 tog*, repeat from *-* the entire round = 32 sts. ROUND 14-16: K all sts. ROUND 17: Switch to red, *K2 sts, K2 tog*, repeat from *-* the entire round = 24 sts. ROUND 18-20: K all sts. ROUND 21: Switch to light gray, *K1 st, K2 tog*, repeat from *-* the entire round = 16 sts. ROUND 22-23: K all sts. ROUND 24: Bind off the first 2 sts (= armhole), K5 sts, bind off the next 2 sts (= armhole), work the remaining 5 sts = 12 sts remain. Slip all sts on a stitch holder and put piece aside. HAND AND ARM: Worked in one in stockinette st. The hand is first worked back and forth and then in the round on double pointed needles. Cast on 4 sts on 1 double pointed needle with red. On next row inc 1 st in every st = 8 sts. Then continue to work on 4 double pointed needles in the round as follows: Inc 1 st in every st = 16 sts. Then K all sts for a total of 9 rounds. On next round, dec as follows: * K2 sts, K2 tog *, repeat from *-* the entire round = 12 sts. K all sts for 2 more rounds. On next round switch to light gray and continue with STRIPES. Continue with stripes until 6 stripes in light gray have been worked - NOTE: Work last round (= 4th round) in light gray as follows: bind off the first 2 sts (= armhole), work the remaining sts on round = 10 sts remain. Slip all sts on a stitch holder. Take the cast on yarn tail and pull it through the 4 sts cast on at the edge of hand, tighten tog. Fill the hand with some poly stuffing and fill the arm with some poly stuffing (until approx. 1 cm / ⅜" from last round, so that you can bend the arm), put the piece aside. Knit another hand and arm the same way. SHOULDER AND HEAD: Slip sts from stitch holder from body and arms back on needle (bind off against bind off). Then work the body and arms tog for shoulder with red as follows: K 10 sts from one arm, 6 sts from body, 10 sts from the other arm, 6 sts from body = 32 sts on round. K 1 round. On next round, dec as follows: * K2 sts, K2 tog *, repeat from *-* the entire round = 24 sts (8 sts dec). K another round. On next round switch to off white (for head) and dec as follows: * K1 st, K2 tog *, repeat from *-* the entire round = 16 sts. K another round. Then inc as follows: * K 1 st, inc 1 st in next st *, repeat from *-* the entire round = 24 sts. Continue to K all sts for 11 more rounds. Then dec as follows: * K 1 st, dec 1 st *, repeat from *-* the entire round = 16 sts. K all sts for 3 more rounds. Then dec as follows: * K 2 sts, K2 tog *, repeat from *-* the entire round = 12 sts. K another round. Then dec as follows: * K 1 st, K2 tog *, repeat from *-* the entire round = 8 sts, cut the yarn. Pull yarn tail through the 8 sts, tighten tog. HAT: Worked in the round in stockinette st. Cast on 28 sts on double pointed needles size 2.5 mm / US 1.5 with red. K all sts for 6 rounds. Then dec in the piece as follows: ROUND 1: * K 5 sts, K2 tog *, repeat from *-* the entire round = 24 sts (4 sts dec). ROUND 2-6: K all sts. ROUND 7: *K 4 sts, K2 tog *, repeat from *-* the entire round = 20 sts. ROUND 8-12: K all sts. ROUND 13: *K 3 sts, K2 tog *, repeat from *-* the entire round = 16 sts. ROUND 14-18: K all sts. ROUND 19: *K 2 sts, K2 tog *, repeat from *-* the entire round = 12 sts. ROUND 20-24: K all sts. ROUND 25: *K 1 st, K2 tog *, repeat from *-* the entire round = 8 sts. ROUND 26-28: K all sts. ROUND 29: K2 tog around = 4 sts, cut the yarn. Pull yarn tail through the 4 sts, tighten tog. FOOT AND LEG: Work from bottom (sole) up. The sole is first worked back and forth in garter st - Read explanation above, then the foot is worked in the round in garter st and the leg in the round in stockinette st. Cast on 4 sts with red. Work next row as follows: K 1, inc 1 st in each of the next 2 sts, K 1 = 6 sts (2 sts inc). * K 1 row, on next row inc 1 st in the 2nd st and in the next to last st on row * = 8 sts. Repeat from *-* 1 more time = 10 sts. Continue in garter st back and forth until piece measures approx. 3½ cm / 1¼". On next row, dec as follows: K2 tog in each side = 8 sts. K 1 row, on next row K2 tog in each side = 6 sts. K 1 row, on next row K2 tog in each side while AT THE SAME TIME binding off, cut the yarn. Then pick up new sts as follows: Beg in the middle of bind off edge (= back part of foot), pick up 40 sts around the entire sole. Then work in the round as follows: ROUND 1 (and then every uneven numbered round): P all sts. ROUND 2: K 16, K2 tog, K 4, K2 tog, K 16 = 38 sts. ROUND 4: K 15, K2 tog, K 4, K2 tog, K 15 = 36 sts. ROUND 6: K 14, K2 tog, K 4, K2 tog, K 14 = 34 sts. ROUND 8: K 13, K2 tog, K 4, K2 tog, K 13 = 32 sts. ROUND 10: K 12, dec 4 sts (i.e. work the next 8 sts tog 2 by 2), K 12 = 28 sts. ROUND 12: K 10, dec 4 sts, K 10 = 24 sts. ROUND 14: K 4, dec 8 sts, K 4 = 16 sts. On next round switch to dark gray and K all sts. Then K until foot and leg measures approx. 13 cm / 5" vertically. Fill the piece with some poly stuffing (until approx. 1 cm / ½" from bind off edge remain, so that you can bend the leg). Knit another foot and leg the same way. ASSEMBLY: Make 1 pompom with a diameter of approx. 1½ cm / ½" with 1 strand off white and 1 strand light gray, fasten it on the hat and fasten the hat at the top of head. Embroider eyes on the head with black. Fill the body with some poly stuffing. Sew tog the cast on edge on body. Place the bind off edge on the legs flat and sew them under the body. SCARF: Work a scarf back and forth as follows: Cast on 6 sts with red, work in garter st until scarf measures approx. 26 cm / 10¼" (or desired length), bind off. Tie the scarf around the neck. |
|
Have you finished this pattern?Tag your pictures with #dropspattern #dropsjulius or submit them to the #dropsfan gallery. Do you need help with this pattern?You'll find 15 tutorial videos, a Comments/Questions area and more by visiting the pattern on garnstudio.com. © 1982-2026 DROPS Design A/S. We reserve all rights. This document, including all its sub-sections, has copyrights. Read more about what you can do with our patterns at the bottom of each pattern on our site. |
|


With over 40 years in knitting and crochet design, DROPS Design offers one of the most extensive collections of free patterns on the internet - translated to 17 languages. As of today we count 325 catalogs and 12298 patterns - 12288 of which are translated into English (US/in).
We work hard to bring you the best knitting and crochet have to offer, inspiration and advice as well as great quality yarns at incredible prices! Would you like to use our patterns for other than personal use? You can read what you are allowed to do in the Copyright text at the bottom of all our patterns. Happy crafting!
Post a comment to pattern DROPS Extra 0-861
We would love to hear what you have to say about this pattern!
If you want to leave a question, please make sure you select the correct category in the form below, to speed up the answering process. Required fields are marked *.