
Popular categories
Looking for a yarn?


Comments / Questions (118)
![]() Lucia wrote:
Lucia wrote:
Come fare il picciolo in tondo con solo punti? Grazie
08.05.2026 - 22:22DROPS Design answered:
Buonasera Lucia, ci può spiegare meglio il suo problema? Buon lavoro!
11.05.2026 - 21:52
![]() Sini wrote:
Sini wrote:
Ihana pipo tuli, mutta aivan liian iso kokoinen pikkuisen päähän. Tein pienimmällä koolla ja käsialani oli tiukkaa. Valmiin työn ja ohjeiden mitat täsmäsivät.
05.05.2026 - 08:54
![]() Karin Eriksen Andersgaard wrote:
Karin Eriksen Andersgaard wrote:
Er det noe galt med nettsidene deres? De fleste bildene vises bare som spørsmålstegn, blant annet diagrammene. Da blir det vanskelig å følge oppskriften 😊
29.04.2026 - 07:48DROPS Design answered:
Hei Karin. Det var noe feil i dag tidlig, men skal nå være OK. mvh DROPS Design
29.04.2026 - 08:34
![]() Cecilia wrote:
Cecilia wrote:
Kan jag använda rundstickor istället för strumpstickor för det här mönstret?
23.04.2026 - 23:54DROPS Design answered:
Hej Cecilia. Om du använder tekniken "magic loop" kan du använda runsticka men annars tror jag det blir svårt upp mot toppen när det blir färre maskor. Mvh DROPS Design
24.04.2026 - 13:33
![]() Wilma wrote:
Wilma wrote:
Hi, I bought this pattern and it does not describe how to do the little whits seeds. It just came with a pattern diagram. Could you please explain? Thank you wilma
21.04.2026 - 20:17DROPS Design answered:
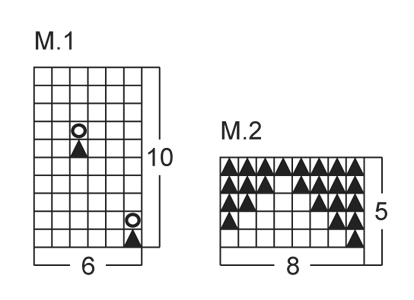
Hi Wilma, The seeds are worked in colour Olive and the method is described in diagram M.1: First round, knit 1 in Olive, then on the next round purl this stitch in Olive. Regards, Drops Team.
22.04.2026 - 06:00
![]() María De La Luz Maturana wrote:
María De La Luz Maturana wrote:
Muy lindo muchas gracias
16.04.2026 - 01:46
![]() Christa wrote:
Christa wrote:
Diese Mütze ist so niedlich und leicht zu stricken, ich habe sie schon dreimal gestrickt und bei den beschenken Eltern große Freude sehen können
13.04.2026 - 18:10
![]() Knittingninna wrote:
Knittingninna wrote:
Super söt, dock tunna smala stickor kan vara jobbiga för äldre händer, kan ge värk. Fö helt super söt mössa
10.04.2026 - 17:39
![]() AnneMarie wrote:
AnneMarie wrote:
Tack Mona ! Just där du beskrev hade jag kört fast. / AM
24.03.2026 - 22:29
![]() Christelle wrote:
Christelle wrote:
Bonjour , où peut on se procurer les explications du bonnet pour un bébé 0/3 mois. Cdlt
11.11.2025 - 18:56DROPS Design answered:
Bonjour Christelle, vous trouverez les explications de ce bonnet en taille 1/3 mois (1ère taille, nous n'avons pas plus petit), ici. Bon tricot!
12.11.2025 - 16:22
|
||||||||||
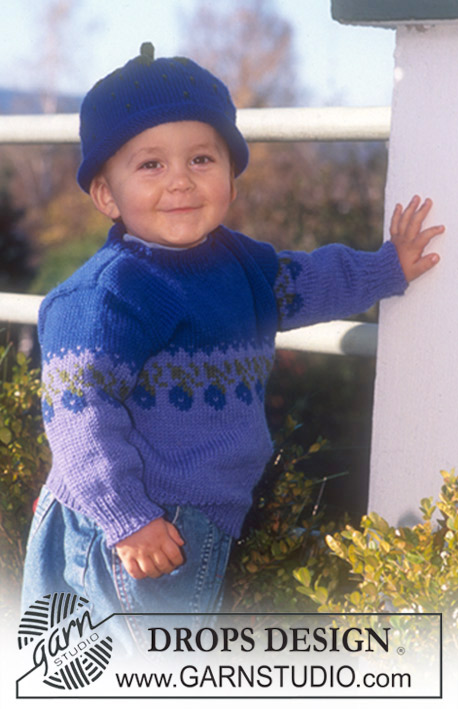
Sweet Strawberry#sweetstrawberryhat |
||||||||||
|
|
||||||||||
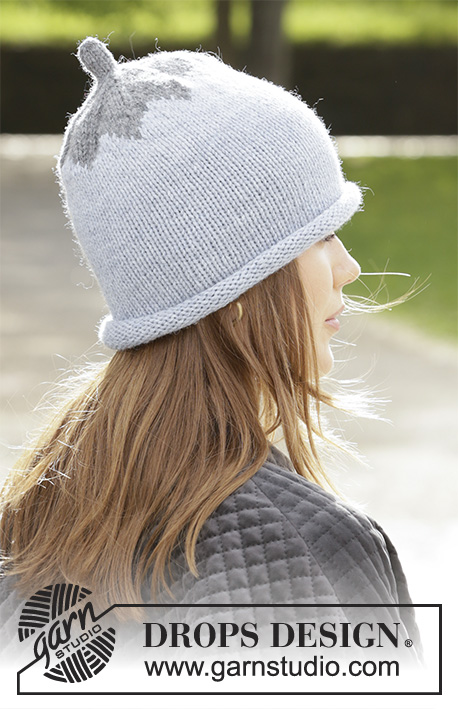
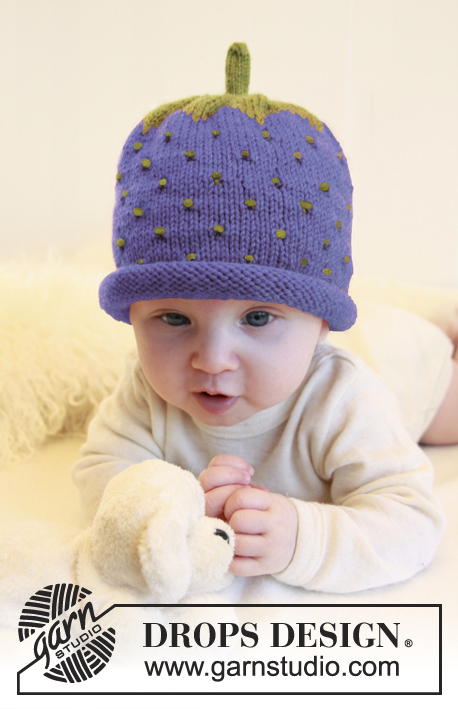
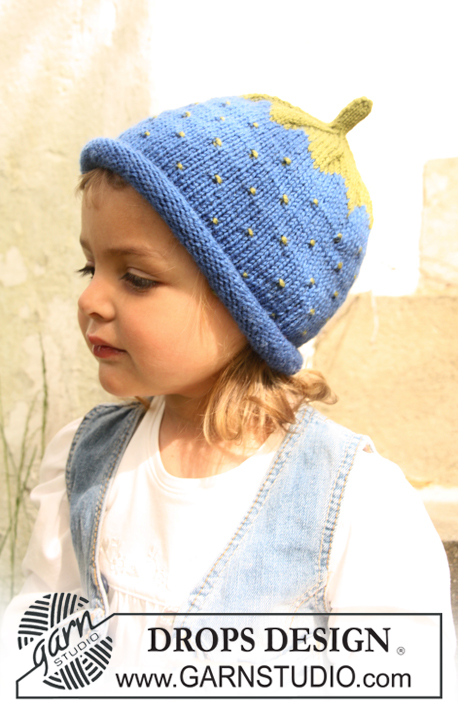
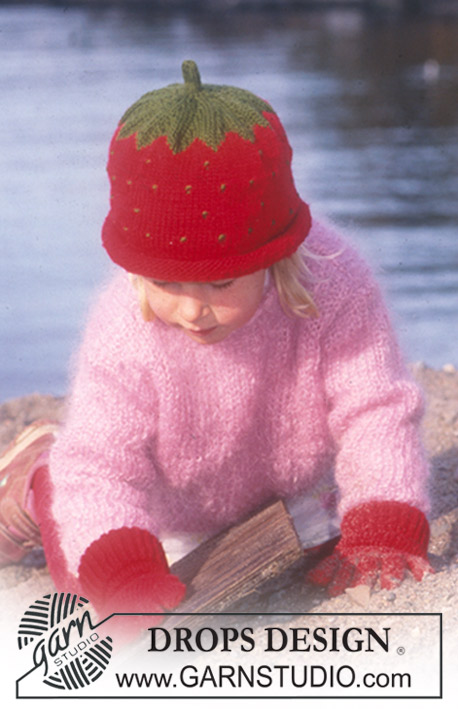
Knitted strawberry hat for baby and children in DROPS Alpaca
DROPS Baby 21-21 |
||||||||||
|
PATTERN: See diagrams M.1 and M.2. ---------------------------------------------------------- HAT: Worked in the round. Loosely cast on 108-114-120 (126-132) sts on double pointed needles size 2.5 mm / US 1or2 with red or graypurple (no of sts divisible by 6, distribute sts evenly on 4 double pointed needles). P 1 round, then work in stockinette st. REMEMBER THE GAUGE! When piece measures 5-5-6 (6-7) cm / 2"-2"-2⅜" (2⅜"-2¾") work diagram M.1. After diagram M.1 has been worked 2 times vertically, work rounds 1-7 in diagram M.1, then K 1 round with red while at the same time dec 4-2-0 (6-4) sts evenly = 104-112-120 (120-128) sts (no of sts divisible by 8). Piece now measures approx. 13-13-14 (14-15) cm / 5⅛"-5⅛"-5½" (5½"-6"). Then work diagram M.2 1 time vertically, and then finish the piece with dark olive. Now insert 13-14-15 (15-16) markers in the piece 8 sts apart. Then dec 1 st on left side of all markers (by K 2 tog) on every other round until 13-14-15 (15-16) sts remain on needles. Knit 1 round where you decrease 5-6-7-7-8 sts evenly spaced = 8 sts on needles. Piece now measures approx. 18-18-19 (20-21) cm / 7"-7"-7½" (8"-8¼"). Work in the round for 3 cm / 1⅛" over these sts for "stem". Pull a double thread through the remaining sts and fasten tightly. |
||||||||||
Diagram explanations |
||||||||||
|
||||||||||
 |
||||||||||
Have you finished this pattern?Tag your pictures with #dropspattern #sweetstrawberryhat or submit them to the #dropsfan gallery. Do you need help with this pattern?You'll find 6 tutorial videos, a Comments/Questions area and more by visiting the pattern on garnstudio.com. © 1982-2026 DROPS Design A/S. We reserve all rights. This document, including all its sub-sections, has copyrights. Read more about what you can do with our patterns at the bottom of each pattern on our site. |
||||||||||


With over 40 years in knitting and crochet design, DROPS Design offers one of the most extensive collections of free patterns on the internet - translated to 17 languages. As of today we count 325 catalogs and 12298 patterns - 12288 of which are translated into English (US/in).
We work hard to bring you the best knitting and crochet have to offer, inspiration and advice as well as great quality yarns at incredible prices! Would you like to use our patterns for other than personal use? You can read what you are allowed to do in the Copyright text at the bottom of all our patterns. Happy crafting!
Post a comment to pattern DROPS Baby 21-21
We would love to hear what you have to say about this pattern!
If you want to leave a question, please make sure you select the correct category in the form below, to speed up the answering process. Required fields are marked *.