
Popular categories
Looking for a yarn?


Comments / Questions (6)
![]() Airashii wrote:
Airashii wrote:
Ooo, this is the perfect increase. Drops Design, thank you very much for your help. Kind regards.
21.02.2023 - 16:34
![]() Airashii wrote:
Airashii wrote:
Hello, Drops Design. I aprreciate your answer with example for increasing but following your instructions (1 st, yo, 2st, 1yo ...) I end up with 55 sts increased, which is not what is written in pattern (52 sts); and since it is said to increase evenly, just following instructions you have given until there are 52 sts does not distribute stitches evenly. I wonder how others who tried this pattern worked this out.
20.02.2023 - 16:35DROPS Design answered:
Dear Airashii, as explained in the lesson, divide 84 by 52= 1.6 you will have to increase alternately after 1 and after 2 stitches until you have increased 52 sts; you can also work for ex: K1, (YO, K1) x 10, (YO, K2)x31, (YO, K1)x10, YO, K1. Happy knitting!
21.02.2023 - 09:56
![]() Airashii wrote:
Airashii wrote:
Which increasing method do you recommend for this hat pattern? I really do not know how to make nicely distributed increase with given number of stitches in the pattern (84 sts and increasing 52 sts). Further help would be much appreciated.
17.02.2023 - 14:54DROPS Design answered:
Dear Airashii, for this pattern, work 1 yarn over after every 1 or 2 stitches alternatively. For example: 1 stitch, yarn over, 2 stitches, yarn over, 1 stitch, yarn over, 2 stitches, yarn over..... Continue like this until you have increased 52 sts. Happy knitting!
19.02.2023 - 19:49
![]() Airashii wrote:
Airashii wrote:
Hi. Can you please help me with blackberry pattern for the hat. I am curious what difference does it make if I do "p1, k3/k3, p1" (this hat) compared to "purl all sts in row 1 and row 3" (pattern nr. 67-22 and video )? It seems the same pattern for both hats, but the instructions are different (also regarding increase of the sts). I have trouble increasing 52 sts evenly - can you please also help me with that? =) Many thanks for your help.
17.02.2023 - 12:01DROPS Design answered:
Dear Airashii, there are different way to work a blackberry pattern - you can swatch both to check which one you rather like. This lesson will help you increasing evenly. Happy knitting!
17.02.2023 - 12:11
![]() Ykje Hansma wrote:
Ykje Hansma wrote:
Erg handig in de zomer, als schouderwarmer. De lengte is precies goed. Ook voor beginners een leuk brei project. Wil het wel een naam geven. Lilly.
20.03.2018 - 16:18
![]() Lene Grøndahl wrote:
Lene Grøndahl wrote:
Jeg vil gerne strikke den i large kan I hjælpe med antal masker samt indtagningen? Havde købr garn da jeg opdagede at denne poncho kun er i str M i opskriften - ærgerligt men håber I kan hjælpe
03.01.2015 - 22:57DROPS Design answered:
Hej Lene. Jeg kan desvaerre ikke skrive et helt mönster ud, men jeg ville anbefale at du maaler hvor meget större du vil have den og saa med hjaelp af strikkefastheden i mönstret (antal masker per 10 cm) beregne antal masker du skal begynde med. Jeg ville nok tage ind lidt höjere og maaske 1-2 gange mere, men se undervejs hvordan det ser ud. Haaber det gaar godt. God fornöjelse med den.
08.01.2015 - 16:48
|
|
DROPS 93-38 |
|
|
|
|
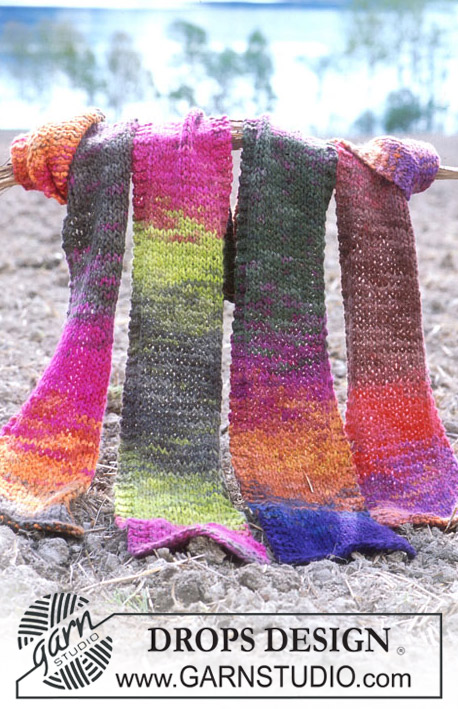
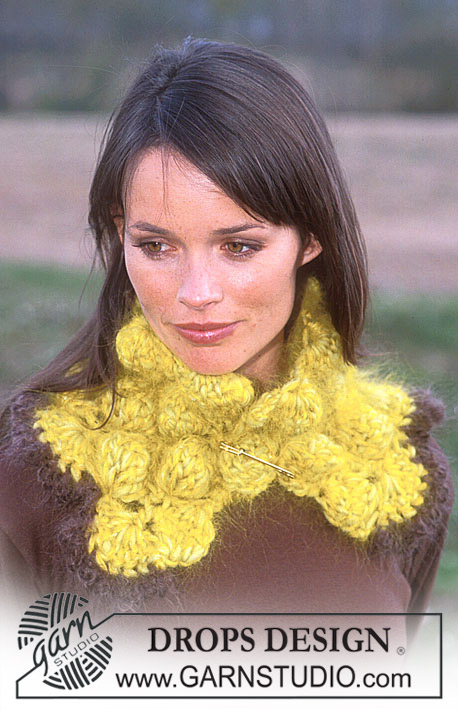
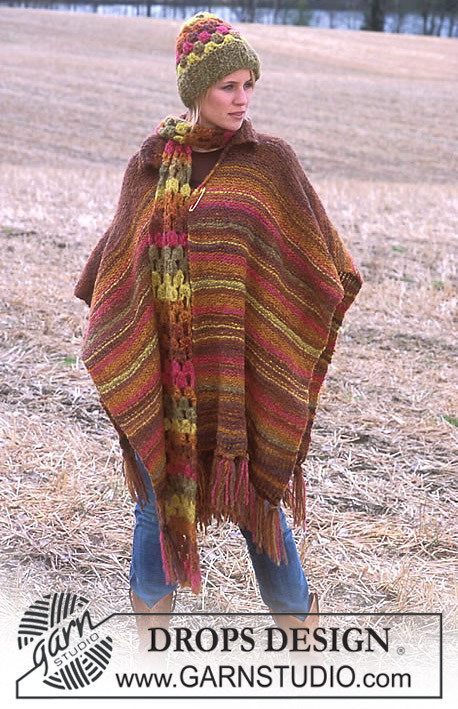
Blackberry stitch Hat in Alaska and Poncho in Puddel and Snow
DROPS 93-38 |
|
|
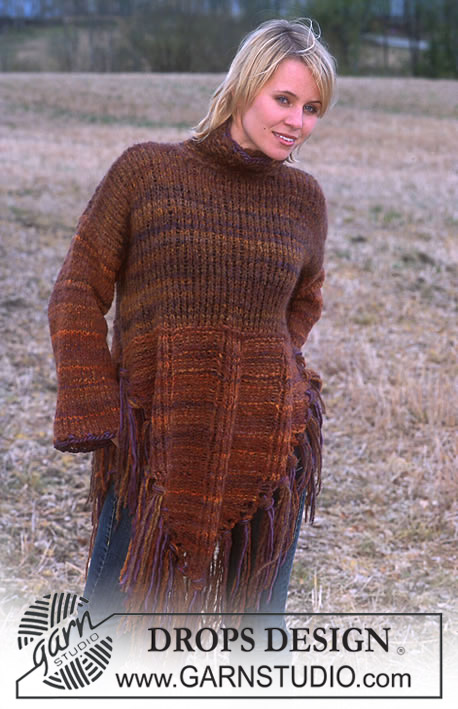
Gauge: 17 sts x 22 rows on larger needles in stockinette st = 10 x 10 cm. Blackberry stitch: Knit the pattern in the round, then turn inside out. The pattern stitch is divisible by 4. Round 1: * P 1, K 3 *, repeat * - * around row. Round 2: * knit 3 sts in the same st as follows: K 1, P 1, K 1, then P 3 tog *, repeat * - *. Round 3: * K 3, P 1 *, repeat * - *. Round 4: * P 3 tog, then knit 3 sts in the next st as follows: K 1, P 1, K 1 *, repeat * - *. Hat: Cast on 84 sts on smaller double-pointed needles; join and place a marker at the join (marker = center back). Knit garter st until the piece measures 4.5 cm. Then knit 2 more rows garter st, increasing 52 sts evenly distributed on 1st row = 136 sts. Change to larger double-pointed needles. Now knit Blackberry stitch – see instructions above. When the piece measures 22 cm K 2 tog around row = 68 sts. Repeat dec on the next row= 34 sts. Pull a double strand of yarn through the remaining sts and pull tight. Turn inside out. PONCHO: Size: Medium Circumference at lower edge: approx. 126 cm [approx. 49-⅝"] Materials: DROPS Puddel from Garnstudio 200 gr nr 01, natural and use: DROPS SNOW from Garnstudio 100 gr nr 01, natural DROPS 8 mm [US 11] needles, or size needed to obtain correct gauge. DROPS 6 mm [US J] crochet hook, or size needed to obtain correct gauge. Gauge: 8 sts x 16 rows on needles 6 and garter st = 10 x 10 cm. Back: Cast on 51 sts around 2 needles with Puddel (so that cast-on edge will be elastic). Pull out one needle and knit garter st. When the piece measures 8 cm dec 1 st at each side every other cm a total of 11 times = 29 sts. When the piece measures 32 cm bind off all sts. Front: Cast on and knit the same as the back, but when the piece measures 28 cm bind off the center 9 sts for the neck. Then bind off at each neck edge every other row: 2 sts 1 time and 1 st 1 time. When the piece measures 32 cm bind off all sts. Assembly: Sew the 2 sides in the outermost sts from neck down until 8 cm remain (= split). Crocheted edge: Crochet with Snow along entire bottom edge (including split) as follows: 1 sc in st, * ch 3, skip over approx. 3½-4 cm, 1 sc in the next st *, repeat * - * and finish with ch 3, skip over approx. 3½-4 cm and 1 sl st in sc at start of row. Fringe: 1 fringe tuft = 3 strands Snow + 2 strands Puddel (= 5 strands) approx. 60 cm long. Fold strands in half, pull loop through sts at one end of lower edge of poncho and pull ends through loop. Fasten 1 fringe tuft at each corner and space fringe tufts between these approx. every 6-7 cm. |
|
Have you finished this pattern?Tag your pictures with #dropspattern or submit them to the #dropsfan gallery. Do you need help with this pattern?You'll find 24 tutorial videos, a Comments/Questions area and more by visiting the pattern on garnstudio.com. © 1982-2026 DROPS Design A/S. We reserve all rights. This document, including all its sub-sections, has copyrights. Read more about what you can do with our patterns at the bottom of each pattern on our site. |


With over 40 years in knitting and crochet design, DROPS Design offers one of the most extensive collections of free patterns on the internet - translated to 17 languages. As of today we count 324 catalogs and 12290 patterns - 12280 of which are translated into English (US/in).
We work hard to bring you the best knitting and crochet have to offer, inspiration and advice as well as great quality yarns at incredible prices! Would you like to use our patterns for other than personal use? You can read what you are allowed to do in the Copyright text at the bottom of all our patterns. Happy crafting!
Post a comment to pattern DROPS 93-38
We would love to hear what you have to say about this pattern!
If you want to leave a question, please make sure you select the correct category in the form below, to speed up the answering process. Required fields are marked *.