Comments / Questions (32)
![]() Birte Veith wrote:
Birte Veith wrote:
Mütze Das erste Aufnehmen wird in der 1. Und 3. li.-Partie in M2 Was ist die li.-Parie?
05.05.2022 - 15:21DROPS Design answered:
Liebe Frau Veith, in jedem M.2 stricken Sie 3 Maschen links insgesamt 4 Mal; bei der 1. Zunahmen, nehmen Sie die 3 li. Maschen auf 4 in jeder 1. und 3. zu (so haben Sie 4 M li, 1 M re, 3 M li, Lochumster, 4 M li, 1 M re, 3 M li, 1 M re), bei der nächsten Zunahmen nehmen Sie die linke Maschen zu, so daß es sind 4 Maschen überall - und so nehmen Sie weiter, bis es 6 linken Maschen in jedem M.2 sind. Viel Spaß beim stricken!
06.05.2022 - 07:34
![]() Liz wrote:
Liz wrote:
Thanks. However, can you tell me how to do the inc & dec please.
17.03.2021 - 18:32DROPS Design answered:
Dear Liz, you can increase with a yarn over knitted twisted on next row or any other method you rather; decrease by knitting 2 stitches together. Happy knitting!
18.03.2021 - 09:02
![]() Liz wrote:
Liz wrote:
Hi, can you please show how to: "inc 1 st in each side on every 4th row a total of 2 times" & "dec 1 st in each side on every 4th row a total of 2 times". Thanks
17.03.2021 - 15:32DROPS Design answered:
Dear Liz, for the increases, work: 1 row increasing 1 stitch on each side (= 2 sts in total), 3 rows without increasing, 1 row increasing 1 stitch on each side (= you have increased 4 sts = 39 sts on needle). For the decreases: work 1 row decreasing (K2 tog) 1 st on each side (= 2 sts decreased), work 3 rows without decreasing, work 1 row decreasing 1 st on each side = 35 sts remain. Happy knitting!
17.03.2021 - 16:13
![]() Rébecca wrote:
Rébecca wrote:
In der Anleitung für den Handschuh steht, dass zunächst M1 gestrickt wird. Im nächsten Satz soll M1 über M2 gestrickt werden. Sollte es nicht M2 über M1 heißen? Mit freundlichen Grüßen
10.01.2021 - 22:06DROPS Design answered:
Liebe Rébecca, ja doch schon, nach M.1 stricken Sie M.2 über M;1 - Anleitung wird korrigiert, danke für den Hinweis. Viel Spaß beim stricken!
11.01.2021 - 10:25
![]() Sharon wrote:
Sharon wrote:
The ends of the scarf are sewn together? To make a loop?
09.11.2019 - 19:18DROPS Design answered:
Dear Sharon, yes, you are right, the ends of the "scarf" are sewn together to make it more like a shoulder warmer than a simple scarf. Happy Knitting!
10.11.2019 - 11:19
![]() Criss wrote:
Criss wrote:
Bonjour, Est-il possible de faire le bonnet avec une seule boule? Merci
12.01.2019 - 15:27
![]() Criss wrote:
Criss wrote:
Bonjour, J’ai il me restait une boule après avoir faire un autre travail et j’ai commencé le bonnet. Je suis à 13 cm et il me reste environ 13 grammes de laine. J’ai peur de ne pas avoir assez...... Est-il possible de faire le bonnet avec une seule boule ? Merci pour votre réponse.
12.01.2019 - 15:24DROPS Design answered:
Bonjour Criss, il faut 150 g DROPS Alpaca pour l'ensemble bonnet et gants, nous n'avons malheureusement pas le détail de chaque modèle. En fonction de là où vous en êtes rendue au bonnet, il est possible que vous n'en ayez pas assez. Bon tricot!
14.01.2019 - 10:06
![]() Huong wrote:
Huong wrote:
Tusen takk for svaret!
14.01.2015 - 20:02
![]() Huong wrote:
Huong wrote:
Skal jeg øke i 1. omgang i M.2 på den måten: 3 vrang, 1 kast, 1 rett ,3 vrang og fortsette i M.2 inntil å begynne med økning i 3. vrangpari med 3 vrang, 1 kast, 1 rett og tilslutt 3 vrang, 1 rett? Skal økingen skal gjøre på den siste maske av vrangparti slik at det blir 3 vrang, 1 kast....eller det skal gjøre på begynnelse av vrangparti?
13.01.2015 - 15:53DROPS Design answered:
Hei Huong. Pröv at se öketips til luen: 1.økning gjøres i 1. og 3.vrangparti i M.2. 2.økning gjøres i 2. og 4.vrangparti i M.2. Øk vekselsvis på denne måten slik at det til slutt er økt 3 m i alle vrangpartiene. Du kan selv bestemme om du vil öke i begynnelsen eller slutningen af hvert vrangparti - hvad du synes bliver paenest.
14.01.2015 - 15:11
![]() Huong wrote:
Huong wrote:
Når jeg begynner med M.2 skal jeg øke 1 m i 1. Og 3. vrangparti slik at det blir økt 12m. i første omgang? 2.omgang øker jeg i 2. og 4. vrangparti = 12 m blir økt og fortsette videre samme måte i 4. 5.og 6. omgang slik at m= 216. Skal jeg fortsette å øke samme måte når jeg begynner tilbake med M.2 ? Eller skal jeg bare strikke M2 uten økning inntil arbeidet kommer opp til 13cm?
11.01.2015 - 21:06DROPS Design answered:
Hei Huong. Du skal kun öke til du har 216 m, derefter strikker du videre uden ökninger til du har 13 cm.
13.01.2015 - 13:47
Grey Dove |
||||||||||||||||
|
|
||||||||||||||||
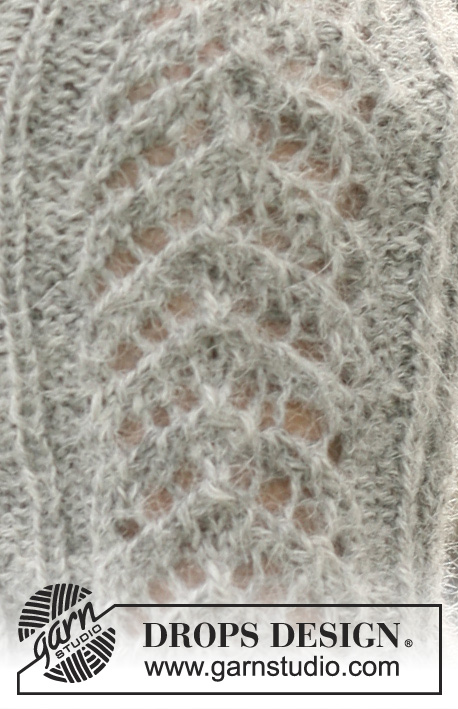
A set of: DROPS beret and gloves with lace pattern in ”Alpaca”, and scarf in ”Puddel”.
DROPS 102-3 |
||||||||||||||||
|
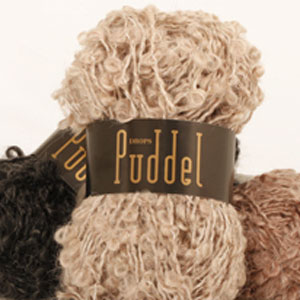
Pattern: See diagram M.1 and M.2. Increase tip (apply to beret): First inc are made in the 1st and 3rd P part in M.2. Second inc are made in the 2nd and 4th P part in M.2. Inc alternately like this so that finally there are P6 in every P part. Decrease tip (apply to beret): First dec are made in the1st and 3rd P part in M.2. Second dec are made in the 2nd and 4th P part in M.2. Dec alternately like this so that finally you have dec 5 sts in all P parts (= P1 remains in every P part). BERET Beret: Knit in the round. Cast on loosely 144 sts on circular needle size 2 mm with Alpaca. K1 round and then work M.1. When piece measures 3 cm work M.2. At the same time inc 1 st in every other P part on every 6th row a total of 6 times – read inc.tip above = 216 sts. When piece measures 13 cm dec 1 st in every other P part on every 4th row a total of 10 times – read dec.tip = 96 sts. Now K2 rows at the same time knit all sts tog 2 by 2 = 24 sts. Pull the thread through the remaining sts and pull tog. The beret measures approx 23 cm. Crochet border along edge: Crochet with hook 3 mm and Alpaca: 1 dc, * 3 ch, skip approx 1 cm, 1 dc *, repeat *-* and end with 1 sl st in first dc. GLOVES Left glove: Knit in the round on double pointed needles. Cast on 56-60 sts on double pointed needles size 2 mm with Alpaca. Work like this: P3, K1, M.1 over the next 24 sts, * P3, K1 *, repeat *-* until end of round. When piece measures 3 cm work M.2 over sts in M.1, the remaining sts in stocking stitch. When piece measures 12 cm inc for thumb like this: inc 1 st on each side of next to last st on round on every 4th round a total of 6-7 times – inc by making YO, on next round knit YO twisted (i.e. knit in back loop instead of in the front to prevent holes) = 13-15 thumb sts. When piece measures 17-18 cm slip these 13-15 sts + 1 st on each side (= 15-17 sts) on a thread and cast on 3 new sts over these = 56-60 sts. Continue to knit until piece measures approx 20-22 cm - finish after a whole repeat of M.2. Work 1 round in stocking stitch over all sts. Slip 22-24 sts on top of hand on a thread, keep 12-13 sts on needle and put the remaining 22-23 sts inside hand on another thread. Little finger: = 12-13 sts, cast on 2 new sts towards sts on the tread = 14-15 sts. Knit stocking stitch round in 5½ -6½ cm, then knit all sts tog 2 by 2. Cut the tread and pull through the remaining sts, pull tog. Hand: Slip sts on thread back on needle, pick up 2 sts in edge towards little finger = 46-49 sts. Work 3 rounds in stocking stitch. Keep the 2 new sts towards little finger + 7-7 sts on top of hand and 6-7 sts inside hand on needle. Slip back the remaining sts on each one thread (= 15-17 sts on top of hand and 16-16 sts inside hand). Ring finger: = 15-16 sts, cast on 1-2 new sts towards sts on threads = 16-18 sts. Work stocking stitch round in approx 7-8 cm, then knit all sts tog 2 by 2. Cut the tread and pull through the remaining sts, pull tog. Middle finger: Put 7-8 sts from the tread on top of hand + 8-8 sts from the tread inside hand back on needle, pick in addition up 2 sts towards ring finger and cast on 1-2 new sts toward sts on threads = 18-20 sts. Work stocking stitch round in approx 7½-8½ cm, then knit all sts tog 2 by 2. Cut the tread and pull through the remaining sts, pull tog. Index finger: Put the remaining 16-17 sts from threads back on needle, pick in addition up 2-3 sts towards middle finger = 18-20 sts. Work in stocking stitch round in approx 6½-7½ cm, then knit all sts tog 2 by 2. Cut the tread and pull through the remaining sts, pull tog. Thumb: Put thumb sts on needle and pick in addition up 3 sts along edge behind thumb sts = 18-20 sts. Work stocking stitches in the round for approx 5½-6 cm, then knit all sts tog 2 by 2. Cut the tread and pull through the remaining sts, pull tog. Crochet border along edge: Crochet with hook 3 mm and Alpaca: 1 dc, * 3 ch, skip approx 1 cm, 1 dc *, repeat *-* and end with 1 sl st in first dc. Right glove: Knit as left but reversed, i.e. knit like this from beg: * K1, P3 *, repeat *-* over 28-32 sts, M.1, K1, P3. Inc for thumb on each side of 2nd st on round, instead of the next to last. SCARF Measure: ca 35 x 120 cm Materials: DROPS Puddel from Garnstudio 200 g colour no. 07, middle grey DROPS Needle size 7 mm – or needle size needed to make 10 sts x 28 rows in garter stitch with Puddel on 10 x 10 cm. Garter stitch: Knit all rows back and forth on needle Scarf: Cast on 35 sts on needle size 7 mm with Puddel. Work in garter stitch – see explanation above. When piece measures 30 cm inc 1 st in each side on every 4th row a total of 2 times = 39 sts. When piece measures 88 cm dec 1 st in each side on every 4th row a total of 2 times = 35 sts. Cast off when piece measures 120 cm. Put each end of the scarf toward each other and fasten with some stitches. |
||||||||||||||||
Diagram explanations |
||||||||||||||||
|
||||||||||||||||
 |
||||||||||||||||
Have you finished this pattern?Tag your pictures with #dropspattern or submit them to the #dropsfan gallery. Do you need help with this pattern?You'll find 26 tutorial videos, a Comments/Questions area and more by visiting the pattern on garnstudio.com. © 1982-2026 DROPS Design A/S. We reserve all rights. This document, including all its sub-sections, has copyrights. Read more about what you can do with our patterns at the bottom of each pattern on our site. |
||||||||||||||||


Post a comment to pattern DROPS 102-3
We would love to hear what you have to say about this pattern!
If you want to leave a question, please make sure you select the correct category in the form below, to speed up the answering process. Required fields are marked *.