
Suositut kategoriat
Etsitkö tiettyä lankaa?


Kommentit / Kysymykset (73)
![]() SandraB kirjoitti:
SandraB kirjoitti:
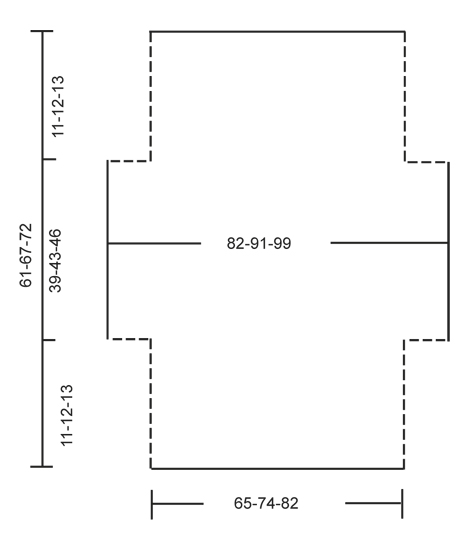
Hallo! Ik wil graag dit patroon maken. Heb nog niet zovaak kleren gehaakt. Daarom begrijp ik de tweede tekening met de maten niet zo goed. Hoe moet ik die zien?
01.07.2017 - 08:37DROPS Design vastasi:
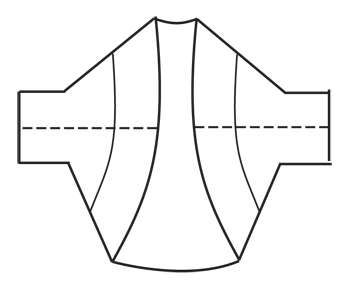
Hoi Sandra, In de tweede tekening zie je het werk wanneer je klaar bent met haken, maar nog niet in elkaar genaaid hebt. Het kledingstuk wordt op de horizontale lijn dubbel gevouwen en op op de stippellijnen aan elkaar gehaakt.
01.07.2017 - 12:01
![]() Elizabeth Baker kirjoitti:
Elizabeth Baker kirjoitti:
I have finished my 21 1/2 inches and pattern says to not work 12 stitches on either side how then do I start my next row
21.05.2017 - 19:07DROPS Design vastasi:
Dear Mrs Baker, work next row until 12 sts remain, turn and work next row until 12 sts remain, turn and work next row. You will have now 12 sts unworked on each side. Happy crocheting!
22.05.2017 - 09:54
![]() Elizabeth Baker kirjoitti:
Elizabeth Baker kirjoitti:
I have finished my 21 1/2 inches and pattern says to not work 12 stitches on either side, how do I start next row?
20.05.2017 - 19:02
![]() Elizabeth Baker kirjoitti:
Elizabeth Baker kirjoitti:
After I have finished row 8 to continue do I start with A1 or A2 to repeat
01.05.2017 - 16:43DROPS Design vastasi:
Dear Mrs Baker, after you have worked A.2 1 time in height, repeat A.2 from row 1. Happy croccheting!
02.05.2017 - 11:48
![]() Elizabeth Baker kirjoitti:
Elizabeth Baker kirjoitti:
After I have finished row 8 do I start with row A1 or A2
01.05.2017 - 16:20DROPS Design vastasi:
Dear Elizabeth, after row 8, you should continue and repeat pattern A.2. I hope this helps. Happy crocheting!
06.05.2017 - 11:06
![]() GB kirjoitti:
GB kirjoitti:
Hi, in the pattern directions it says the picot has a DC in the first of the chain 3s, but the video shows a sc instead. Could you clarify please? Thanks!
15.04.2017 - 17:14DROPS Design vastasi:
Dear GB, you should work 1 dc in 1st of the 3 ch as explained in the pattern and not 1 sc as worked in the video, thanks for noticing. Happy crocheting!
19.04.2017 - 15:24
![]() Mary Ancira kirjoitti:
Mary Ancira kirjoitti:
The letter sizes, (example- S, M, L,) are not showing what size the bust is like it normally does. Should I assume the sizes are the same on all the patterns?
03.04.2017 - 10:24DROPS Design vastasi:
Dear Mrs Ancira, you will find at the bottom of the pattern a measurement chart with measurements for each size in cm, taken flat from side to side. Compare these to a similar garment you have and like the shape to find out the matching size. Read more about sizing and convert into inches here. Happy crocheting!
03.04.2017 - 11:25
![]() Stephanie kirjoitti:
Stephanie kirjoitti:
Bonjour je ne comprends pas l'augmentation, au rang 6 avec l'ajout de maille en l'air que l'on crochete apres avec une bride un ml une bride et ensuite crochete le reste comment ? c'est la que je saisis pas , parce que logiquement on serait sur le rang 7 mais ensuite encore au rang 7 ,pouvez vous m'expliquer merci
14.02.2017 - 00:10DROPS Design vastasi:
Bonjour Stéphanie, la 1ère augmentation sur le côté se fait à la fin du rang 5 (= le rang suivant sera le rang 6), on crochète 14 ml à la fin de ce rang, on tourne, on crochète 11B, puis le rang 6 de A.2 et on crochète 15 ml à la fin du rang 6, on tourne, on crochète 1B, 1 ml sur les nouvelles ml et on continue le rang 7 comme A.2. Puis on continue A.2 sur toutes les mailles. Bon crochet!
14.02.2017 - 09:32
![]() Jasmine kirjoitti:
Jasmine kirjoitti:
Dear Jasmine, "on row 1 in A.1 work 1 dc in each st," So since I have 92 stitches in A.1 I need to do 92 DC stitches all the way across?
21.01.2017 - 03:45DROPS Design vastasi:
Dear Jasmine, you should have 92 dc on first row, then work: A.1A (= 4 sts), repeat A.1B a total of 7 times (= 7 x 12 sts), and finish with A.1C (= 4 sts), ie: 3 + (x12=84) + 4= 91 sts. Happy crocheting!
23.01.2017 - 09:29Leonore kirjoitti:
This pattern doesnt make any sence. Row one is clear to work. From there on i dont understand anything! Please write out the pattern. I dont work with diagrams or whatever this confusuon is called. Please help!
17.12.2016 - 18:45DROPS Design vastasi:
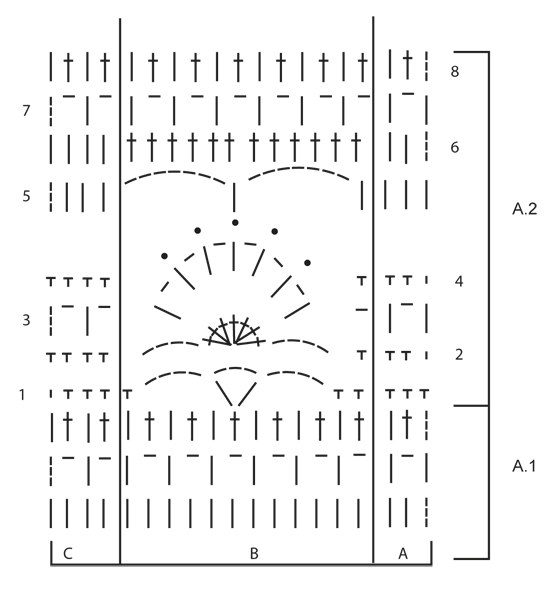
Dear Leonore, there is only diagram to this pattern, start reading diagram from the bottom corner on the right side and read towards the left from RS and from left to right from WS. Each symbol represents 1 st/group of sts. work A.1A (= 3 sts), then repeat A.1B (= 12 sts) and finish with A.1C (= 4 sts). You are welcome to contact your DROPS store for any further individual assistance. Happy crocheting!
19.12.2016 - 09:17
|
||||||||||||||||
Blue Wonder#bluewondershoulderpiece |
||||||||||||||||
 |
 |
|||||||||||||||
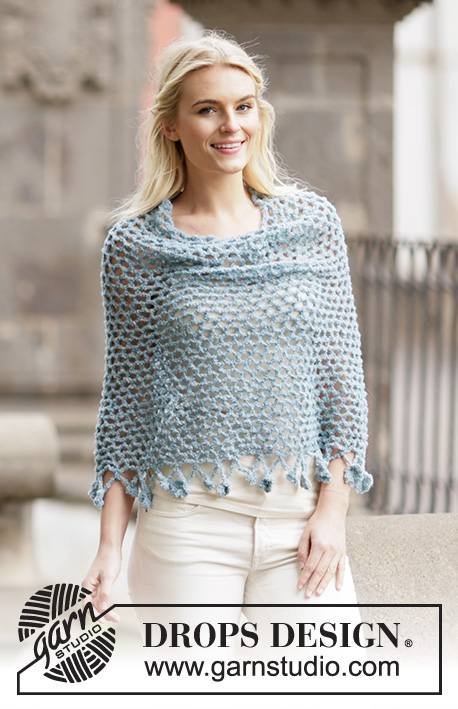
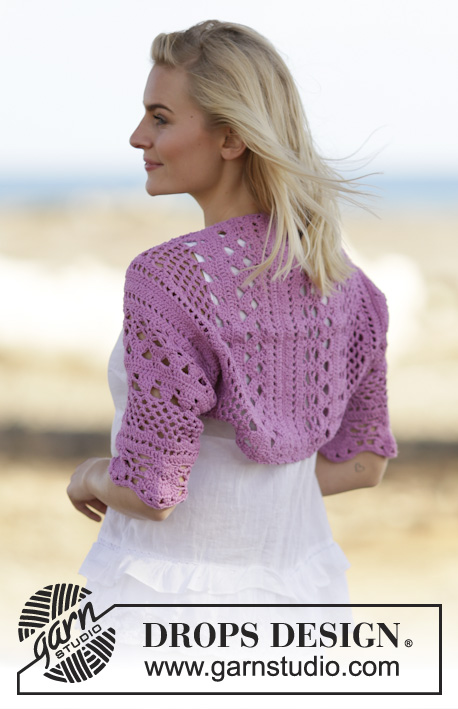
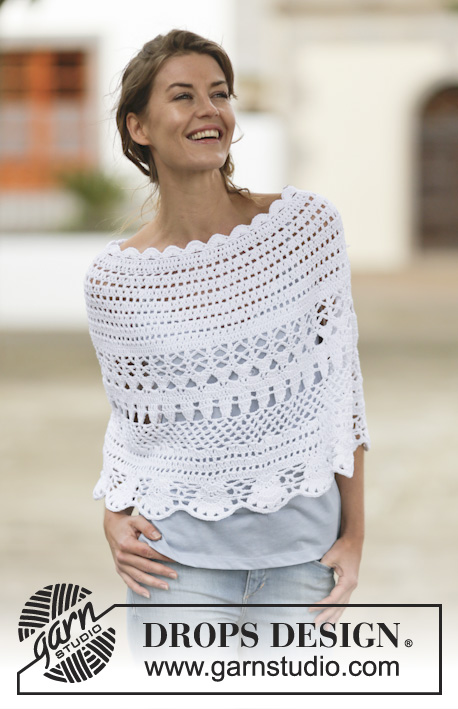
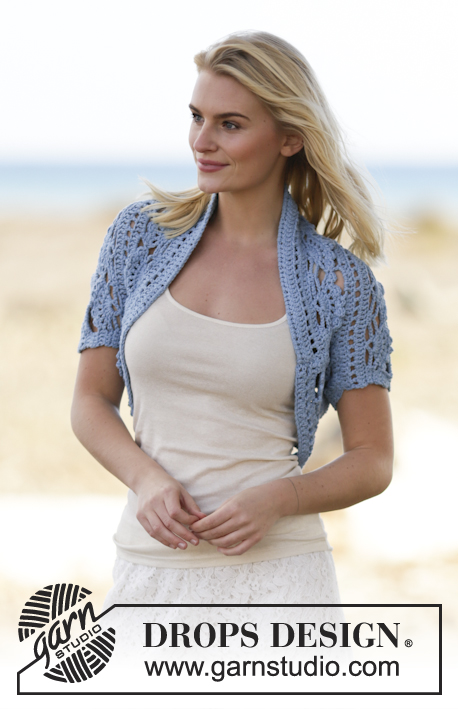
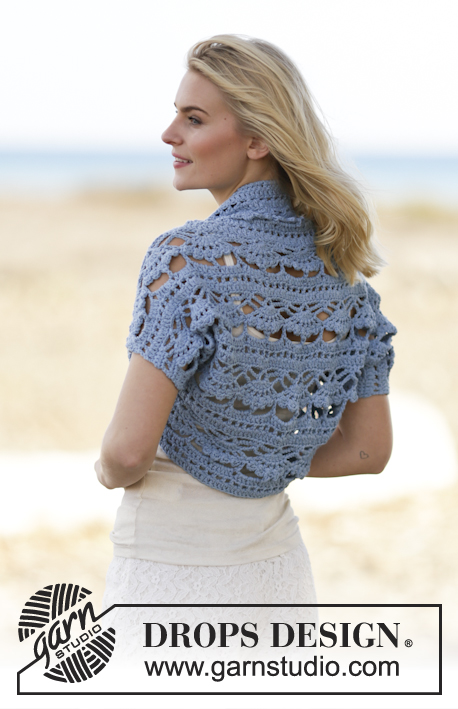
Virkattu DROPS hartianlämmitin ”Paris”-langasta. Koot S-XXXL.
DROPS 162-34 |
||||||||||||||||
|
MALLIVIRKKAUS: Katso piirrokset A.1 ja A.2. --------------------------------------------------------- HARTIANLÄMMITIN: Virkkaa 110-125-139 kjs koukulla nro 5 ja Paris-langalla. 1. KRS: Käännä työ ja virkkaa 1 p 4. kjs:aan koukusta laskien (= 2 p), virkkaa 1 p jokaiseen 4-1-3 seuraavaan kjs:aan, *jätä 1 kjs väliin, 1 p jokaiseen 5 seuraavaan kjs:aan*, toista *-* = 91-103-115 p. 2. KRS: Virkkaa nyt mallivirkkausta piirroksen A.1 mukaisesti seuraavasti: A.1 A, toista piirroksen A.1 B mallikertaa yht. 7-8-9 kertaa, virkkaa lopuksi piirroksen A.1 C mallivirkkausta. Jatka mallivirkkausta tähän tapaan. Kun olet virkannut piirroksen A.1 loppuun, toista jatkossa piirroksen A.2 mallikertaa. SAMANAIKAISESTI kun työn pituus on n. 11-12-13 cm (tarkista, että seuraava krs on piirroksen A.2 6. krs), virkkaa krs:n loppuun 14 kjs (= 5. krs). Käännä työ ja virkkaa 1 p 4. kjs:aan koukusta laskien, virkkaa sitten 1 p jokaiseen 10 seuraavaan uuteen kjs:aan. Jatka virkkaamalla piirroksen A.2 6.krs:ta, virkkaa krs:n loppuun 15 kjs. Käännä työ ja virkkaa 1 p 6. kjs:aan koukusta laskien, *virkkaa 1 kjs, jätä 1 kjs väliin, 1 p seuraavaan kjs:aan*, toista *-* seuraavien 9 uuden kjs:n kohdalla, virkkaa lopuksi 1 kjs. Virkkaa krs loppuun piirroksen A.2 mukaisesti. Virkkaa seuraava krs kuten aiemmin, kunnes olet krs:n loppuun virkattujen uusien silmukoiden kohdalla, virkkaa sitten 1 p jokaiseen kjs:aan ja 1 p jokaiseen p:seen. Työn kumpaankin reunaan on nyt lisätty 12 p = 115-127-139 p. Jatka virkkaamalla 8. krs:ta seuraavasti: A.2 A, toista piirroksen A.2 B mallikertaa yht. 9-10-11 kertaa, virkkaa lopuksi piirroksen A.2 C mallivirkkausta. Kun työn pituus on n. 50-55-59 cm (tarkista, että seuraava krs on piirroksen 7. krs), jätä kummankin reunan reunimmaiset 12 p pois työstä = 91-103-115 p. Jatka virkkaamalla seuraavasti: A.2 A, toista piirroksen A.2 B mallikertaa yht. 7-8-9 kertaa, virkkaa lopuksi piirroksen A.2 C mallivirkkausta. Jatka mallivirkkausta tähän tapaan, kunnes työn pituus on n. 61-67-72 cm ja olet virkannut kokonaisen piirroksen A.2 mallikerran loppuun. Katkaise lanka ja päättele langanpäät. VIIMEISTELY: Ompele sivu- ja hihasaumat yhden reunasilmukan päästä. |
||||||||||||||||
Ruutupiirroksen selitykset |
||||||||||||||||
|
||||||||||||||||
 |
||||||||||||||||
 |
||||||||||||||||
 |
||||||||||||||||
Oletko tehnyt tämän mallin?Tägää tällöin kuviasi #dropspattern #bluewondershoulderpiece tai lähetä kuvat #dropsfan galleriaan. Tarvitsetko apua tämän ohjeen kanssa?Löydät 7 ohjevideota, kommentteja/kysymyksiä ja muuta osoitteessa www.garnstudio.com © 1982-2026 DROPS Design A/S. Pidätämme kaikki oikeudet. Tämä tiedosto ja kaikki sen alatiedostot on suojattu tekijänoikeuslailla. Lue lisää siitä, mitä voit tehdä ohjeillamme, verkkosivujemme jokaisen ohjeen alaosasta. |
||||||||||||||||


DROPS Design on toiminut neule- ja virkkausalalla yli 40 vuotta ja meillä on yksi kaikkein laajin valikoima ilmaisia ohjeita verkossa - käännettynä 17 kielelle. Tänään meiltä löytyy 324 lehteä ja 12290 ohjetta - joista 11706 ohjetta on käännetty suomeksi.
Työskentelemme ahkerasti, jotta voisimme antaa teille kaikkein parhaimpia neule- ja virkkausohjeita, inspiraatiota ja neuvoja sekä korkealaatuisia lankoja todella edulliseen hintaan! Haluaisitko käyttää ohjeitamme muuhun kuin henkilökohtaiseen käyttöön? Voit lukea säännöistä ohjeiden Tekijänoikeus -tekstissä, joka löytyy kaikkien ohjeidemme alapuolelta. Hauskoja hetkiä käsitöiden parissa!
Lisää kommentti ohjeeseen DROPS 162-34
Haluamme mielellämme kuulla mielipiteesi tästä ohjeesta!
Mikäli haluat esittää kysymyksen, valitse oikea kategoria alla olevasta valikosta - tällä tavoin saat vastauksen nopeammin. Pakolliset kentät on merkitty tähdellä *.