
Popular categories
Looking for a yarn?


Comments / Questions (41)
![]() Bianca wrote:
Bianca wrote:
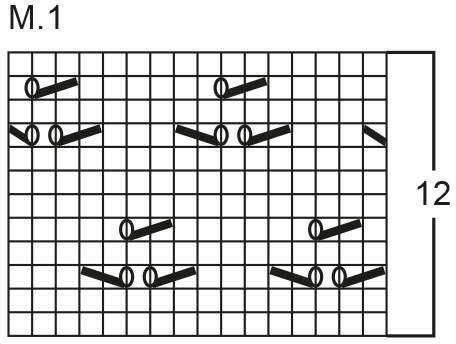
I’m confused about the 9th row of Pattern 1. How do you start it? Please help!
13.04.2026 - 21:13DROPS Design answered:
Dear Bianca, at the beginning of 9th round, slip the first stitch without working it and continue diagram as shown, then work the last stitch M.1 together with the first stitch next M.1 and repeat like that to the end of the round, the last stitch last repeat M.1 will be worked together with the first stitch first repeat of the round (the decreased stitch is now the first stitch of the round). Happy knitting!
14.04.2026 - 08:51
![]() Céline Charbonnier wrote:
Céline Charbonnier wrote:
Bonjour en tricotant une seconde fois M1, il y a un décalage, est-ce normal ? Merci pour votre réponse. 03.04.2026 - 14:13
03.04.2026 - 14:57
![]() Céline Charbonnier wrote:
Céline Charbonnier wrote:
Bonjour en tricotant une seconde fois M1, il y a un décalage, est-ce normal ? Merci pour votre réponse.
03.04.2026 - 14:13
![]() Céline wrote:
Céline wrote:
Bonjour en tricotant, la seconde fois M1, il y a un décalage, est-ce normal ? Merci de votre réponse.
03.04.2026 - 13:44DROPS Design answered:
Bonjour Céline, le diagramme ne doit pas être décalé, la 1ère maille du tour / de M.1 doit toujours être la même. N'hésitez pas à placer des marqueurs si besoin. Bon tricot!
08.04.2026 - 07:36
![]() Céline wrote:
Céline wrote:
Bonjour , je ne comprends pas comment commencer le rang 9. Merci pour votre aide
02.04.2026 - 14:05DROPS Design answered:
Bonjour Céline, au début du tour, glissez la 1ère maille sans la tricoter, puis tricotez le diagramme comme indiqué, à la fin, tricotez la dernière maille de chaque M.1 avec la 1ère maille du M.1 suivant, et à la fin du tour, tricotez la dernière maille du tour et la 1ère maille de ce même tour ensemble = c'est désormais la 1ère maille du tour (la dernière maille du tour est le jeté à la fin du dernier M.1 du tour). Bon tricot!
07.04.2026 - 17:07
![]() Magdalena wrote:
Magdalena wrote:
HJÄLP! Stickat en av ärmarna med strumpstickor. Ärmen ser ut som ett runt rör, förutom de 8 avm maskorna. Frågan är hur jag ska pussla ihop ärmen med tröjan? Har försökt att placera tröjans och ärmens avm delar över varandra och sedan flytta över resterande maskor från strumpstickorna till rundstickan, men går det? Kollade på videon om raglanärm som finns på mönstrets sida, men då var ärmen en del, inte som ett rör.
01.04.2026 - 15:08DROPS Design answered:
Hej Magdalena, jo men du sætter ærmerne ind der hvor du har strikket ærmegab. Det er først nu du starter med raglanindtagningerne. Se gerne den video som viser hvordan man gør :)
09.04.2026 - 12:02
![]() Christiane wrote:
Christiane wrote:
Wird in Reihen oder Runden gestrickt? Die Abkürzung R steht eigentlich für Reihe. Nirgendwo steht das man die Arbeit zur Runde schließt. Wird an einer Seite zusammen genäht?
24.03.2026 - 17:07DROPS Design answered:
Liebe Christiane, das Rumpfteil wird auf der Rundstricknadel in der Runde bis zum Armloch gestrickt, die ÄRmel werden auf Nadelspiel in der Runde gestrickt, und die Passe wird zuerst in der Runde gestrickt, dann wenn man die mittleren Maschen für Halsausschnitt beim Vorderteil stilllegt wird man weiter in Hin und Rückreihen stricken. Viel Spaß beim Stricken!
25.03.2026 - 07:21
![]() Christiane wrote:
Christiane wrote:
Das Muster besteht aus 16 Maschen. Wenn ich nach den Zunahmen mit dem Muster beginne geht es nicht auf. Bei 216 Maschen muss man das Muster 13,5 mal stricken. Sollte das nicht immer glatt aufgehen? Also dann 208 Maschen nach der Zunahme haben?
24.03.2026 - 08:56DROPS Design answered:
Liebe Christiane, so stricken Sie insgesamt 13 Mal die 16 Maschen und dann noch einmal die 8 ersten maschen (das Muster selbst wird über 8 Maschen wiederholt). Viel Spaß beim stricken!
24.03.2026 - 09:59
![]() Christiane wrote:
Christiane wrote:
Ich habe eine Frage zur 9. Reihe im Muster. Wie stricke ich die erste Masche ? Als rechte Masche? Und am Ende der Reihe?
23.03.2026 - 23:25DROPS Design answered:
Liebe Christiane, am Anfang der Runde heben Sie diese Masche ab, ohne sie zu stricken, am Ende M.1 stricken Sie die letzte Masche mit der ersten Masche vom nächsten A.1 zusammen, und am Ende der Runde stricken Sie die letzte Masche vom letzten M.1 zusammen mit der 1. Masche der Runde = diese Masche ist jetzt die erste Masche der Runde. Viel Spaß beim Stricken!
24.03.2026 - 09:16
![]() Iva wrote:
Iva wrote:
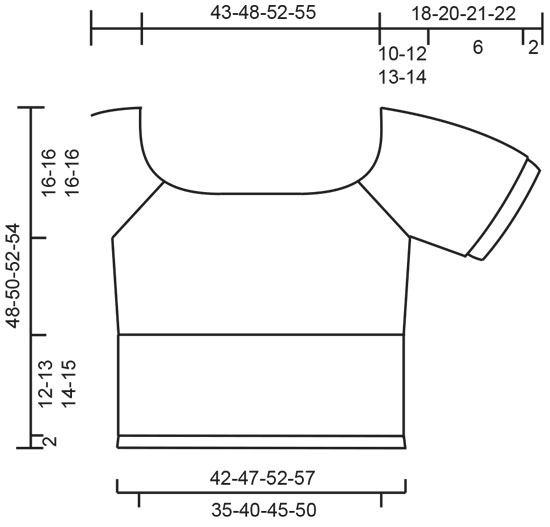
Dobrý den, můžete mi prosím poradit s velikostí? Na 90 cm hrudník a 76 cm pas bych volila velikost M, ale trochu se v tom nákresu ztrácím, nejsem si jistá, kam ty kóty ukazují. Děkuji předem. Iva
22.03.2026 - 11:04
|
||||||||||
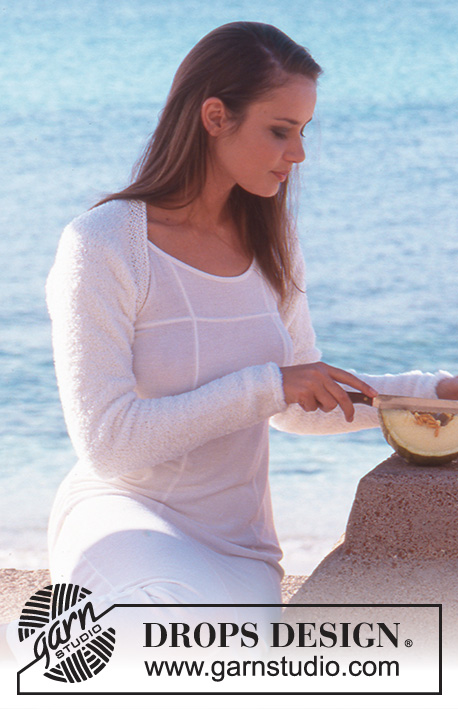
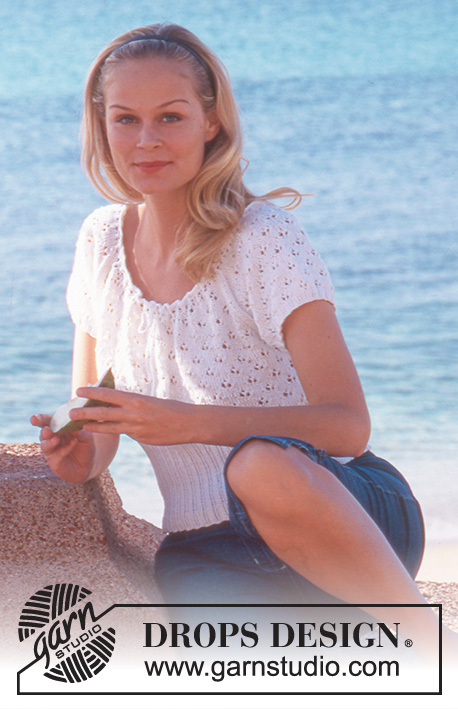
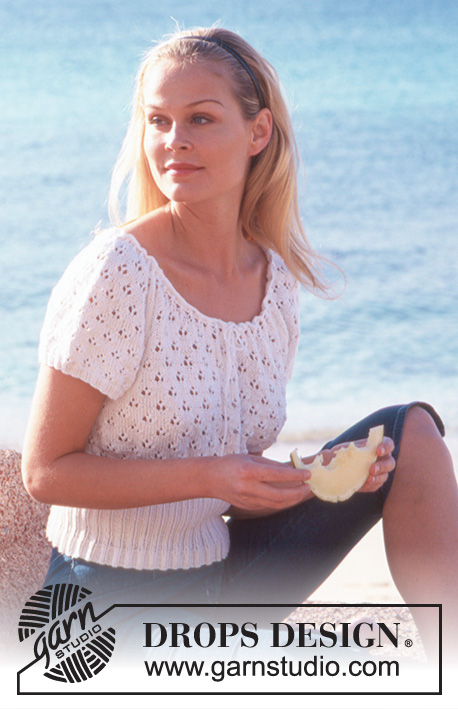
Bethany Top#bethanytop |
||||||||||
 |
 |
|||||||||
DROPS Lace Top in Safran with short sleeves.
DROPS 65-6 |
||||||||||
|
Gauge: 24 sts x 32 rows on larger needles in stockinette st = 10 x 10 cm [4" x 4"]. Pattern: See chart. One chart = 1 repeat. The pattern is seen from the right side. Garter st on circular needles: 1st row: K, 2nd row: P. Garter st, when knitting flat: Knit all sts, all rows. Rib-1 (multiple of 6 sts): * K 2, P 4 *, repeat from * - *. Rib-2 (multiple of 4 sts): * K 2, P 2 *, repeat from * - *. BODY Knit in the round. Cast on 252-288-324-360 sts on smaller circular needles; join and place a marker at the join. Knit Rib-1 for 2 cm [0.75"]. Work the next row as follows: * K 2, P 2 tog, P 2 tog *, repeat * - * = 168-192-216-240 sts. Change to Rib-2. When the work measures 14-15-16-17 cm [5.5"-5⅞"-6.25"-6.75"], change to larger circular needles and knit the rest in Pattern 1, increasing 48-48-48 sts evenly distributed on the 1st row = 216-240-264-288 sts. When the work measures 26-28-29-30 cm [10.25"-11"-11⅜"-11.75"], knit the next row as follows: bind off 4 sts for armholes, 100-112-124-136 sts for the front, bind off 8 sts for armholes, 100-112-124-136 sts for the back, bind off 4 sts for armholes. Put the work aside and knit the sleeves. SLEEVES Cast on 80-84-88-92 sts on smaller double pointed needles; join and place a marker at the join. Knit Rib-2 for 2 cm [0.75"]. Change to larger double pointed needles and knit the rest of the work with Pattern 1, increasing 0-4-8-4 sts evenly distributed on the 1st row = 80-88-96-96 sts. When the work measures 8-8-8-8 cm [3⅛"] bind off 4 sts each side of marker = 72-80-88-88 sts. YOKE Put the sleeves on the same circular needles as the body where you have bound off for armholes = 344-384-424-448 sts on the needles. Place 1 marker in each transition between the sleeves and the body = 4 markers. Continue to knit the pattern (the pattern will match up over the sleeve and over the body, but not in the transitions) - at the same time shape raglan as follows: RAGLAN SHAPING Read this entire section before knitting. Knit 4-2-3-3 rows before beginning raglan shaping. Dec 1 st for raglan at each side of the markers 17-17-16-15 times every other row, then 0-2-6-8 times every row, as follows: There are 8 decs per row - 1 at each side of the markers. There are 2 sts of stockinette st between decs (1 st each side of the markers). Decrease on right side rows as follows: Before the marker: K 2 tog, K 1. After the marker: K 1, slip 1, K 1, pass the slipped st over (psso). After the neck shaping, also dec on wrong side rows as follows: Before the marker: P 2 tog into back of st, P 1. After the marker: P 1, P 2 tog. At the same time, when the work measures 32-34-35-38 cm [12⅝"-13⅜"-13.75"-14⅞"] at the center front, put the center front 22-24-26-28 sts on a st holder for the neck and knit the work back and forth on the needles. Put 2 sts on the st holder at each neck edge every other row 9 times. After the last row of raglan shaping, put all sts back on circular needles = 208-232-248-264 sts. Knit 1 row, then knit the next row as follows: * K 2 tog, yo *, repeat from * - *. Knit 1 row then bind off all sts. ASSEMBLY Work 1 row of single crochet (sc) around the neck opening. Then make a chain approx. 150 cm [59"] long. Draw the chain through the hole border and tie at the center front. Sew the openings under the sleeves. |
||||||||||
Diagram explanations |
||||||||||
|
||||||||||
 |
||||||||||
 |
||||||||||
Have you finished this pattern?Tag your pictures with #dropspattern #bethanytop or submit them to the #dropsfan gallery. Do you need help with this pattern?You'll find 21 tutorial videos, a Comments/Questions area and more by visiting the pattern on garnstudio.com. © 1982-2026 DROPS Design A/S. We reserve all rights. This document, including all its sub-sections, has copyrights. Read more about what you can do with our patterns at the bottom of each pattern on our site. |
||||||||||


With over 40 years in knitting and crochet design, DROPS Design offers one of the most extensive collections of free patterns on the internet - translated to 17 languages. As of today we count 324 catalogs and 12290 patterns - 12280 of which are translated into English (US/in).
We work hard to bring you the best knitting and crochet have to offer, inspiration and advice as well as great quality yarns at incredible prices! Would you like to use our patterns for other than personal use? You can read what you are allowed to do in the Copyright text at the bottom of all our patterns. Happy crafting!
Post a comment to pattern DROPS 65-6
We would love to hear what you have to say about this pattern!
If you want to leave a question, please make sure you select the correct category in the form below, to speed up the answering process. Required fields are marked *.