
Popular categories
Looking for a yarn?


Comments / Questions (67)
![]() Tina Larsson wrote:
Tina Larsson wrote:
Ser ut som knapphål på hennes vänstra framstycke, ser inte att det näms i mönstret.\\Mvh dropsstickare
02.02.2026 - 15:00
![]() Silvana wrote:
Silvana wrote:
Ich bin beim linken Vorderteil und habe auch Probleme mit dem Kragen. Ich habe jetzt 2 verkürzte Reihen gestrickt und soll jetzt in jeder Reihe 1 M zunehmen. Heißt das ,1 M zunehmen in der Hinreihe und 1 M zunehmen auch in der Rückreihe? Danke und liebe Grüße
24.11.2025 - 16:52
![]() Britt-Marie Lilja wrote:
Britt-Marie Lilja wrote:
Jag förstår inte var man gör minskningen för halsringningen
31.05.2025 - 22:23DROPS Design answered:
Hei Britt-Marie. Ta en titt på hjelpevidoene som ligger under: VIDEOR (til høyre eller under bildet). Scroll til du finner videoene som viser de ulike minskningene som er forklart under Felletips. mvh DROPS Design
02.06.2025 - 11:41
![]() Denise wrote:
Denise wrote:
Die Anleitung ist hier meiner Meinung nach fürs „Muster“ falsch angegeben. Die Angabe * 2 R. glatt stricken, 1 R. li. * kann nur die Ansicht von vorne sein wie die Maschen dann erscheinen, aber dadurch, dass aber hin und retour gestrickt wird, strickt man jeweils wie folgt: *3 R. Glatt, 3 R. Links* —> dies erscheint dann im Muster wie gewünscht 2 Glatt und 1 Links.
15.02.2025 - 21:06
![]() Susanne wrote:
Susanne wrote:
Laut der Anleitung soll beim Ärmel 1 cm Krausrippe und dann das Muster gestrickt werden. Auf dem Bild sieht es aber aus wie 12 cm Krausrippe oder täusche ich mich?
16.01.2025 - 22:19DROPS Design answered:
Liebe Susanne, Sie sind ja recht, man soll hier 12 cm Krausrippe Stricken; die Anleitung wird korrigiert, danke für den Hinweis. Viel Spaß beim Stricken!
17.01.2025 - 08:38
![]() Susanne wrote:
Susanne wrote:
Vielen Dank für die schnelle Antwort. Werden die 2 Maschen am Kragenanfang in einer Reihe aufgenommen ?
07.01.2025 - 09:55DROPS Design answered:
Liebe Susanne, ja genau, die ersten 2 Maschen werden bei einer Reihe zugenommen (dafür können Sie z.B. 1 Umschlag innerhalb 1 Randmasche + die vorletzte Masche doppelt stricken), dann wird nur 1 Masche zugenommen. Viel Spaß beim Stricken!
07.01.2025 - 13:33
![]() Susanne wrote:
Susanne wrote:
Wo werden die erste beiden Maschen für den Kragen aufgenommen. Nähe der Randmasche oder in der Nähe der glatt rechts gestrickten Masche? Und werden die Maschen einfach aufgenommen und in der selben Reihe noch abgestrickt oder macht man zuerst einen Umschlag um diesen in der nächsten Reihe abzustricken?
06.01.2025 - 16:08DROPS Design answered:
Liebe Susanne, die neuen Maschen für den Kragen sind innerhalb 1 Masche zugenommen, dh beim linken Vorderteil, vor der letzten Maschen bei einer Hinreihe. Diese Maschen nehmen Sie üblich zu, dh benutzen Sie Ihr Lieblings-Technick dafür. Viel Spaß beim Stricken!
07.01.2025 - 09:17
![]() Florence wrote:
Florence wrote:
Bonjour Je voudrais savoir si il y aurait une vidéo pour former le col s’il vous plaît je ne comprends pas ce système Merci
17.12.2024 - 20:10DROPS Design answered:
Bonjour Florence, dans cette vidéo, nous montrons comment assembler ce type de col, il a été fait sans rangs raccourcis pour la vidéo, mais le principe sera le même: assemblez les mailles de chaque côté du col (fin des devants) entre elles et assemblez ensuite le côté court du col le long de l'encolure dos. Bon assemblage!
18.12.2024 - 08:19
![]() Nat wrote:
Nat wrote:
Bonjour, pour le devant comment diminuer les 18 mailles ? sur la bordure ou sur la partie des points fantaisie? Merci pour votre réponse
05.09.2024 - 11:22DROPS Design answered:
Bonjour Nat, diminuez dans la partie point fantaisie comme indiqué sous Diminutions au tout début des explications; c'est le nombre de mailles point fantaisie qui doit diminuer pour former l'encolure V. Bon tricot!
06.09.2024 - 07:44
![]() Nat wrote:
Nat wrote:
EN MÊME TEMPS, à 50-51-53-54 cm de hauteur totale, diminuer pour former l'encolure (en même temps que les augmentations pour le col) de la façon suivante : diminuer à 1 m jersey + les mailles du col au point mousse : 18 fois tous les 2 rangs – Bonjour, Je ne comprends pas. il faut diminuer 1m après la maille jersey, côté "corps" (point fantaisie)et non pas bordure, 18 fois ?pour le devant gauche
05.09.2024 - 09:34DROPS Design answered:
Bonjour Nat, vous devez former l'encolure et vous allez ainsi diminuer en début de rang, après les mailles point mousse du col + celles de la bordure devant pour le devant droit, et avant les mailles du col et celles de la bordure devant pour le devant gauche, autrement dit, côté encolure et pas côté dos/corps. Bon tricot!
06.09.2024 - 07:41
|
|
DROPS 69-8 |
|
 |
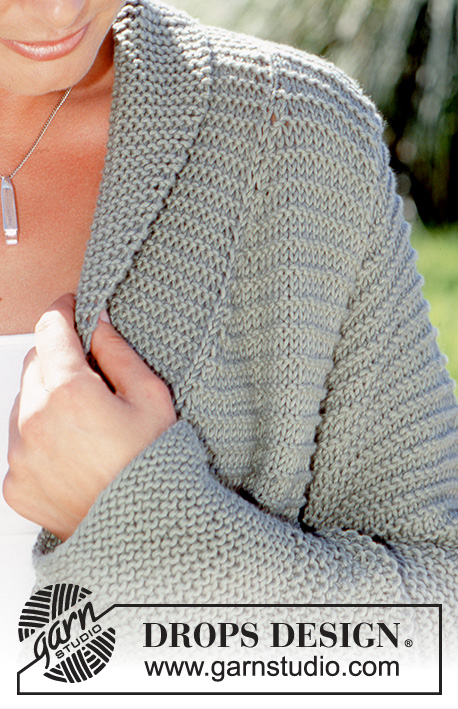 |
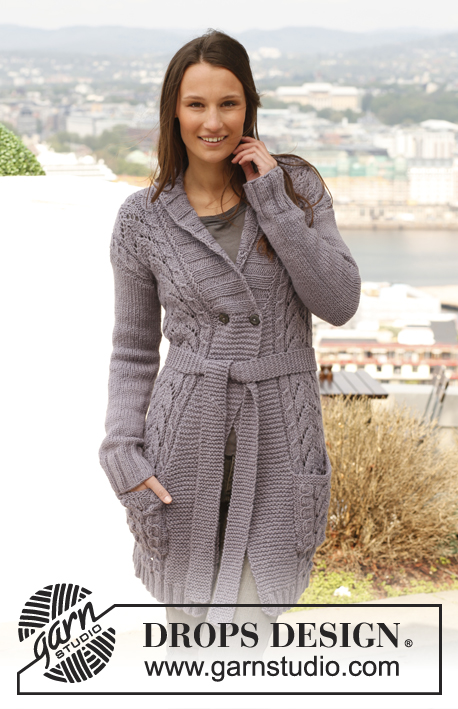
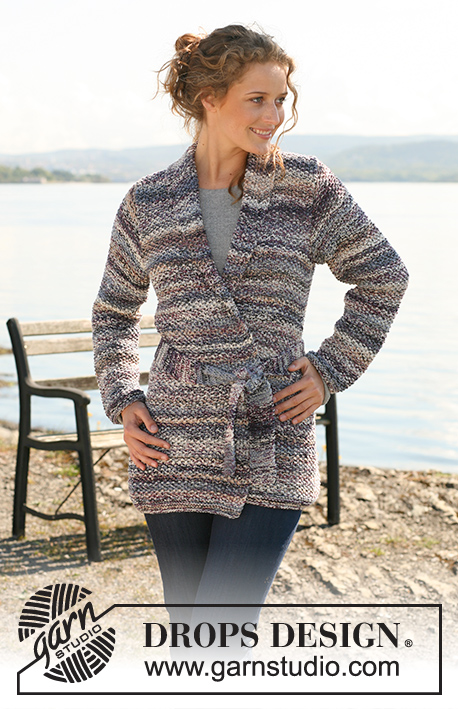
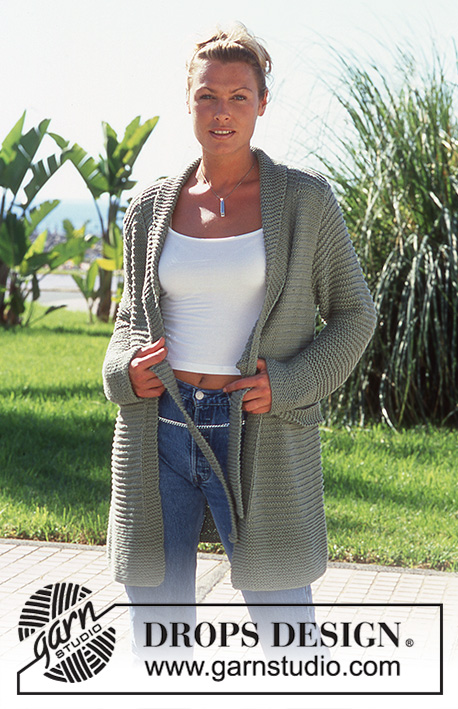
DROPS Cardigan in Paris
DROPS 69-8 |
|
|
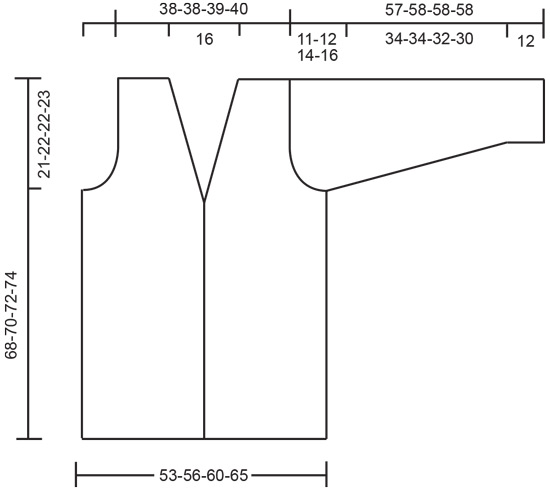
Gauge: 16 sts x 20 rows = 10 x 10 cm [4" x 4"] in stockinette st. Garter st, when knitting flat: Knit all sts, all rows. Pattern: Row 1 (right side row): Knit Row 2: Purl Row 3: Purl Row 4: Purl Row 5: Knit Row 6: Knit Repeat these 6 rows. Knitting tips: Dec for the neck only on right side rows. Right front: dec 1 st as follows: sl 1, K 1, psso. Left front: dec 1 st as follows: K 2 tog. Back: Cast on 86-92-98-106 sts. Knit garter st for 12 cm [4.75"], then continue with pattern- see instructions above. When the piece measures 47-48-50-51 cm [18.5"-18⅞"-19.75"-20"] bind off for armhole at each side every other row: 3 sts 1-2-2-2 times, 2 sts 2-2-3-4 times, 1 st 5-5-5-7 times = 62-62-64-64 sts. When the piece measures 66-68-70-72 cm [26"-26.75"-27⅝"-28.25"] bind off the center 24 sts for the neck. On the next row dec 1 st at each neck edge = 18-18-19-19 sts remain on each shoulder. Bind off the remaining sts when the piece measures 68-70-72-74 cm [26.75"-27⅝"-28.25"-29⅛"]. Left front: Cast on 48-51-54-58 sts. Knit garter st for 12 cm [4.75"] over all sts. Continue with pattern, but knit the 6 edge sts at the center front as follows from edge (seen from the right side): 5 sts garter st, 1 st stockinette st. Read the entire next section before knitting. When the piece measures 46-47-49-50 cm [18⅛"-18.5"-19.25"-19.75"] inc 2 sts inside 1 edge st at the center front for collar - knit the increased sts for collar in garter st, keeping the 1 st in stockinette st between button bands and body. On the following 2 rows knit 2 rows garter st over only the 7 button band sts (short rows). Then inc 1 st inside 1 edge st 6 times every row, then 6 times every other row and then 6 times every 4th row = 20 sts increased for collar. At the same time when the piece measures 47-48-50-51 cm [18.5"-18⅞"-19.75"-20"] bind off for armhole at the side as on back. At the same time when the piece measures 50-51-53-54 cm [19.75"-20"-20⅞"-21.25"] dec for the neck shaping (while increasing for collar) as follows: make decs inside the 1 stockinette st + garter sts for collar. Dec 1 st 18 times every other row - see knitting tips. When the piece measures 68-70-72-74 cm [26.75"-27⅝"-28.25"-29⅛"] bind off shoulder sts + 6 button band sts = 18-18-19-19 sts bound off. There are now 20 garter sts on the needles (collar). Continue in garter st as follows: * 2 rows garter st over all sts, 2 rows garter st over only the outermost 16 sts *, repeat from * - * until the inner edge of collar measures approx. 8 cm [3⅛"] (the outer edge should measure 16 cm [6.25"]). Put sts on a holder. Right front: Cast on and knit the same as the left but reverse all shaping. Sleeve: Cast on 38-38-40-42 sts. Knit garter st for 12 cm [4.75"], then continue with pattern. When the piece measures 13-13-14-14 cm [5⅛"-5⅛"-5.5"-5.5"] inc 1 st at each side 13-14-13-14 times every 2.5-2-2-2 cm [1"-0.75"-0.75"-0.75"] = 64-66-66-70 sts. When sleeve measures approx. 46-46-44-42 cm [18⅛"-18⅛"-17.25"-16.5"] bind off for sleeve cap at each side every other row: 3 sts 1-1-1-0 time, 2 sts 3-3-2-2 times, 1 st 4-5-7-10 times, then bind off 2 sts at each side until the piece measures 56-57-57-57 cm [22"-22.5"-22.5"-22.5"] and then bind off 3 sts each side 1 time. The piece measures approx. 57-58-58-58 cm [22.5"-22⅞"-22⅞"-22⅞"]. Bind off the remaining sts. Belt: Cast on 9 sts and knit garter st to desired length or until the belt measures approx. 120-130-140-150 cm [47.25"-51⅛"-55⅛"-59"]. Bind off. Assembly: Sew shoulder seams. Join the collar at center back with Kitchener stitch. Sew the collar to back neckline with seam on right side of work. Sew in sleeves. Sew sleeve and side seams using edge sts as a seam allowance. |
|
 |
|
Have you finished this pattern?Tag your pictures with #dropspattern or submit them to the #dropsfan gallery. Do you need help with this pattern?You'll find 22 tutorial videos, a Comments/Questions area and more by visiting the pattern on garnstudio.com. © 1982-2026 DROPS Design A/S. We reserve all rights. This document, including all its sub-sections, has copyrights. Read more about what you can do with our patterns at the bottom of each pattern on our site. |
|


With over 40 years in knitting and crochet design, DROPS Design offers one of the most extensive collections of free patterns on the internet - translated to 17 languages. As of today we count 324 catalogs and 12267 patterns - 12257 of which are translated into English (US/in).
We work hard to bring you the best knitting and crochet have to offer, inspiration and advice as well as great quality yarns at incredible prices! Would you like to use our patterns for other than personal use? You can read what you are allowed to do in the Copyright text at the bottom of all our patterns. Happy crafting!
Post a comment to pattern DROPS 69-8
We would love to hear what you have to say about this pattern!
If you want to leave a question, please make sure you select the correct category in the form below, to speed up the answering process. Required fields are marked *.