Comments / Questions (75)
![]() Regula wrote:
Regula wrote:
Ich bin erst am Beginnen von Sigrid Jacket. ist die erste Reihe am Rückenteil auf der linken Seite undohne Randmasche gerechnet, resp. ist die Randmasche die erste Masche von A.1 Vielen Dank für die Antwort
06.04.2025 - 06:46DROPS Design answered:
Liebe Regula, es sind hier keine extra Randmaschen, so ist die 1. Masche A.1 die erste Masche der Hinreihe/die letzte der Rückreihe und die letzte Masche A.2 ist die letzte Masche im Diagram am Ende der Rückreihe/die erste am Anfang der Rückreihe. Viel Spaß beim Stricken!
07.04.2025 - 08:27
![]() Margaret Greenwood wrote:
Margaret Greenwood wrote:
If I order yarn off you for cardigan will you put a printed pattern in for me . I have just had some wool off you for a jumper I am making . we have no wool shops in Preston that sell your wool or yarn . in fact we only have 2 shops so they won’t print as don’t have the yarn thanks
21.08.2024 - 18:02DROPS Design answered:
Dear Mrs Greeenwood, you should ask your store we don't print any pattern to send them, but DROPS stores do most often together with the yarn ordered for the pattern. Happy knitting!
22.08.2024 - 08:11
![]() Margaret Greenwood wrote:
Margaret Greenwood wrote:
I would like the cardigan pattern but have no printer thanks
21.08.2024 - 14:20DROPS Design answered:
Dear Mrs Greenwood, you can keep consulting the free pattern online or save them as a .pdf using a virtual printer. Or maybe even ask your Yarn store to print the pattern for you when ordering the yarn. Happy knitting!
21.08.2024 - 16:03
![]() Margaret Greenwood wrote:
Margaret Greenwood wrote:
The Sigurd in Air pattern could I have it printed if I order yarn as no printer a order off you due today thanks
09.08.2024 - 12:18DROPS Design answered:
Dear Mrs Greenwood, please feel free to ask your yarn store to print it for you when ordering yarn. Happy knitting!
09.08.2024 - 15:20
![]() Bex wrote:
Bex wrote:
I don’t know if someone has asked this, I can only read the English. When doing the displacement of A3/increasing stitches - what stitch do I use for those extra stitches? After the edge garter stitch & before A3 are they stocking stitch or garter stitch pls?
07.02.2024 - 16:37DROPS Design answered:
Hi Bex, The increased stitches are in stocking stitch. Happy knitting!
08.02.2024 - 07:03
![]() Luz Pinilla wrote:
Luz Pinilla wrote:
Me gustaría contar con un tutorial de vueltas acortadas para la manga , con el fin de entenderlo mejor .
14.11.2023 - 21:34DROPS Design answered:
Hola Luz, aquí tienes un video sobre cómo trabajar filas acortadas: https://www.garnstudio.com/video.php?id=66&page=2&lang=es.
26.11.2023 - 23:46
![]() Esther Deppendorf wrote:
Esther Deppendorf wrote:
Hallo liebes Team, könnte ich diese Anleitung auch mit dem Garn Melody stricken? Das ist ja nun Garngruppe D. Vielen Dank für Ihre Rückmeldung.
22.12.2021 - 21:19DROPS Design answered:
Liebe Frau Deppendorf, DROPS Air gehört zur Garngruppe C so wird Melody nicht das richtige Garn um Air zu erseten. Hier lesen Sie mehr. Viel Spaß beim stricken!
03.01.2022 - 08:16
![]() Angel wrote:
Angel wrote:
I agree with the lady who has been knitting for 70 years. Your videos are as poor as the pattern instructions, no sound or explanations given.
14.11.2021 - 15:16
![]() Ute wrote:
Ute wrote:
Hallo Drops-Team, Ich habe eine Frage direkt am Beginn der Anleitung. Stricke ich den Anfang des Rückenteils an dem später der Schlitz sein soll, ganz ohne Randmasche, d.h. Hinreihe links und Rückreihe rechts? Viele Grüße, Ute
24.08.2021 - 08:47DROPS Design answered:
Liebe Ute, die Randmaschen sind in A.1 und A.2 gestrickt (= die erste Masche in A.1 und die letzte Masche in A.2 ist kraus rechts gestrickt. Viel Spaß beim stricken!
03.01.2022 - 08:04
![]() Wenny wrote:
Wenny wrote:
Dankjewel voor de reacties, in de opmerkingen staat het volgende: DROPS Design 18.05.2018 kl. 13:32: displacement will be worked from RS, ie on a RS row increase 1 st before A.3 and dec 1 st after A.3 at the beg of row and dec 1 st before last A.3 and inc 1 st after last A.3 at the end of row. The new sts increased will be then worked in A.4 see INCREASE-TIP. Happy knitting! Zo lijkt het op de foto ook of het patroon door gebreid wordt.
17.02.2021 - 09:06
Sigrid Jacket#sigridjacket |
|||||||
|
|
|||||||
Knitted DROPS jacket with false raglan, vent and textured pattern in ”Air”. Size: S - XXXL.
DROPS 166-11 |
|||||||
|
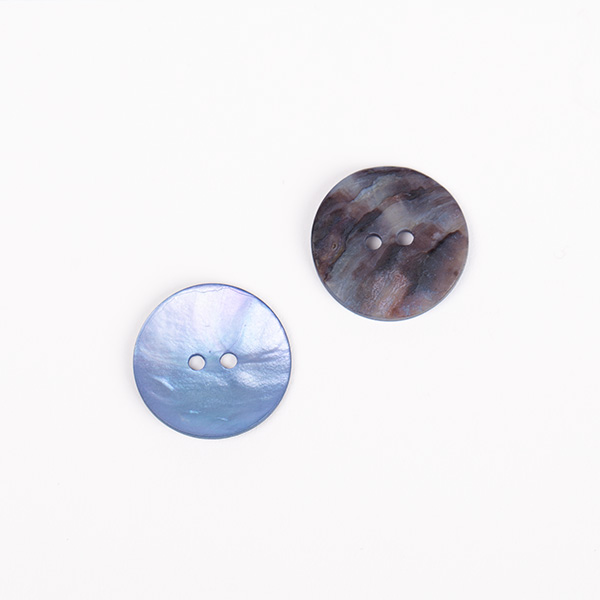
GARTER ST (back and forth): K all rows. 1 ridge = K2 rows. PATTERN: See diagrams A.1 to A.6. The diagrams show all rows in pattern seen from RS. INCREASE TIP: Inc 1 st by making 1 YO. On next row work YOs twisted, i.e. work in the back loop of st instead of front to avoid holes. NOTE: Work the inc sts gradually in diagram A.4. DECREASE TIP: Dec 1 sts as follows: All dec are done from RS! Dec as follows after A.3: K 2 tog. Dec as follows before A.3: Work until 2 sts before A.3, slip 1 st as if to K, K 1, psso. BUTTONHOLES: Dec for buttonholes on right band. 1 buttonhole = K tog third and fourth st from edge and make 1 YO. Dec for buttonholes when piece measures: SIZE S: 25, 33, 41, 49, 57 and 65 cm / 9¾",13",16",19¼",22½",25½". SIZE M: 25, 33, 42, 50, 59 and 67 cm / 9¾",13",16½",19¾",23¼",26½". SIZE L: 27, 35, 44, 52, 61 and 69 cm / 10½",13¾",17¼",20½",24",27". SIZE XL: 28, 37, 45, 54, 62 and 71 cm / 11",14½",17¾",21¼",24½",28". SIZE XXL: 28, 37, 46, 55, 64 and 73 cm / 11",14½",18",21½",25¼",28¾". SIZE XXXL: 30, 39, 48, 57, 66 and 75 cm / 11¾",15¼",19",22½",26",29½". ---------------------------------------------------------- JACKET: Worked back and forth on circular needle and sewn tog when finished. BACK PIECE: Cast on 95-98-101-107-113-116 sts on circular needle size 5 mm / US 8 with Air. Work rib as follows: A.1 (= 8 sts), K 1, * P 2, K 1 *, repeat from *-* until 8 sts remain on row, A.2 (= 8 sts). Continue like this back and forth until piece measures 4 cm / 1½". On next row from RS switch to circular needle size 5.5 mm / US 9 and work as follows: A.1, stockinette st over the next 79-82-85-91-97-100 sts, AT THE SAME TIME dec 15-14-15-17-21-20 sts evenly, A.2 = 80-84-86-90-92-96 sts on needle in total. Continue in stockinette st, work A.1 and A.2 in each side as before until piece measures 22 cm / 8¾". REMEMBER THE KNITTING TENSION/GAUGE At the end of the next 2 rows cast on 2 new sts (marks vent) = 84-88-90-94-96-100 sts. Now work as follows: 1 edge st in GARTER ST - see explanation above, A.3 (= 9 sts) stockinette st until A.2, work A.3 over A.2 and next to last st and finish with 1 edge st in garter st. When piece measures 26-24-24-23-23-23 cm / 10¼"-9½"-9½"-9"-9"-9", beg displacement of A.3 towards mid back. Work 1 edge st in garter st, inc 1 st - READ INCREASE TIP, A.3, dec 1 st - READ DECREASE TIP, stockinette st until 2 sts remain before A.3, dec 1 st, A.3, inc 1 st, 1 edge st in garter st. Repeat displacement of A.3 every 4th row 17-19-20-21-22-24 more times. NOTE: Inc is always inside 1 edge st in garter st in each side. AT THE SAME TIME when piece measures 60-61-62-63-64-65 cm / 23⅝"-24"-24⅜"-24¾"-25¼"-25½", cast on 1 new st at the end of the next 2 rows for armholes = 86-90-92-96-98-102 sts. Now continue pattern inside 1 edge st in garter st and 1 st in stockinette st in each side. Work the 82-86-88-92-94-98 middle sts in pattern as before. When piece measures 74-76-78-80-82-84 cm / 29⅛"-30"-30¾"-31½"-32¼"-33", cast/bind off the middle 24-24-24-26-26-26 sts for neck and finish each shoulder separately. On next row from the neck, cast/bind off 1 st = 30-32-33-34-35-37 sts remain on each shoulder. When piece measures 76-78-80-82-84-86 cm / 30"-30¾"-31½"-32¼"-33"-33⅞", work 1 ridge over all sts. Cast/bind off. Work the other shoulder the same way. RIGHT FRONT PIECE: Cast on 55-55-58-61-64-64 sts on circular needle size 5 mm / US 8 with Air. Work rib as follows: A.5 (= band), K 1, * P 2, K 1 *, repeat from *-* until 8 sts remain, A.2. Continue like this back and forth until piece measures 4 cm / 1½". On next row from RS switch to circular needle size 5.5 mm / US 9 and work as follows: A.5 (= 7 sts), stockinette st until 8 sts remain, AT THE SAME TIME dec 8-6-8-9-11-9 sts evenly over these sts, A.2 = 47-49-50-52-53-55 sts. Continue in stockinette st, work A.5 over band and A.2 in the side as before until piece measures 22 cm / 8¾". Now cast on 2 new sts in the side (= marks vent) = 49-51-52-54-55-57 sts. REMEMBER BUTTONHOLES! Now work A.3 over A.2 and next to last st on needle and work 1 edge st in garter st in the side. When piece measures 26-24-24-23-23-23 cm / 10¼"-9½"-9½"-9"-9"-9", beg displacement of A.3 towards mid front. Dec 1 st before A.3 and inc 1 st before last st on needle. Repeat displacement of A.3 every 4th row 17-19-20-21-22-24 more times. NOTE: Inc is always inside 1 edge st in garter st in the side. AT THE SAME TIME when piece measures 60-61-62-63-64-65 cm / 23⅝"-24"-24⅜"-24¾"-25¼"-25½", cast on 1 new st at the end of next row from RS for armhole = 50-52-53-55-56-58 sts. Continue pattern as before with 1 edge st in garter st and 1 st in stockinette st in the side. When piece measures 64-66-68-69-71-73 cm / 25¼"-26"-26¾"-27"-28"-28¾", slip the first 14-14-14-15-15-15 sts on a stitch holder for neck. Then cast/bind off sts on every row from neck as follows: 3 sts 1 time, 2 sts 1 time and 1 st 1 time = 30-32-33-34-35-37 sts remain for shoulder. Work edge st towards neck in garter st. When piece measures 76-78-80-82-84-86 cm / 30"-30¾"-31½"-32¼"-33"-33⅞", work 1 ridge over all sts. Cast/bind off. LEFT FRONT PIECE: Cast on and work as right front piece but reversed. I.e. work as follows on first row: A.1, K 1, * P 2, K 1 *, repeat from *-* until 7 sts remain, A.6 (= band). When piece measures 22 cm / 8¾", cast on 2 new sts in the side (marks vent). Now work A.3 over the 2nd st on row and A.1. When piece measures 26-24-24-23-23-23 cm / 10¼"-9½"-9½"-9"-9"-9", beg displacement of A.3 towards mid front. Inc 1 st after 1 edge st in garter st in the side and dec 1 st after A.3. Continue displacement the same way as on right front piece AT THE SAME TIME cast on 1 new st for armhole - adjust according to right front piece. When piece measures 64-66-68-69-74-73 cm / 25¼"-26"-26¾"-27"-28"-28¾", slip the first 14-14-14-15-15-15 sts seen from WS on a stitch holder for neck. Then cast/bind off sts on every row from neck as follows: 3 sts 1 time, 2 sts 1 time and 1 st 1 time = 30-32-33-34-35-37 sts. Work edge st towards neck in garter st. When piece measures 76-78-80-82-84-86 cm / 30"-30¾"-31½"-32¼"-33"-33⅞", work 1 ridge over all sts. Cast/bind off. SLEEVE: Work back and forth on circular needle. Cast on 39-41-43-43-43-45 sts on circular needle size 5 mm / US 8 with Air. Work rib as follows: 1 edge st in garter st, K 1, * P 1, K 1 *, repeat from *-* until 1 st remains, 1 edge st in garter st. When rib measures 4 cm / 1½", switch to circular needle size 5.5 mm / US 9 and continue pattern as follows: 1 edge st in garter st, work last st in A.4, repeat A.4 until 1 st remains, 1 edge st in garter st. When piece measures 10 cm / 4", inc 1 st inside 1 edge st in garter st in each side. Work the inc sts in pattern A.4: Repeat inc every approx. 5½-4½-4½-3½-3-3 cm / 2¼"-1¾"-1¾"-1¼"-1"-1" 6-7-7-9-11-11 more times = 53-57-59-63-67-69 sts. When sleeve measures 46 cm / 18" in all sizes, work a sleeve cap with short rows as follows from RS: Work until 8-9-9-10-11-12 sts remain, turn and work until 8-9-9-10-11-12 sts remain, turn and work until 17-19-19-21-22-23 sts remain, turn and work until 17-19-19-21-22-23 sts remain. Turn and work all sts on needle, turn and work over all sts. Cast/bind off with K from RS. Make another sleeve. ASSEMBLY: Sew the shoulder seams tog. Sew sleeves to body inside 1 edge st in garter st. Sew underarm seams and side seams in one inside 1 edge st in garter st but leave 22 cm / 8¾" for vent at the bottom of body. Sew the buttons on to left band. NECK EDGE: Beg from RS on right front piece and pick up approx. 120-130 sts (includes sts on stitch holders the front). K 1 round from WS while adjusting no of sts to 90-90-90-96-96-96 sts - but not over band sts, work these as before. Now work rib (K 1/P 2) inside band sts in each side, finish with K 1 before last band. When rib measures 3 cm / 1", cast/bind off with K over K and P over P. |
|||||||
Diagram explanations |
|||||||
|
|||||||
 |
|||||||
 |
|||||||
Have you finished this pattern?Tag your pictures with #dropspattern #sigridjacket or submit them to the #dropsfan gallery. Do you need help with this pattern?You'll find 24 tutorial videos, a Comments/Questions area and more by visiting the pattern on garnstudio.com. © 1982-2026 DROPS Design A/S. We reserve all rights. This document, including all its sub-sections, has copyrights. Read more about what you can do with our patterns at the bottom of each pattern on our site. |
|||||||






Post a comment to pattern DROPS 166-11
We would love to hear what you have to say about this pattern!
If you want to leave a question, please make sure you select the correct category in the form below, to speed up the answering process. Required fields are marked *.