
Popular categories
Looking for a yarn?


Comments / Questions (41)
![]() Peggy Le Terrier wrote:
Peggy Le Terrier wrote:
Je ne comprends ce que voulez dire Tricoter ensuite en point fantaisie, mais tricoter les 14-14-14-15-15-15 m côté milieu devant et les 10 m du bord de la manche au point mousse tous les rangs. Merci pour votre aide
10.12.2022 - 18:27DROPS Design answered:
Bonjour Mme Le Terrier, pour le devant droit, tricotez ainsi, vu sur l'endroit: les 14/15 premières mailles au point mousse, point fantaisie jusqu'à ce qu'il reste 10 m et terminez par 10 m point mousse; pour le devant gauche, commencez sur l'endroit par 10 m point mousse, point fantaisie jusqu'à ce qu'il reste 14-15 m et tricotez les 14-15 dernières m au point mousse. Bon tricot!
12.12.2022 - 09:18
![]() Le Terrier wrote:
Le Terrier wrote:
Bonjour Pourriez vous m'expliquer comment faire des rangs raccourcis car je suis bloqué pour faire la suite de la veste Merci
05.12.2022 - 16:12DROPS Design answered:
Bonjour Mme Le Terrier, vous trouverez comment tricoter des rangs raccourcis au point mousse: ici, pour la méthode de base, ou bien ici, pour celle avec les mailles enveloppées. Bon tricot!
06.12.2022 - 10:41
![]() Le Terrier wrote:
Le Terrier wrote:
Bonjour Je souhaiterais faire une ceinture pour ce gilet Quels conseils pourriez vous me donner pour la créer
20.11.2022 - 20:44DROPS Design answered:
Bonjour Mme Le Terrier, vous trouverez ici tous nos modèles de veste avec ceinture, vous y trouverez peut-être l'inspiration. Bon tricot!
21.11.2022 - 10:21
![]() Michaela wrote:
Michaela wrote:
Hallo, habe Probleme das Diagram zu lesen. In welche Richtung wird gestrickt? Was ist Vorderteil und was ist Rückenteil bzw. Kragen? Vielen Dank im voraus für Ihre Antwort. Michaela
07.11.2021 - 19:36DROPS Design answered:
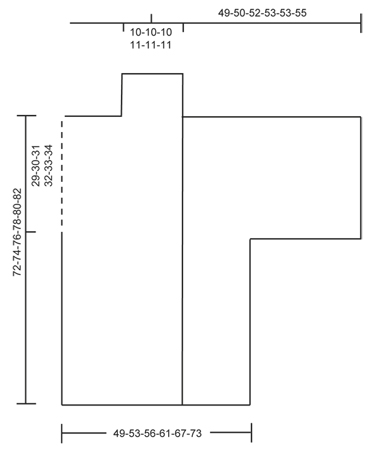
Liebe Michaela, die Jacke wird von unten nach oben in einem Teil bis Armausschnitte gestrickt, dann wird jedes Teil (= Rückenteil und beide Vorderteile) separat gestrickt. Kragen wird am Ende von den Vorderteile mit verkürzten Reihen gestrickt. Hier lesen Sie mehr über die Maßskizze. Kann das Ihnen helfen?
08.11.2021 - 07:42
![]() Marie-Anne Cantin wrote:
Marie-Anne Cantin wrote:
Bonjour je souhaite réaliser ce modèle mais je trouve curieux qu'un modèle réalisé avec une laine à tricoter en aig4 soit fait avec des aig 7 sans mentionner de doubler le fil. sinon le tricot va être très détendu ! Fayt il doubler la laine ?
23.04.2020 - 22:56DROPS Design answered:
Bonjour Mme Cantin, ce modèle se tricote volontairement avec des aiguilles 7 mais avec 1 seul fil pour obtenir l'effet et la texture souhaitée. Les indications du modèle sont sur la base d'un échantillon de 14 m x 26 rangs = 10 x 10 cm - vous trouverez ici plus d'infos. Bon tricot!
24.04.2020 - 09:04
![]() Torhild Raddum wrote:
Torhild Raddum wrote:
Jenta er 1.70 og bruker s/m. Mens oppskrifta sier bakstykket skal felles når den er 74 cm. Jakka som vises på bildet må da være mye lenger enn det ettersom den rekker henne til knærne?
08.03.2020 - 15:17DROPS Design answered:
Hei Torhild, Det er en skisse på bunnen av oppskriften som viser all mål i de forskjellige størrelsene. God fornøyelse!
08.03.2020 - 15:35
![]() Carolina wrote:
Carolina wrote:
Ciao ,vorrei realizzare questo capo ma trasformarlo in cappotto Quanti cm.dovrei lavorare fino allo scalfo manica? Sono alta 170cm Grazie
20.09.2019 - 14:11DROPS Design answered:
Buongiorno Carolina, in questa sede non possiamo darle un aiuto così personalizzato, le consigliamo di rivolgersi al suo rivenditore DROPS di fiducia. Buon lavoro!
20.09.2019 - 15:09
![]() Anne-Lise Lauvstad wrote:
Anne-Lise Lauvstad wrote:
Jeg har bestilt garn til en annen jakke, dvs Lima+Kids silk. Ønsker imidlertid å bruke denne oppskriften heller. Hvis jeg bruker begge trådene,tenkte jeg å bruke pinne 6,5. Må jeg da gå ned på str. Jeg er en M
16.08.2019 - 12:36DROPS Design answered:
Hei Anne-Lise. Et plagg i Lima (garngruppe B) og Kid-Silk (garngruppe A), vil ikke få den sammen tykkelsen som det er oppgitt i denne oppskriften (Lime= garngruppe B). En strikkefasthet kan være veldig personlig, avhengig av om man strikker løst eller stramt. Anbefaler deg å strikke noen prøvelapper med ulike pinnestørrelser, slik at du får den strikkefastheten som er oppgitt i oppskriften. God Fornøyelse!
23.09.2019 - 10:10
![]() Claire wrote:
Claire wrote:
Bonjour! je voudrais tricoter ce modèle pour ma fille qui est végane, donc je dois trouver une "laine" synthétique. La Lima, selon l'étiquette, se tricote en aiguilles 4 normalement. Ici le modèle se tricote en no 7, pourquoi ? Quelle grosseur de laine synthétique dois-je prendre pour faire ce modèle, plutôt une laine qui se tricote normalement en 4-5 ou une laine plus épaisse ? Merci de vos conseils.
26.02.2018 - 10:45DROPS Design answered:
Bonjour Claire, nous sommes en mesure de pouvoir proposer des modèles gratuits grâce à nos fils à tricoter que nous vendons dans le monde entier. Nous vous remercions de bien vouloir contacter votre magasin DROPS pour toute assistance complémentaire. Merci pour votre compréhension.
26.02.2018 - 12:26
![]() Zoe Davison wrote:
Zoe Davison wrote:
I'm trying to interpret the instructions for the right side row does "Work band and pattern as before and at the end of next row from RS, cast on 34-34-34-32-28-26 new sts = 74-76-78-80-80-82 sts. " this mean that at the end of the next right side row you need to cast on "34" stitches?
18.09.2017 - 15:26DROPS Design answered:
Dear Mrs Davison, that's correct. Happy knitting!
18.09.2017 - 16:46
|
|
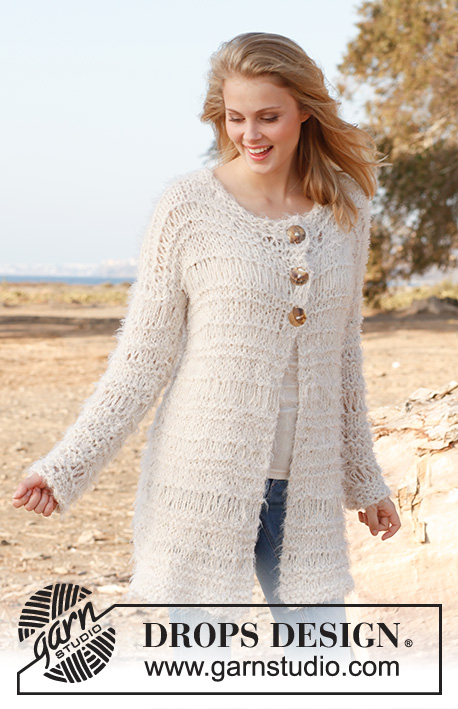
Long Nights#longnightsjacket |
|
 |
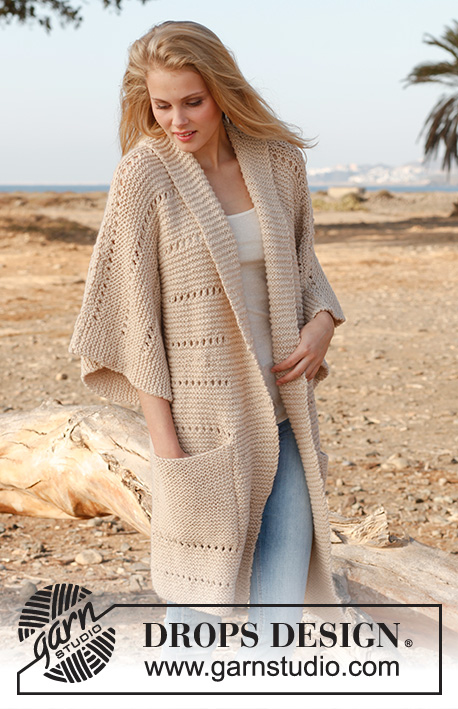 |
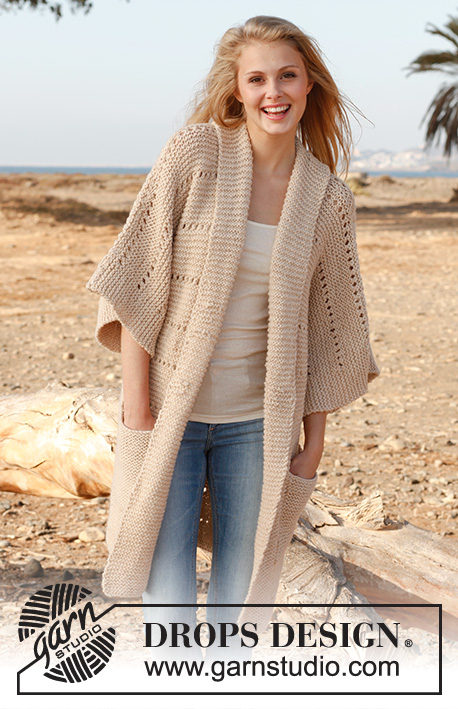
Knitted DROPS jacket in garter st with shawl collar in ”Lima”. Size: S - XXXL.
DROPS 146-21 |
|
|
GARTER ST (back and forth on needle): K all rows. 1 ridge = 2 rows K. MEASURING TIP: Measure when piece is flat, it is important not to stretch the piece when measuring. PATTERN: Row 1-16: K from RS, K from WS. Row 17: K from RS. Row 18 (from WS): * K 2 tog, 1 YO *, repeat from *-*. Repeat these 18 rows upwards. ---------------------------------------------------------- BODY: Worked back and forth on circular needle. Cast on 148-156-164-180-196-212 sts on circular needle size 7 mm / US 10.75 with Lima. Work PATTERN but work the 14-14-14-15-15-15 sts in each side in garter st on all rows (= front bands). Continue this pattern until piece measures 43-44-45-46-47-48 cm / 17"-17¼"-17¾"-18"-18½"-19" - read MEASURING TIP above. Slip the first 40-42-44-48-52-56 sts and the last 40-42-44-48-52-56 sts on stitch holders for front piece = 68-72-76-84-92-100 sts remain on needle for back piece. BACK PIECE: = 68-72-76-84-92-100 sts. Continue with PATTERN, AT THE SAME TIME cast on 34-34-34-32-28-26 sts for sleeves (shorter measurements in the larger sizes because of wider shoulders) at the end of the next two rows = 136-140-144-148-148-152 sts. Continue with PATTERN but work the outermost 10 sts in each side in garter st on all rows. When piece measures 70-72-74-76-78-80 cm / 27½"-28⅜"-29⅛"-30"-30¾"-31½, bind off the middle 16-16-16-18-18-18 sts for neck = 60-62-64-65-65-67 sts remain on each shoulder/sleeve. Bind off when piece measures 72-74-76-78-80-82 cm / 28⅜"-29⅛"-30"-30¾"-31½"-32¼". RIGHT FRONT PIECE: = 40-42-44-48-52-56 sts. Work band and pattern as before and at the end of next row from RS, cast on 34-34-34-32-28-26 new sts = 74-76-78-80-80-82 sts. Then work pattern but work the 14-14-14-15-15-15 sts towards mid front and the outermost 10 sts on sleeve in garter st on all rows. When piece measures 72-74-76-78-80-82 cm / 28⅜"-29⅛"-30"-30¾"-31½"-32¼", bind off the outermost 60-62-64-65-65-67 sts from WS = 14-14-14-15-15-15 sts remain on needle for collar. Work in garter st over these sts with short rows, beg from RS: * 2 rows back and forth over the first 7 sts, 2 rows over all sts *, repeat from *-* until piece measures 8-8-8-9-9-9 cm / 3"-3"-3"-3½"-3½"-3½" at the shortest. Bind off. LEFT FRONT PIECE: Work as right front piece but reversed. POCKETS: Cast on 25-25-25-28-28-28 sts on needle size 7 mm / US 10.75 with Lima. Work in garter st until piece measures 18-18-18-20-20-20 cm / 7"-7"-7"-8"-8"-8", bind off. Make one more. ASSEMBLY: Sew shoulder/overarm seams and underarm seams. Sew the collar tog mid back and sew it to the neckline at the back. Place the pockets on front piece approx. 11-13-15-17-19-21 cm / 4½"-5"-6"-6¾"-7½"-8¼" from bottom edge and edge to edge with the band (try the jacket on for desired placement). |
|
 |
|
Have you finished this pattern?Tag your pictures with #dropspattern #longnightsjacket or submit them to the #dropsfan gallery. Do you need help with this pattern?You'll find 13 tutorial videos, a Comments/Questions area and more by visiting the pattern on garnstudio.com. © 1982-2026 DROPS Design A/S. We reserve all rights. This document, including all its sub-sections, has copyrights. Read more about what you can do with our patterns at the bottom of each pattern on our site. |
|


With over 40 years in knitting and crochet design, DROPS Design offers one of the most extensive collections of free patterns on the internet - translated to 17 languages. As of today we count 324 catalogs and 12284 patterns - 12274 of which are translated into English (US/in).
We work hard to bring you the best knitting and crochet have to offer, inspiration and advice as well as great quality yarns at incredible prices! Would you like to use our patterns for other than personal use? You can read what you are allowed to do in the Copyright text at the bottom of all our patterns. Happy crafting!
Post a comment to pattern DROPS 146-21
We would love to hear what you have to say about this pattern!
If you want to leave a question, please make sure you select the correct category in the form below, to speed up the answering process. Required fields are marked *.