
Popular categories
Looking for a yarn?


Comments / Questions (74)
![]() Ellen Bergli wrote:
Ellen Bergli wrote:
1.Tips til økning av midtmaske gjør jeg lett etter øketips, men dette skal jo gjøres I samme omgang som M2 begynner. Når jeg har strikket M2A og M2B, er jeg etter instruksjonen kommet til de 3 midtmaskene, som er det jeg trenger til M2C, og jeg kan fortsette med M2D og M2E. Eller?? Ifølge instruksjonen skal jeg Fortsett med dette mønsteret i alt 20 pinner. Da er jeg kommet langt forbi M2Ax. Hvordan skal dette forståes?
12.03.2024 - 23:05DROPS Design answered:
Hej Ellen, vi forstår ikke rigtig dit spørgsmål... men det er samme mønster som strikkes over de nye masker, som du har taget ud på midten :)
19.03.2024 - 11:23
![]() Kajsa wrote:
Kajsa wrote:
Hej och tack för svar. Men det var inte riktigt svar på min fråga. Jag förstår hur jag ska göra själva ökningen, men inte på vilket varv. Är det på första mönstervarvet i M2?
12.06.2023 - 14:01DROPS Design answered:
Hei Kajsa. Ja, 1. rad i M.2 viser økninger, disse strikkes fra retten. mvh DROPS Design
19.06.2023 - 07:56
![]() Kajsa wrote:
Kajsa wrote:
Jag förstår inte hur det varv där mittmaskan ska ökas till fem ska stickas. Ska det vara bara räta maskor?
10.06.2023 - 01:28DROPS Design answered:
Hei Kajsa. Jo, når du kommer til midtmasken, strikker du i denne og i midtmasken fra forrige pinne slik: Strikk 1 rett maske, ikke ta masken av på venstre pinne, gjør et kast om høyre pinne = 2 masker på høyre pinne, strikk 1 maske rett i samme maske (de to maskene du strikket 1. maske i) = 3 masker på høyre pinne (ikke ta masken av på venstre pinne), gjør et nytt kast om høyre pinne = 4 masker på høyre pinne og strikk 1 maske rett i samme maske (de to maskene du strikket 1. og 3. maske i) = 5 masker på høyre pinne. Slipp maskene på venstre pinne av. Du har nå økt med 4 masker i en og samme maske = 5 masker. mvh DROPS Design
12.06.2023 - 13:00
![]() Lucia wrote:
Lucia wrote:
Ringrazio per la risposta, ma dopo aver lavorato altri 4 ferri di M2 il diagramma successivo non si inserisce correttamente. Inoltre sulle maglie aumentate dovrebbe man mano allargarsi il motivo delle altre maglie ma occorrerebbe rivedere gli schemi.
20.03.2022 - 20:31DROPS Design answered:
Buonasera Lucia, abbiamo inviato una segnalazione al settore design, se ci dovessero essere delle correzioni le troverà direttamente online. Buon lavoro!
02.07.2022 - 22:07
![]() Lucia wrote:
Lucia wrote:
Buongiorno, non mi è chiaro questo passaggio: la spiegazione indica di proseguire finché non sono state lavorate in tutto 20 righe del diagramma M.2 ma il diagramma M.2 è composto da 16 ferri, se si riprende da capo il diagramma M.2A prima di iniziare M.2Ax ci sono altri 6 ferri e quindi diventano 22. Grazie.
12.03.2022 - 10:24DROPS Design answered:
Buonasera Lucia, deve lavorare il diagramma A.2 intero e poi altri 4 ferri del diagramma. Buon lavoro!
13.03.2022 - 14:48
![]() Pascale wrote:
Pascale wrote:
Bonjour Je ne comprends pas ce que je dois faire après avoir tricoté M1b et M1a. IL est indiqué "continuer le point fantaisie et les augmentations de la même façon, c'est-à-dire augmenter 4 m tous les rangs sur l'endroit. " Quel point fantaisie ? Sachant que je me retrouve avec 13 mailles + 2 mailles point mousse de chaque côté.
02.09.2018 - 15:47DROPS Design answered:
Bonjour Pascale, vous continuez simplement comme avant (répétez par ex les 2 derniers rangs des diagrammes, vous aurez juste plus de mailles (1 dim, 1 jeté ou 1 jeté, 1 dim) entre le début et la fin du motif. Bon tricot!
04.09.2018 - 13:12
![]() Marie Madeleine wrote:
Marie Madeleine wrote:
Bonjour, Après une longue réflexion et des recherches , j'ai enfin refait les diagrammes M 2 A et M2 E qui présentent des ERREURS...les explications manquent de précisions et il vaut mieux être experte pour le tricoter jusqu'au bout. Toutefois le rendu est très joli. Bonne journée
06.06.2018 - 07:49
![]() Marie-Madeleine wrote:
Marie-Madeleine wrote:
Bonjour, Si j'ai bien compris le 2ème motif M2 est bordé de 2 mailles jersey (en plus des 2 mailles lisière), le 3ème de 4 mailles jersey et ainsi de suite. Merci de votre réponse Cordialement
29.05.2018 - 16:08DROPS Design answered:
Bonjour Marie-Madeline, une correction a été faite pour la façon de tricoter M.2 - Bon tricot!
25.06.2018 - 15:54
![]() Marie-Madeleine wrote:
Marie-Madeleine wrote:
Bonjour madame, Quand j'ai tricoté M 2 une fois en hauteur pour M2A j'ai 13 mailles : donc 8 pour M2 B il reste 5 mailles et non 4.. Ensuite je commence par 2 m lisière puis 2 m puis M2 A sur 2 mailles. Au rang suivant (rang 3) comment tricoter les 2 mailles endroit après les 2 m lisière et avant M2A ? Si je suis les indications j'obtiens alors 4 mailles lisière et non 2 comme précédemment. Je suis perdue.Merci de votre aide Bonne journée
29.05.2018 - 13:55DROPS Design answered:
Bonjour Marie-Madeleine, le modèle va être vérifié dès que possible, merci d'avance pour votre patience.
30.05.2018 - 15:02
![]() M Madeleine wrote:
M Madeleine wrote:
Bonjour, Quand j'ai tricoté 1 fois M2 en hauteur je suis les indications données (rang 1 après M2) Ensuite au rang 3 (après avoir tricoté 1 fois M2) je ne sais pas comment commencer ce rang. Merci de votre aide Bonne soirée
28.05.2018 - 22:01DROPS Design answered:
Bonjour M Madeleine, après avoir tricoté 1 x M.2 en hauteur, répétez les 2 derniers rangs de M.2B, M.2C et M.2D, et, en même temps, reprenez M.2A et M.2E à partir du 1er rang ainsi: 2 m end, M.2A sur les 2 m suivantes, M.2B sur les 8 m suivantes, et tricotez M.2E ainsi: M.2D au-dessus des 8 premières m et commencez M.2E à partir du 1er rang sur les 2 m suivantes, 2 m end. Après les 2 premiers rangs, répétez M.2B,C et D et continuez M.2A et M.2E (= rang 3 de ces diagrammes). Bon tricot!
29.05.2018 - 08:58
|
||||||||||||||||
Rosita#rositashawl |
||||||||||||||||
 |
 |
|||||||||||||||
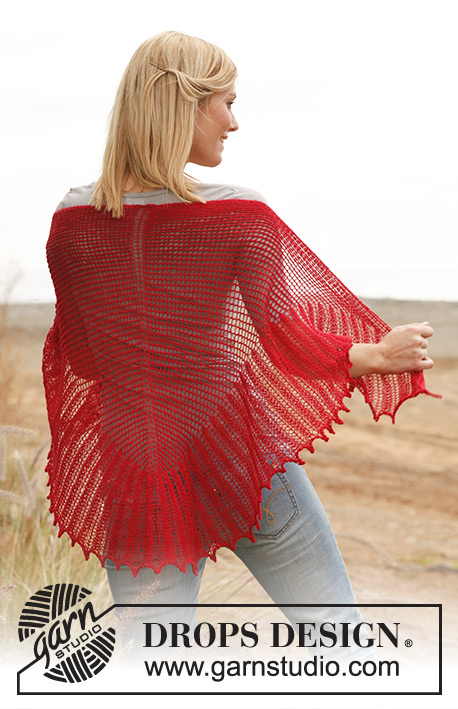
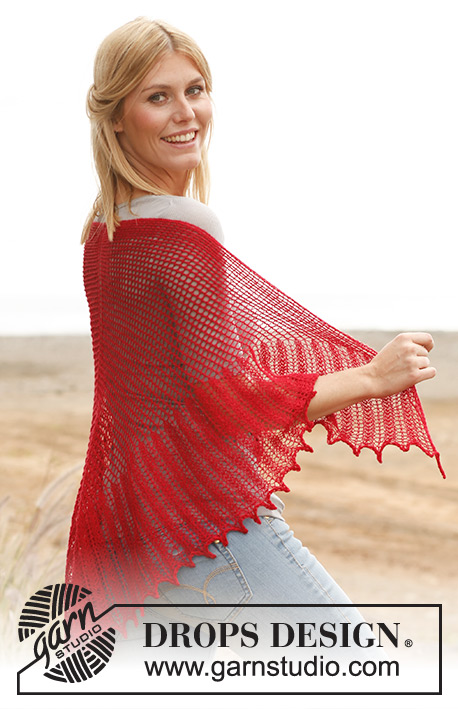
Knitted DROPS shawl with lace pattern in "Lace".
DROPS 139-2 |
||||||||||||||||
|
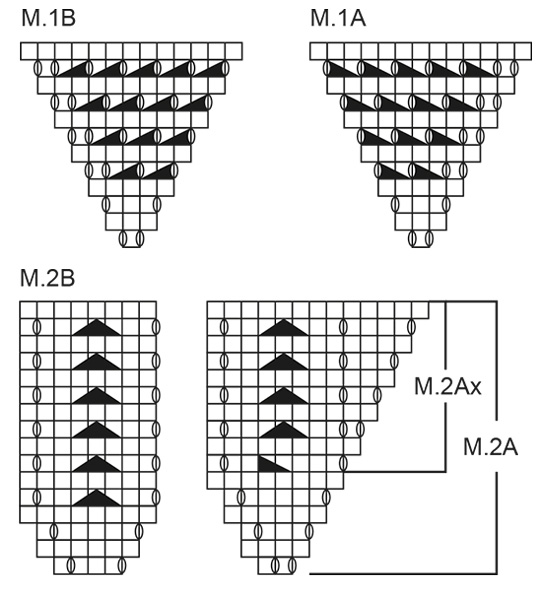
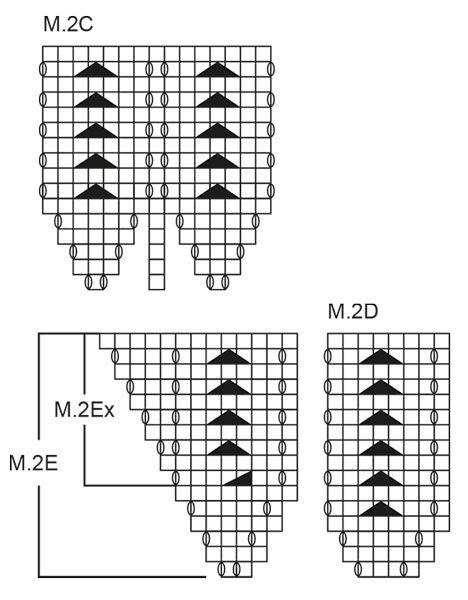
KNITTING GAUGE: This garment is to be soaked and blocked/stretched to size afterwards so the knitting gauge is not that important but to get a sense of whether you are working too loose/tight, work a test on needle size 3.5 mm / US 4 in stockinette st and get approx. 23 sts x 30 rows = 10 x 10 cm / 4" x 4". GARTER ST (back and forth on needle): K all rows. PATTERN: See diagrams M.1 and M.2. Diagrams show pattern from RS. Pattern in diagram M.1A is reversed from pattern in diagram M.1B. INCREASE TIP: Work 5 sts in 1 st as follows: K 1, 1 YO, K 1, 1 YO, K 1. NOTE: To avoid a "fragile" middle st when inc 5 sts in this st, knit up sts both through middle st on needle and middle st from previous row at the same time. --------------------------------------------------------- SHAWL: Worked back and forth on circular needle, work from mid back of neck and down. Cast on 3 sts on circular needle size 3.5 mm / US 4 with Lace. Work as follows: Row 1: K 2 sts in 1st and 2nd st, and K 1 st in 3rd st = 5 sts. Row 2: K all sts. Row 3: K 1, K 2 sts in next st, insert a marker in next st (mid st), K 2 sts in next st, K 1 = 7 sts. Row 4: K all sts. Row 5 (WS): K 2 (= edge sts), P 3 and K 2 (= edge sts). Continue as follows: 2 edge sts in GARTER ST - see explanation above, diagram M.1A, 1 mid st in stockinette st, diagram M.1B and 2 edge sts in garter st. When diagram M.1 has been worked, continue inc and pattern the same way, i.e. inc 4 sts on every row from RS. Work until the shawl measures approx. 42 cm/ 16½" – measure mid back and lightly pull when measuring (finish after 1 row from WS). Continue in pattern and on next row (= from RS) inc mid st to 5 sts (4 sts inc) – SEE INCREASE TIP. Work one more row from the WS – purl the inc sts. Continue with diagram M.2 as follows: 2 sts in garter st, diagram M.2A over the first 2 sts, insert a marker, then diagram M.2B until the 3 sts in the middle (the middle st and 1 st on each side of this st), insert a marker, work the 3 middle sts in diagram M.2C, insert a marker, continue with diagram M.2D until 4 sts remain, insert a marker, work diagram M.2E over 2 sts and the last 2 sts in garter st. Continue pattern like this until a total of 20 rows of M.2 have been worked. Continue as follows: 2 sts in garter st, diagram M.2Ax over the next 8 sts, continue the rest of the pattern as before until 10 sts remain, work M.2Ex over the next 8 sts, 2 sts in garter st. Continue like this, incorporating new sts each side in pattern until piece measures approx. 60 cm / 23½" mid back (with a light pull). Bind off with 2 strands as follows: K 2 sts, slip them back on left needle and K them twisted tog (i.e. work in back loop of st instead of front). * Work 1 more st (= 2 sts on right needle), slip them back on the left needle, K them twisted tog *, repeat from *-* until all sts have been bind off. This is done to make the edge elastic for blocking. BLOCKING: Place the shawl in lukewarm water until it is soaking wet. Carefully squeeze the water out of the shawl - do not twist the shawl - then roll the shawl in a towel and squeeze to remove more water - the shawl will now only be moist. Place the shawl on a carpet or mattress - carefully stretch it out to size and fasten it with pins. Leave to dry. Repeat the process when the garment has been washed. |
||||||||||||||||
Diagram explanations |
||||||||||||||||
|
||||||||||||||||
 |
||||||||||||||||
 |
||||||||||||||||
Have you finished this pattern?Tag your pictures with #dropspattern #rositashawl or submit them to the #dropsfan gallery. Do you need help with this pattern?You'll find 8 tutorial videos, a Comments/Questions area and more by visiting the pattern on garnstudio.com. © 1982-2026 DROPS Design A/S. We reserve all rights. This document, including all its sub-sections, has copyrights. Read more about what you can do with our patterns at the bottom of each pattern on our site. |
||||||||||||||||


With over 40 years in knitting and crochet design, DROPS Design offers one of the most extensive collections of free patterns on the internet - translated to 17 languages. As of today we count 324 catalogs and 12290 patterns - 12280 of which are translated into English (US/in).
We work hard to bring you the best knitting and crochet have to offer, inspiration and advice as well as great quality yarns at incredible prices! Would you like to use our patterns for other than personal use? You can read what you are allowed to do in the Copyright text at the bottom of all our patterns. Happy crafting!
Post a comment to pattern DROPS 139-2
We would love to hear what you have to say about this pattern!
If you want to leave a question, please make sure you select the correct category in the form below, to speed up the answering process. Required fields are marked *.