
Popular categories
Looking for a yarn?


Comments / Questions (11)
![]() Brugere wrote:
Brugere wrote:
Bonjour, Pouvez vous me dire pour les augmentations du début , c est sur l avant dernière maille que l on fait cette augmentation pour finir toujours avec une maille endroit,? Merci cordialement
26.05.2020 - 19:15
![]() Brugere wrote:
Brugere wrote:
Bonjour, Pouvez vous me dire pour les augmentations du début , c est sur l avant dernière maille que l on fait cette augmentation pour finir toujours avec une maille endroit,? Merci cordialement
26.05.2020 - 17:02DROPS Design answered:
Bonjour Mme Brugere, pour augmenter, tricoter 2 fois à l'endroit (une fois dans le brin avant et une fois dans le brin arrière) la dernière maille des rangs 3 et 7 . Bon tricot!
27.05.2020 - 08:30
![]() Eva wrote:
Eva wrote:
Vielen Dank für die schnelle Antwort! Wenn ich es also richtig verstanden habe, fange ich gleich in der nächsten Reihe nach Beendigung des Lochmusters mit den verkürzten Reihen an. Wie ist die Beschreibung "zurück stricken" zu verstehen? Stricke ich die Reihe bis zum Ende oder lass ich auch dort 4M stehen? Sollen die verkürzten Reihen mit Umschlag oder ohne Umschlag gestrickt werden?
21.07.2013 - 22:04DROPS Design answered:
Liebe Eva, wir haben dieses Tuch ohne Umschläge gestrickt, aber sie können sich beide Videos in unserer Videodatenbank anschauen. Zu Ihrer anderen Frage: Sie stricken die Reihe ganz zurück, denn die verkürzte Reihe wird ja nur an einer Seite durchgeführt, so entsteht das keilförmige Stück.
22.07.2013 - 13:32
![]() Eva wrote:
Eva wrote:
Ich habe eine Frage bezüglich der verkürzten Reihen. Ich glaube, ich habe verstanden wie ich sie stricken soll. Einfach immer die letzten Maschen gar nicht stricken und umdrehen. Aber bei welchen Reihen sind "die verkürzten" Reihen?
19.07.2013 - 10:18DROPS Design answered:
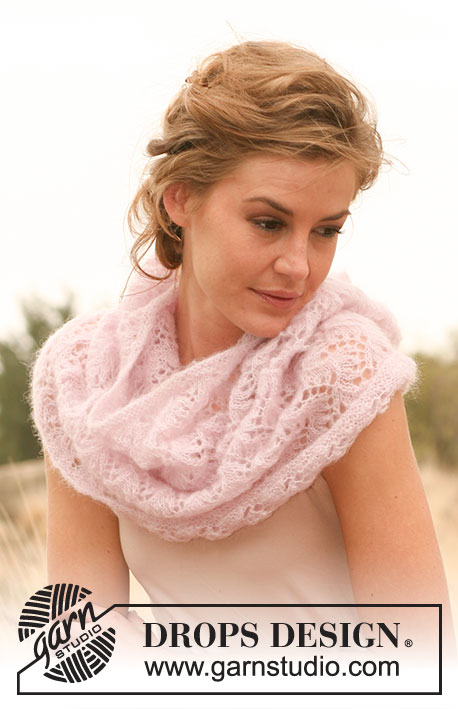
Liebe Eva, die verkürzten Reihen sind in dem Krausrippen-Teil in der hinteren Mitte. Auf dem zweiten Foto können Sie das gut erkennen.
19.07.2013 - 12:01
![]() Christelle wrote:
Christelle wrote:
Bonjour, je ne comprends pas la partie au point mousse qui combine augmentation et rangs raccourcis... pourriez vous m'expliquer de manière un peu plus détaillée SVP ??? Merci d'avance
04.01.2013 - 06:53DROPS Design answered:
Bonjour Christelle, les rangs raccourcis se tricotent au point mousse, les augmentations sont les mêmes qu'avant. Pour les rangs raccourcis, on commence sur l'envers : 2 rangs jusqu'à ce qu'il reste 4 m (il reste 4 m sur l'aiguille de gauche au 1er rang), puis 2 rangs jusqu'à ce qu'il reste 8 m et ainsi de suite, en tricotant toujours 4 m en moins jusqu'à ce qu'il reste 72 m non tricotées sur l'aiguille, à ce moment là, vous avez augmenté 9 m et donc un total de 94 m. Tricotez 4 rangs sur toutes les mailles et continuez les rangs raccourcis dans l'autre sens comme indiqué. Bon tricot !
04.01.2013 - 10:32
![]() Jeannette A Murphy wrote:
Jeannette A Murphy wrote:
I am having difficulty with the short rows. When I have increased 9 stitches to 94 total, the numbers don't total up for making short rows by working "4 sts less for every time before working back". To get 72 st remaining it would have to be knitting 8 sts less with each row (8x9=72)! What am I doing wrong?
04.03.2012 - 20:41DROPS Design answered:
You start working short rows turning 4 sts earlier each time, to get to 72 sts left on row you have to work a total of 36 rows back and forth. If you inc 1 st on every 4th of these 36 rows, you will inc a total of 9 sts. 4x9 = 36.
06.03.2012 - 02:02
![]() DROPS Design NL wrote:
DROPS Design NL wrote:
Om het gaatje in de overgang kleiner te maken kan je: trek stevig aan de draad bij het breien van de st net voor en net na de overgang. Bij het wassen / spannen verdwijnt de gaatjes meestal. Of je kan 1 extra st opnemen in de overgang en samenbreien met de eerstvolgende st. Ik hoop dat je hiermee verder kan. Veel plezier mee!
24.05.2011 - 16:35
![]() DROPS Design NL wrote:
DROPS Design NL wrote:
Hoi Mieke. Je moet keren als er 76 st over zijn, dan 72, dan 68 enz. Tegelijkertijd mindert je ook in elke 4e nld. Ga zo door met minderingen + 4 st minder voor het keren tot er in totaal 85 st op de nld staan.
24.05.2011 - 16:33
![]() Mieke wrote:
Mieke wrote:
Mijn vraag is: Als ik door ga met de verkorte toeren tijdens het meerderen aan de schuine kant komt er wel een lengteverschil tussen het linker en rechtergedeelte. Dit veroorzaakt straks als ik de hele pen weer ga breien een gat. Hoe los ik het op? Of is het zo dat als er eenmaal 72 steken op de pen staan ik weer de hele pen kan gaan breien ook al is het meerderen naar 94 st. nog niet klaar. Ik hoop dat U mijn vraag begrijpt. Het is lastig een vraag te stellen op schrift.
24.05.2011 - 16:30
![]() Maartje wrote:
Maartje wrote:
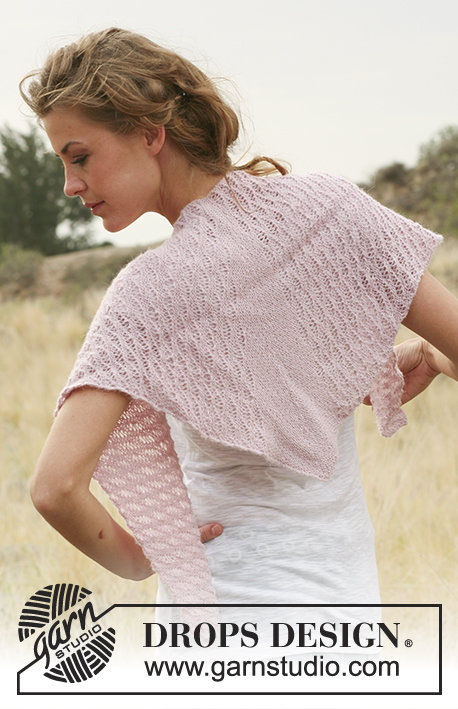
Lovely variation on the straight scarfs with the same stitch pattern!
16.01.2011 - 20:38
|
|
Good Morning#goodmorningshawl |
|
 |
 |
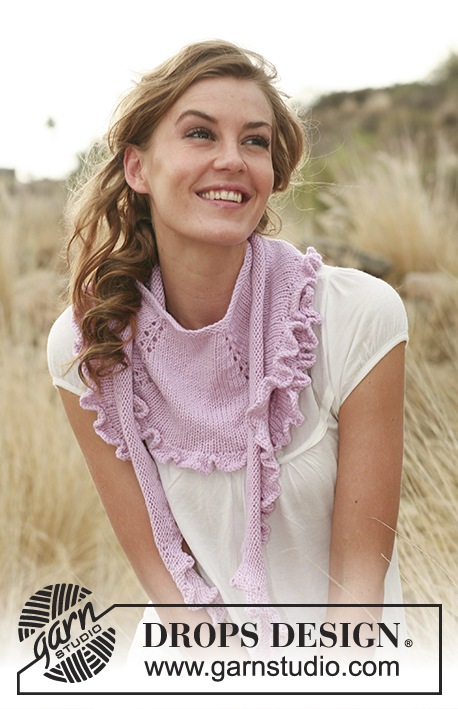
Knitted DROPS shawl with lace pattern in "Alpaca".
DROPS 127-30 |
|
|
GARTER ST (back and forth on needle): K all rows. LACE PATTERN: ROW 1 (= RS): * K 4, 1 YO, K 1, 2 YO, K 1, 3 YO, K 1, 3 YO, K 1, 2 YO, K 1, 1 YO, K 3 *, repeat from *-*. ROW 2: K all sts from previous row. The YOs are not worked but slipped off the needle to make holes. ROW 3-4: K all sts. ROW 5: * K 1, 3 YO, K 1, 2 YO, K 1, 1 YO, K 7, 1 YO, K 1, 2 YO, K 1, 3 YO *, repeat from *-*. ROW 6: As 2nd row. ROW 7-8: K all sts. Repeat row 1 to 8. INCREASE TIP: Inc 1 st by working 2 sts in the last st. DECREASE TIP: Dec 1 st by K tog the first 2 sts on needle . -------------------------------------------------------- SHAWL: Worked from side to side, back and forth on circular needle (because of no of sts after inc). Cast on 13 sts on needle size 2.5 mm / US 1or2 with Alpaca. K 4 rows. On next row from RS, work LACE PATTERN - see explanation above - until 1 st remains, finish with K 1. Continue with lace pattern vertically, while AT THE SAME TIME inc 1 st at the end of row 3 and row 7 in the lace pattern (= from RS) – READ INCREASE TIP! Work the inc sts in lace pattern and always K the last st on every row. REMEMBER THE GAUGE! Continue with lace pattern and inc in the side as before until there are a total of 85 sts on needle (= 7 pattern repetitions in width + 1 K st) and finish after row 3 or row 7 in the lace pattern (= from RS). Then work in GARTER ST - see explanation above - and continue to inc in the side on every 4th row as before, while AT THE SAME TIME working short rows as follows (1st row = WS): Work until 4 sts remain, turn and work back. Work until 8 sts remain, turn and work back. Continue with short rows by working 4 sts less for every time before working back. When 72 sts remain after last turn with short rows and a total of 9 sts have been inc in the side during these rows (= a total of 94 sts on needle), K 4 rows over all sts without inc (= middle of shawl). Then dec 1 st at beg of next row from WS – READ DECREASE TIP! Repeat the dec on every 4th row while AT THE SAME TIME working short rows as follows (1st row = WS): Work until 76 sts remain, turn and work back. Work until 72 sts remain, turn and work back. Continue dec in the side and short rows by working until 4 sts less remain for every time until there are a total of 85 sts on needle. Then work lace pattern (1st row = from RS): Continue back and forth over all sts and dec in the side as before at beg of row 4 and row 8 in the lace pattern (= from WS). When 13 sts remain on needle (finish after row 2 or row 6 in the lace pattern), K 4 rows over all sts. Bind off. |
|
Have you finished this pattern?Tag your pictures with #dropspattern #goodmorningshawl or submit them to the #dropsfan gallery. Do you need help with this pattern?You'll find 10 tutorial videos, a Comments/Questions area and more by visiting the pattern on garnstudio.com. © 1982-2026 DROPS Design A/S. We reserve all rights. This document, including all its sub-sections, has copyrights. Read more about what you can do with our patterns at the bottom of each pattern on our site. |
|


With over 40 years in knitting and crochet design, DROPS Design offers one of the most extensive collections of free patterns on the internet - translated to 17 languages. As of today we count 325 catalogs and 12298 patterns - 12288 of which are translated into English (US/in).
We work hard to bring you the best knitting and crochet have to offer, inspiration and advice as well as great quality yarns at incredible prices! Would you like to use our patterns for other than personal use? You can read what you are allowed to do in the Copyright text at the bottom of all our patterns. Happy crafting!
Post a comment to pattern DROPS 127-30
We would love to hear what you have to say about this pattern!
If you want to leave a question, please make sure you select the correct category in the form below, to speed up the answering process. Required fields are marked *.