
Popular categories
Looking for a yarn?


Comments / Questions (17)
![]() Mariska wrote:
Mariska wrote:
Ik begrijp de beschrijving van de onderkant niet goed. Je begint met 12 steken, vermeerdert dit tot 102 steken en daarna stopt de beschrijving. Moet het werk daarna niet terug naar 12 steken zodat het een rond "lapje" wordt?
14.09.2020 - 18:48DROPS Design answered:
Dag Mariska,
Als je de onderkant hebt gebreid en 102 steken op de naald hebt ga je verder met de volgende paragraaf 'REST VAN DE TAS'. Dit is het gedeelte wat omhoog gaat. Aan het eind naai je de tas in de lente dicht.
15.09.2020 - 13:27
![]() Angelique wrote:
Angelique wrote:
Ik zou graag deze tas maken maar dan met gewone breinaalden. Hebben jullie daar ook het patroon van? (Ik ben beginnende breier). Alvast hartelijk dank
29.02.2020 - 17:33DROPS Design answered:
Dag Angelique,
Helaas hebben we alleen een patroon om in de rondte te breien.
04.03.2020 - 11:17
![]() Nici wrote:
Nici wrote:
Verstehe ich die Anleitung hier richtig: die Tasche wird in Reihen gestrickt und dann zusammengenäht? Danke vorab für die Antwort! LG
24.10.2012 - 17:36DROPS Design answered:
Hallo Nici, es wird nur der Boden in Hin- und Rück-R gestrickt, dann glatt re in Runden.
26.10.2012 - 11:09
![]() Drops Design wrote:
Drops Design wrote:
Bonjour Martine, les explications de nos modèles sont disponibles gratuitement sur notre site (sac = modèle n°120-14 - lien sous la photo). Bon tricot :)
24.02.2010 - 10:14Martine wrote:
C'est la premiere fois que je regarde le catalogue. pouvez vous m'envoyer les explication pour le joli sac blanc et bleu . Merci . Martine
24.02.2010 - 09:56
![]() Klaudia wrote:
Klaudia wrote:
Würde sofort loslegen, sobald die Anleitung da wäre. Sieht schick aus.
19.01.2010 - 09:47
![]() Jerges wrote:
Jerges wrote:
Compared to the ruffly, lollipop baby bags in the collection, this cute adult bag is the only one I would make.
19.01.2010 - 02:26
![]() Bribricrochet wrote:
Bribricrochet wrote:
Trés jolis coordonné et trés pratique
15.01.2010 - 08:21Bourque wrote:
Jadorce model de tricot et bien sur tout les autre , pouvez vous me donné ce patron de ce sac bandoulierre il est magnifique, merci bc
12.01.2010 - 22:17
![]() Lillemor Johansson wrote:
Lillemor Johansson wrote:
Fräch och rent, den vill jag ha
10.01.2010 - 11:26
|
|
Follow the Fleet#followthefleetbag |
|
 |
 |
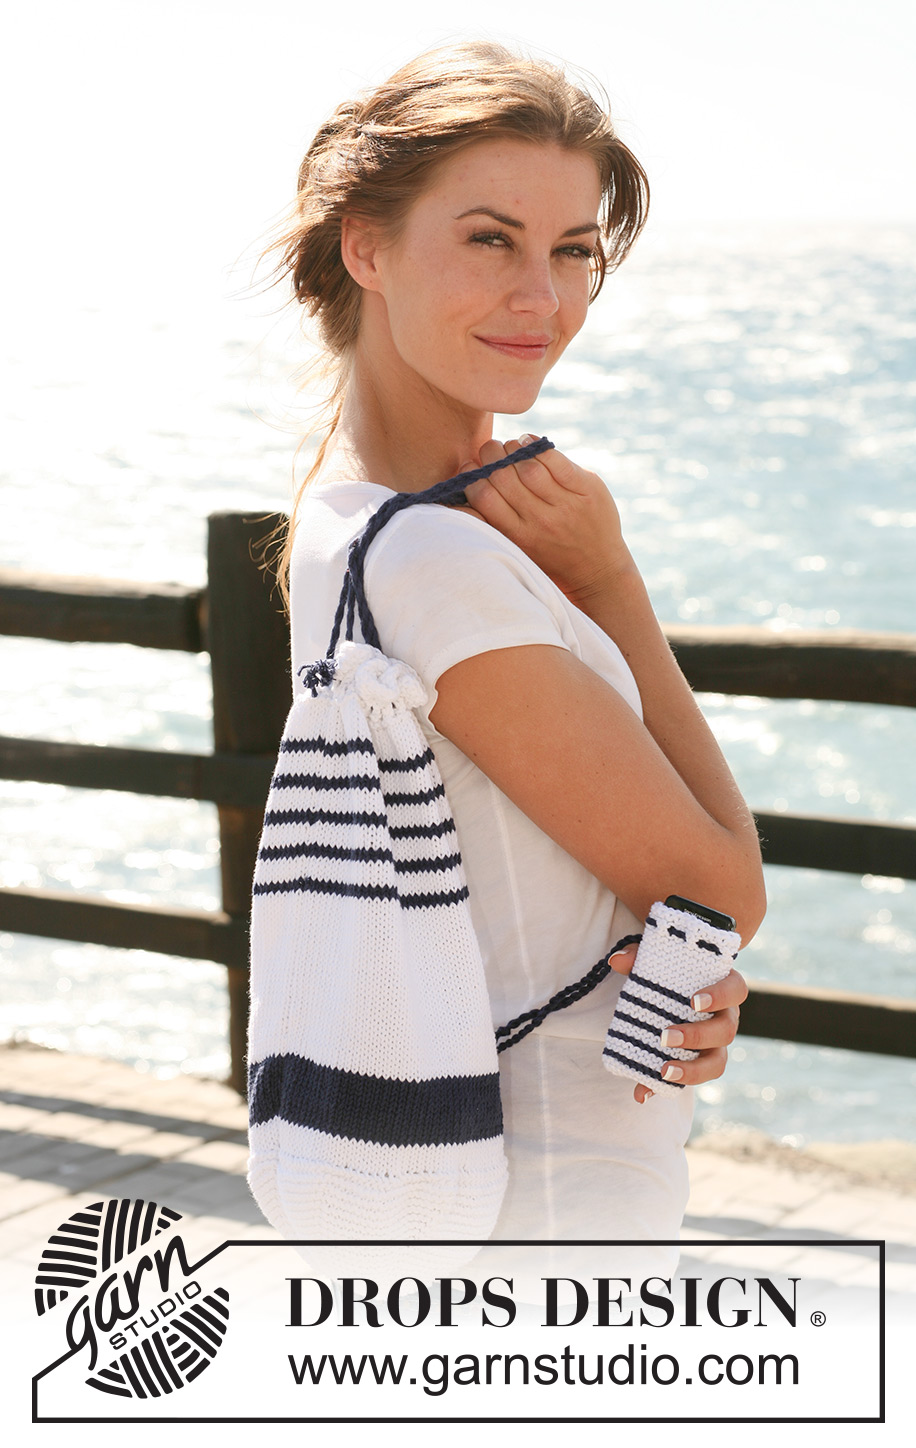
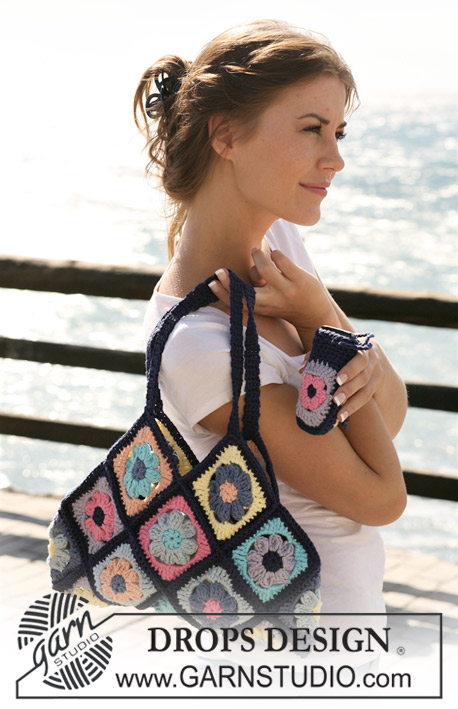
Knitted navy striped bag/tote bag and mobile phone pocket in DROPS Paris
DROPS 120-14 |
|
|
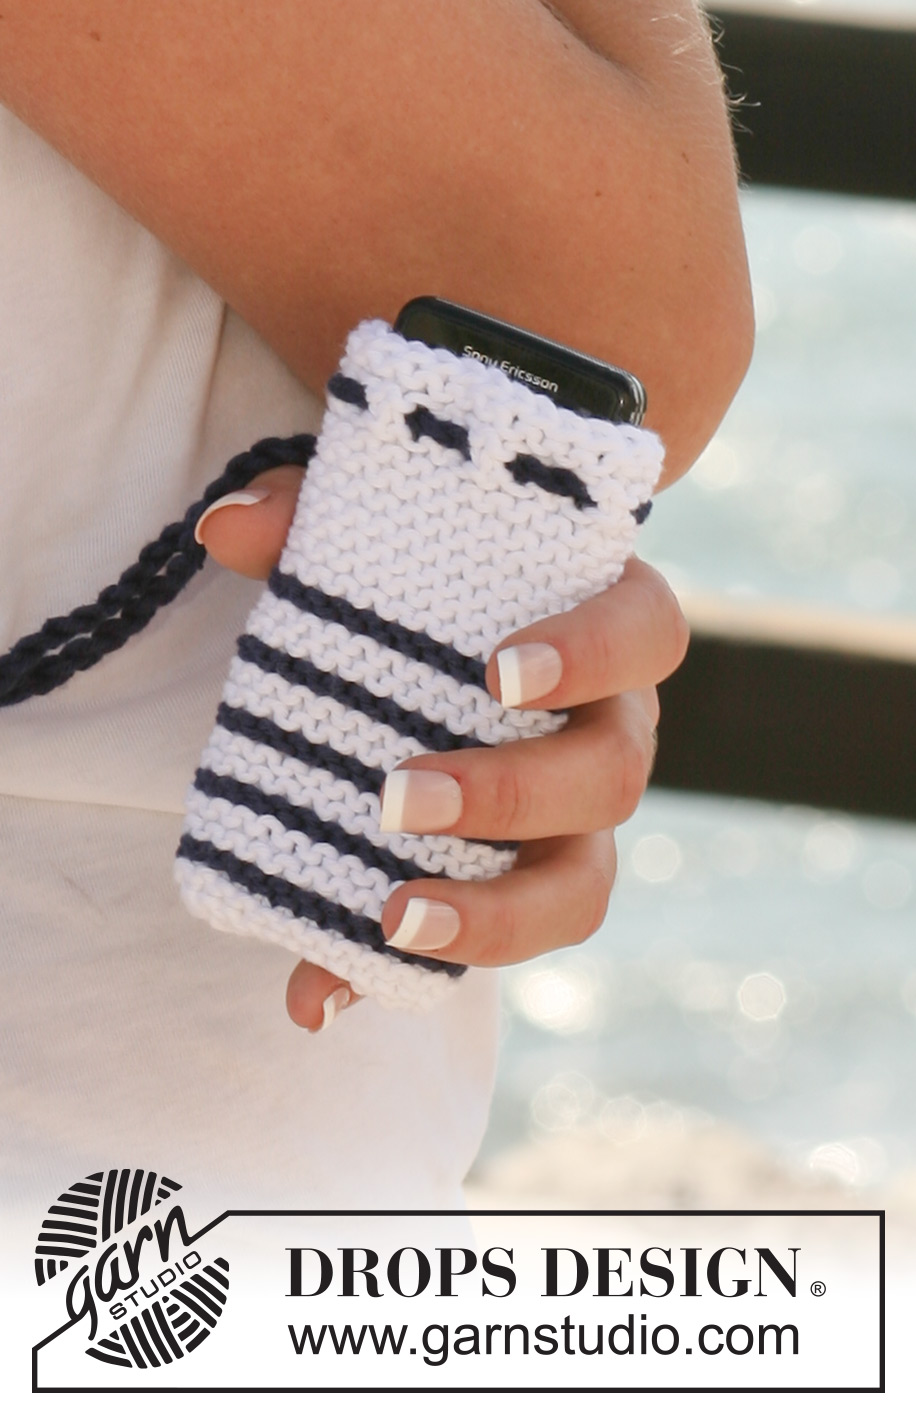
GARTER ST (back and forth on needle): K all rows. ---------------------------------------------------------- ---------------------------------------------------------- BAG: First work bottom of bag in garter st back and forth on circular needle, and then continue in the round. BOTTOM: Cast on 12 sts on circular needle size 3 mm / US 2or3 with white. Insert a marker in every other st, place first marker in first st, second n 3rd st and so forth (= 6 markers). Work GARTER ST - see above - back and forth on needle. AT THE SAME TIME on row 2 inc 1 st before each st with marker (i.e. 6 inc sts) - inc by making 1 YO and work YO into back of loop on return row to avoid a hole. Repeat the inc on every other row a total of 15 times = 102 sts on needle. Piece now measures approx 8 cm / 3⅛". Now measure piece from here! REST OF BAG: Change to circular needle size 3.5 mm / US 4, and continue in stockinette st in the round as follows: 2 cm / ¾" white, 4 cm / 1½" navy blue, 10 cm / 4" white, then *2 rounds navy blue, 4 rounds white* and repeat from *-* a total of 5 times (there are now 5 narrow navy blue stripes), complete piece in white. REMEMBER THE GAUGE! When piece measures 28 cm / 11" change to circular needle size 3 mm / US 2or3. P 1 round, K 1 round, P 1 round and work next round as follows: * K2 tog, 2 YO *, repeat from *-*. P 1 round – P 1 YO and slip the other YO off needle to make "long" holes. Now K 1 round, P 1 round, K 1 round, P 1 round, K 1 round and P 1 round, and bind off in K sts. Sew bottom of bag tog, edge to edge to avoid a chunky seam. STRING: Cut 3 threads navy blue measuring approx 4 m / 4,4 yds each, twist them hard, fold them double, and let them twist again. Thread the string through in the eyelet row twice at the top of bag, tie the ends tog and pull the knot inside the bag. -------------------------------------------------------- CELLPHONE POCKET: Worked back and forth on pointed needles. Cast on 25 sts on needle size 3 mm / US 2or3 with white. Work 4 rows garter st with white and 2 rows garter st with navy blue alternately until there are 5 navy blue stripes. Complete piece in white. When piece measures 11 cm / 4⅜" work next row as follows: * K2 tog, 1 YO *, repeat from *-*, finish with K1. K 3 rows and bind off. ASSEMBLY: Fold piece double and sew tog edge to edge to avoid a chunky seam at bottom and at the sides. Cut 2 threads navy blue measuring approx 120 cm / 47¼" each, twist them hard, fold them double, and let them twist again. Tie a knot each end and pull string through eyelet row at the top. |
|
Have you finished this pattern?Tag your pictures with #dropspattern #followthefleetbag or submit them to the #dropsfan gallery. Do you need help with this pattern?You'll find 16 tutorial videos, a Comments/Questions area and more by visiting the pattern on garnstudio.com. © 1982-2026 DROPS Design A/S. We reserve all rights. This document, including all its sub-sections, has copyrights. Read more about what you can do with our patterns at the bottom of each pattern on our site. |
|


With over 40 years in knitting and crochet design, DROPS Design offers one of the most extensive collections of free patterns on the internet - translated to 17 languages. As of today we count 325 catalogs and 12298 patterns - 12288 of which are translated into English (US/in).
We work hard to bring you the best knitting and crochet have to offer, inspiration and advice as well as great quality yarns at incredible prices! Would you like to use our patterns for other than personal use? You can read what you are allowed to do in the Copyright text at the bottom of all our patterns. Happy crafting!
Post a comment to pattern DROPS 120-14
We would love to hear what you have to say about this pattern!
If you want to leave a question, please make sure you select the correct category in the form below, to speed up the answering process. Required fields are marked *.