
Looking for a yarn?


Comments / Questions (14)
![]() Kirsten Merrild wrote:
Kirsten Merrild wrote:
Mon ikke der er fejl i opskriften på ærmet, ærmekublen skal da være meget længere end 5 cm? Og hvor mange m skal der være tilbage til at lukke af i slutningen?
23.08.2024 - 17:41DROPS Design answered:
Hei Kirsten. Ermtoppen er ca 6 cm i alle str. Og hvor mange masker det skal være tilslutt kommer an på hvilken str. man strikker. Følg beskrivelsen til hver størrelse på fellingen i oppskriften (husk det felles i begynnelsen på hver pinne) og når det er felt, skal det felles 2 masker i hver side til arbeidet måler 35-37-39-41 cm, deretter felles det 3 masker 1 gang i hver side, så felles de resterende maskene når ermet måler ca 36-38-40-42 cm. mvh DROPS Design
26.08.2024 - 09:56
![]() Erika wrote:
Erika wrote:
Guten Abend, ich möchte gern die Jacke mit langen Ärmeln Stricken und weiß nicht wie lang der Ärmel bei Größe 13/14 Jahren sein muss , wieviel Maschen ich anschlagen muss und wie die Zunahmen sein müssen. Ich hoffe, Sie können mir helfen. Besten Dank und herzliche Grüße von Erika
21.01.2022 - 19:32DROPS Design answered:
Liebe Erika, leider können wir nicht jede Anleitung nach jeder Anfrange umrechnen, aber hier finden Sie Jacken für Kinder mit längen Ärmel, das kann Ihnen sicher inspirieren. Viel Spaß beim stricken!
24.01.2022 - 08:16
![]() Enid wrote:
Enid wrote:
After you do the garter stitchin this pattern I need help with the bind off under BACK PIECE and also the bind off at LEFT and RIGHT front piece. Will someone be able to explain how to do this? Thanks Enid
04.05.2020 - 23:14DROPS Design answered:
Dear Enid, the bind off for armholes are worked at the beginning of each row (both from RS and from WS) on back piece (= bind off 3 sts at the beginning of next 2 rows, then cast off 2 sts at the beg of next 2-4-4-4 rows then 1 st at the beg of next 6-4-4-4 rows). On front pieces you will cast off at the beg of row from the side (the one with the decreases, which will be sewn tog with back piece), ie opposite of the 8 front band sts. Hope this helps. Happy knitting!
05.05.2020 - 11:00
![]() Anna Scognamiglio wrote:
Anna Scognamiglio wrote:
Riporto lo scollo del davanti sinistro: Quando il lavoro misura 42-45-47-50 cm trasferire 13-14-15-16 m verso il centro davanti su un fermamaglie per il collo e intrecciare per modellare la scollatura all’inizio di ogni f dal centro davanti: 2 m 2 volte e 1 m 4 volte = 18-18-20-21 m rimaste sulla spalla. Intrecciare quando il lavoro misura 47-50-53-56 cm. COSA NE FACCIO DELLE 16 MAGLIE TRASFERITE SU UN FERMAMAGLIE.? Scusate ma non capisco come fare lo scollo Anna
12.01.2020 - 22:38DROPS Design answered:
Buongiorno Anna. Le maglie messe in attesa sul ferma maglie verranno riprese alla fine del lavoro, per il bordo intorno allo scollo. Lo trova nel paragrafo intitolato: Scollatura. Buon lavoro!
21.01.2020 - 12:26
![]() DELESTRA wrote:
DELESTRA wrote:
Bonjour, Ma question concerne l'encolure. Après avoir repris les mailles, j'ai compris qu'il faut tricoter à l'endroit, est-ce bien cela ? ou plutôt au point mousse ? parce que à l'endroit l'encolure va s'enrouler sur elle-même, non ? Dans l'attente de votre aide, merci !! G. DELESTRA
14.03.2019 - 17:34DROPS Design answered:
Bonjour Mme Delestra, vous tricotez 5 rangs endroit pour le col, soit au point mousse = vous aurez 3 côtes mousse (dernier rang sur l'envers) et rabattez au rang suivant sur l'endroit. Bon tricot!
15.03.2019 - 08:24
![]() Ayrault wrote:
Ayrault wrote:
Bonjour, je ne comprends pas pourquoi il faut laisser 16 maillles en attente pour les devants alors que la patte de boutonnage ne compte que 8 mailles merci de me répondre dans cette attente bonne réception marie-édith
09.01.2016 - 18:23DROPS Design answered:
Bonjour Mme Ayrault, ces mailles correspondent à l'encolure, on les reprend ensuite (cf sous "COL") pour tricoter la bordure d'encolure (en même temps, on relève les mailles le long des mailles rabattues pour l'encolure). Bon tricot!
11.01.2016 - 09:51
![]() Maryse wrote:
Maryse wrote:
Moi j'adore cette veste elle est trop belle !!!!
30.03.2014 - 11:05
![]() Karin wrote:
Karin wrote:
Dieses Modell ist schlicht und edel. Die Alpakawolle ist wundervoll
07.03.2009 - 11:25Anita wrote:
Trés joli gilet simple et beau
02.02.2009 - 05:26
![]() Ulla wrote:
Ulla wrote:
Virkelig sød pigemodel, glæder mig til at se opskrift. Herligt med opskrifter til alderen 8-16
29.01.2009 - 10:47
|
|
Quiet Lake Kids#quietlakekidscardigan |
|
|
|
|
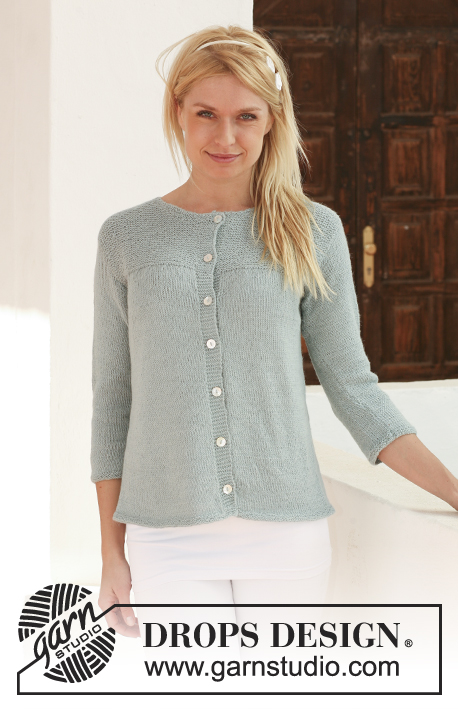
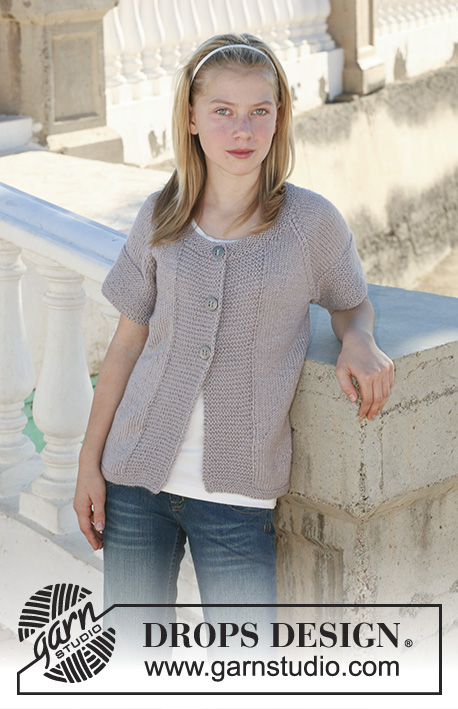
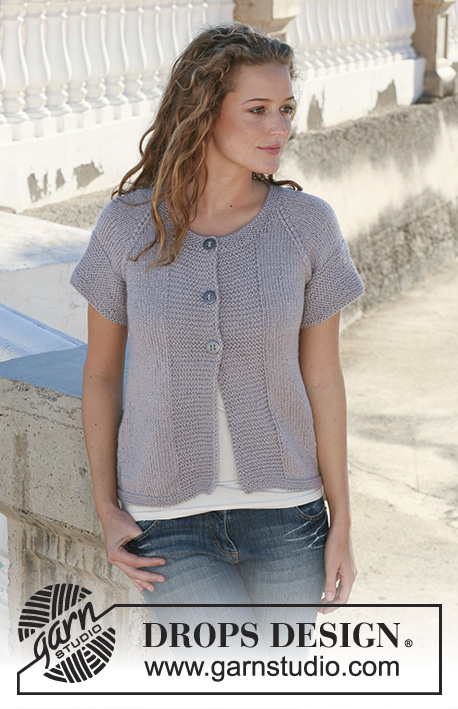
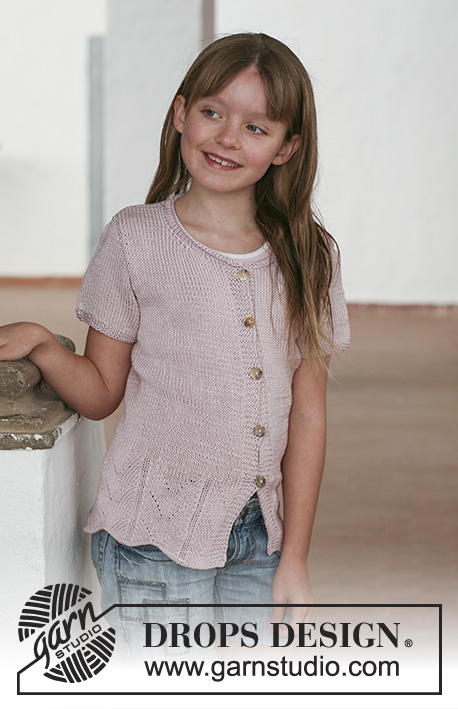
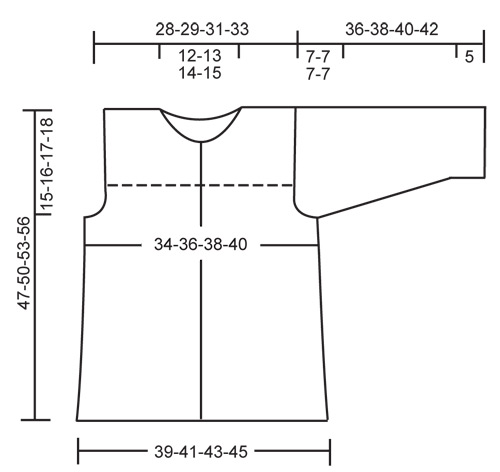
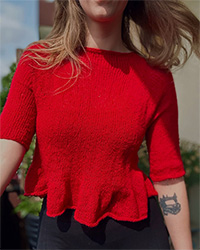
DROPS jacket with 3/4 sleeves in ”Alpaca”. Size 7 – 14 years.
DROPS 111-19 |
|
|
GARTER ST (back and forth on needle): K all rows. BUTTONHOLES: Make buttonholes on right front band. 1 buttonhole = bind off 4th and 5th st from mid front and cast on 2 new sts on return row. Make buttonholes when piece measures: SIZE 7/8 years: 3, 10, 16, 23, 29, 36 cm /1⅛", 4", 6¼", 9", 11⅜", 14¼" SIZE 9/10 years: 3, 10, 17, 24, 31, 38 cm / 1⅛", 4", 6 ¾", 9½", 12 ¼", 15" SIZE 11/12 years: 5, 12, 19, 26, 33, 40 cm / 2", 4¾", 7½", 10¼", 13", 15¾" SIZE 13/14 years: 5, 13, 20, 28, 35, 43 cm / 2", 5⅛", 8", 11", 13¾", 17" NOTE: The last buttonhole is made on neckline. ---------------------------------------------------------- ---------------------------------------------------------- BACK PIECE: Worked back and forth on needle. Cast on 96-100-106-110 sts (includes 1 edge st each side) on needle size 3 mm / US 2or3 with Alpaca. Work 6 rows garter st – see above – and continue in stockinette st. REMEMBER THE KNITTING GAUGE! When piece measures 6 cm / 2⅜" dec 1 st on each side and repeat the dec on every 4-4.5-5-5 cm / 1½"-1¾"-2"-2" a total of 6 times = 84-88-94-98 sts. When piece measures 32-34-36-38 cm / 12½"-13⅜"-14¼"-15" bind off for armhole each side at the beg of every row: 3 sts 1-1-1-1 time, 2 sts 1-2-2-2 times and 1 st 3-2-2-2 times = 68-70-76-80 sts. When piece measures 37-39-41-43 cm / 14½"-15¼"-16⅛"-17" dec 4 sts evenly on row = 64-66-72-76 sts. Now complete piece in garter st. When piece measures 45-48-51-54 cm / 17¾"-19"-20"-21¼" bind off the middle 24-26-28-30 sts for neck and complete each shoulder separately. Bind off on every row from neckline: 1 st 2 times = 18-18-20-21 sts left on shoulder. Bind off when piece measures 47-50-53-56 cm / 18½"-19¾"-21"-22". LEFT FRONT PIECE: Worked back and forth on needle. Cast on 56-58-61-63 sts (includes 1 edge st at the side and 8 front band sts towards mid front) on needle size 3 mm / US 2or3 with Alpaca. Work 6 rows garter st and continue in stockinette st with 8 front band sts towards mid front in garter st. When piece measures 6 cm / 2⅜" dec at the side as described for back piece = 50-52-55-57 sts. When piece measures 32-34-36-38 cm / 12½"-13⅜"-14¼"-15" bind off for armhole at the side as described for back piece = 42-43-46-48 sts. When piece measures 37-39-41-43 cm / 14½"-15¼"-16⅛"-17" dec 3 sts evenly on row (do not dec on front band) = 39-40-43-45 sts. Now complete piece in garter st on all sts, but to mark the front band P the 9th st from mid front on every row. When piece measures 42-45-47-50 cm / 16½"-17¾"-18½"-19¾" slip 13-14-15-16 sts towards mid front on a stitch holder for neck and bind off to shape the neckline at the beg of every row from mid front: 2 sts 2 times and 1 st 4 times = 18-18-20-21 sts left on shoulder. Bind off when piece measures 47-50-53-56 cm / 18½"-19¾"-21"-22". RIGHT FRONT PIECE: Like left front piece, but mirrored, and remember BUTTONHOLES – see above. SLEEVE: Worked back and forth on needle. Cast on 50-52-54-56 sts (includes 1 edge st each side) on needle size 3 mm / US 2or3 with Alpaca. Work 6 rows garter st and continue in stockinette st. When piece measures 5 cm / 2" inc 1 st each side, and repeat the inc on every 11-9-10-9 row a total of 8-10-10-11 times = 66-72-74-78 sts. When piece measures 29-31-33-35 cm / 11⅜"-12¼"-13"-13¾" bind off for sleeve cap each side at the beg of every row: 3 sts 1 time, 2 sts 2-3-4-4 times and 1 st 7-5-4-3 times, then 2 sts each side until piece measures 35-37-39-41 cm / 13¾"-14½"-15¼"-16⅛", now bind off 3 sts each side 1 time and bind off remaining sts. Piece measures approx 36-38-40-42 cm / 14¼"-15"-15¾"-16½". ASSEMBLY: Sew shoulder seams. NECKLINE: Pick up approx 85 to 105 sts round neckline (incl sts on stitch holders mid front) on needle size 3 mm / US 2or3 with Alpaca. K 5 rows, AT THE SAME TIME on row 2 make 1 buttonhole in line with the others on front band. Bind off loosely after 5 rows. FURTHER ASSEMBLY: Set in sleeves. Sew side and sleeve seams inside 1 edge st. Sew on buttons. |
|
 |
|
Have you finished this pattern?Tag your pictures with #dropspattern #quietlakekidscardigan or submit them to the #dropsfan gallery. Do you need help with this pattern?You'll find 21 tutorial videos, a Comments/Questions area and more by visiting the pattern on garnstudio.com. © 1982-2025 DROPS Design A/S. We reserve all rights. This document, including all its sub-sections, has copyrights. Read more about what you can do with our patterns at the bottom of each pattern on our site. |


With over 40 years in knitting and crochet design, DROPS Design offers one of the most extensive collections of free patterns on the internet - translated to 17 languages. As of today we count 320 catalogs and 12083 patterns - 12073 of which are translated into English (US/in).
We work hard to bring you the best knitting and crochet have to offer, inspiration and advice as well as great quality yarns at incredible prices! Would you like to use our patterns for other than personal use? You can read what you are allowed to do in the Copyright text at the bottom of all our patterns. Happy crafting!
Post a comment to pattern DROPS 111-19
We would love to hear what you have to say about this pattern!
If you want to leave a question, please make sure you select the correct category in the form below, to speed up the answering process. Required fields are marked *.