
Popular categories
Looking for a yarn?


Comments / Questions (39)
![]() Sara wrote:
Sara wrote:
Hola. No entiendo la última sección del cuerpo. Cierro los 28 puntos en el lado del hombro. Entiendo que es el lado pegado a la sisa. Pero luego no sé como seguir especialmente eso de "filas acortadas" y lo de "medir por el lado corto". ¿Me pueden orientar por favor?
31.03.2026 - 09:21DROPS Design answered:
Hola Sara, en la sección del cuello trabajas sobre los 19-20-21-22-23-24 pts restantes, para el cuello. Ahora vas a trabajar como sigue: 1 fila sobre 10-10-11-11-12-12 pts (por el lado revés), 1 fila de vuelta por el lado derecho hasta el final (es decir, sobre los 10-10-11-11-12-12 pts trabajados en la fila anterior). Ahora trabajar 2 filas en pt musgo sobre todos los puntos (19-20-21-22-23-24 pts), 1 de ida y 1 de vuelta. La siguiente fila tiene que ser por el lado revés, y vuelves a trabajar sobre 10-10-11-11-12-12 pts, e.t.c. Repites esta secuencia (2 filas cortas, 2 filas largas). Terminas el cuello cuando la labor mida 7-7.5-8-8.5-9-9.5 cm desde donde se cerraron los 28 pts. Debido a las filas acortadas, te va a quedar una pieza irregular con una parte más estrecha y una más larga. La parte más corta tiene que tener la medida indicada.
26.04.2026 - 23:35
![]() Ina wrote:
Ina wrote:
I skriver om ærmekuplen videre lukkes der 2 m af i hver side til arb måler 54-55-55-56-56-57 cm. Luk 3 m af i hver side, derefter lukkes de resterende m af. Arb måler ca 55-56-56-57-57-58 cm Hvor mange MASKER slutter man af med inden aflukning?
03.08.2025 - 15:54DROPS Design answered:
Hei Ina. Det kommer an på hvilken str. du strikker. Når du har felt det antall masker det står i oppskriften i den str. du strikker etter, mål arbeidet. Deretter strikkes og felles det 2 masker i hver side til arbeidet måler 54-55-55-56-56-57 cm. mvh DROPS Design
08.09.2025 - 09:57
![]() Lefebvre Marie Paule wrote:
Lefebvre Marie Paule wrote:
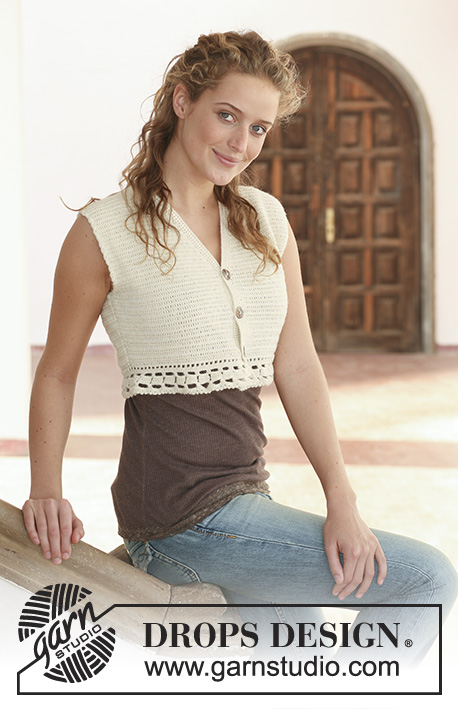
Belle réminiscence des années cinquantes J aime beaucoup
30.01.2024 - 09:24
![]() Kate wrote:
Kate wrote:
On left front ‘work 4 rows garter st on 21-22-23-24-25-26 sts towards mid front (includes 3 sts on front band), with remaining sts as before. Now work next row as follows: Cast off the first 19-20-21-22-23-24 sts towards mid front’ I don’t see any garter st rows at this level in photo. Also is cast off from buttonhole side or side seam?
06.03.2023 - 20:49DROPS Design answered:
Dear Kate, these will make 2 ridges at the top of the neck edge, where we crochet afterwards a crocheted edge, reason why these ridges are not that visible. You cast off at the beginning of the row from mid front = buttonhole side to shae the collar pointing down on the picture. Happy knitting!
07.03.2023 - 10:20
![]() Maria Stella wrote:
Maria Stella wrote:
Buongiorno, vorrei lavorare questo modello con i ferri dritti: quante maglie dovrò montare per il dietro, metà davanti e manica? Grazie
21.05.2021 - 06:44DROPS Design answered:
Buongiorno Maria Stella, questo modello è lavorato in piano, quindi può utilizzare i ferri dritti seguendo le istruzioni indicate. Buon lavoro!
21.05.2021 - 10:37
![]() Silvana wrote:
Silvana wrote:
Ho terminato il mio lavoro. Volevo inviarvi la foto
05.04.2021 - 09:49DROPS Design answered:
Buonasera Silva, a questo link può compilare il modulo per condividere il suo progetto. Buon lavoro!
05.04.2021 - 23:51
![]() Alison Lorch wrote:
Alison Lorch wrote:
Thank you. The amount of times I have searched through the pattern. I suppose the moral is to wait untill I’m fully recovered before embarking on this project.
05.10.2020 - 20:24
![]() Alison Lorch wrote:
Alison Lorch wrote:
So there is an error as I cannot see this stated in the pattern? So where would I find it apart from asking you?
05.10.2020 - 14:49DROPS Design answered:
Dear Mrs Lorch, you will find the knitted tension under header, just below material and together with needle size, ie: DROPS DOUBLE POINTED and CIRCULAR NEEDLE (80 cm) size 4 mm – or size needed to get 21 sts x 28 rows in stocking st = 10 x 10 cm.. Happy knitting!
05.10.2020 - 16:12
![]() Alison Lorch wrote:
Alison Lorch wrote:
Hello again, I’ve been unwell and struggled with this pattern so far. I’ve only managed to get to ‘Remember the knitting tension’ having unpicked and put it down many times. What is the tension for this pattern please?
04.10.2020 - 14:08DROPS Design answered:
Hi Alison, The knitting tension is 21 stitches x 28 rows using needle size 4 mm = 10 x 10 cm. Remember, this is just a guide so you can adjust the needle size if your knitting tension is different to this. Happy knitting!
05.10.2020 - 09:17
![]() Alison Lorch wrote:
Alison Lorch wrote:
Hello, I have just bought the yarn for this pattern and it’s the first time using ‘Drops’ patterns. Why do you not include more images of the pattern-eg; the back view/cuffs/rib etc? Why aren’t other nationality questions and answers translatable as they are all relevant? Thank you
30.07.2020 - 13:35DROPS Design answered:
Dear Mrs Lorch, there are no further pictures to this pattern - back piece will be almost as front piece (without opening/front band sts) and wrist are just a large edge in garter stitch then worked in stocking stitch - We are unfortunately not able to translate every comment/question into every language, but feel free to ask here your own question. Happy knitting!
30.07.2020 - 15:40
|
|
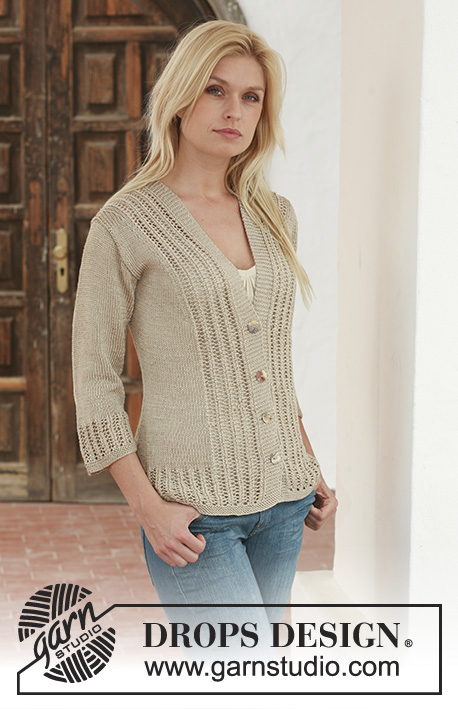
Coffee and Milk#coffeeandmilkcardigan |
|
|
|
|
Knitted DROPS jacket with collar in ”Muskat”. Size S - XXXL.
DROPS 111-26 |
|
|
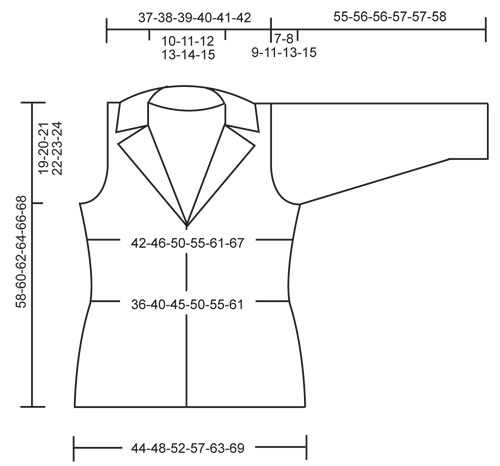
GARTER ST (back and forth on needle): K all rows. GARTER ST (in the round): K 1 round, P 1 round. BUTTONHOLES: Make buttonholes on right front piece. 1 buttonhole = bind off 4th and 5th st from mid front and cast on 2 new sts on return row. Make buttonholes when piece measures 19 and 25 cm / 7½" and 9¾" for all sizes. -------------------------------------------------------- JACKET: Worked back and forth on circular needle from mid front. Cast on 200-216-236-256-280-304 sts on circular needle size 4 mm / US 6 with Muskat. Work 4 rows garter st - see above. Insert 2 markers in piece, 54-58-63-68-74-80 sts in from each side (back piece = 92-100-110-120-132-144 sts). Continue in stockinette st with 3 garter sts each side towards mid front (= front bands) REMEMBER THE KNITTING GAUGE! When piece measures 4 cm / 1½" dec 1 st on each side of both markers and repeat the dec on every 2 cm / ¾" a total of 8 times = 168-184-204-224-248-272 sts. NOW READ ALL OF THE FOLLOWING SECTION BEFORE CONTINUING! AT THE SAME TIME when piece measures 18 cm / 7" change to circular needle size 3.5 mm / US 4 and continue in garter st on all sts. AT THE SAME TIME when piece measures 19 cm / 7½" make BUTTONHOLE on right front piece – see above. Repeat when piece measures 25 cm / 9¾". AT THE SAME TIME when piece measures 24 cm / 9½" inc 1 st on each side of both markers and repeat the inc on every 2-2-2.5-2.5-3-3 cm / ¾"-¾"-⅞"-⅞"-1⅛"-1⅛" a total of 6 times = 192-208-228-248-272-296 sts. AT THE SAME TIME when piece measures 26 cm / 10¼" change to circular needle size 4 mm / US 6 and continue in stockinette st with 3 garter sts each side towards mid front. When piece measures 39-40-41-42-43-44 cm / 15¼"-15¾"-16⅛"-16½"-17"-17¼" bind off 6 sts for armhole each side (= 3 sts on each side of marker), and now complete each piece separately. BACK PIECE: = 82-90-100-110-122-134 sts. Bind off for armhole each side at the beg of every row: 2 sts 1-2-4-6-8-10 times and 1 st 0-1-1-1-2-3 times = 78-80-82-84-86-88 sts. When piece measures 56-58-60-62-64-66 cm / 22"-22¾"-23⅝"-24⅜"-25¼"-26" bind off the middle 20-22-24-26-28-30 sts for neck and complete each shoulder separately. Bind off 1 st on neckline on next row = 28-28-28-28-28-28 sts left on shoulder. Bind off when piece measures 58-60-62-64-66-68 cm / 22¾"-23⅝"-24⅜"-25¼"-26"-26¾". LEFT FRONT PIECE: = 49-53-58-63-69-75 sts. Bind off for armhole at the side as described for back piece = 47-48-49-50-51-52 sts. When piece measures 47-49-51-53-55-57 cm / 18½"-19¼"-20"-21"-21⅝"-22½" work 4 rows garter st on 21-22-23-24-25-26 sts towards mid front (includes 3 sts on front band), with remaining sts as before. Now work next row as follows: bind off the first 19-20-21-22-23-24 sts towards mid front, work 2 garter sts and work stockinette st on remaining sts on row. On next row cast on 19-20-21-22-23-24 new sts over the bind off sts, AT THE SAME TIME work 4 rows garter st on the 21-22-23-24-25-26 sts towards mid front with remaining sts in stockinette st. Now continue in stockinette st with 3 garter sts towards mid front. When piece measures 58-60-62-64-66-68 cm / 22¾"-23⅝"-24⅜"-25¼"-26"-26¾" bind off 28-28-28-28-28-28 sts for shoulder and work remaining 19-20-21-22-23-24 sts on row for collar. On next row (from WS) work shortened rows as follows: * work garter st back and forth on 10-10-11-11-12-12 sts, work garter st back and forth on all sts *, repeat from *-* until collar measures 7-7.5-8-8.5-9-9.5 cm / 2¾"-2⅞"-3⅛"-3¼"-3½"-3¾" (measured on the shorter side) from where you bind off for shoulder. Bind off. RIGHT FRONT PIECE: = 49-53-58-63-69-75 sts. Like left front piece, but mirrored. SLEEVE: Worked in the round on double pointed needles. Cast on 46-48-50-52-54-56 sts on double pointed needles size 3.5 mm / US 4 with Muskat. Work garter st – see above. When piece measures 8 cm / 3⅛" change to double pointed needles size 4 mm / US 6 and continue in stockinette st. Insert a marker at beg of round (= mid under arm). When piece measures 10 cm / 4" inc 1 st on each side of marker and repeat the inc on every 3-2.5-2.5-2-1.5-1.5 cm / 1⅛"-⅞"-⅞"-¾"-½"-½" a total of 12-14-15-17-19-20 times = 70-76-80-86-92-96 sts. When piece measures 48-48-47-46-44-43 cm / 19"-19"-18½"-18"-17¼"-17" (less for the larger sizes because of longer sleeve cap and wider shoulder) bind off 4-4-4-3-3-3 sts on each side of marker and complete piece back and forth on needle. Bind off to shape the sleeve cap each side at the beg of every row: 2 sts 3-4-4-4-4-4 times, 1 st 0-1-1-3-8-11 times, then 2 sts each side until piece measures 54-55-55-56-56-57 cm / 21¼"-21⅝"-21⅝"-22"-22"-22½", now bind off 3 sts each side 1 time and bind off remaining sts. Piece measures approx 55-56-56-57-57-58 cm / 21⅝"-22"-22"-22½"-22½"-22¾". ASSEMBLY: Sew shoulder seams. Sew collar tog mid back and sew to neckline. Set in sleeves. Sew on buttons. CROCHET BORDER: Crochet a picot border up along right front piece, round neckline/collar and down along left front piece with crochet hook size 4 mm / G/6 and Muskat as follows: 1 sc, * 3 ch, 1 sc in first ch, skip approx 1 cm / ⅜", 1 sc in next st *, repeat from *-*. |
|
 |
|
Have you finished this pattern?Tag your pictures with #dropspattern #coffeeandmilkcardigan or submit them to the #dropsfan gallery. Do you need help with this pattern?You'll find 25 tutorial videos, a Comments/Questions area and more by visiting the pattern on garnstudio.com. © 1982-2026 DROPS Design A/S. We reserve all rights. This document, including all its sub-sections, has copyrights. Read more about what you can do with our patterns at the bottom of each pattern on our site. |


With over 40 years in knitting and crochet design, DROPS Design offers one of the most extensive collections of free patterns on the internet - translated to 17 languages. As of today we count 324 catalogs and 12290 patterns - 12280 of which are translated into English (US/in).
We work hard to bring you the best knitting and crochet have to offer, inspiration and advice as well as great quality yarns at incredible prices! Would you like to use our patterns for other than personal use? You can read what you are allowed to do in the Copyright text at the bottom of all our patterns. Happy crafting!
Post a comment to pattern DROPS 111-26
We would love to hear what you have to say about this pattern!
If you want to leave a question, please make sure you select the correct category in the form below, to speed up the answering process. Required fields are marked *.