
Popular categories
Looking for a yarn?


Comments / Questions (89)
![]() Riitta wrote:
Riitta wrote:
Jos etuosan pituus on x ja sitten lisätään puntit jne, niin lasketaanko etuosan pituuteen myös resori vai vain oikein neulottu osuus?
03.03.2026 - 19:59DROPS Design answered:
Hei, joustinneule lasketaan mukaan etuosan pituuteen.
05.03.2026 - 18:22
![]() Hanan wrote:
Hanan wrote:
Bonjour Madame pour faire la réhausse faut -il commencer les 10 mailles après le marqueur ou compter avec la maille du marqueur ?
20.12.2024 - 12:51DROPS Design answered:
Bonjour Hanan, la réhausse commence au milieu dos, au 1er rang (sur l'endroit), vous tricotez 10 mailles (après le marqueur du milieu dos), tournez et tricotez jusqu'à 10 mailles après le marqueur de l'autre côté (10 m de chaque côté du marqueur = 20 m au total) et continuez ainsi en tricotant 10 m en plus à la fin de chaque rang de chaque côté jusqu'à ce qu'il reste 20-14-28-22-16 m non tricotées à partir du marqueur au milieu du devant. Bon tricot!
20.12.2024 - 16:00
![]() Hanan wrote:
Hanan wrote:
Bonjour Madame est-ce qu’on doit mettre le marqueur au début du rang ou après les 3 mailles envers ?( Taille S, L et XXL : 3 m env, placer un marqueur dans la 1ère m = milieu dos)
17.12.2024 - 16:04DROPS Design answered:
Bonjour Hanan, dans ces 3 tailles, le début du tour est au niveau de la 1ère de ces 3 mailles = au milieu des 5 mailles envers pour le milieu du dos / et dans la maille au milieu des 5 mailles envers centrales pour le milieu du devant. Bon tricot!
18.12.2024 - 08:05
![]() Nadine wrote:
Nadine wrote:
Die nächsten 11-12-13-14-15 M. auf der Nadel lassen (=Schritt), die nächsten 73-79-85-91-97 M. wieder auf einen Hilfsfaden legen (= Bein) und die restlichen 5-6-6-7-7 M. abketten Muss ich die Maschen für den Schritt stricken, um dann die restlichen 5 Maschen abketten zu können?
07.09.2024 - 23:05DROPS Design answered:
Liebe Nadine, Sie können alle Maschen der Runde stricken, dann Faden abschneiden und den Schritt zuerst stricken, dann annähen und Beine stricken. Viel Spaß beim Stricken!
09.09.2024 - 10:19
![]() MM wrote:
MM wrote:
Hi, I’m noticing that the 2 types of yarns for the pattern are ‘incompatible’..in term of wash-ability. Would this finished piece be washable?
26.02.2024 - 02:21DROPS Design answered:
Dear MM, sure but you have to follow the instructions of Alpaca, ie the piece cannot be washed in the machine as Alpaca is not super wash. Happy knitting!
26.02.2024 - 09:55
![]() Anna wrote:
Anna wrote:
Hei! Ohje Drops 103-23 villahousut. Takakorotuksen tekeminen: neulo 10 s. keskitakan ohi (tarkoitetaanko että kierroksen 1.silmukka on 1. ja 9 seuraava myös kudotaan?) entä mitä tarkoitetaan kun neuvotaan kutomaan toisen sivun merkkilangan ohitse (tarkoitetaanko sillä keskiedun merkkilanhan ohitse 10 s)? Kun jätän nostamatta 1.s niin silti työhön jää reikä...
07.05.2023 - 21:53
![]() Veronica Volle wrote:
Veronica Volle wrote:
Jeg har kommet til vendepinnene. Skal jeg telle med den første masken på omg? Altså den midterste masken bak? Eller skal jeg hoppe over den i tellingen slik at det blir 10 m - midtmaske - 10 m ?
13.01.2023 - 17:18DROPS Design answered:
Hei Veronica. Tell med 1. maske på omgangen. mvh DROPS Design
16.01.2023 - 11:08
![]() Thalia wrote:
Thalia wrote:
Hi there! I'd like to ask if the elevation for the back is done in pattern 19-22-26-29-33 sts of stockinette sts, 33 sts of Rib as before, 37-44-51-58-65 sts of stockinette sts, 33 sts of Rib as before and 18-22-25-29-32 sts of stockinette sts, or I just knit on right side and purl on wrong side. Thanks a lot!
11.12.2022 - 16:55DROPS Design answered:
Dear Thalia, work simply in stocking stitch for the elevation in the back. Happy knitting!
12.12.2022 - 00:00
![]() Ulrike wrote:
Ulrike wrote:
Hallo, wenn ich für Größe L mit 168 Maschen beginne und mit einem Rapport von 2 re. und 5 li. arbeite, mit 3 li. am Anfang und 2 li. am Ende, bleiben 2 Maschen übrig. Oder mache ich irgendwo einen Fehler? Danke für Antwort!
19.10.2022 - 20:54DROPS Design answered:
Liebe Ulrike, so stricken Sie die 168 Maschen: 3 li, *2 re, 5 li*, von *-* insgesamt 23 Mal stricken, (es sind noch 4 M übrig), 2 re, 2 li = 3 + (7x23) + 2+2=168 M. Viel Spaß beim stricken!
20.10.2022 - 10:00
![]() Sofia wrote:
Sofia wrote:
Tänkte sticka dessa i novitas sju bröder, som står att det är garngrupp B. Tror ni det går bra, tänkte eftersom det är dubbelt garn i detta mönster?
06.10.2022 - 22:03DROPS Design answered:
Hej Sofia, det garn kender vi ikke til. Vi anbefaler DROPS Fabel sammen med DROPS Alpaca for at få både stil og størrelse ifølge billede og opskrift :)
07.10.2022 - 09:32
|
|
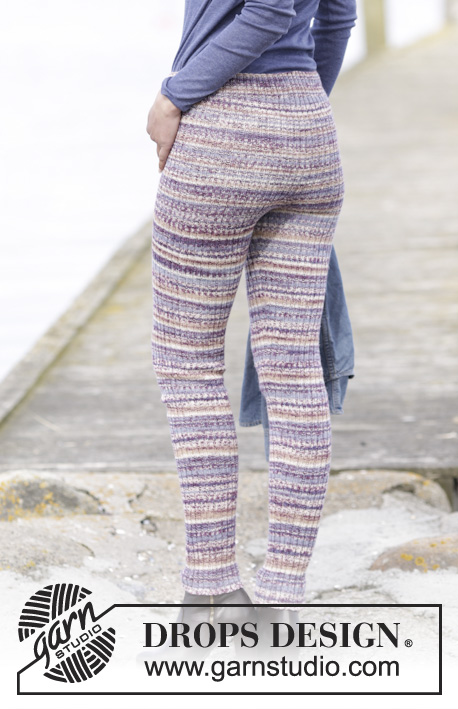
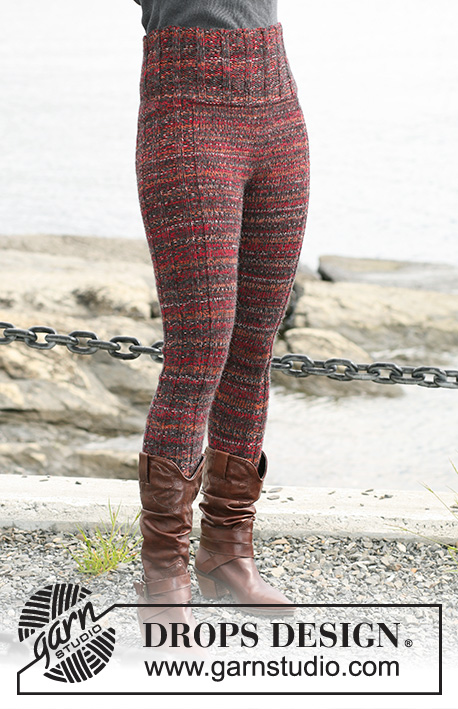
Rhoda |
|
 |
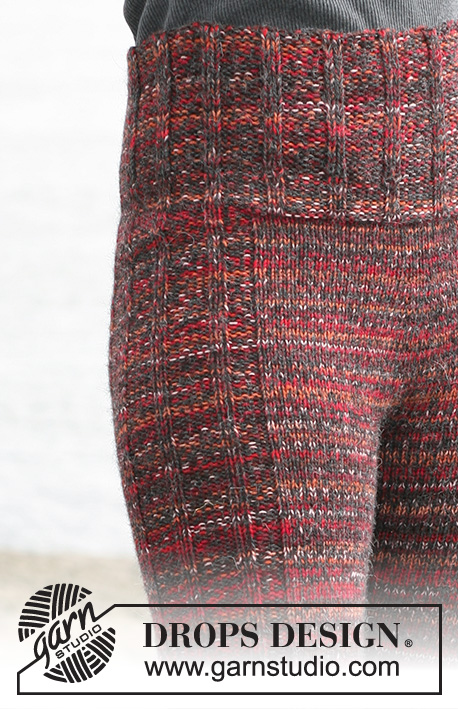 |
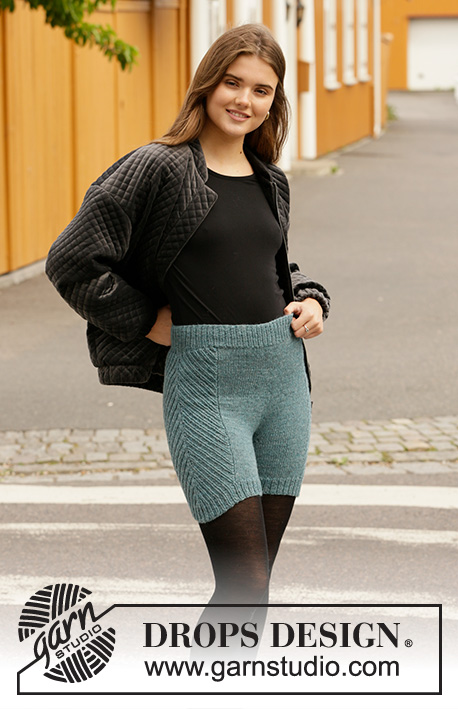
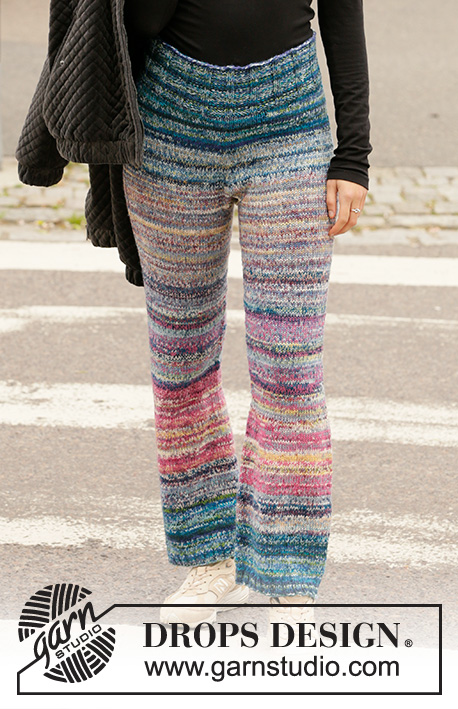
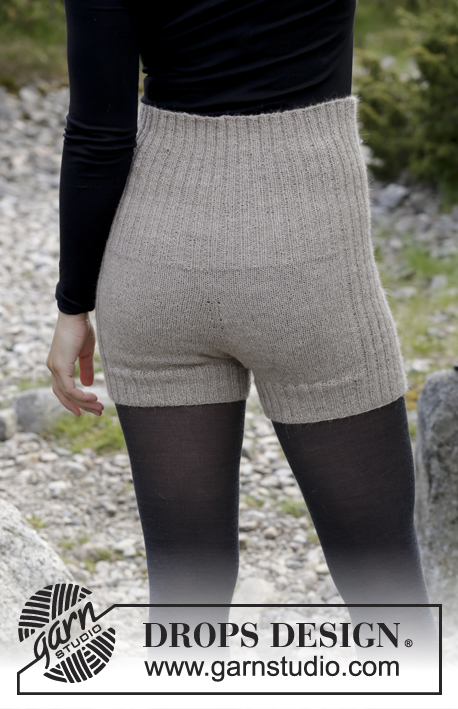
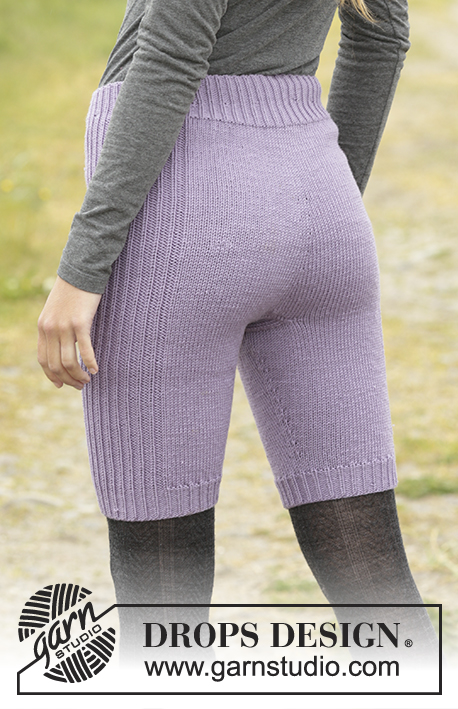
DROPS Tights in ”Fabel” and ”Alpaca”.
DROPS 103-23 |
|
|
Knitting gauge: 19 sts x 25 rows with 1 thread of each quality knitted in stockinette sts on needles size 4 mm [US 6] = 10 x 10 cm [4" x 4"]. Decreasing tip (apply for the legs): dec each side of the MT (marking thread). Dec as follows before the MT: K2 tog. Dec as follows after the MT: Slip a st as if to K, K1, psso. Increasing tip: Size S, L og XXL: Inc. each side of 3 K sts mid front and mid back. Sie M and XL: Inc. each side of 2 K sts mid front and mid back. Inc. sts as follows: Pick up 1 st from previous round. K st. ________________________________________ TIGHTS Knit round on circular needles from the top and down. Cast on 140-154-168-182-196 sts on circular needles size 4 mm [US 6] with 1 thread of each quality. Knit in Rib for 10 cm [4"] as follows: Size S, L and XXL: P3 – insert 1 MT in the first st = mid back, *K2, P5*, repeat from *-* and finish with P2 – insert 1 MT in the 71-85-99 sts on round (middle of 5 P sts) = mid front. Size M and XL: Insert 1 MT at beg. of round = mid back, K1, *P5, K2*, repeat from *-*, finish with P5 and K1 – insert 1 MT after 77-91 sts (in the middle of 2 K sts) = mid front. Continue as follows: 19-22-26-29-33 sts of stockinette sts, 33 sts of Rib as before, 37-44-51-58-65 sts of stockinette sts, 33 sts of Rib as before and 18-22-25-29-32 sts of stockinette sts. When the piece measures 11 cm [4⅜"] knit the trousers so they will become longer at the back than on the front. This is done as follows: Knit 10 sts past the MT at the back, turn and knit back as follows: slip the first st (to avoid a hole) and knit 10 sts past the other side of the MT, turn *slip the first st, past the MT and knit 10 sts more than previous turn*, repeat from *-* until 20-14-28-22-16 left mid front. Turn a last time so the work begins from the RS. Continue to knit over all sts. When the piece measures 13-14-14-15-15 cm [5⅛"-5½"-5½"-6"-6"] mid front (approx 18-20-20-21-22 cm [7"-8"-8"-8¼"-8¾"] mid back) inc. at the front and at the back – see inc. tip above: Inc. 2 sts at the front and at the back on every 5-5-6-6-7 round a total of 7 times = 168-182-196-210-224 sts. When the piece measures 27-29-31-33-35 cm [10⅝"-11⅜"-12¼"-13"-13¾"] mid front bind off the first 6-6-7-7-8 sts, put 73-79-85-91-97 sts on a thread or a stitch holder (= 1 leg). Leave the following 11-12-13-14-15 sts on the needle (gusset), put the next 73-79-85-91-97 sts on a thread or a stitch holder (= 1 leg) and bind off the remaining 5-6-6-7-7 sts. Then knit 9 cm [3½"] of stockinette sts over the 11-12-13-14-15 sts for the gusset. Bind off and sew the gusset tight to the 11-12-13-14-15 sts bind off mid back. Leg: Put 73-79-85-91-97 sts from one of the threads or stitch holders onto a short circular needle (40 cm [15¾"] long), and in addition pick up 18-20-20-22-24 sts along one side of the gusset = 91-99-105-113-121 sts. Continue with Rib over the 33 sts at the side and stockinette sts over the remaining 58-66-72-80-88 sts. Insert 1 MT at the inner side of the leg (in the sts picked up along the gusset). When the leg measures 8 cm [3⅛"] dec. 1 st each side of the MT - see decreasing tip above: Dec on every 4-3.5-3-2.5-2.5 cm [1½"-1¼"-1⅛"-⅞"-⅞"] a total of 17-20-22-25-28 times = 57-59-61-63-65 sts – change to double pointed needles when there are to few sts for the circular needle. Continue to knit until the leg measures approx 78-79-80-81-82 cm [30¾"-31"-31½"-32"-3¼"] – Try the trousers for the right length. Bind off with K over K and P over P. Put the sts from the other thread or stitch holder on the 4 mm [US 6] circular needle and knit another leg. |
|
Have you finished this pattern?Tag your pictures with #dropspattern or submit them to the #dropsfan gallery. Do you need help with this pattern?You'll find 16 tutorial videos, a Comments/Questions area and more by visiting the pattern on garnstudio.com. © 1982-2026 DROPS Design A/S. We reserve all rights. This document, including all its sub-sections, has copyrights. Read more about what you can do with our patterns at the bottom of each pattern on our site. |
|


With over 40 years in knitting and crochet design, DROPS Design offers one of the most extensive collections of free patterns on the internet - translated to 17 languages. As of today we count 324 catalogs and 12290 patterns - 12280 of which are translated into English (US/in).
We work hard to bring you the best knitting and crochet have to offer, inspiration and advice as well as great quality yarns at incredible prices! Would you like to use our patterns for other than personal use? You can read what you are allowed to do in the Copyright text at the bottom of all our patterns. Happy crafting!
Post a comment to pattern DROPS 103-23
We would love to hear what you have to say about this pattern!
If you want to leave a question, please make sure you select the correct category in the form below, to speed up the answering process. Required fields are marked *.